Hog Rings and Pushrods

7173Mustangs.com

Help Support 7173Mustangs.com:

This site may earn a commission from merchant affiliate links, including eBay, Amazon, and others.
Joined
Sep 2, 2012
Messages
1,622
Reaction score
221
Location
Blue Springs, MO
My Car
1971 Mach 1, Grabber Blue w/Argent stripes. Original 2V 351C Auto, Tilt, rear defog, Black Comfortweave Interior. Under restoration. Original colors, 4V 351C, 4-Speed, Spoilers, Magnums, Ram Air. All Ford parts.
Once again I am trying to progress on the worst run project of my life. I have 2 new areas I need help.

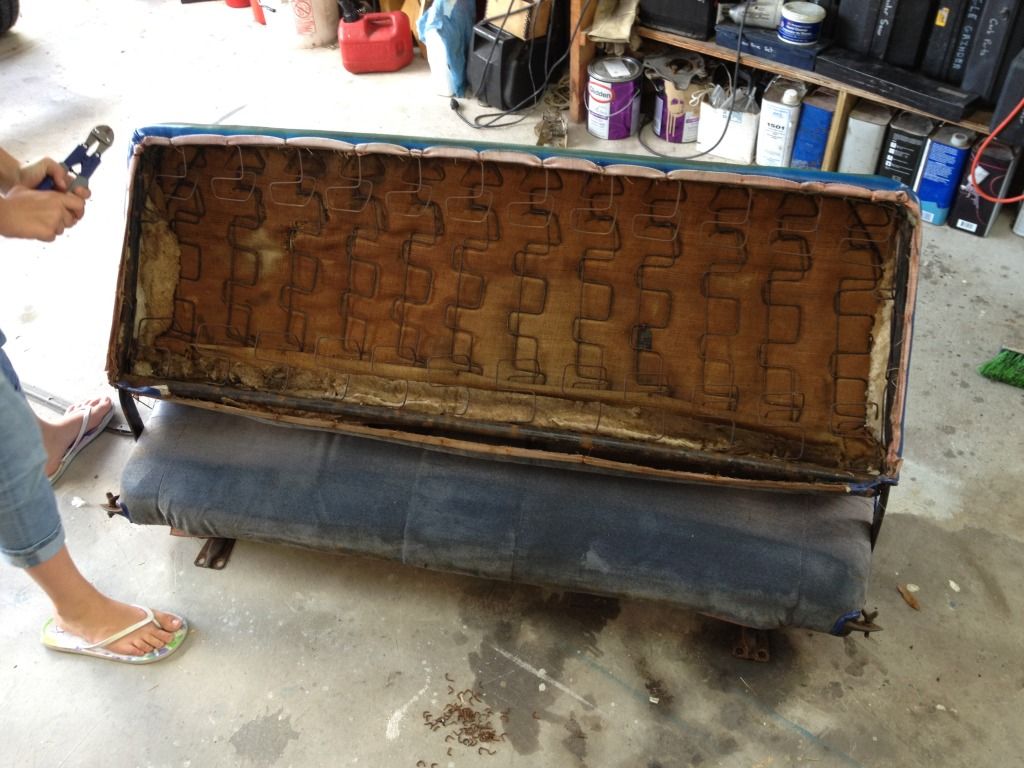
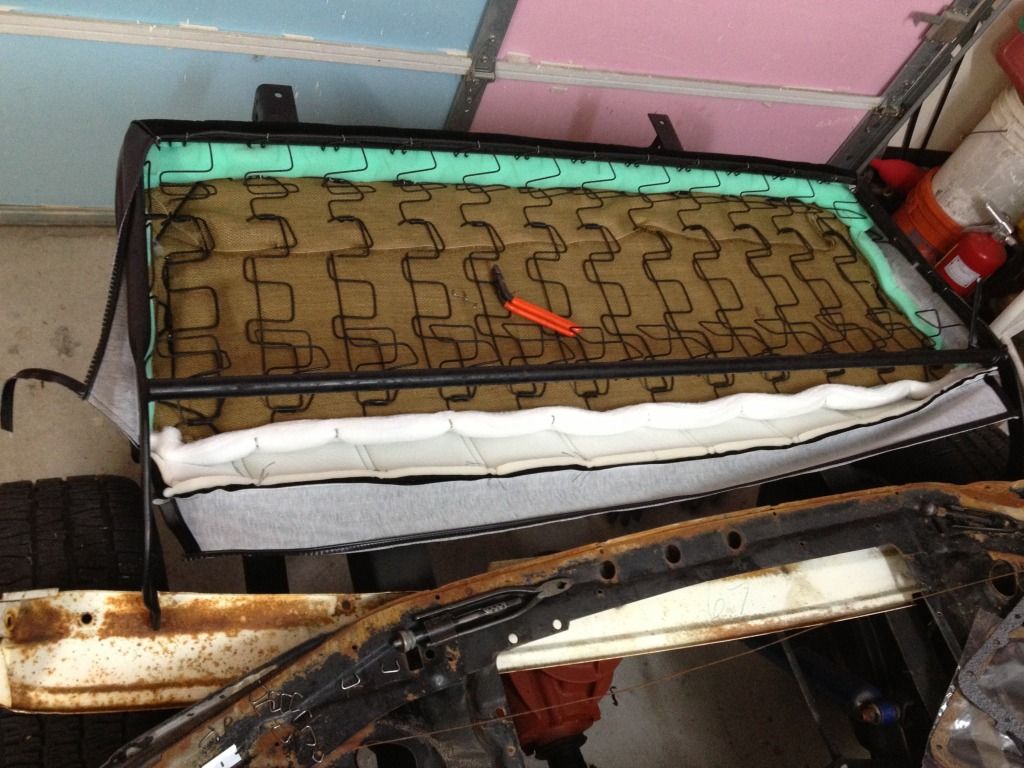
1) Hog Rings- With the price of upholstery repair I want to tackle the seat covers and foam on my own. Any advice? I have never even tried this before, but I am an engineer who thinks that I can do anything within reason. So my question is regarding hog rings. I notice there are 45 degree pliers and straight pliers. Will the 45's be sufficient to do a Mach 1 interior? Additionally, I did see the post about using zip ties in place of hog rings. Is that a smarter way to go? Save the $35 in hog ring pliers, plus the hog ring purchase, and have nice adjustable tension zip ties?

2) Different area of the car, the valve train. I have a Ford Motorsport cam, Ford Lifters, Stamped Rockers, Boss 351/Non-adjustable) heads, Ford Guide plates, and poly locks, but no pushrods yet. I have read all the techniques on using an adjustable pushrod to determine the correct length for my rods. I want to know the easiest way to do this correctly. What length rods should I need? 8.5, 8.75, 7.5. I need to know so I can order the correct length pushrod measurement tool. Is there any place I can go to rent or borrow that tool since I do not plan to use it again? (I bought the engine parts as a set, unassembled, years ago, so it has never been completed or run as a complete engine.)

Any wisdom is greatly appreciated!

kcmash

 
The non-adjustable rocker arm head pushrod length was 8.408. The adjustable rocker arm head pushrod length was 8.500. Use checking spring when you determine proper pushrod length.

I'm no help with the hog ring pliers. Zip ties sound like a bad idea to me. Plastic always fails it's just a question of when.

Chuck
Chuck, THANK YOU for the information so far. What do you mean by "Use checking spring when you determine proper pushrod length."?

Thanks!

 
Zip ties sound like a bad idea to me. Plastic always fails it's just a question of when.

Chuck
+1

The quality of zip ties varies considerably, The good ones with stainless steel locking tabs and good quality nylon straps aren't all that cheap. Then you'll want to punch the holes instead of just sticking a knife blade through them, a good quality plier type leather punch is around $20. When you use the hog rings you wrap the material around the wires, springs, and frame and then squeeze the hog rings around them so the stresses from the material pulling is around the wires and springs, not the holes.

Zip ties would be a lot more work, with questionable results.

 
The non-adjustable rocker arm head pushrod length was 8.408. The adjustable rocker arm head pushrod length was 8.500. Use checking spring when you determine proper pushrod length.

I'm no help with the hog ring pliers. Zip ties sound like a bad idea to me. Plastic always fails it's just a question of when.

Chuck
Chuck, THANK YOU for the information so far. What do you mean by "Use checking spring when you determine proper pushrod length."?

Thanks!
Checking springs are very light strength springs (Moroso is one source). If you use a regular valve spring you will likely bend the checking pushrod or ruin the threads.

 
Some upholstery kits come with a set of hog rings and the cheapest hog ring pliers you can imagine. The pliers will get the job done but I have never actually used them. I have a set of 45deg pliers that I purchased years ago when I did my first set of seats. They are pretty decent quality and the grips really save your hands when you are installing dozens and dozens of hog rings.

Another tool you might want to get is a small set of bolt cutters in order to cut/remove all the old hog rings. You can get a dedicated hog ring cutter, but the bolt cutters have other uses when the job is done. Here is me and my daughter restoring the bench seat on my F-100. Not the best pictures but you can see the tools used.

IMG_0469_zps49191a89.jpg


IMG_0492_zps14b5af06.jpg


As far as pushrod checker tools go, I always made my own with some 1/4"-20 threaded rod and a used non hardened pushrod for the application. Cut the pushrod with a hacksaw about 2" from the one end, remove approximately .2" of pushrod material so the checker can be made smaller if necessary, run the tap down both cut ends of the pushrod, install a appropriate length of threaded rod into it and viola.

Not my picture but you get the idea.

PUSH_ROD_LENGTH_CHECKING_TOOL_003.jpg


Last edited by a moderator:
I now use the same tools MwZapU shows above. I've tried the cheep ones and the straight heavy duty pliers and diagional cutters over the past twenty years. These tools shown in his post will save your hands. I takes about 50 hog rings per seat. I recommend the silver ones sold by our suppliers. The real pig rings from hardware stores are heavier and after doing 200 you'll wish that you hadn't.

Great idea on that pushrod tool.

 
I just took the rear seat bottom apart. 110 Hog rings to remove!

I sure hope I can get it back together. I notice the original burlap has wires run through it. Do you guys replace burlap and foam when re-covering? Where do you get your supplies?

kcmash

 
I went to AC Moore. The foam is expensive as it is a petroleum product, but far cheaper than having a shop do it. You should also put a layer of Dacron or other plush covering over the foam before the cover goes on. It will help plump up the seat cover and prevent the wrinkles common with DIY seat restorations.

IMG_0486_zpsb751749c.jpg


IMG_0488_zps0780ff06.jpg


IMG_0489_zpseebc48de.jpg


IMG_0490_zpsba5ddf27.jpg


IMG_0491_zpsfb06b576.jpg


IMG_0494_zpse0159351.jpg


If you don't use the burlap (or some suitable substitute), the springs will eat the foam.

As to the hog ring pliers, get a pair that are spring loaded to stay open-the cheap ones are a pin in the ass to open to place the hog ring in position.

Quality zip ties aren't a substitute, but they can be helpful on some inital fitting. Cheap zipties are crap. I only use black zip ties made in the USA, but that is just my personal experience

 
my advice just buy the best hog ring pliers you can afford. the cheap thing that comes with seat kits is junk.

the better the ring plier the better your seats will come up. i did my seats myself about 11 years ago now.

 
I have seen upholstery shops wrap a rubber band around the hog ring pliers just below the pivot(to make them self closing) so they hold onto the hog rings during installation. This can be useful as often the ring drops out of the jaws when orienting around trying the get the correct angle before you squeeze them closed.

 
Last edited by a moderator:
I have seen upholstery shops wrap a rubber band around the hog ring pliers just below the pivot(to make them self closing) so they hold onto the hog rings during installation. This can be useful as often the ring drops out of the jaws when orienting around trying the get the correct angle before you squeeze them closed.
I dropped it all at an upholstery shop today. These guys appear credible and quoted $350 to put the foam and covers on all the seats. I have enough other stuff to do on the car, so I figure I couldn't pass on that one!
Well, that was a really good choice! They did the work in 1 day while I was at work, It looks great! I'll post a picture when I can.

I must say that there is a lot to be said for the quality of the OEM Mach 1 upholstery versus the reproduction stuff from TMI. But, it looks good for now, and I can focus on other parts of the car!


Sorry about the lack of knowledge questions here, but setting up this valve train seems way too difficult. Local speed shops are pretty well non -existant, so simply finding an adjustable pushrod, and the light springs to check everything drags on for weeks. I don't have the machine tools to make my own pushrod.

with the information in previous posts I am wondering if the pushrods below are what I really need? Or do I start with an 8.5. I don't have the money to do this twice or to "experiment" for months.

An earlier post said the adjustable length pushrods are 8.5.(I assume the machined heads and the guide plate/poly lock setup is what we mean by adjustable.)

Comp Cams High Energy Pushrods

Designed for your performance street rod, RV or everyday street driving. Sets of 16.

Product Type: Push Rods

Application: Ford 351C Standard Length

Overall Length: 8.412"

Diameter: 5/16"

Material: C1010 Steel

Tube Wall Size: 0.060"

Top Tip Size: 5/16"

Top Tip Type: Welded Ball

Bottom Tip Size: 5/16"

Bottom End Type: Welded Ball

One-Piece Pushrod: No

Swedged Ends: No

210° Top Tip: No

Tapered: No

Oils Through Pushrod: Yes

Heat Treated: Yes

Use With Guide Plates: Yes

Finish: Natural

Manufacturer: Comp Cams

Manufacturer's Part Number: 7832-16

Weight: 2.14 lbs.

Warranty: 1 Year Limited Warranty

Quantity: Sold as Set of 16

 
Last edited by a moderator:
You said you have a motorsports cam? Is it one of the 'alphabet' cams? if you can post the specs on it, that would help.

In addition to having an adjustable push rod and the light weight checking spring I have learned the value of a 12 inch digital caliper.

On the one hand, it isn't really hard to do, but on the other hand, if you don't do it right, you will spend a lot of money trying to figure it out.

I have learned the hard way, so here is some free info, use it if it makes sense to you.

The heads will need to bolted on, with the same thickness head gasket you will use for final assembly. Depending on what kind of spring compressor you have available, you install the checking springs on the head, either off, or on the engine. Take two of the lifters, take them apart, and turn the plungers upside down, so that in effect it is a solid lifter.

Take a magic marker and draw a swipe top to bottom on the tip of the valve stem. Install the checking push rod, and rotate the engine twice, that is usually enough to get a mark. The goal, is to get the narrowest line, in the middle of the valve stem as possible.

If the mark is high, then the PR is not long enough, if it is low, then too long.

http://sbftech.com/index.php/topic,317.0.html


All my projects 185.jpgJust don't forget to turn your lifters back to their correct orientation!! The reasoning behind the lifter mod, is so that you take out the variable of the hydraulic action, that makes hyd. cam/lifter set ups desirable. The picture with the aluminum head is from my W engine, in my 69 Cougar.

When I built the engine in my 68, (the cast iron head picture) I have been through 3 cams, push rod sets, and two sets of roller rockers. I had many issues with push rod length initially. One of the things I didn't do, was modify the lifter, and so when I ordered my PR's, they are now about .050 too long. The wear pattern is acceptable, but not optimal. I will probably have some early valve guide wear because of it...

I talked to lots of people, and thought I had it figured out. Sadly, some of the advice I got and took, was from people who sell parts for a living. ( the machine shop!!!)

If your cam is a single pattern, meaning intake and exhaust are the same lift and duration, you can probably get by checking one valve. However, I would recommend at least both intake, and exhaust on one cylinder. You can see that I have an air hose in my #1 cylinder here, (the aluminum head) to make sure the valves don't drop in the combustion chamber. The link I posted covers the same thing I said, just much better, with more illustrations. I don't know why the pictures swapped places.....Sorry about that!

All my projects 006.jpg

 
Last edited by a moderator:
Back
Top