My 72 Mach 1 ongoing Project Thread

7173Mustangs.com

Help Support 7173Mustangs.com:

This site may earn a commission from merchant affiliate links, including eBay, Amazon, and others.

iceberg65

Well-known member
Joined
Apr 9, 2016
Messages
121
Reaction score
1
Location
Medicine Hat, AB
My Car
72 mustang Mach 1
351c 4v auto
Hi Everyone;

Since I've got the introduction done now I thought I'd start up a thread of what I'm working on with the car, hopefully get some good tips and suggestions!

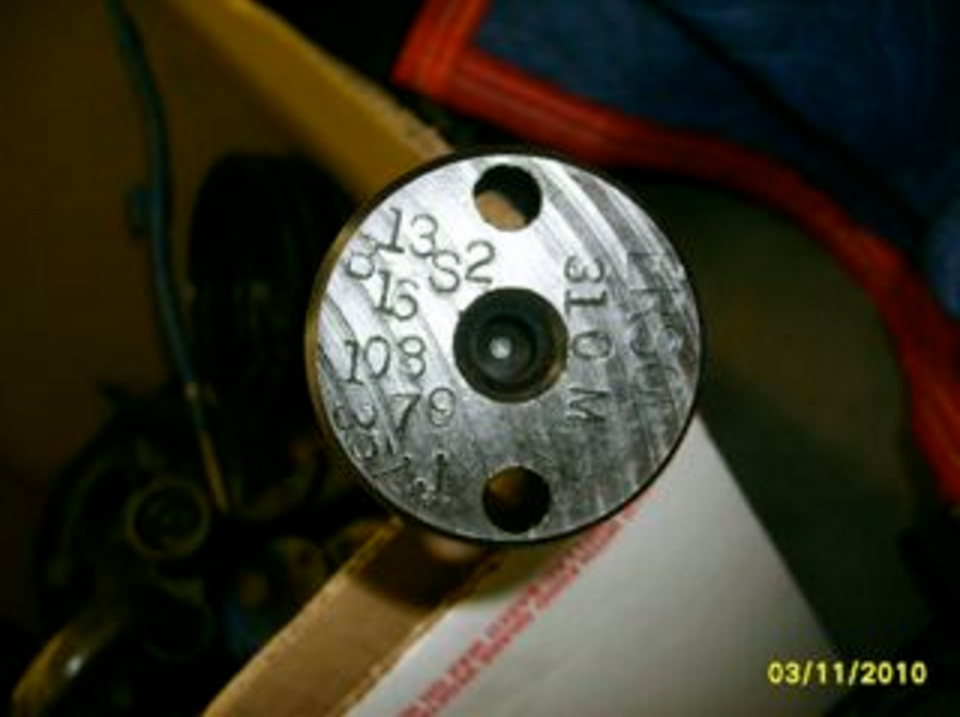
Just got a freshly swapped in open chamber 4v 351c (just what would have been in this Q code mach 1 by chance.) Oh, if anyone can shed some light on specs on this erson cam, I would be pretty appreciative, I cant find anything :s


This is it's 3rd motor since I've had it; got it with a very tired 2v that I still have stashed away. The 2nd motor was a stoutly build closed chamber 4V That met it's demise through a dropped valve and had some bad cam lobe wear upon dis-assembly. Shame; I still have one good head and a wrecked one its got a badly cracked valve guide and a pretty pounded combustion chamber. Some crappy circumstances on that failure; still not clear on what happened it was stored at my dads place and someone decided to start it and rev it after sitting a few months.... so yea i was pissed... anyway with that it sat for a loooong time.

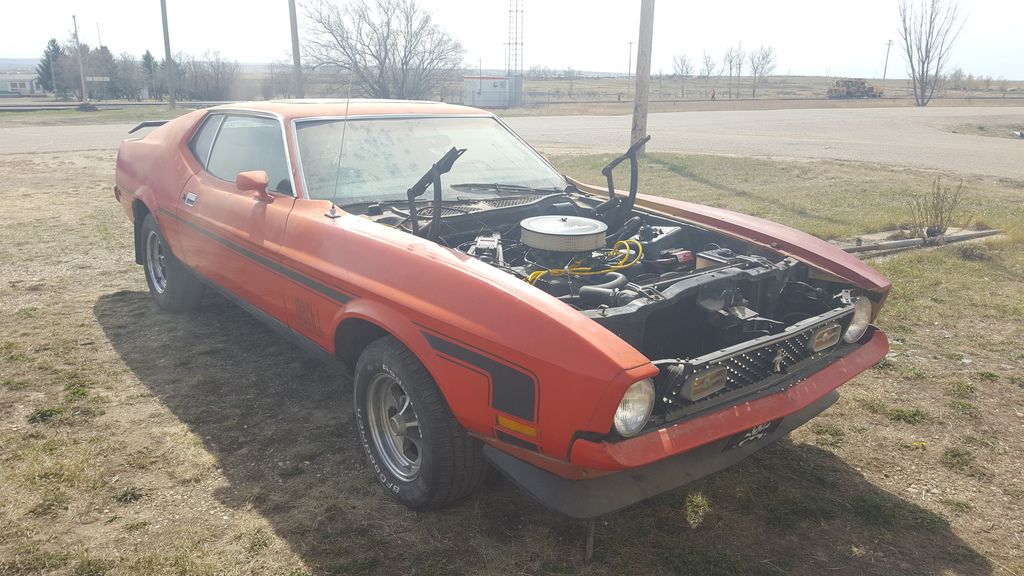
9 years later now and she runs again. Started with function; All thats really left is to get the brakes working a bit better and fab up a basic exhaust (straight 3" to hooker maxflow mufflers with a downturn before the axle; cheap and easy for the time being. I can do the over axle pipes later.)

For the time being the car needs drivers side floor pan work before I can have it roadworthy. And the interior is all covered in very faded black crushed velvet (how fantastic is that!)

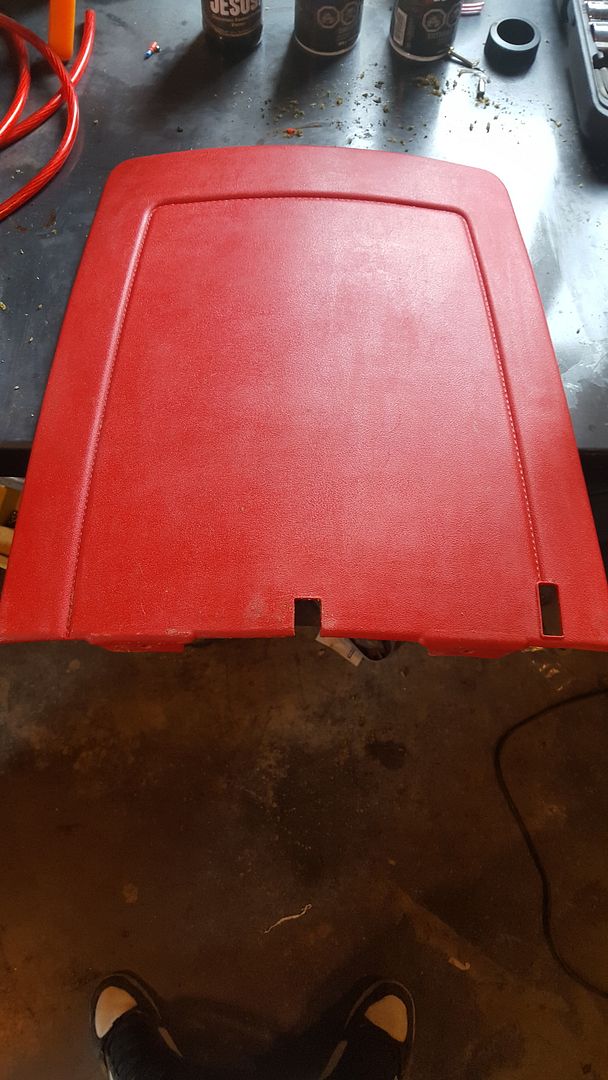
Anyway... the plus side of the custom interior (I'm hoping) is that my interior plastics should have minimal sun fade once I get the material and glue off everything...its gonna take some elbow grease. I took off and cleaned up one of the back seat panels and found paint thinner to work best on removing the gunk and that it was in quite good shape!


The seats however, do not have the original vinyl underneath so they will either need to be replaced or fully re-covered; which is something I will wait on since it's kinda pricey, and bodywork is gonna take priority.

Anyway; I'll keep this updated with how things are going; I've already found a lot of great information here and I'm loving working on this car again! Happy to be here :)

 
Last edited by a moderator:
Well I got to trying to bring back one of the rear interior panels and its not going so well. This one has some kind of primer underneath the glue that I just cant get off in a reasonable way; it's like it dyed into the plastic :(

I'm gonna have to end up painting them, I've had luck in the past with Krylon Fusion. If I can find a satin red I may go that route, but I dont think I've seen it before. Satin black will most likley be the color they go to, which does look good and unassuming.

 
Got some exhaust on the car so the neighbors dont dislike me too much hehe; just 3" straight pipes from the hooker headers, to some hooker Maxflow mufflers. I'll have to add flexpipes, get it tucked in a bit better and add a H pipe when I get around to actually driving it any significant amount. For now it tames down the sound a nice amount without having to drop any cash (I had everything I used laying around already). So again; this is just the "get it going" setup. Final adjustments can be done with lift access when I'm not doing most of the work left handed (due to a collar bone injury)


I also have a couple pictures of my progress trying to clean up the one interior panel thats being far more stubborn then the seat back. I think I'll try painting it tomorrow.


Well I did some more deconstruction over the past while. My door panels are going to be a job, but I don't want to drop $500+ on new ones when there's more important places to drop that kind of money first....even though I also bought new rims :S

Anyway; I'm going to be replacing the entire bottom section of the panel as all of the clip slots are busted and the corner is broken away This will most likely be done with aluminum. I'll also be making the speaker cutout look good with this as well; Not sure exactly what I'm going to do with it as a whole but I'm confident that I can get it looking reasonable for initial use. The panel has a couple minor cracks but the arm rest is very cracked up; so I may re-cover with new vinyl. Or I may fiberglass part of it solid. I have some brainstorming to do.

yep its ugly


Couldn't get the stains from whatever primer was used on the rear plastic so I went black. It looks reasonably good in person; far better then it was anyway.


And I test fitted a cougar seat in it, looks out of place but damn if it isn't waaay more comfortable and the seating position is quite good. It actually fits pretty well; only need to make a minor adjustment to get it right.


Oh and I came across these 15" wheels brand new for a steal of a price so I couldn't pass them up.


I've ordered the drivers side floor pan that should be here in a week or two; and I'm going to be getting a new carpet as well; these items are really very reasonably priced.

 
Last edited by a moderator:
Will do jbojo; most of the "progress" in the near future is going to be deconstruction. But eventually I'll get into some cool stuff. I've worked with fiberglass and some fabrication so I'm hoping I can get creative and get this thing looking good at a minimal cost, interior panels are pricey. Gonna end up with 6X9's in the rear deck just because there's already large holes there.

I played around trying to get more vacuum out of the engine the other day; Best I can do is 5-6 inHg at idle :S. Still no idea on the cam specs on that erson but the idle is quite lobey. It will idle at about 700rpm when warm but I ended up setting it at 850 for the time being. I did take a little video.


Well I've made some progress on resurrecting my Door panel and its finally looking better rather then worse haha. I totally cut out the arm rest area and am going to make a black pad to secure to it so there will be a seam but it will be something I can live with It will be attached via nutserts in the base of the pad I make. I also got it mostly cleaned up (very tedious) and I made a replacement bottom section out of hardboard. I'm not seeing if I can find automotive carpet locally that comes off a roll 44" or more so I dont have to but a bunch of it to get full coverage across the bottom, and I need a bit of foam to make an arm rest pad still.

All that ugly glue


Cleaned up not too bad.


And the replacement for the lower section


I plan on attaching the replacement lower section where the trim normally goes; I'm going to cut off the bottom section as its in very poor shape. I'm just going to stack the new panel over the original where the holes for the trim are. My trim was gone so I'm making a new one out of aluminum and can drill and rivet through it with adhesive to secure the new lower section.

Still a long way to go before this thing is tolerable haha

 
Will do Tim, I made a bit more progress on the door panel; I'm really just getting it to reasonable shape that I can live with for a while; the long run it does need different panels.

On another note; My drivers floor pan and new carpet should be in my possession towards the end of today! I've also stripped out almost all of the interior now and have been hard at work removing velvet from plastic panels; most are now done!

Oh and non mustang note; tomorrow I'm taking my Taurus SHO to the drag strip Fingers crossed for mid 12's

 
Allright; more carnage on my car; working towards a brighter future haha. I now have a new black carpet and a drivers side floor pan ready to go.

Brought the car from the shop it was being stored (without power) home


Got a picture of the mock up on the door panel; I have more done but didnt get a picture aparantly. This is before the makshift armrest is stuffed, It's all together now; It's something I can live with for a while.


With my new parts sitting just waiting to get use; I tore into the car to get to the floor!


Drivers side is holy as expected!


But the passenger side is not too bad; confident that I can save it without a replacement panel.


I got going with some pliers to reveal the frame under the drivers side hole; looks nice and solid underneath.


I didn't want to get into the power tools just yet as I still have to get the fuel line and ebrake cable disconnected. But I'm happy that the level of rust is about what I was expecting and that both rocker panels look very solid.

The seat risers are going to need a bit of work on the lower lip but should be quite doable without too much time into them.

Also, I'm going to coat the inside of the frame rail while it's exposed. Canadian Tire carries Por 15; but most seem to be using rust bullet and I'm not sure where I can pick some of that up. Also read somewhere that welding + por 15 = bad gasses released; is rust bullet the same?

 
Last edited by a moderator:
Update time;

I have a few pictures but havent uploaded them yet; I got the drivers side floor nearing completion on the welding now; took me a while to line up a decent welder and bottle; but managed to get hold of a 120v Lincoln mig for one hell of a price. I've been flux core welding too much haha Mig is a walk in the park.

I also took back the bondo cracks in my rear sail panels, and found that the metal is in good shape; whoever did the bondo was mostly just VERY bondo happy, and they removed the fill from the roof seam so I'll have to do something with that.

Anyway; I've also started collecting other parts for this build to line up with my vision of what I want. I'm going to swap the 8" rear end out for a 9". I already picked up a full rear end thats near the same width as whats in it; and I picked up a set of motive pro 3.89 gears for $40. Then I found a ford 31 spline trac-loc that hasn't had much use since being rebuilt with a set of 4:10 gears for $75, I snagged a Hurst Promatic 2 off a guy that bought it and never used it. Even the 3.89 ratio is a bit higher then I wanted to go with; but the cars really going to see minimal time on the highway. I Dont have 31 spline axles for the diff so I'm gonna have to buy some; But I'll have plenty to go over when I actually start working on the rear end swap.

Now I've never touched the c6 in this car as it's been good; but in the long run it's gonna get some work. I'm watching for used ones to come up for sale that already have some work done. But I would appreciate input on which way to go as far as valve body goes. The engine makes very little vacuum as is and the car is going to be a street/strip car probably 50/50. I have enough other vehicles that I can drive on the street this this is just gonna be for fun.

 
Last edited by a moderator:
The 31 spline trac loc unit can be converted to 28 spline fairly inexpensively with a set of spider gears and a new "hat" It can also be reversed in the future if you need the heavier axles. I just called Randy's ring and pinion, told them what I wanted to do and they sent me the parts for somewhere around a hundred bucks or maybe a bit less. The 8" rear end axles will work in a 9" housing if they are the proper length

 
Last edited by a moderator:
Nice to see another mustang being saved in Alberta.
You know it; there's a few of em around but not commonly spotted driving around down in Medicine hat. That being said; right after speinding about 4 hours welding on my floors; I catch a light right next to a beautiful bright red 73 mach 1 that I haven't seen around town before in minty shape! Gave the guy a thumbs up and told him I was just welding on my 72.

The 31 spline trac loc unit can be converted to 28 spline fairly inexpensively with a set of spider gears and a new "hat" It can also be reversed in the future if you need the heavier axles. I just called Randy's ring and pinion, told them what I wanted to do and they sent me the parts for somewhere around a hundred bucks or maybe a bit less. The 8" rear end axles will work in a 9" housing if they are the proper length
Thats great to know, thanks Jeff! I'll be looking into my options more closely when I come to the swap... probably late winter early spring by the time I get to it. I like the idea of stronger axles but saving a few bucks is also great; the motor in it now wont be taxing the 28's. I'll definitely keep randy's ring an pinion in mind when I go to order stuff.

 
Well I did a bit of work on my dash; got the autometer gauges mounted up and I'm happy with how they sit in the original housing. I put some faux carbon fiber vinyl on front just cause thats what I had laying around and the old woodgrain was really rough; in the long run I'll be changing it up but I can deal with it for now. I'm also going to tough up some paint on it in the future. the chrome trim is in pretty rough shape.


I've also got a mechanical issue that I'm gonna have to find out. Im getting a very pronounced noise coming from the transmission when it's in gear (even reverse). This noise is stronger on the drivers side and goes away completely when you get moving any faster then a crawl.

It almost sounds like the parking pawl isn't fully disengaging or something. The speedo cable did come out of its housing on the transmission side and it left the gear inside....so I'm probably going to have to at least drop the pan and see what I can find. I checked the linkages; and its solid from the floor shifter to the trans lever, but its loose where it goes to the steering column....Guessing this should only be for the key lockout.

http://s237.photobucket.com/user/iceberg65/media/20160902_192601_zpsubpv3v1w.mp4.html?sort=3&o=0

Speaking of speedo cable; I was going to order a replacement but the listing on Rockauto says the speedo for a 72 auto is 80" is that correct? seems like it shouldn't need to be over 6 feet long....I dont have mine fully out yet though.

 
Last edited by a moderator:
Well I did a bit of work on my dash; got the autometer gauges mounted up and I'm happy with how they sit in the original housing. I put some faux carbon fiber vinyl on front just cause thats what I had laying around and the old woodgrain was really rough; in the long run I'll be changing it up but I can deal with it for now. I'm also going to tough up some paint on it in the future. the chrome trim is in pretty rough shape.

Yay! I'm not the only one with the carbon fiber vinyl! ::thumb::

attachment.php


attachment.php


haha; it does seem to work fairly well on a black interior; and the woodgrain on mine was just in such rough shape; I've got it on my door panel inserts as well....whenever I get around to putting that together (my panels are really hurting)

 
Well I got the steering wheel off and the gauge cluster out.

I'm not sure what I'm gonna do with the tach yet... the MSD adapter is pretty stupidly expensive for what it is.... The rebuild that can be done to convert the old unit is what I want but the ~150 will easily go to over 200 with the exchange rate and shipping. I'm kind of leaning towards just mounting the aftermarket one I have for the time being (I could probable fit it in the cluster reasonably well then send the old one for a rebuild when my budget is in a little better shape for it. I just have other areas that I would rather spend money on at the moment. (like figuring out the transmission issue....maybe a valve body while I'm at it.)

On another note; I ran a new best at the track yesterday in my Taurus; and killed a 6.4l challenger with ease while I was at it. Ran a 12.75@ 110mph our track is at a high elevation too almost half a second slower then a lot of the faster tracks down in the states. The other (near stock) taurus running was at 14.0 so I've got mine running pretty awesome. There was also a pretty gorgeous 66 gt350 in white/blue running at 12.2 drooled over that one a fair bit!

 
Last edited by a moderator:
Back
Top