Block sanding question.

7173Mustangs.com

Help Support 7173Mustangs.com:

This site may earn a commission from merchant affiliate links, including eBay, Amazon, and others.
Joined
May 15, 2011
Messages
3,537
Reaction score
447
Location
PA
My Car
1971 Mach 1 Mustang
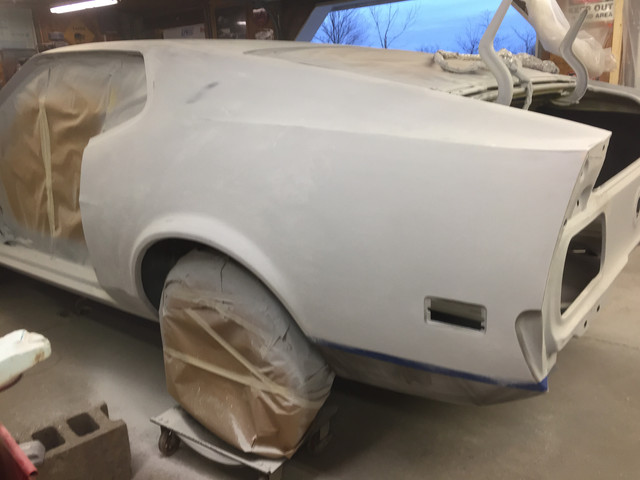
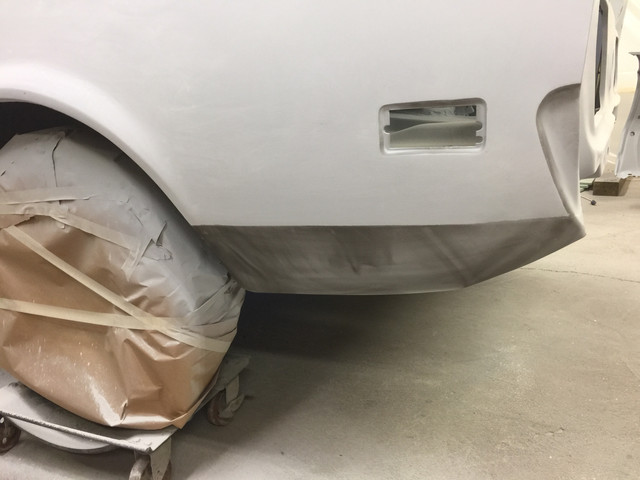
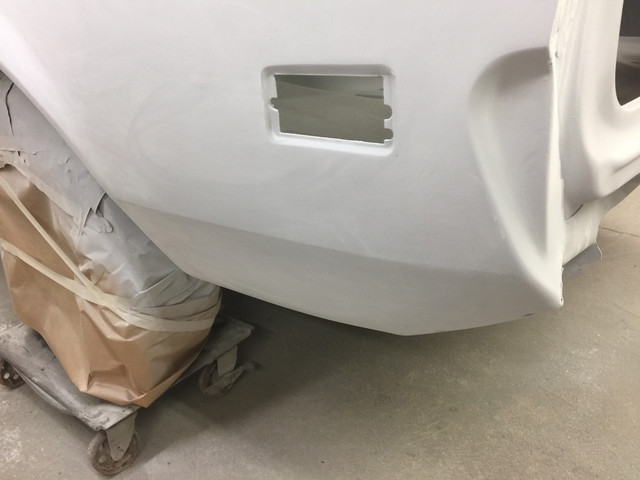
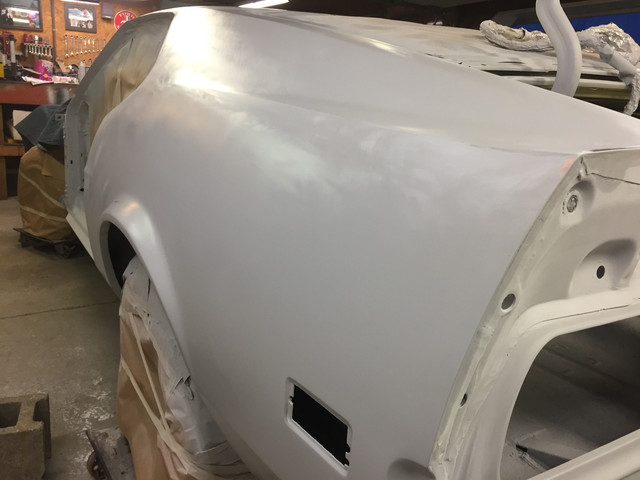
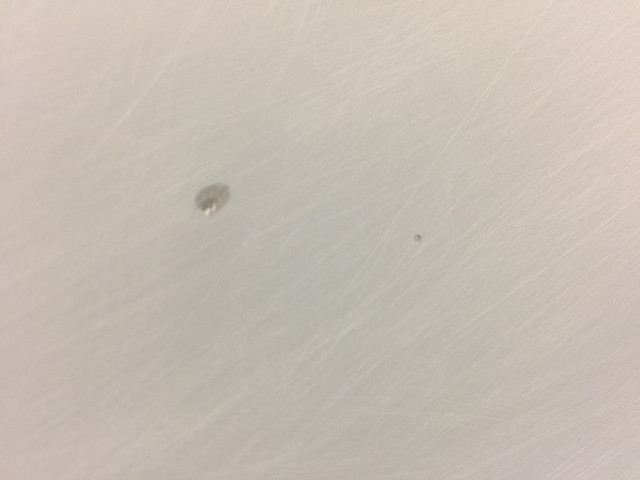
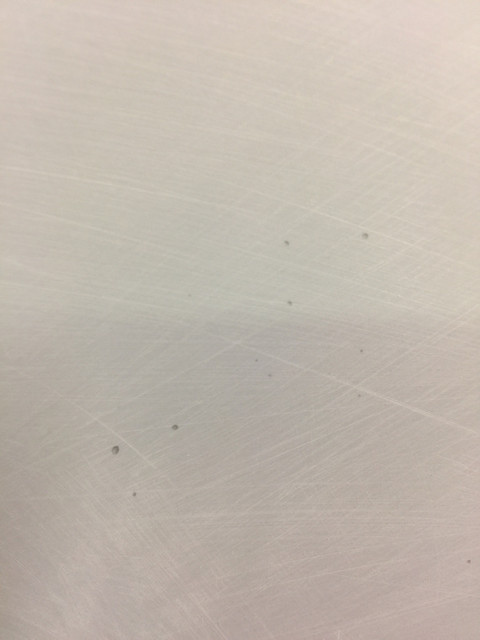
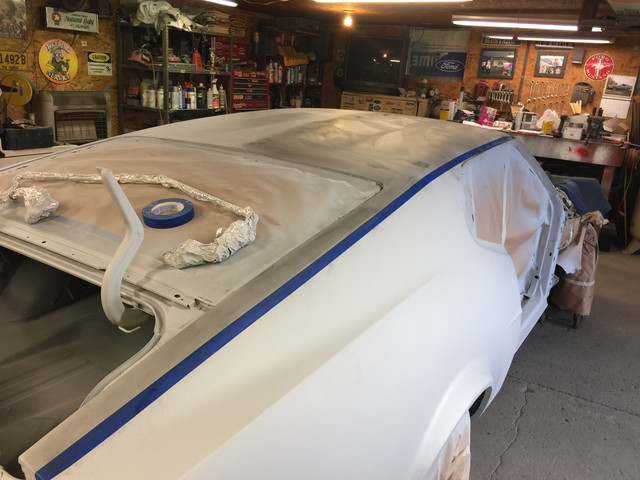
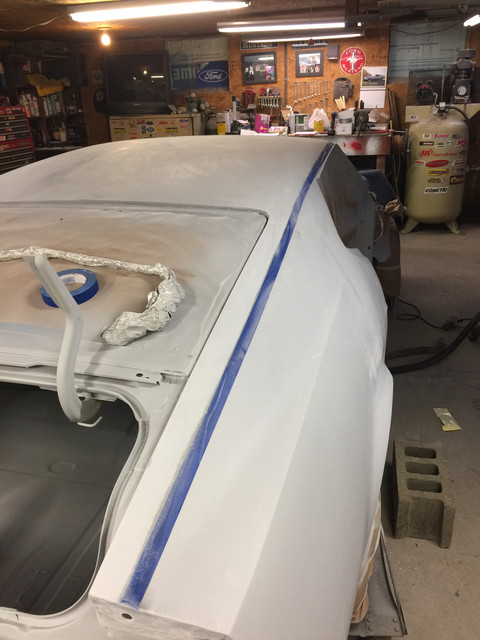
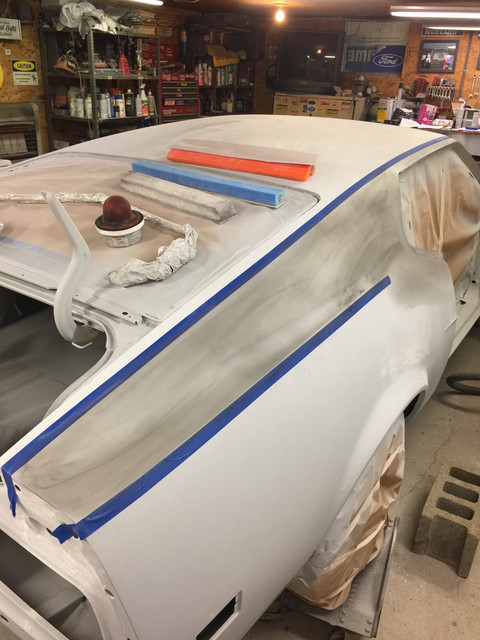
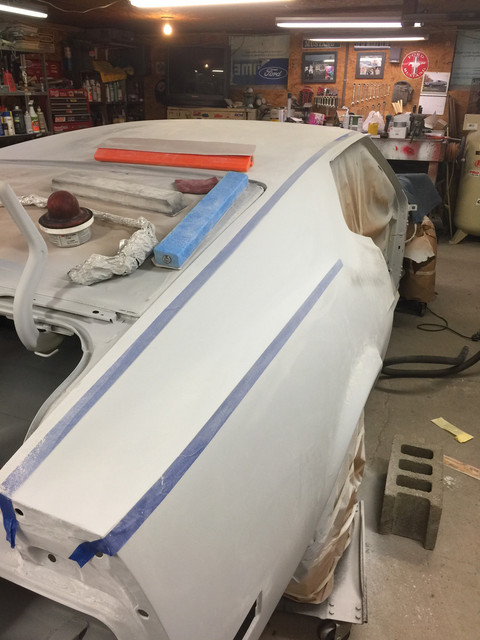
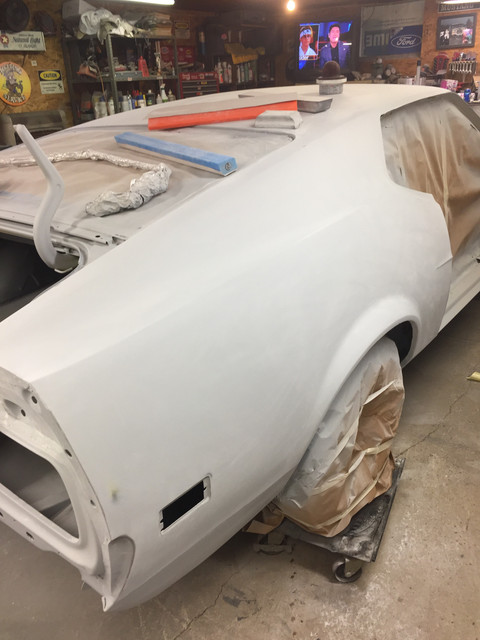
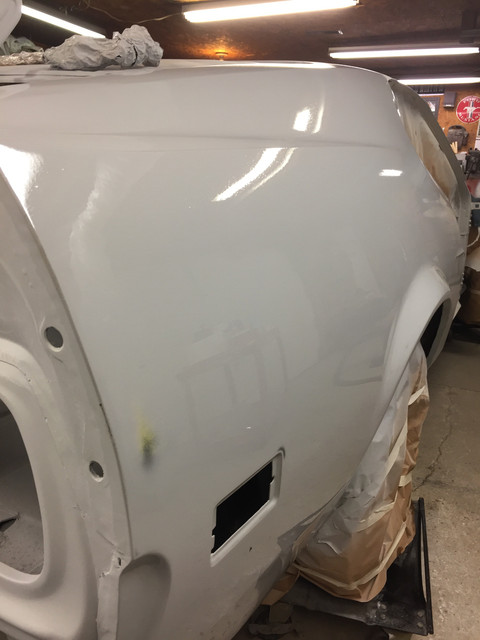
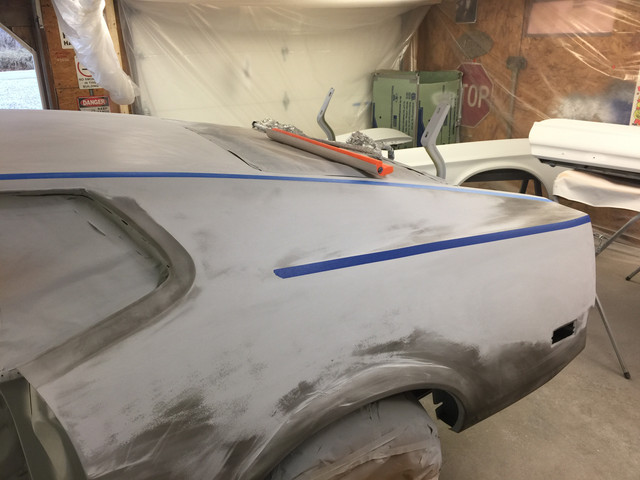
So I had a few questions for all you body work gurus. I am block sanding this 71. I got half the roof done and the driver side quarter panel. I ended up sanding it with 220 grit and sanded through the primer in a few spots also found a couple pinholes. I am going to finish blocking the rest of the car with 220. Then what should I do?  So do I need to shoot the whole car again with primer then sand with 400 grit? Or can I just shoot over the areas that sanded through then sand with 400? And what is the best way to deal with the pinholes? Do I need to sand to bare metal then filler? Or just scuff primer and use  icing filler? Then prime and sand with 400? Any input is appreciated! Thanks for looking. 


free image hosting


Hi Kevin,

It all depends on how straight you want the paint job to turn out. The more you prime and long block the smoother and straighter the finish (3 times around should provide outstanding results, if your body work under the primer is straight) First off I am assuming you are using a 2 part epoxy primer/surfacer/filler. If you are not, I would strongly recommend it. You should also be applying 3 medium wet coats in between blockings. This will give you the best results when long blocking your car. Looks like you are guide coating, that is the best way to read your work. You should do your first block with the 220 using at least a 6inch block (the longer the block the straighter the finish will be) and read your guide coat to see how flat the panel is. If you have low spots you should reprime and 220 again, If you have metal showing through you should reprime before any further sanding is done. It is a good idea to fill the pinholes with a light coat of glazing putty at this time then block sand those areas with 220 prior to applying your second coat of primer. Once you feel the panels are straight enough and the minor defects are addressed shoot another primer coat, guide coat and block with 320, if no metal shows through and no low spots are seen and no other defects are visible, wet sand with 400. Use the wet, glossy panel as a mirror and look down the side of the car, moving reflections down or across the glossy panel to see waves, dents or ripples. This will give you an idea of how the paint will look. If you see any imperfections and it bothers you, do another round of priming and blocking. A good rule of thumb is one sanding per coat of primer. I would not recommend block sanding multiple times on one regular coat of primer. With the exception of the 320 to 400 sanding as the 400 is meant to smooth out the 220 and 320 sanding marks only.

There are a few different ways to accomplish the same thing here and I hope more will chime in. This process has played a big part in me winning best paint on a few occasions. If you shoot a stellar coat of paint on a poorly prepped surface the finished product will look terrible and if you lay down a crappy coat of paint on a perfectly prepped surface it will look terrible. Patience is key in this whole process. And this process will test your patience!! I hope this helps!

 
Hi Kevin,

Happy to give tech advice, but a few questions first to help you nail it.

What product did you use?  - Brand and type.

How did you use this product? - as a primer or putty.

How many coats did you apply?

What substrate did you apply this paint over? - previous old paint/bare metal etc.

Why the need to long block the whole car? - does every panel have an straightness issue.

Does your product need an etch primer used first, if applying it over bare metal?

What paint will you be using for the final color coats? - 2 pack solid color enamel or   base coat/ clear coat or   2 pack solid with 2 pack clear on top etc.

Are you wet sanding or dry sanding your primer /putty to end up taking it to the color stage?

If you can answer all these questions for me, i can give you better, accurate  feedback and advice on  ending up with a good result.

Many thanks,

Greg. :)

 
Hi Kevin,

Happy to give tech advice, but a few questions first to help you nail it.

What product did you use?  - Brand and type.      U-POL DTM PRIMER http://www.pbejobbers.com/repository/techsheet/ts0196.pdf


How did you use this product? - as a primer or putty.    HIGH BUILD PRIMER SURFACER

How many coats did you apply?      3 COATS


What substrate did you apply this paint over? - previous old paint/bare metal etc.     APPLIED OVER BARE METAL, 220 GRIT SANDED FACTORY PAINT, AND EVERCOAT EXTREME FILLER.  SEE LINK..   https://www.7173mustangs.com/thread-new-project-for-this-winter-71-mach-1?page=7


Why the need to long block the whole car? - does every panel have an straightness issue. I WAS ALWAYS TOLD TO BLOCK SAND ENTIRE CAR??  IM USING DURABLOCKS AND SOFTSANDERS IN VARIOUS LENGTHS AND CONTOURS. 6" - 24" LONG BOARDS.


Does your product need an etch primer used first, if applying it over bare metal?  NO. IT'S DTM.

What paint will you be using for the final color coats? - 2 pack solid color enamel or   base coat/ clear coat or   2 pack solid with 2 pack clear on top etc.          I WILL BE USING PPG GRABBER YELLOW 2 PACK BASE COAT AND PPG CLEARCOAT    (I BELIEVE IT'S PPG DELTRON??)

Are you wet sanding or dry sanding your primer /putty to end up taking it to the color stage? I PREFER TO DRY SAND WITH 400 FOR SOLID COLOR LIKE GRABBER YELLOW.

If you can answer all these questions for me, i can give you better, accurate  feedback and advice on  ending up with a good result.     THANKS FOR ANY INPUT AND ALL INPUT GREG. AND KEEP IN MIND, THIS GUY IS GOING TO DRIVE AND DRIVE AND DRIVE THIS CAR. NO SHOW CAR BEAUTY QUEEN, JUST A NICE GOOD LOOKING DRIVER.

Many thanks,

Greg. :)
 
Last edited by a moderator:
Kevin,

Thanks for the info - got it. The only thing i was not sure about was did you mix your UPOL as a spray putty, 4:1  or as a primer  4:1:1 reducer?   If you mixed it as a primer only, then that would not give you a very good film build to work with for blocking purposes, but three coats of spray putty is a good start.

OK, so here's my take on it all. Before you put the whole car into primer or spray putty, you would normally examine each panel for straightness and small dents etc. If you have a clean, straight panel so to speak, it becomes a waste of time loading primer filler onto that panel, and long blocking that panel for straightness. To any other unclean or not straight panels, well then yes, go for it. The UPOL product sounds like a very good versatile one too. ::thumb::  So yes, i would first apply your three or four medium wet coats of spray putty to the necessary panels. BTW - Pin holing in the spray putty happens when you apply each coat too wet, and / or you apply further wet coats on top too soon before the last coat has flashed off properly. Next, for your block work, 220 dry is ok, but 240 would be better for creating less sand scratches. 240 works good for wet sanding the spray putty down. Using your guide coat as an indicator, your first block rubbing will reveal the state of each panel. It may show that you still have some highs and lows in that panel, after a good and careful block down,and therefore that panel needs more spray putty applied to it, and further blocking again. It may be that the panel blocks down first off with no highs and lows for example, and you have not sanded through anywhere on that panel. That is the ideal situation. If you have sanded through any where, then those areas will have to be spot primed  before the color coats are applied. So now, re putty any panels that need more filling up for straightness. If you have any pinholes in your spray putty, then you have a choice of filling them with 2 pack wiping putty, or spraying more 2 pack spray putty into them, wiping each wet coat in with your fingers to force the spray putty into the tiny holes. In both cases, you will need to guide coat and block sand down those pinholed areas with 240 or 220 dry. If you go the wiping putty way, then you will need to sand down the wiping putty first, then spray a couple of light coats of spray primer over your pin holed areas to  seal them off completely, and again, block down those areas.

Once you get to a stage where all your panels are nice and straight, and have the right amount of spray putty on them, and there are no spot rub throughs, you are now ready for the final sanding before the color coats go on. You said you will be using a base coat/ clear coat system. (solid color, non metallic). For best results, the final sanding down process should be a wet one, not dry. You start with a light guide coat, then you will be wet hand sanding down each panel with 800 wet and dry paper, not 400 grade. I will guarantee you that if you use 400 grade wet/dry paper on a metallic job, you will get sand scratch marks coming through and into your final clear coats. Even with your solid color base coat, you will still get some sand scratches appearing in your final clear coats. 400 grade is only ok for final wet or dry sanding, when the top coats will be  a solid color 2 pack enamel only. 800 wet and dry will guarantee NO sand scratch marks will appear in your clear coats.

So once the guide coat has been removed with the wet, hand sanding process, then that's it. You are now ready to apply your color and clear coats. Also, don't let water pool on any panel. As soon as you have finished rubbing any panel, then dry rag or chamois the panel off, removing all excess water. If you have rubbed through any small spots in any given panel, then spot prime them with one or two light/ wet coats of your 2 pack primer. THERE ARE SINGLE PACK SPECIAL SPOT PRIMERS ON THE MARKET THAT CAN TAKE CARE OF THESE SMALL RUB THROUGH AREAS. They are quick and handy for this type of application. Now move into your application of your color and clear coats.

Hope that answers your questions Kevin.

Many thanks,

Greg. :)

 
Great!! Thanks for the reply Greg!! A lot of good information in there. I did have a couple questions. And to answer one of yours, I did mix the U-pol primer to the 4:1 ratio and shot it with a 1.8 tip..... Its biggest one I had. I like this U-pol primer, it seems to sand out really nicely and easy.

Now that I am almost done dry block sanding with 220, I should prime any spots that I sanded through and hit again with 220. Once that is complete wet sand with 800?? Is that too big of a jump from 220? Will the 800 take all the 220 scratches out? I have a big roll of adhesive backed wet/dry 400. Should I use it after the 220? then go to the 800??

Also when I start my wet sanding I should use a spray on guide coat correct? The powder stuff wont work with water.

Thanks again for all the info Greg!!!

 
Last edited by a moderator:
Kevin, looks like your panels are coming out smooth. If you choose to spot prime your sand throughs (high areas) use a finer grade paper or you will just sand through them again. Try not to build the primer up on these ares or you will create a high spot that will show up in the paint, it is just meant to cover a bare area. I would recommend stepping down on your paper, such as going from 220 to 320 to 400 wet. 220 to 800 is too big of a step and you dont need to go that far since you are shooting a solid non metallic color you don't have to worry about sand scratches coming through. Your final guide coat can be sprayed on using a krylon flat black. Wet sand the panel until the guide coat is gone, if you see some scratches remaining spray more guide coat and wet sand again. Do not hand sand! Always use a block! If you just use your hand on paper you will create finger lines and make your paint wavy. One again check your panel when it's wet to make sure it is straight enough and wipe/blow the panel dry. Highly recommend that once the car is all sanded with 400 you should use a sealer immediately before you paint. This will keep any old paint and contamination from bleeding through. You can mix your UPOL to become a sealer. This will be a non sanding sealer and applied just before painting.

Here is one of my metallic paint jobs blocked twice with 220 dry and finished in 400 wet with a sealer and the paint was color sanded with 2000, 3000 and 5000 wet and buffed.

View attachment 37871

View attachment 37872

 
Kevin, looks like your panels are coming out smooth. If you choose to spot prime your sand throughs (high areas) use a finer grade paper or you will just sand through them again. Try not to build the primer up on these ares or you will create a high spot that will show up in the paint, it is just meant to cover a bare area. I would recommend stepping down on your paper, such as going from 220 to 320 to 400 wet. 220 to 800 is too big of a step and you dont need to go that far since you are shooting a solid non metallic color you don't have to worry about sand scratches coming through. Your final guide coat can be sprayed on using a krylon flat black. Wet sand the panel until the guide coat is gone, if you see some scratches remaining spray more guide coat and wet sand again. Do not hand sand! Always use a block! If you just use your hand on paper you will create finger lines and make your paint wavy. One again check your panel when it's wet to make sure it is straight enough and wipe/blow the panel dry. Highly recommend that once the car is all sanded with 400 you should use a sealer immediately before you paint. This will keep any old paint and contamination from bleeding through. You can mix your UPOL to become a sealer. This will be a non sanding sealer and applied just before painting.

Here is one of my metallic paint jobs blocked twice with 220 dry and finished in 400 wet with a sealer and the paint was color sanded with 2000, 3000 and 5000 wet and buffed.
WOW that looks great!!  Thanks for the tips and help!!!  I have been using various blocks in different sizes and contours to do all my sanding. About the only places I cant get is around some of the jambs and nooks and crannys. I have been using red scotch brite in those areas. Is that ok to shoot over or do I need to step down to the gray scotch brite?

 
Great!! Thanks for the reply Greg!! A lot of good information in there.  I did have a couple questions. And to answer one of yours, I did mix the U-pol primer to the 4:1 ratio and shot it with a 1.8 tip..... Its biggest one I had.  I like this U-pol primer, it seems to sand out really nicely and easy.

Now that I am almost done dry block sanding with 220, I should prime any spots that I sanded through and hit again with 220. Once that is complete wet sand with 800??  Is that too big of a jump from 220? Will the 800 take all the 220 scratches out?  I have a big roll of adhesive backed wet/dry 400. Should I use it after the 220? then go to the 800??

Also when I start my wet sanding I should use a spray on guide coat correct?  The powder stuff won't work with water.

Thanks again for all the info Greg!!!
Kev,

Moving into the final hand wet sanding with 800 w & d , i will stick with.  I realize that will require a lot of pretty hard rubbing work. If you want to make matters more easy for yourself, then you have other options here. I will explain by giving you two roads or basic options you can go with here. I will explain each one separately. Option one is to use or spray a wet on wet primer before you lay your solid color base coat down, and option two is not to use a wet on wet primer at all.

OK, firstly, you have chosen to use a 220 grade dry paper to long block or block your spray putty. That grade is a good choice for taking down the putty fast, and slicing through the highs well. So in that sense, it's a good choice of paper to use. However, the negative to using it is that it leaves very aggressive sanding scratches and marks in the putty finish. Traditionally, spray putty is sanded down with a 240 grade dry or wet & dry paper. You get good sanding results with this grade of paper as well, and the best part is you can move into using 800 wet & dry paper to wet sand the putty down. So that said, with option one, you will have finished block sanding down your panels with 220 dry. Next you can spot prime any rub throughs with two or three light coats of primer. Next, you can spray on a light but even black guide coat of mat black lacquer from a rattle can over your panels. Next you can use 400 grade paper, and either hand rub all your panels dry or wet. (YOUR SPOT PRIMED AREAS DON'T NEED TO BE RUBBED DOWN WITH ANY ROUGH PAPER SUCH AS 240 OR 220.) I would choose rubbing wet for better results. Once all the guide coat has been removed, you are now ready to apply your top coats. But in this case, you will be applying about two or three medium wet coats of wet on wet primer first before the base coat color is applied. By going this way, you will eliminate any sand scratches from coming or showing through the base coat solid color. So in this case, using 400 grade paper is OK. The only possible drawback here, is if you get dirt nibs in the paint as you are spraying, be it the wet on wet primer, or the base coat color, because you won't be able to sand them out as you are applying the paint on the fly, because you can't disturb the wet on wet primer.

In option two, we don't use wet on wet primer. In this case, we finish off block sanding down your panels with 220 dry, and again spot prime any rub throughs. Next you will guide coat each panel with your mat black lacquer rattle can, and then wet hand sand down each panel until all the guide coat has gone. Next, dry each panel as you go, and re guide coat the panel again, only this time you will be using 800 wet & dry sand paper to wet hand sand down each panel. After this has been done, you will be ready to move straight into your base coat / clear coat top coats. As i said, you will not get any sand scratch marks if you follow these steps.

Lastly, i will mention a couple of points. Firstly, using 400 grade sand paper dry or wet, lastly, and before the application of a solid base coat color will reveal some sand scratch marks in the final show. This has happened to me many times over the years. It's just too aggressive a grade of paper. The problem is that base coat color paint has very little body to it, and therefore, produces little to no film build, and so, does a poor job of hiding and covering and filling in the sand scratches left behind when 400 grade paper has been used. It also shrinks back when dry, revealing any of the slightest surface imperfections that may be present on the substrate. Even 600 grade paper can cause scratch mark issues. With 800 paper, it's not a problem. However, if you sprayed with a 2K solid color enamel, then 400 grade paper, final sanding scratch marks get covered up well. 2k solid enamel has very good covering, body, and filling characteristics.

Also, hand sanding. In my trade we were taught the proper techniques to correct hand sanding that deliver top results. Most non pro painters would not be aware of them. The idea of using rubbing blocks on panels to carry out the final fine paper sanding for pre  top coat application is acceptable to a point, but overkill really. The main negative in going this way, is that edge block marks or lines, sometimes called tram tracking lines, can appear in the final look. That is a no, no. Correct and proper hand sanding eliminates this from happening. If you blocked properly in the first place, then blocking again with fine sand paper grades, achieves very little at all, if nothing.  Kevin - if you don't feel happy or confident enough with hand sanding to get a good result, and you are more happy or at home with using a block for finish sanding, then stick with that. It's your choice. I can give you the basics on hand sanding techniques if you want another time.

OK, hope that helps,

Greg. :)

 
Anyone besides me a bit overwhelmed here? :)

Greg, I for one would love to hear your basics of hand sanding...

Bodywork/paint is one of those things that if you ask 10 different people that have tons of experience and have produced killer jobs you get 10 different answers. I've tried duplicating some of these things down to the letter, even the same color of the same paint... and not gotten the same results. I've also done things that people have said will never work and they worked fine (for what it's worth I'm a home gamer with a lot of experience... not a pro at all but I've produced some nice results where pros have failed).

I think a couple of things result in these differences:

- People using different products (and what is available, formulations, thicknesses, solvents used... tend to be regional, the same stuff sold in different parts of the US sometimes seems to be different, I worry about this with some of your advice Greg, since you're in Australia). A couple of weekends ago I was helping a friend with some bodywork and ran into the 80grit that he had wouldn't cut his old paint as well as the 120 that he had from another brand. Turned out that even brand new the 80 grit wouldn't cut anything, it was really weird, it was like trying to sand through old paint with 400 grit.

- Different techniques, sometimes not even what they actually do, but just some fine details about how they do something. With that same friend I gave him details what to get and what to do and watched him do some of what I suggested and realized that I had to show him how to do what I told him to do to get the results I was expecting. In some cases it was something like how to hold the sander...

- Finally, it seems like the products change every few years (this might fit in under the first category), like if I told you what I did as a teen ager in Buffalo fixing up the families rotted out cars every spring, well that was the 80's, lacquer everything even one part laquer based spot putty, in the 90's in college I did a major re-do on my project car which suddenly a lot of the lacquer was gone and everyone was about isocyanate and phosphoric acid based etching primers (and this was before there was much worry about protective equipment, I sprayed the stuff in the driveway without a mask :-/ )

Anyway, I was always under the impression that the correct way:

- bodywork

- dtm primer (etching, epoxy...)

- primer surfacer (sounds like the UPOL stuff covers both primers), glaze in any bad spots that turn up

- a lot of sanding, depending on how rough the bodywork is and how thick the surfacer is starting at between 180-240 and working up to 320 and 400. With the 400 I always got "it's better to wet sand it but if you're doing a lot of wet sanding it can absorb into the bodywork/primer and cause problems." I've heard a lot of "don't go past 400, you won't see it in the finished job and some products will not stick well to something sanded past 400." Honestly I've only went past 400 a few times (in cases of trying to blend something together or do something that I shouldn't be doing anyway), but my experience is that every time I've gone past 400 I've caused problems- I've caused waves where there weren't any and had stuff flake off... It could have been dozens of things but I'm freaked out by going past 400.

- sealer- seems like people don't talk about this much, it used to be considered an essential step to make sure everything in the under coats stayed in the undercoats. It sounds like the UPOL stuff does this to? I will admit at times for me this meant whatever primer I had left over I put a thin coat of over everything. Usually here it was either "recoat in the recoat window or wait till it cures and scuff it" and then with some products it turned into "if you scuff it the paint will come off, it won't work"

- top coats

Have I ever done all this? Well not really. I think every time I've had something come up, I thought I was done and found a bad spot, the process got pre-empted by weather (if working in the driveway) and I had to improvise to protect my work. But usually, to be honest it would be that something wasn't quite working out the way it was supposed to and I had to figure something out to make it work, typically it was because of mixing products or doing something outside of manufacturer's recommendations, but not always, often it was that something just didn't work the way it was suppose to.

Anyway, I'm on the edge of my seat... I have a "new" (to me) door to put on my project and I was about to start doing some light bodywork to it and then paint it before putting it on the car... I haven't decided what I'm using for primer/paint... yet.

-
 
Thanks Greg and Mark!  Great info and input.  And I agree that if you ask 10 people you get 10 different answers.  But one thing I have noticed in researching this information is that the overall consensus is the same.  If your using a solid color basecoat and you wet sand with 400, then use a wet on wet sealer before topcoat, you should be good to go. 

If you don't want to use a wet on wet sealer you can do as Greg also mentioned and go a little finer with the wet sanding of the primer then move straight into the top coat.

I think since I already have the 400 wet dry paper and almost a full gallon of the Upol primer left, I will just finish up wet sanding with the 400, then put a wet on wet coat of the upol primer on before basecoat. They claim this Upol primer is a 3 in 1 primer, I guess I will see!!  

Got another question for you fellas....... this has been heavily debated online also and probably get varying answers here too.    In the door jambs and all the other small nooks and crannies that I cant properly sand can I use a red scotch brite or should I use a gray scotch brite??  Not sure if the red scratches will cover??  I suppose it depends on if im using the wet on wet sealer before top coat?  Since I am using the sealer I should be able to use the red. if I was not using the sealer and was going to sand everything down to a finer 600-800 grit then I assume I would use the gray? Sound right?? :huh: :chin:  I know one thing.... this paint stuff is confusing!!! I need to stick to welding and fabricating!! rofl

Again thank you all for your replies and advise!!!

 
Well, I can tell you that I've always used red, never gray and never seen the scratch marks. OTOH, I don't think I've ever done a non-metallic color on a car and I've never seen 400 grit sanding scratches come through, and I'm pretty fussy about those things, (for a while in college had a detailing business and did a lot of color sanding... doing that kind of work makes you fussy, more accurately anal retentive).

AAMOF, I did the bed side on my cummins ram last fall (the wheel arch was rotting out and I had scorch marks/melted steel up by the cab where the bed got caught on a live powerline I had to repair, long story), it was in chrysler patriot blue (a dark metallic blue). I finished the primer in 400 grit and did some areas in the tailgate opening, the taillight opening and behind the bumper corner with red scotchbrite. Big 8' long flat sections done in a dark metallic blue would show sanding scratches if they were there to be seen, and some of the areas that I used scotch brite are on the outside surfaces in the sun.

OTOH, I've already mentioned that some things seem to work out for some people and not others, maybe I'm just lucky ;-) . I don't think there would be any harm in making a quick pass with some gray, wouldn't add much to the job, if it makes you feel better then better safe than sorry. But again, I wouldn't.

 
Thanks Greg and Mark!  Great info and input.  And I agree that if you ask 10 people you get 10 different answers.  But one thing I have noticed in researching this information is that the overall consensus is the same.  If your using a solid color basecoat and you wet sand with 400, then use a wet on wet sealer before topcoat, you should be good to go. 

If you don't want to use a wet on wet sealer you can do as Greg also mentioned and go a little finer with the wet sanding of the primer then move straight into the top coat.

I think since I already have the 400 wet dry paper and almost a full gallon of the Upol primer left, I will just finish up wet sanding with the 400, then put a wet on wet coat of the upol primer on before basecoat. They claim this Upol primer is a 3 in 1 primer, I guess I will see!!  

Got another question for you fellas....... this has been heavily debated online also and probably get varying answers here too.    In the door jambs and all the other small nooks and crannies that I cant properly sand can I use a red scotch brite or should I use a gray scotch brite??  Not sure if the red scratches will cover??  I suppose it depends on if im using the wet on wet sealer before top coat?  Since I am using the sealer I should be able to use the red. if I was not using the sealer and was going to sand everything down to a finer 600-800 grit then I assume I would use the gray? Sound right?? :huh: :chin:  I know one thing.... this paint stuff is confusing!!! I need to stick to welding and fabricating!! rofl

Again thank you all for your replies and advise!!!
Kev,

Stick with the grey pad. It will do everything you want to abraize the substrate you want to paint over. Use it wet or dry.   My, my - you are a lazy painter aren't you. :p :p :p :p

Greg. :)
Thanks Greg!!!  By the way im not a painter!!!  Im a fabricator!! rofl

 
Well, I can tell you that I've always used red, never gray and never seen the scratch marks.  OTOH, I don't think I've ever done a non-metallic color on a car and I've never seen 400 grit sanding scratches come through, and I'm pretty fussy about those things, (for a while in college had a detailing business and did a lot of color sanding... doing that kind of work makes you fussy, more accurately anal retentive).  

AAMOF, I did the bed side on my cummins ram last fall (the wheel arch was rotting out and I had scorch marks/melted steel up by the cab where the bed got caught on a live powerline I had to repair, long story), it was in chrysler patriot blue (a dark metallic blue).  I finished the primer in 400 grit and did some areas in the tailgate opening, the taillight opening and behind the bumper corner with red scotchbrite.  Big 8' long flat sections done in a dark metallic blue would show sanding scratches if they were there to be seen, and some of the areas that I used scotch brite are on the outside surfaces in the sun.

OTOH, I've already mentioned that some things seem to work out for some people and not others, maybe I'm just lucky ;-) .  I don't think there would be any harm in making a quick pass with some gray, wouldn't add much to the job, if it makes you feel better then better safe than sorry.  But again, I wouldn't.
Mark, when you did the bed with 400 did you use a sealer?

 
Hi Mark,

Thanks for your reply and feedback. Yes, you are correct about products and paint chemistry specs changing and varying around the world at any given time.

I started out in my trade of auto spray painting back in 1976, and have never got out of the game since. I still now paint 5 days a week at the tender age of 60 years. :p and work only on brand new cars. Most major paint companies around the world are a pack of dead sh-ts, because they are money or profit driven only.   They charge rediculous prices for their products and continually change the paint chemistry of their products from year to year, sometimes going backwards in performance and quality would you believe. Yes, it's freakin' true.

For example , sand paper companies around the world, list their papers on a stock universal number's basis. However, the true  story is that the abrasive factor varies from company to company. I base my tech advice on the 3M company, and use them as a yard stick to go by internationally.  The interesting thing about this game is that when i did my 4 year training apprenticeship from way back then, you were taught the proper and correct procedures  of all aspects of the trade or job. What i found over the years, was a lot of pro painters tweak and change the basic rules as they go along in their jobs, to suit themselves, or what they perceive works best for them. That goes for everything from gun application  techniques to all aspects of preparation methods etc, etc.

Don't be scared regards using abrasives over the 400 grade mark. For example, i use 2000 grade  to prep up an original factory painted panel before top coating, and get fantastic results.

Regards hand sanding techniques - time has got me right now, but i will try and follow through at some stage in the future, and lay out the whole thing. If you really want to get technical, at some stage, we can link up and have a phone conversation about it all. That would be great!

Thanks,

Greg. :)

 
Nope.  Like I mentioned and listed, I know that the right way is, but I rarely have ended up doing it like that.  

In that case I did a bunch of cutting/grinding/welding/hammering, put some 'glass filler over anything that was cut/any exposed edges, then a light skim of regular filler (Marson's Platinum, when I went to get some the body shop supply was out of the evercoat I usually use, they told me it was equivalent and I didn't have time to wait), a few iterations of prime-sand (first with a bondo buster DA, the 8" pad makes fast work of large flat surfaces, later with a regular DA and then some long boards, smaller blocks and by hand in the details like around the taillights and the tailgate opening).  Once I had it blocked straight in 400grit and no metal exposed I hit it with base and clear, I was in a hurry- I was doing it outside in November 2015 in Maryland it was getting cold, I just wanted it straight, one piece and covered up before winter.  I used 1000watts of halogen work light and a heat gun to warm it up, I kept the paint and primers in a bucket of hot water till I was ready to use them.  Most of it was done on 45-60 degree nights, without the heat I was having problems with condensation by the time I got to doing paint.

FWIW, I would have been happy with this one looking OK straight and the right color from 10 feet away (work truck, just keeping it from falling apart over the winter), but it turned out really well, better than the other side of the bed that a bodyshop did a few years ago.  Honestly you can't tell it from the factory paint on the cab a year and a half later when you get right up to it (except where the factory clear is starting to oxidize).

 
Back
Top