Trunk paint color

7173Mustangs.com

Help Support 7173Mustangs.com:

This site may earn a commission from merchant affiliate links, including eBay, Amazon, and others.
They were painted with spatter paint. The inside of the quarter panels were spray with sound deadener. The inside of the tail panel was combination of spatter and body color and sometimes they were partially unpainted.


They were painted with spatter paint. The inside of the quarter panels were spray with sound deadener. The inside of the tail panel was combination of spatter and body color and sometimes they were partially unpainted.

Are there different colors? Can I get them local?


I used Duplicolor black and gray spatter paint TSP101. The black and gray spatter chips are a little small compared to factory. It took 6 cans to get good coverage with out streaks. I got the paint from O'reilly auto parts.

 
Last edited by a moderator:


I used Duplicolor black and gray spatter paint TSP101. The black and gray spatter chips are a little small compared to factory. It took 6 cans to get good coverage with out streaks. I got the paint from O'reilly auto parts.
Thanks and by the way looks great.

How high did you spatter on the inside of your quarter panels? In the photo it does not look like it is all the way up. 

Rich

 
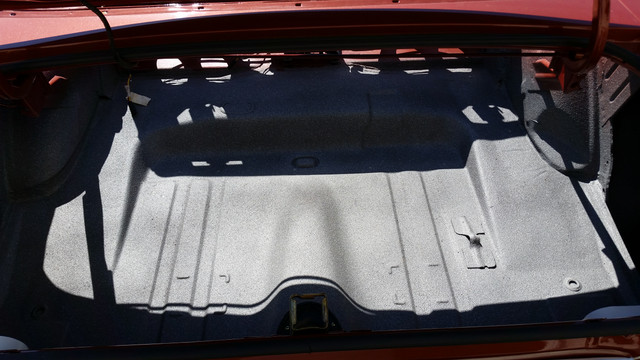
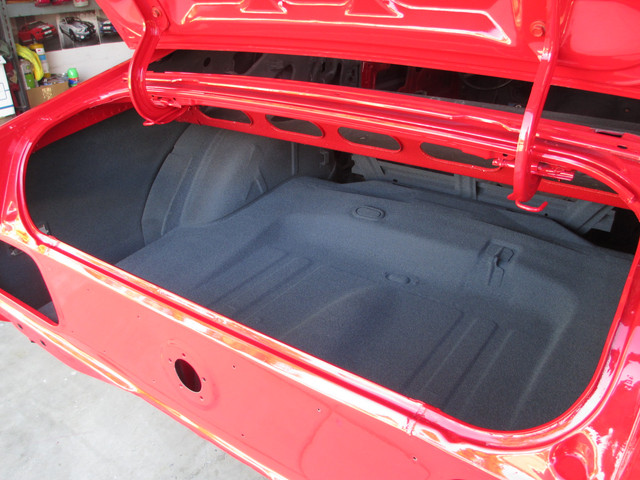
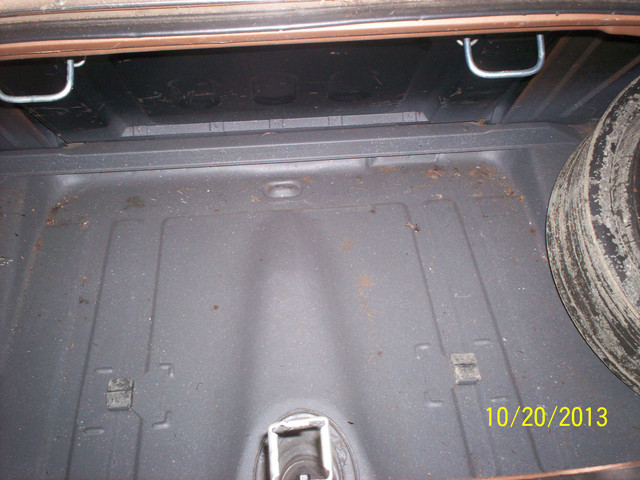
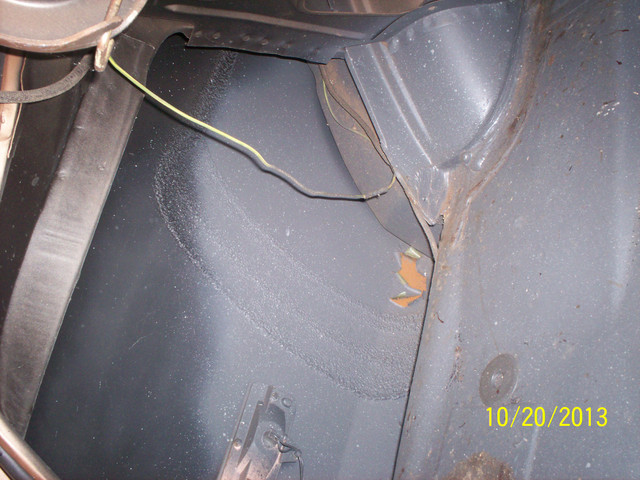
Judging by the original trunk in my car, the splatter paint was applied very hap-hazardly, almost like an afterthought on the line. I wish I'd taken photo's of it before it was repainted, but it was  not done well. The quarter panels had some sound deadener covered with a spritz of  dark grey/grey splatter paint that did not go all the way up. More like just as far as the painter could reach. The top of the quarters up to the roof were bare steel and rusty. I had my painter spray POR 15 up in that area before the splatter. I chose to cover the entire trunk as total originality was not a concern. The paint I got was from NPD, #AP-500. There is also a clear coat for it, #AP-501 to improve water resistance.

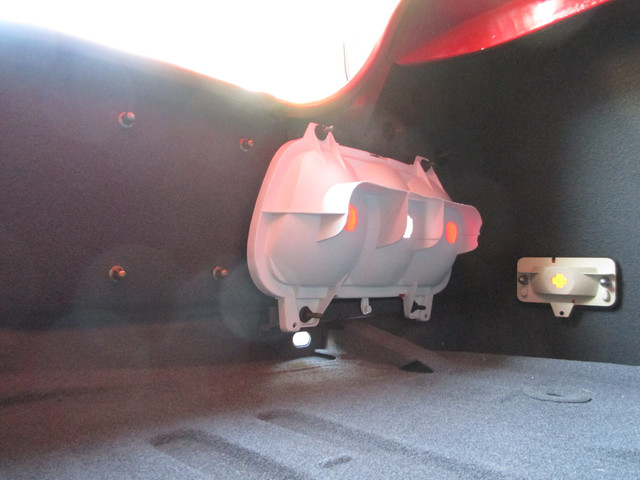
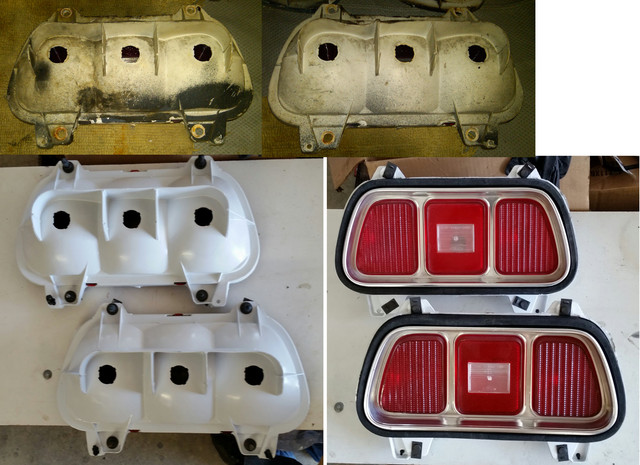
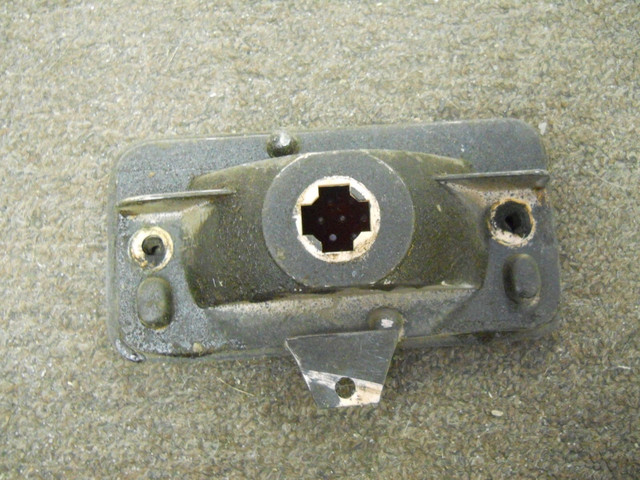
Getting off subject, but still important to trunk refinishing, make sure the drop off drain valves are open and clear. Replace if necessary!! Rear light sealing should also be done imo as this is where water gets in. It is not enough to rely on the foam seals. Mine are totally sealed around with black RTV as well as a thin bead of clear RTV around the lens and the aluminum interface. I have zero water getting in the trunk now. Red arrow = black RTV, yellow = clear RTV, very carefully applied! Better yet and what I would do next time, is to strip the assembly , refinish and seal as it's being put back together. 2nd pic is a stripped assembly.

Geoff.


I used Duplicolor black and gray spatter paint TSP101. The black and gray spatter chips are a little small compared to factory. It took 6 cans to get good coverage with out streaks. I got the paint from O'reilly auto parts.
wow your car is coming along  i cant wait for it to be finished and see it   if you do a good jobe i will let you do my car    lol


I used Duplicolor black and gray spatter paint TSP101. The black and gray spatter chips are a little small compared to factory. It took 6 cans to get good coverage with out streaks. I got the paint from O'reilly auto parts.
Thanks and by the way looks great.

How high did you spatter on the inside of your quarter panels? In the photo it does not look like it is all the way up. 

Rich
 Rich the spatter was done half ass. I don't think you would find 2 cars the same. I have seen where the spatter covered the side marker lights and some not. My markers were not. I chose to do my hole trunk including the tail panel. As stanglover said it defiantly looked like a after thought and the sloppier the better for concourse look.


I used Duplicolor black and gray spatter paint TSP101. The black and gray spatter chips are a little small compared to factory. It took 6 cans to get good coverage with out streaks. I got the paint from O'reilly auto parts.
wow your car is coming along  i cant wait for it to be finished and see it   if you do a good jobe i will let you do my car    lol
Thanks Norm, I'm trying. Sorry but think this will be the last one I do. I say that now. lol You need to stop by when your up this way.

 
If you are looking to duplicate a factory look, the spatter paint was applied while the side markers and tail lights were installed. The rubber plugs were covered with spatter and the fuel filler boot/seal has spatter paint over-spray on it. The tail lights were over-sprayed across the bottom edge with spatter and the side markers, wire and plugs were mostly covered with spatter and/or some sound deadener. Essentially all openings in the trunk area were plugged/closed before the sound deadener and spatter were applied. In the taillights, there was a wade of sealer stuck over the three slots where the white plastic back clips on to the lens.

Also as Geoff stated spatter paint is not waterproof and will soften if it gets wet. Using a mat clear coat will make it more water resistant.

I found separating the tail light lens from the metal frame is tough as the two parts are glued together with a very elastic like contact glue. Take your time separating them in small increments.


Last edited by a moderator:
Here are some pictures of my original 73 mach 1 one owner. As stated the spatter paint was applied after the car was completely assembled. There is over spray on wiring, lights, rubber plugs the drop down door on Mach 1 also. I have never found an exact formula for the paint. They use to sell at paint store but no luck finding it. The original was a water based paint. Probably to keep the over spray mist from getting on everything.

As you are aware one of the horrible design flaws is how the tail lights go in. There are flanges on the inside that hold the 4 studs that pull the white housing into place against the tail light panel. Those two flanges pretty much blocked any primer or paint from getting into the surface that the gasket sat on. Washing the car caused the rust to start and all cars have rust there. You should paint around the inside with a brush to insure you get it covered. That is of course after the rust if repaired or tail light panel replaced. BTW most tail light panels sold on ebay as original Ford are for 73 which is different from 71 & 72 some shape difference along the bottom due to bumper changes for 73. They will tell you it fits all but they do not.

Our cars got I think two coats of primer and I think it was three coats of color. Would have to check the Ford Facts book which copy of in found in the info posted here.

The spatter paint available has larger spatter and goes on much rougher that original.

David


rackerm, definitely agree with separating the lens and frame carefully.  Use a putty knife or similar and That glue is a bi**h to get off!  Just use Varsol or similar or even brake fluid might work. B/F will not affect the acrylic and great for removing old paint on the lenses. The one pictured was covered in gold overspray, now look at it!

Geoff.

EDIT:

When I say brake fluid, I don't mean the silicone type. You don't want that anywhere near surfaces you might paint. Use DOT 3.

 
Last edited by a moderator:

Latest posts

Back
Top