On buffing any parts. Never turn the part to where the edge of the part can be caught by the wheel. Hard to put into words. You can buff in the center of the part but the only way to do an edge is to go parallel to the edge. The cloth buffing wheel will grab the part and can bend it and can also hurt you.
If you have deep scratches you have to do just like with working your paint. Wet sand with finer and finer paper then got go buffer. You can work the dents also. I love to buff parts you see so much improvement so fast.
If you wear any gloves should only be tight fitting and not cloth gloves. Do not wear long sleeved shirt or loose clothing that wheel will wrap you up before you can blink and eye.
I do not have one but you can buy a rake wheel dresser that keeps your buffing wheel fluffed up on the outside. You can see this wheel is getting loaded up with aluminum. What I do is take a screw driver and run it back and forth on the wheel to fluff.
You can find the rake dresser where the paint buffing pads are sold.
Here is a like to a decent video on buffing trim. He does scare me with all the clothing and loose gloves. He also is not very good at keeping his compound clean puts it on the floor. https://youtu.be/mWy9awGv6so
Here is another video taking some dents out and working the surface back. Like any skill practice will make you better. https://youtu.be/wTxR8LB9iek
It looks like he has an old drafting table like I have to work on. I use it all the time because you can tip it and raise and lower it either stand or sit. Got mine at a Goodwill store for like $10.00 and it still have the drafting machine on it.
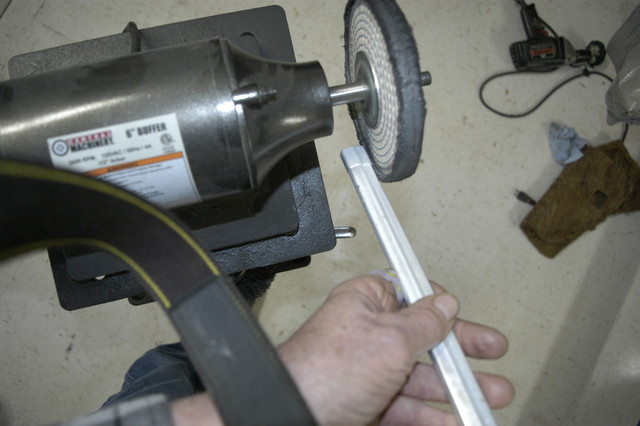
This picture shows how NOT to buff to an edge. If the wheel was turning it will grab the end of the part and bend it and probably toss it across the shop. The trim is aluminum window molding.
 Buff trim with the in this position on the wheel is pushing away from the edge so it will not grab the trim. Notice this wheel is sewn tight that is for heavy buffing. You can switch to a light sewn wheel for final polish. Always use a different wheel for each grad of compound you use. Write on the side of the wheel and keep them in plastic bags with the compound you use with it.
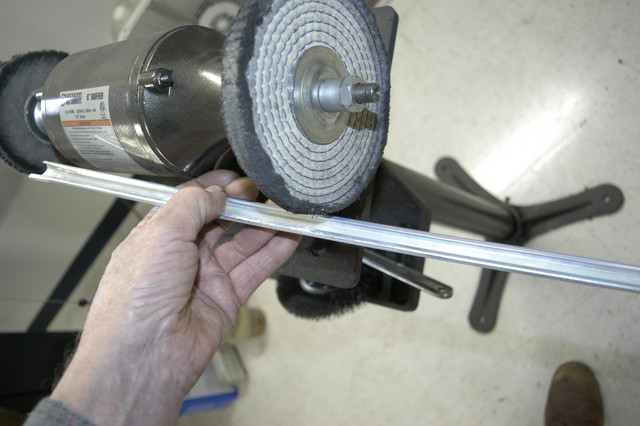
 This picture shows NOT to buff to an edge along the part either. The sharp edge will grab the wheel and bend the trim or toss it. Turn the part length wise to buff. You can after you get proficient buff the surface as long as the wheel going off the edge not on the edge.
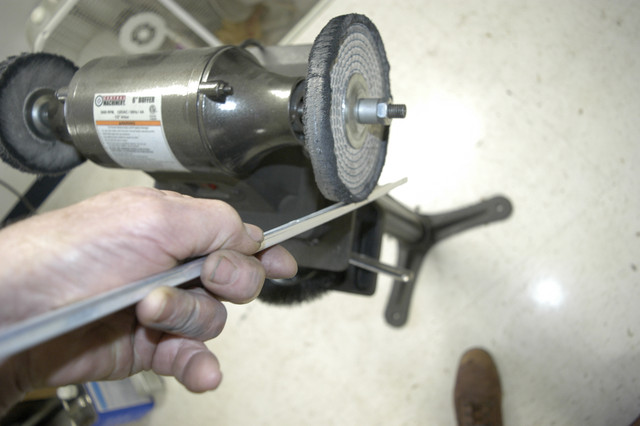
 This is the safest way to buff trim especially narrow trim. The trim will get hot so a bucket of water handy or you can switch out parts to allow them to cool.
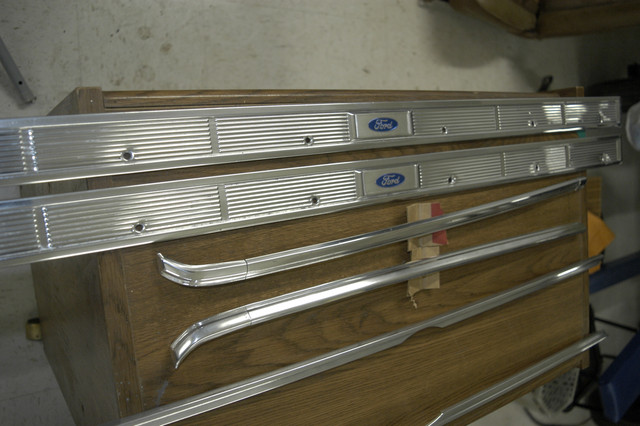
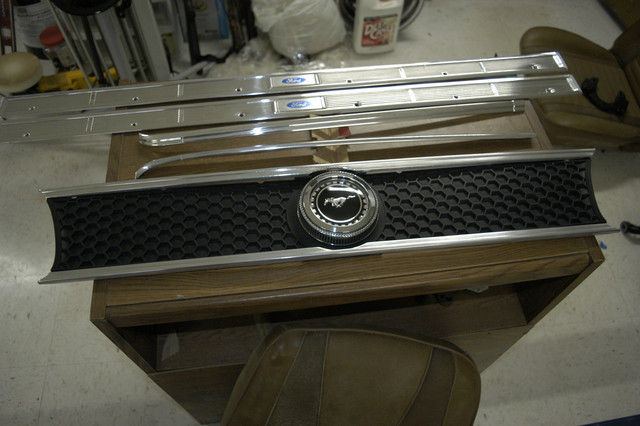
Some of the polished trim. Makes your car look fantastic, easy to do and not expensive. i got my buffer at Harbor Freight and have been using several years. I do the aluminum wheels with a hand drill with wheel buffing pads. I get my buffing wheels at HF also but order the polish compound.