71/72 Bumper on a 73. (How Im making it work)

7173Mustangs.com

Help Support 7173Mustangs.com:

This site may earn a commission from merchant affiliate links, including eBay, Amazon, and others.

JRANGER

Well-known member
Joined
Jun 4, 2018
Messages
143
Reaction score
2
Location
TENNESSEE
My Car
73 Hardtop 302/c4
65 Fastback
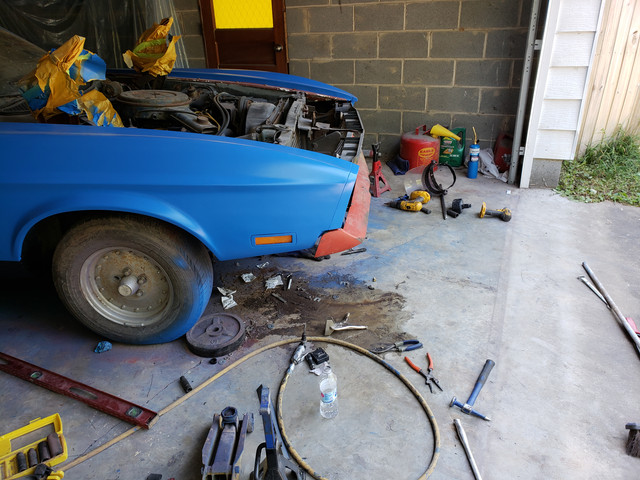
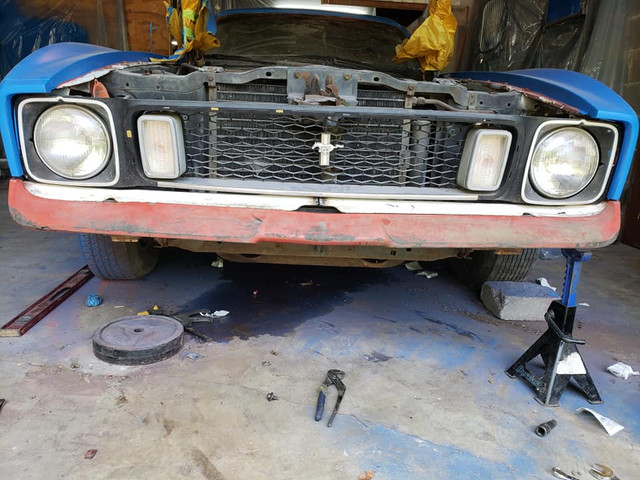
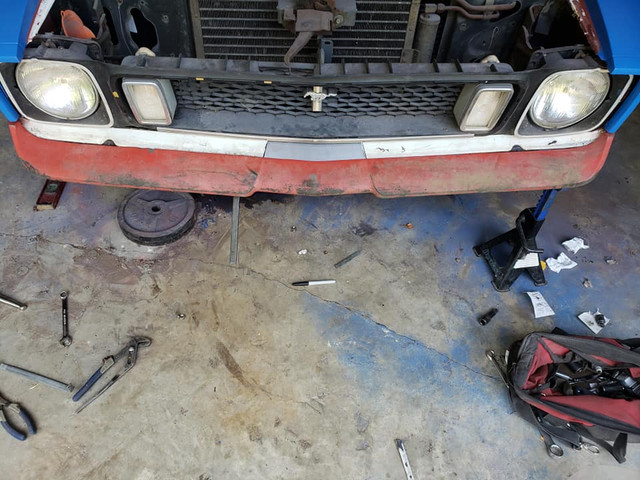
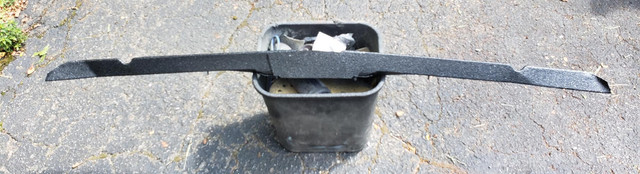
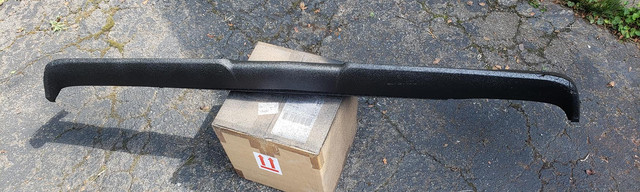
So i know people say it wont fit but i had one laying around and love the look of it. 

So its not finished but i figured i would share how things are going.

FIRST AND FOREMOST: If you are worried about the the 73's safety/crash rating this may not be for you. I am not an engineer and do not gurantee any structural integrity. However this should be better then a fiberglass bumper.

Needs: Angle Grinder with cut off wheels, Drill Press or Drill, stepper bit, Grade 8 bolts, washers, nuts,  grinding bit to widen bracket holes(maybe)

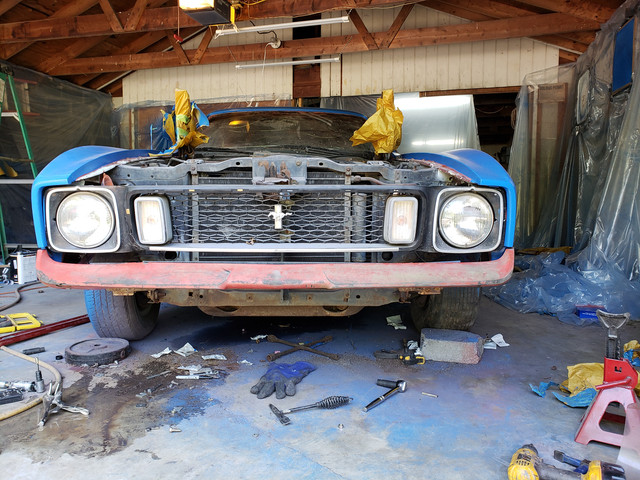
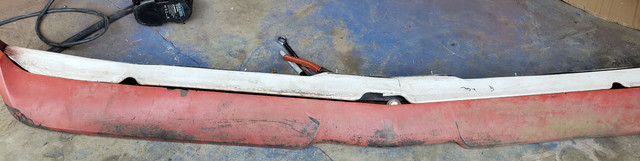
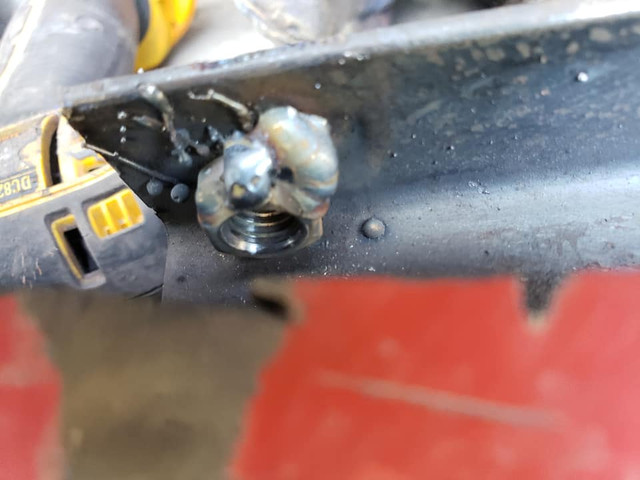
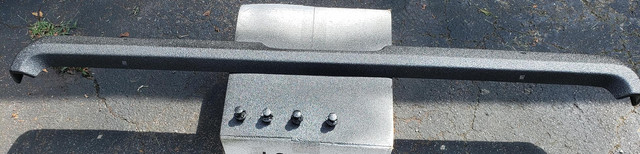
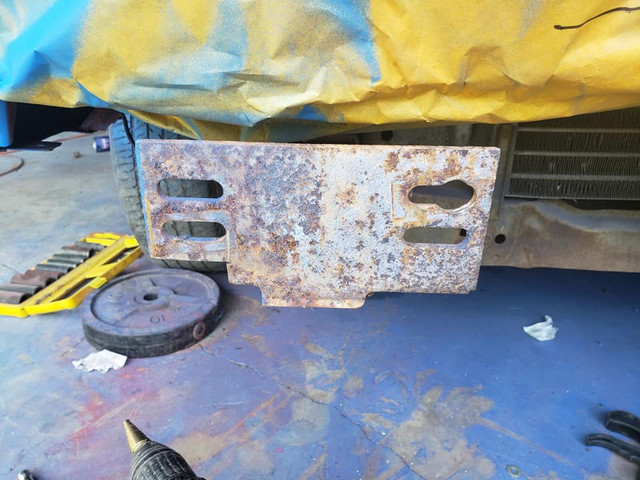
1)  I cut the bumper brackets off. You have to notch the structure from the edge  to about an inch away from the hole seen below: You need to cut along where the urethane meets the metal. Get as close as possible


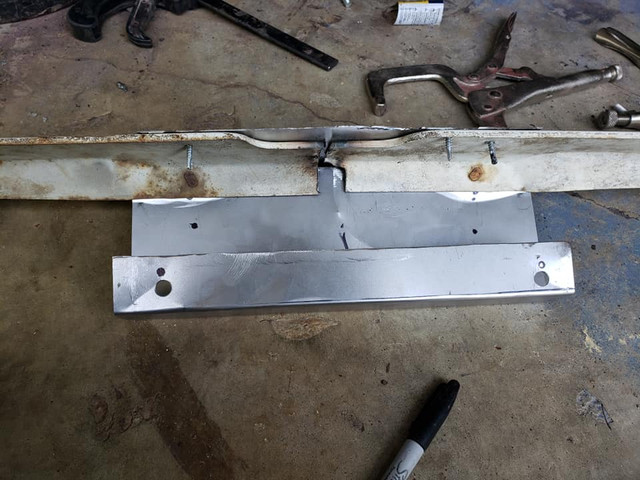
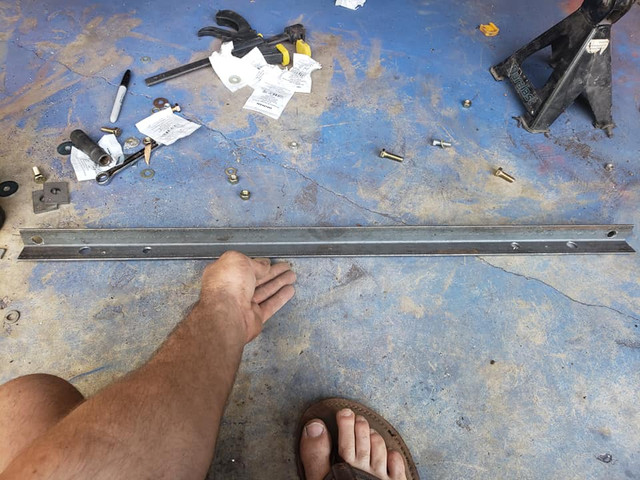
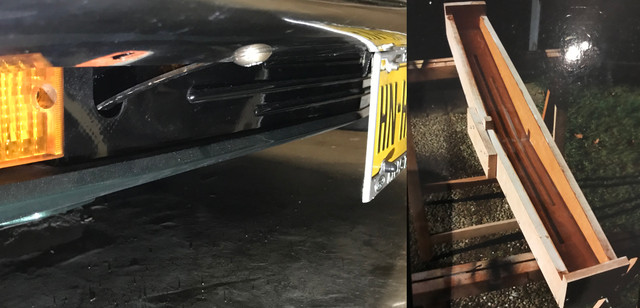
2) You will need a good piece of angle iron. About 36" long. It goes from the inner hole on each bracket. You will need to make at least 4 holes. 1 set for the frame brackets and one set for the bumper.  I made 6, as there are 4 holes on the bumper bracket as is. I made these holes oversized for as much adjustment as possible.  The angle iron will sit on top of the bumper bracket .

You also may considering drlling several small holes from one side to the other. The purpose of this would be once everything is fit properly you can use self tapping screws to keep the angle in the right place for welding in place without worrying about it shifting.


3) You have options here. I believe there is room to drill a new hole above the top slot but it will be tight. I didnt think about this and just started wallowing out the hole for adjustments. I am going to make a plate on the back of it when its all done and weld in place. As you see below i have started this process but the bumper currently sits a little too far to the drivers side and needs to come up about a 1/4" The angle iron should sit close to even with the top edge 

Also you will want to not atleast the bottom outside edge of each bracket otherwise the bottom of the urethane bumper will hit it


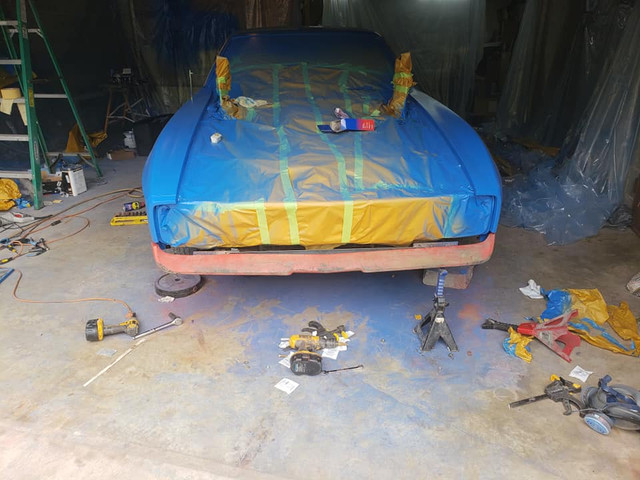
I hope to get as final fitment next weekend but i just wanted to share the results so far. 


aluminium oxide molar mass

 
Last edited by a moderator:
You could just use 71-2 bumper brackets.
That would require changing out the fenders and grille. The early bumpers sit a few iches higher. In retrospec i could of used then and cut a few inches out to lower it. Welded it back  together and reinforced it

 
@JRANGER

You should! I did this swap like few others.

The last in date who did this is @robsweden, he posted last week

https://www.7173mustangs.com/thread-white-lens-for-turnsignal

Aside personal choices to close or not the gap between lights on the valance (I did, Rob is about to),

For the sake of aesthetics, additionally you might want to make some plate to close the small gap between the grille and bumper.
that was the plan!!! What did you use for that piece?


To fill the space between lights, make a moulds and got myself a carbon fiber part out of it. Totally useless and polyester or an aluminum plate would do just fine. Its just I was having some laying around and no polyester :) To secure it, I have 2 bolts on each side, set on the light bracket.


This is the missing plate on 73 grilles that needs be done (if you want to)

 
Last edited by a moderator:
Ill have to look into that. I still have my 73 bumper so ill have to see if it has anything i can pull off of it ::) That or i can see if ABS will work. I will grab some carboard after i finish the bracket and start test fitting stuff


To fill the space between lights, make a moulds and got myself a carbon fiber part out of it. Totally useless and polyester or an aluminum plate would do just fine. Its just I was having some laying around and no polyester :) To secure it, I have 2 bolts on each side, set on the light bracket.


This is the missing plate on 73 grilles that needs be done (if you want to)
The more i think about this, the more it gives me an idea....I have the original 73, so i can just put masking tape all over it and do a few layers of fiberglass on top. This should give me a good "Template" to base the piece off of.

 
The more i think about this, the more it gives me an idea....I have the original 73, so i can just put masking tape all over it and do a few layers of fiberglass on top. This should give me a good "Template" to base the piece off of.
Assuming here that you want the shape to be as nice/smooth/straight as the bumper and not have to sand for ages because of the polyester thickness diffs.

That's what I call a "good bad" idea ! :)

The problem being that by doing what you describe you will end up with a negative shape and to do it nicely you would then need to do the same again reusing this shape to reproduce the original as a positive. You also need to add brackets and make it a wider to fit under the grille. Which is better done when you produce the mould for the positive shape.

That having said, as you have the luxury to have the bumper, if you go for polyester, you would be better off to either use the other side of the polyurethan if you can get it out, you would then have a near perfect positive using the inside of the skin giving you the positive shape that you need in one go without much efforts/sanding, the rough side of the polyester being on the right side.

Or if the polyurethane skin doesn't come off without a fight, you can just cut/lay some MDF or multiplex/wood and follow the guide (the bumper) to produce a negative mould giving you a positive free of sanding work in one go.

All together, for such a plate, that's much more work than recreate the shape with aluminum or flat sheets of plastics especially when you have the bumper as a guide/template. You have most measurements/angles work done for you.

 
Last edited by a moderator:
Make it out of a piece of mild steel with two bends and miter and weld the ends and center up
Yes, I forgot mention steel and would be just fine. As its very humide here (usually), I tend to think aluminum + thin layer of paint most of the time to have parts maintenance free for a long time. What ever the choice of the materials, I think its quicker and easier to make it from plates than using polyester.

I have a damaged 71 grille laying around with that extension shape on it, thought about using it and make a mould in polyester but its still more work

and would not look better.

 
So i have gotten increasingly frustrated. 2 full days and i finally got it decent. My brackets werent level, they also look like they are 2 of the same side because of the angle. Stupid weird but i made it work. Unfortunately its not as tight a fit as id hope but it will do. Also found the perfect filler panel.  The filler panel for the rear bumper is perfect and bends easily. Cut an angle to curve it up. Just going to have to figure out mounting


Man, you work at warp speed! At this pace, you done next week! :)

So you go for the 71/72 look on the back as well! You have located some 71-72 rubber extensions and bumper brackets?

As a side anecdote, back in 1991, young and full energy, I drove 500 kms from Paris to Belgium to a junkyard near the border just to get that filler and few other parts for my 73 that I was missing :)
I have a 71 rear bumper with brackets attached. When you say rubber extension do you mean to rubber pads for the brackets?

 
I have a 71 rear bumper with brackets attached. When you say rubber extension do you mean to rubber pads for the brackets?
I recall the quarters extensions have a rubber fillers underneath them specific to 73. On one side screwed on the quarters and the other going into bumper. This extrusions have the distance bumper to body specific to 73 into them. So going for 71-72, you will need whatever is being used for that year and/or fill the holes on the quarters. 

Mmm thinking of it, may be there is nothing required for these years as the quarters are having the same shape for all 3 years unlike the front fenders.
Yeah, those were put in place only for the 73. Because when they pushed the bumper back an inch or so It left the indention of the bumper in the panel visible. So a 71/72 bumper should sit in that bit of indention so the rubber isnt needed. Which is awesome because mine came off the bolts and they are like $100+ for a new rubber/urethane pads

 
Ok i got all my reinforcement plates welded in and the nuts welded to the angle iron so i dont have to guess as much. It has a slight amount of wiggle to it for adjustment.

I fabbed up a bracket that attached to what im guessing is the front license plate mount on the bumper bracket. Its just a C at the bottom the goes up and attached to the 2 screws that use to go into the trunk area on the rear filler. It has a couple bends to get the angle i wanted it at. I then made a top plate that goes with the aggressive center lines and gets rid of the big hole. This also works to reinforce the filler. I have it all bonding together now. May need to make some outside mounts but its sits pretty good. May also need to put some rubber on the stock mounts because it sits close to them and may cause some noise


Last edited by a moderator:
Back
Top