


downwardspiral
Well-known member
- Joined
- Jul 29, 2010
- Messages
- 307
- Reaction score
- 4
- Location
- LI, NY
- My Car
- 1973 Mach 1
2011 Mustang GT- Vortech v3 kit, custom tune and intake. MT ET Street slicks. Goes good
04 Mountaineer - daily
I got my car about 7 years ago, and ever since I had a problem with water leaking through the dash on the passenger side. It turned out my upper cowl panel was rotted out around the heater box inlet. This is apparently a very common problem on the older mustangs, so check yours out. I bought a welder a few weeks before starting this project, and never welded in my life prior to this. If you take your time and care enough to do a good job, this project honestly isn't too bad; even with no experience. Don't be afraid to do this! I am a 23 year old college student with no experience with body work/ welding and pulled it off!
edited to restore/add more pictures. I'll be 27 in May now :/ lol.
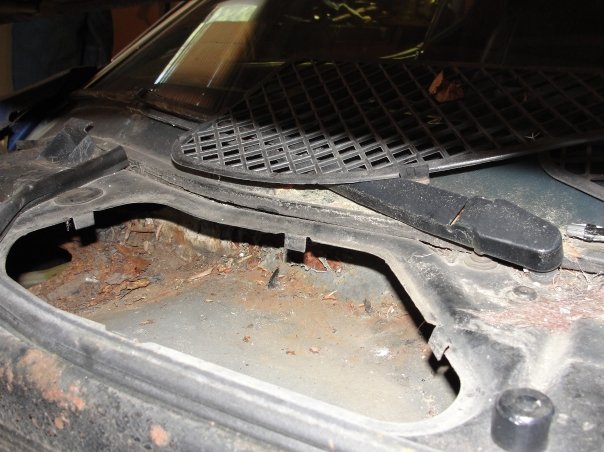
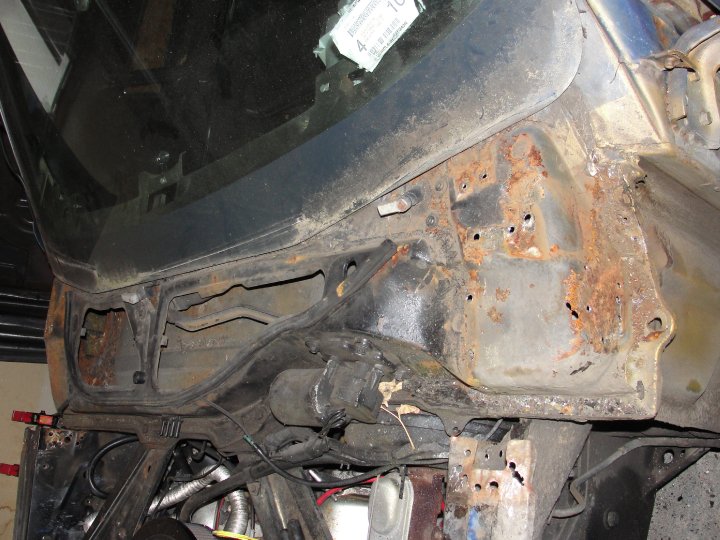
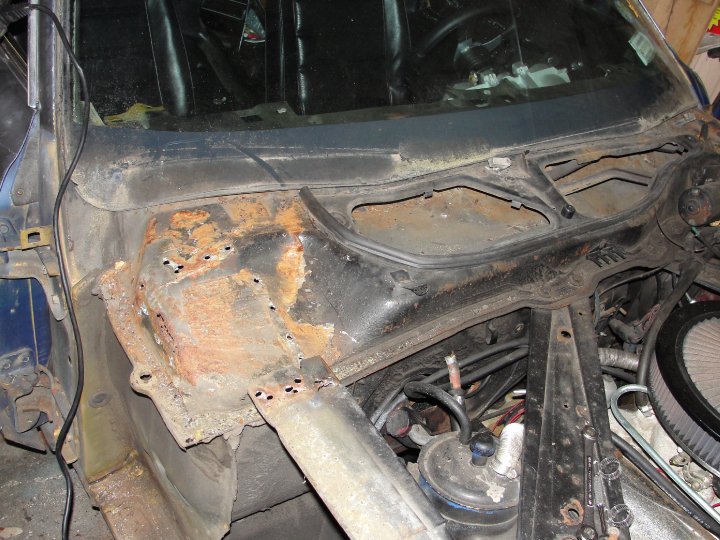
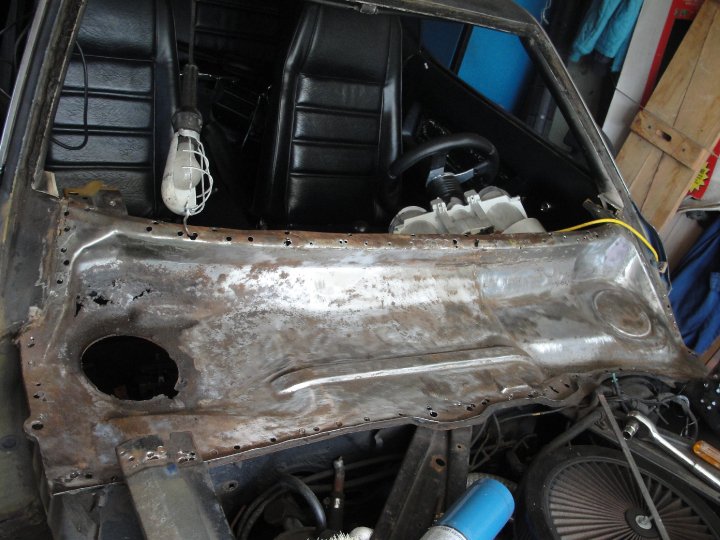
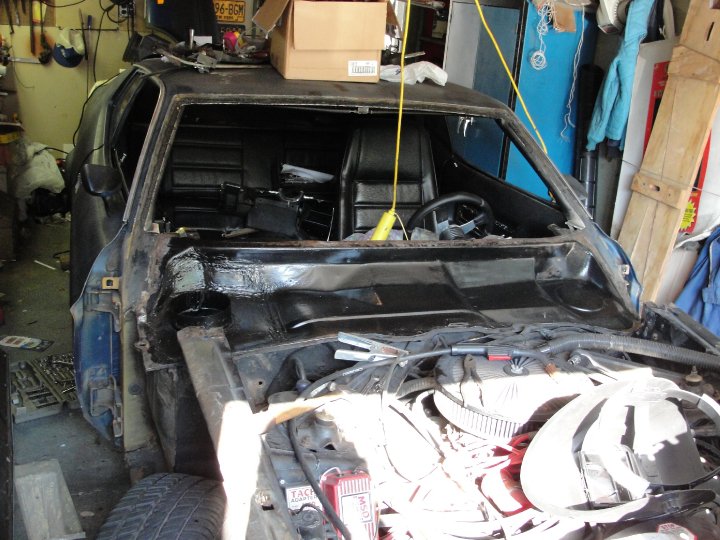
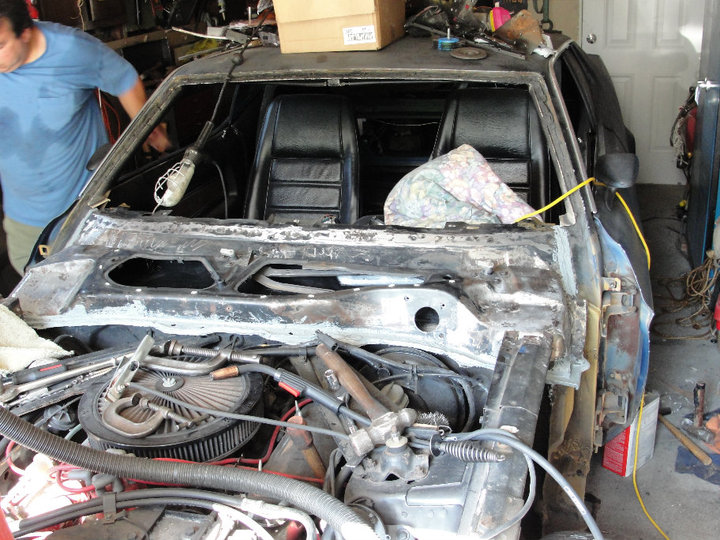
How to identify a rotted lower cowl:
In order to access the lower panel you have 2 major options: either remove the entire upper panel or cut a small piece of the upper panel to access your rusty area. I chose to remove the whole upper panel to make sure there was no other rust spots and to re-finish the entire lower panel with POR 15 to prevent future corrosion.
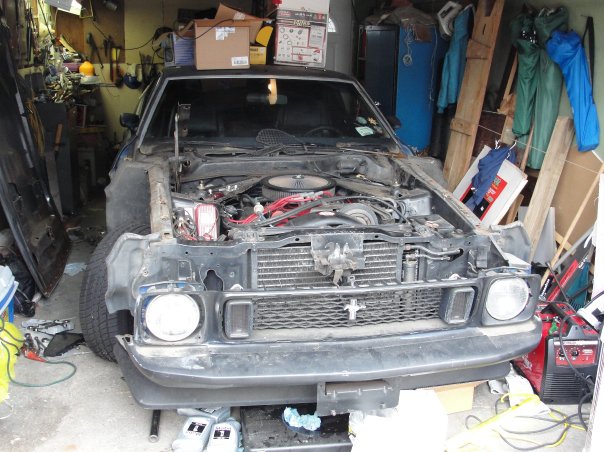
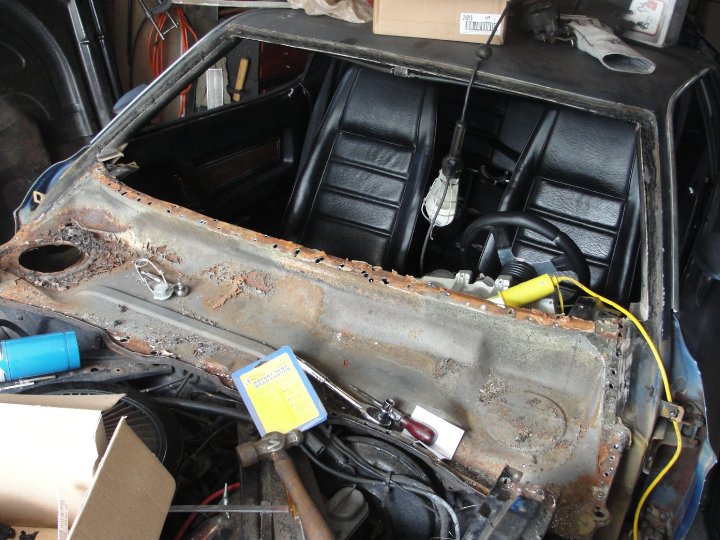
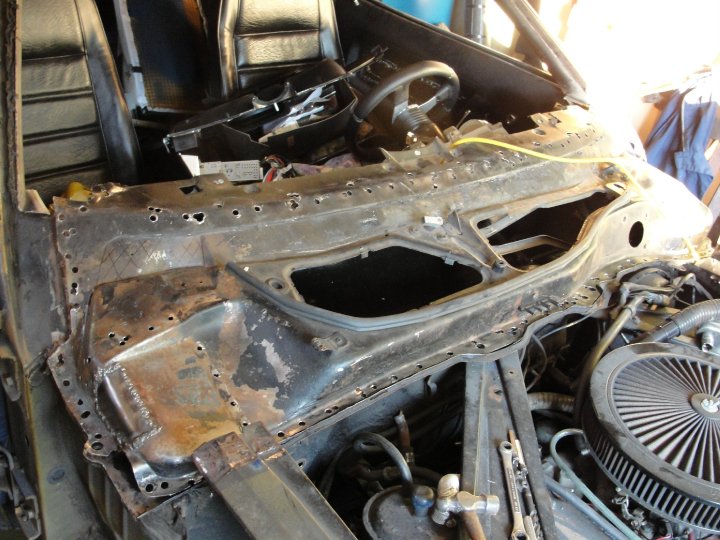
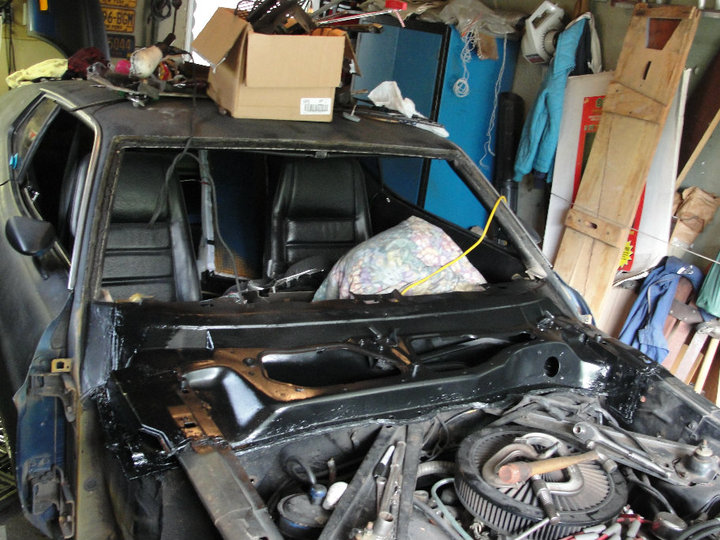
To remove the upper panel, the fenders, support brackets, wiper motor, arms and windshield will need to be removed.
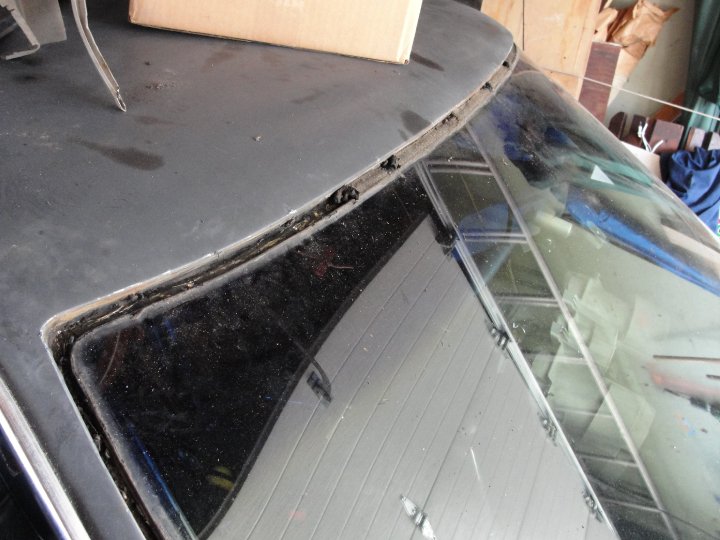
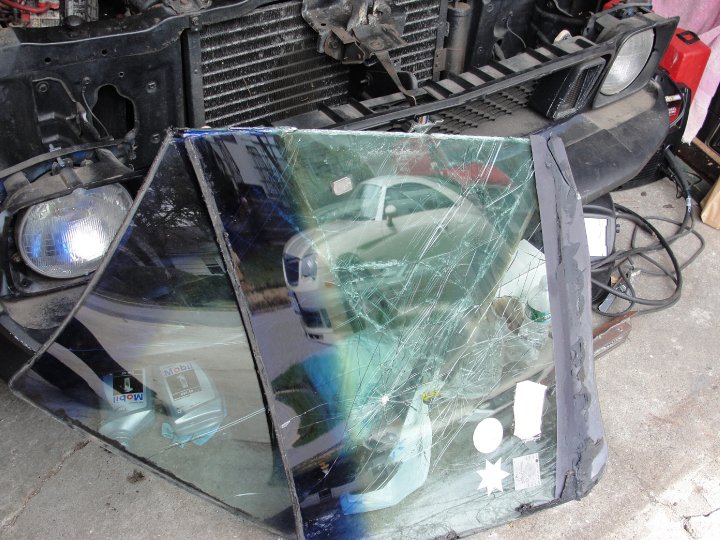
My windshield was sand-blasted after 30 or so years of driving, so I didn't try too hard to get it out in 1 piece. This black snot is what holds the windshield in. A heat gun will loosen it up.
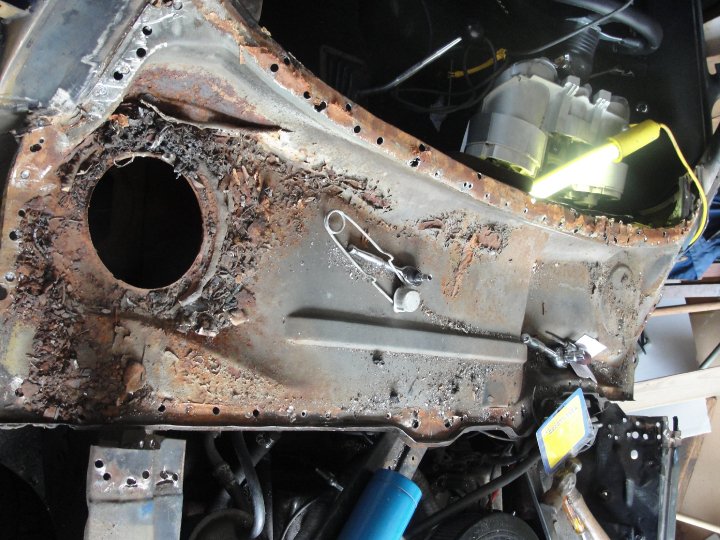
In order to remove the panels which have been welded together, all of the spot welds must be drilled out. There are tools specifically for this called a spot weld drill (go figure), but be sure to buy a good one. I bought some cheapo ones from harbor freight which were useless to me, and ended up using a chisel drill bit anyway.
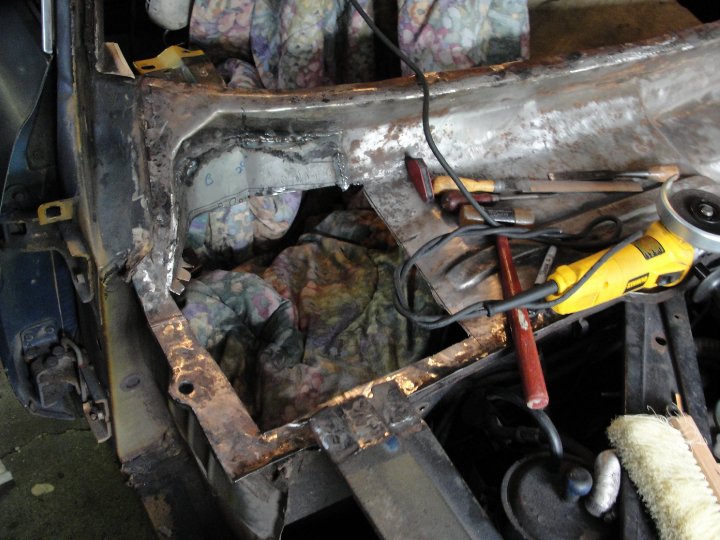
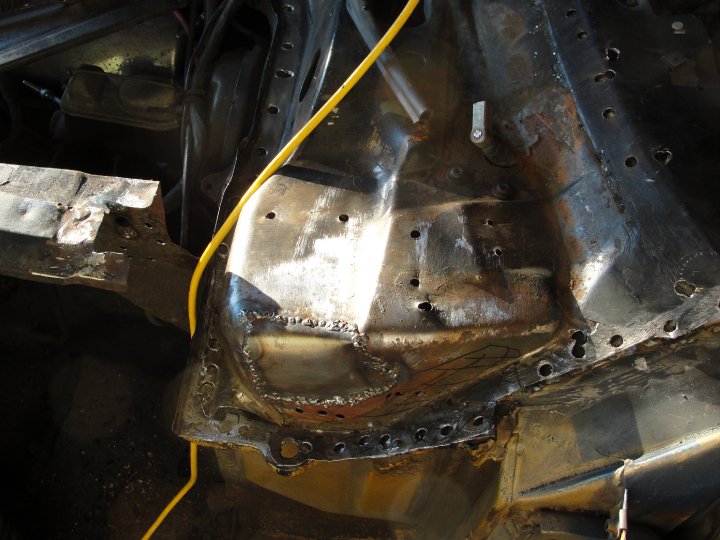
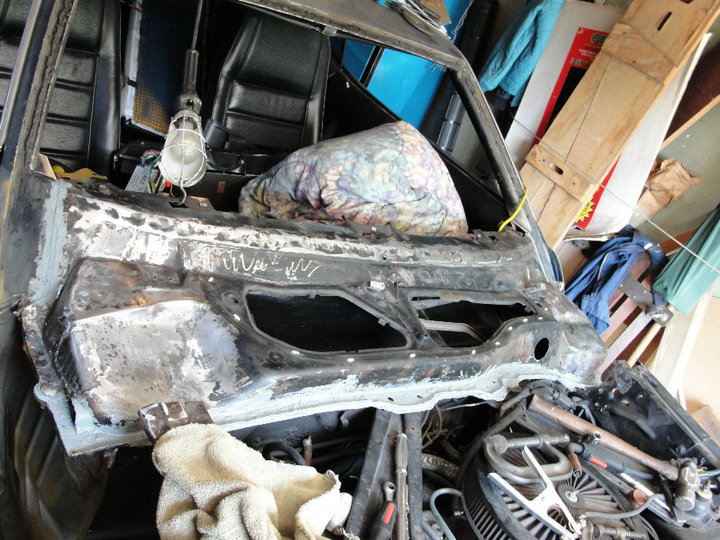
Support brackets removed, here's another reason to remove the whole panel:
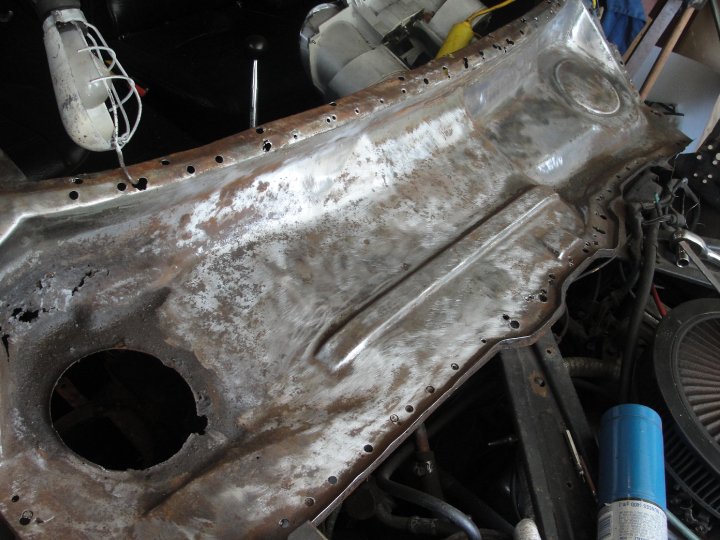
The hardest part of this step might be finding all of the 100+ spot welds. I used a wire brush on a drill to remove the seam sealer and rust that was hiding the spot welds.
Panel removed:
Wire brushing rust off (Respirator and mask is a must!):
I then used little squares I cut from sheet metal to fill the holes from drilling. All I did was put a square behind the hole, then welded the hole shut. I grinded the welds flush and straightened out the panel.
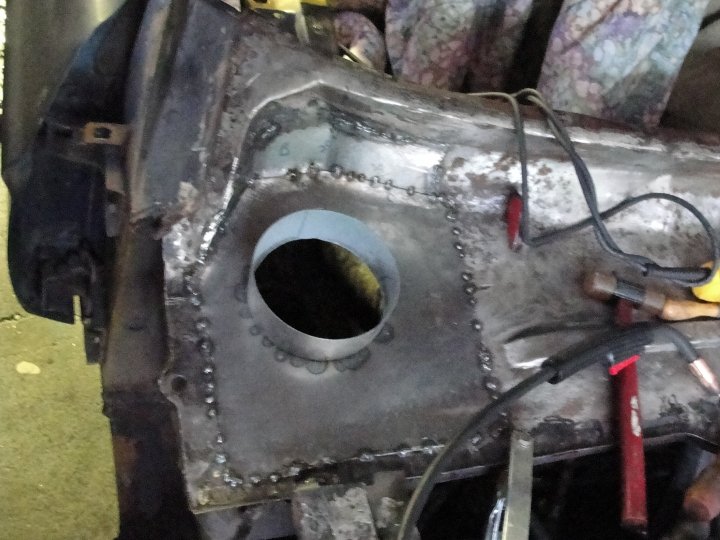
Next, I cut the rotted section out and brought it to my local sheet metal guy. He made me a beautiful 3 piece assembly (nh) that made my life much easier.
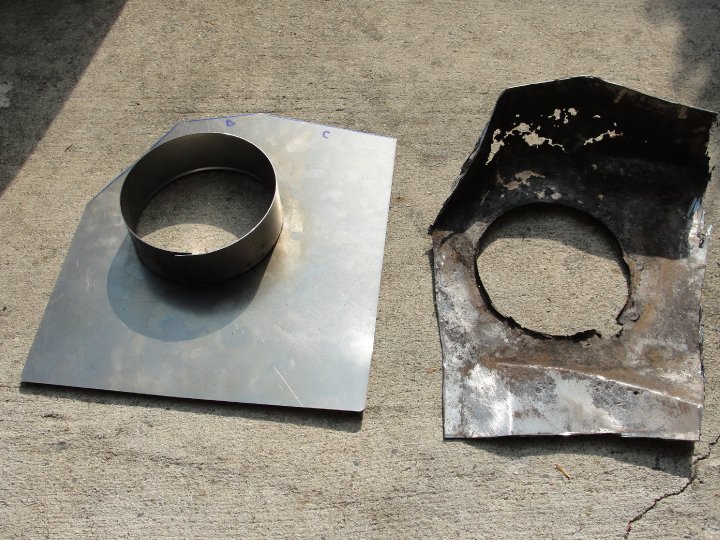
I shaped the panels with a ball-peen hammer. At this step, it is important to make sure the heater box lines up with the hole before the panel is welded in place. The undersides of the panels can be coated with weld-through primer for protection.
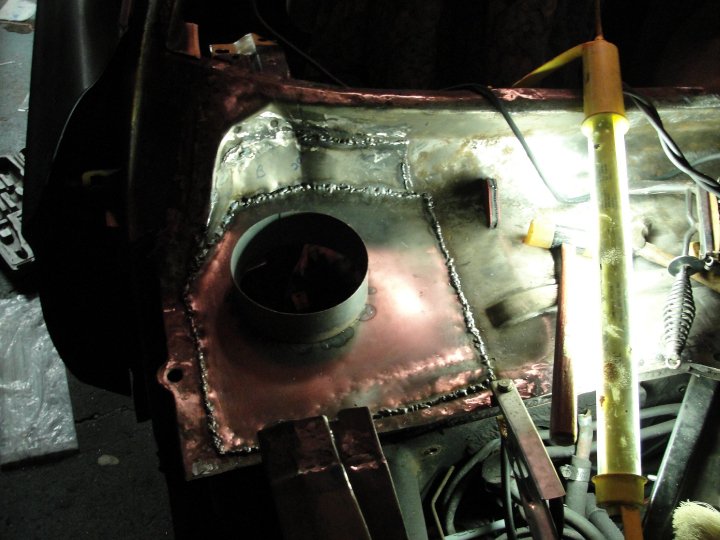
I cut around the panel so there isn't too much of a seam between the two panels where humidity can accumulate again.
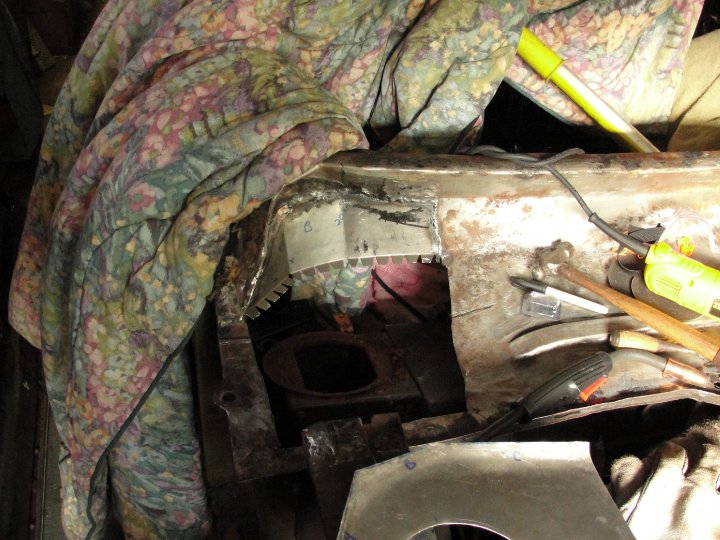
Tacked the panel in place. I started at the corners, going across the panel as far as possible between each weld. kind of like how you torque lug nuts in the star pattern.
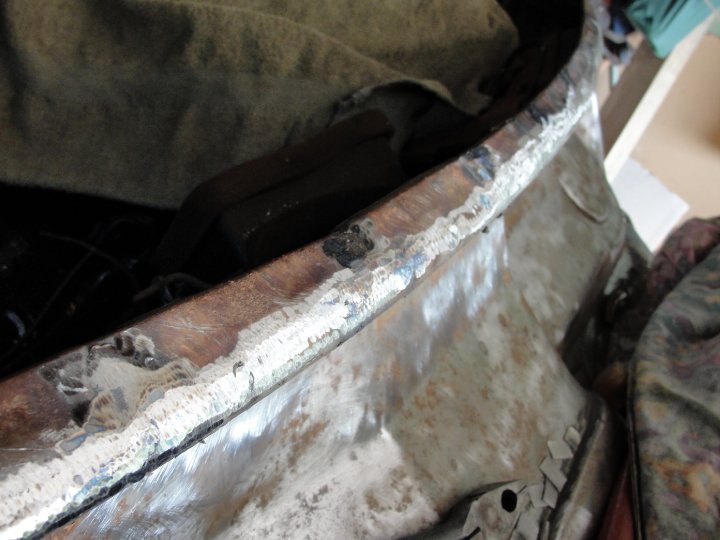
This was my first time welding sheet metal, so here are some vintage booger welds:
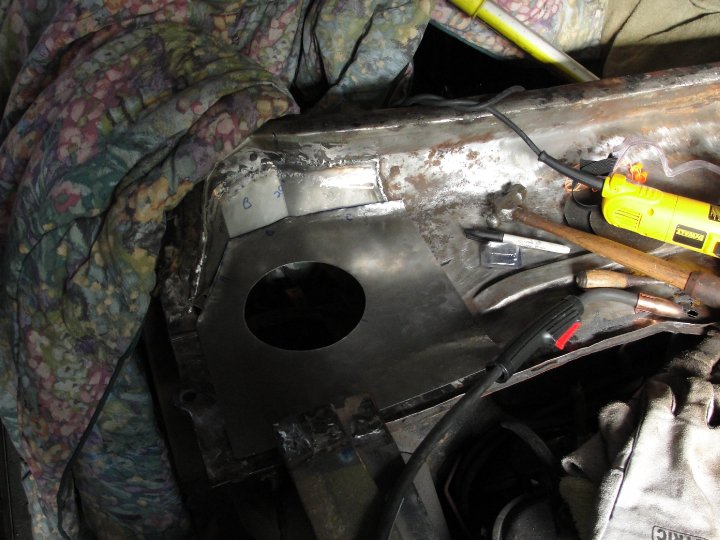
Then, I went batshit crazy with seam sealer and POR 15 to protect the panel from future rust. I didn't go crazy cleaning it up because it'll never be seen and I figured it would be better if I didn't remove any seam sealer.
Next step was to line up the cowl panel, straighten it out, patch up some rust spots and paint it.
To patch the rust spots, I tack welded one side of the patch panel to the upper panel and used a hammer to shape it.
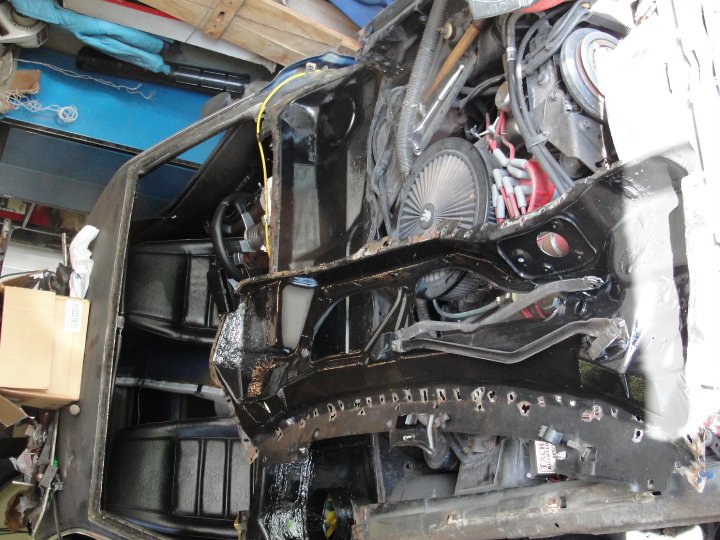
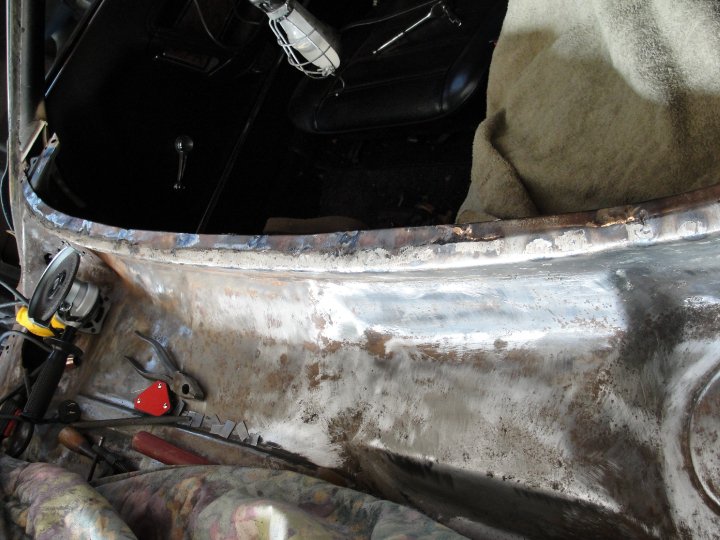
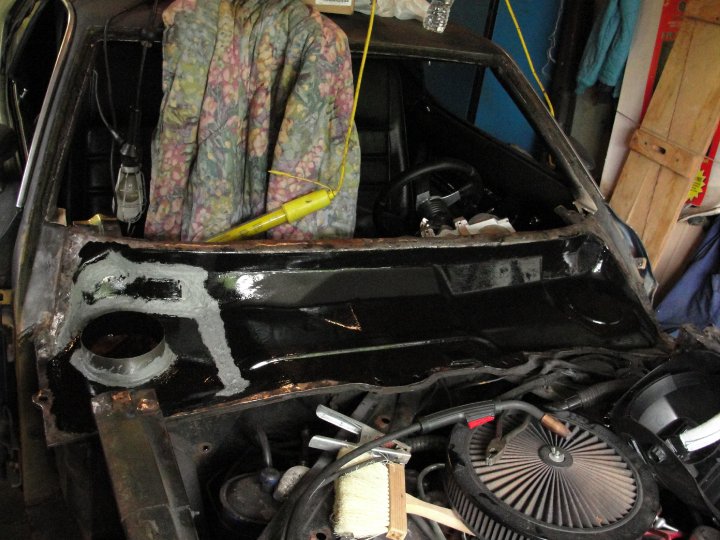
Next step was to weld the upper panel back on (*make sure the arms for the wipers are in the right spot!*). I used about 5 clamps to keep the panels tight against each other. I also used 2 big bolts in the holes towards the outside of the panel. I tried to have 2 clamps close to the area I was welding the get it as solid as possible. Once it was welded on, It got more wire brushing, seam sealer and I hit the part where the windshield mounts against with a belt sander.
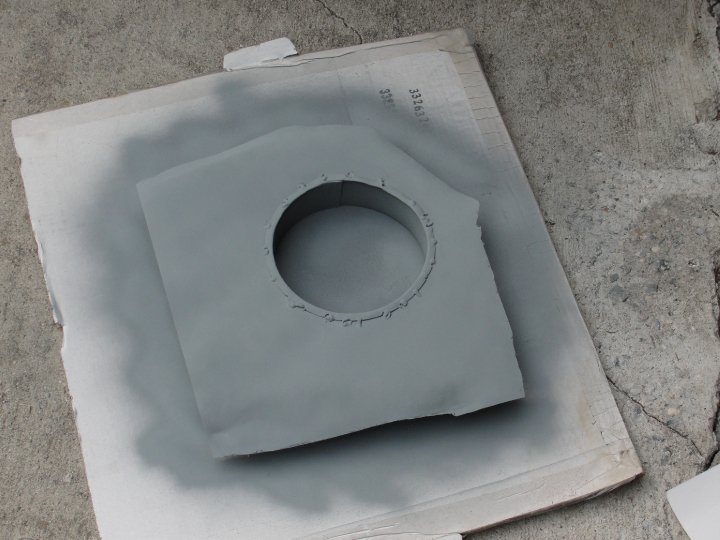
Then, the support brackets must be welded back on and the panel can be painted. I used more POR-15 and top coated it with semi-gloss spraypaint. Then all its needs is the windshield, wiper apparatus and fenders and your passenger has dry feet!

edited to restore/add more pictures. I'll be 27 in May now :/ lol.
How to identify a rotted lower cowl:
In order to access the lower panel you have 2 major options: either remove the entire upper panel or cut a small piece of the upper panel to access your rusty area. I chose to remove the whole upper panel to make sure there was no other rust spots and to re-finish the entire lower panel with POR 15 to prevent future corrosion.
To remove the upper panel, the fenders, support brackets, wiper motor, arms and windshield will need to be removed.
My windshield was sand-blasted after 30 or so years of driving, so I didn't try too hard to get it out in 1 piece. This black snot is what holds the windshield in. A heat gun will loosen it up.
In order to remove the panels which have been welded together, all of the spot welds must be drilled out. There are tools specifically for this called a spot weld drill (go figure), but be sure to buy a good one. I bought some cheapo ones from harbor freight which were useless to me, and ended up using a chisel drill bit anyway.
Support brackets removed, here's another reason to remove the whole panel:
The hardest part of this step might be finding all of the 100+ spot welds. I used a wire brush on a drill to remove the seam sealer and rust that was hiding the spot welds.
Panel removed:
Wire brushing rust off (Respirator and mask is a must!):
I then used little squares I cut from sheet metal to fill the holes from drilling. All I did was put a square behind the hole, then welded the hole shut. I grinded the welds flush and straightened out the panel.
Next, I cut the rotted section out and brought it to my local sheet metal guy. He made me a beautiful 3 piece assembly (nh) that made my life much easier.
I shaped the panels with a ball-peen hammer. At this step, it is important to make sure the heater box lines up with the hole before the panel is welded in place. The undersides of the panels can be coated with weld-through primer for protection.
I cut around the panel so there isn't too much of a seam between the two panels where humidity can accumulate again.
Tacked the panel in place. I started at the corners, going across the panel as far as possible between each weld. kind of like how you torque lug nuts in the star pattern.
This was my first time welding sheet metal, so here are some vintage booger welds:
Then, I went batshit crazy with seam sealer and POR 15 to protect the panel from future rust. I didn't go crazy cleaning it up because it'll never be seen and I figured it would be better if I didn't remove any seam sealer.
Next step was to line up the cowl panel, straighten it out, patch up some rust spots and paint it.
To patch the rust spots, I tack welded one side of the patch panel to the upper panel and used a hammer to shape it.
Next step was to weld the upper panel back on (*make sure the arms for the wipers are in the right spot!*). I used about 5 clamps to keep the panels tight against each other. I also used 2 big bolts in the holes towards the outside of the panel. I tried to have 2 clamps close to the area I was welding the get it as solid as possible. Once it was welded on, It got more wire brushing, seam sealer and I hit the part where the windshield mounts against with a belt sander.
Then, the support brackets must be welded back on and the panel can be painted. I used more POR-15 and top coated it with semi-gloss spraypaint. Then all its needs is the windshield, wiper apparatus and fenders and your passenger has dry feet!
Last edited by a moderator: