- Joined
- Aug 30, 2014
- Messages
- 1,586
- Reaction score
- 408
- Location
- Delaware
- My Car
- Stock 1973 Mustang Convertible with a 351C 2v and C6
Modified 1970 Mach 1 M-Code with a 351C 4v Manual
To anyone who has replaced their Fastback quarter panels. I value this group's expertise and opinion here. Although I am doing this on my 70 fastback, I am thinking the thought process here applies regardless of the model year.
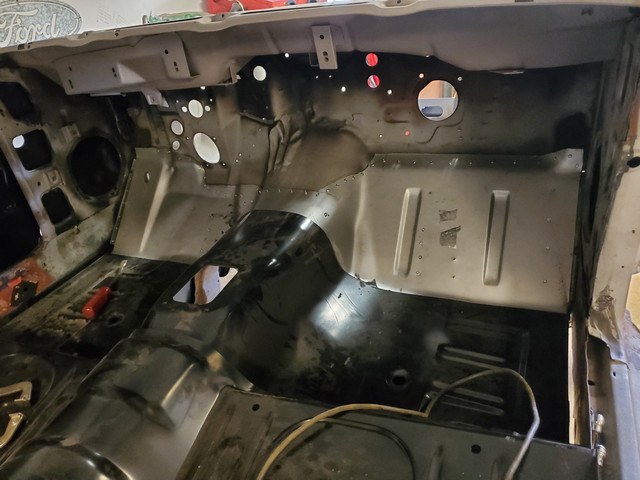
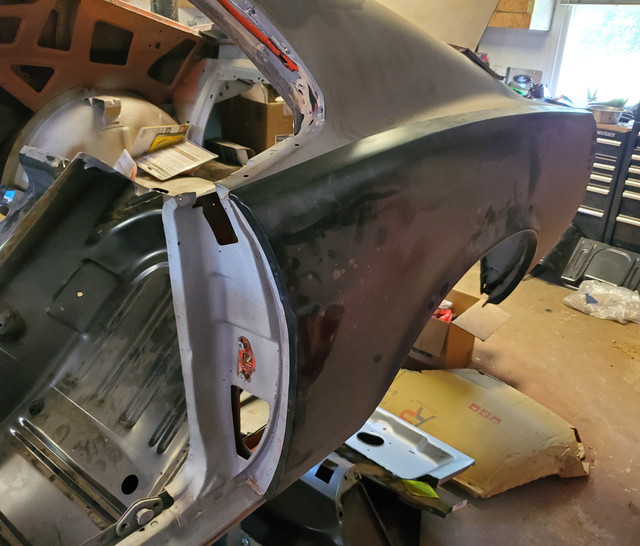
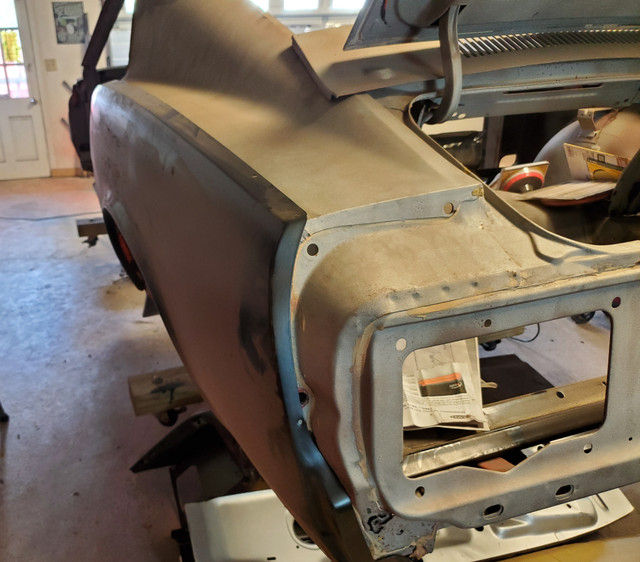
With that said, I am getting ready to replace my 70 fastback original quarters with Dynacorn Skins. The skins replace the old panel from the front door jamb lip to the rear quarter extension lip, and from the rocker, wheel well lip, and drop down on the bottom of the quarter to about two inches over the top of the quarter shoulder. See the pictures below where I have just laid the panel over the old panel.
My quarters are mostly good and only need to be replaced from about halfway down the quarter, this would include the section at the door jamb/rocker in front of the wheel well, the wheel well lip and the lower quarter behind the wheel well where it meets the dropdown and the tail panel and valence.
So my question, is it best to use the entire replacement skin, which means cutting the old quarter panel over the shoulder (just below the quarter window and thru the top of the trunk deck area), or is it better to cut the old panel a few inches down the side of the panel below the top of the quarter, and trim the new skin down to meet it? Seems to me, that it would be easier to patch them together on the side of the panel where you have a more "wide-open" surface area to work it, than over the top of the shoulder where the panel curves are close to the quarter window and C-Pillar.
I would appreciate feedback, from anyone who has done this before.
Thanks
Last edited by a moderator: