Can you get a template from someone living nearby? Would be easier to cut out and replace with new metal
You are using an out of date browser. It may not display this or other websites correctly.
You should upgrade or use an alternative browser.
You should upgrade or use an alternative browser.
Slowest resto ever - Project AmsterFoose / Current subject: The roof
- Thread starter Vinnie
- Start date


Help Support 7173Mustangs.com:
This site may earn a commission from merchant affiliate
links, including eBay, Amazon, and others.
- Joined
- Nov 7, 2013
- Messages
- 1,594
- Reaction score
- 286
- Location
- Amsterdam, The Netherlands
- My Car
- 1973 Mustang Grande 351C 2V, built on the very last production day (July 6, 1973) for Grande's.
Can you get a template from someone living nearby? Would be easier to cut out and replace with new metal
cut out the edges?
Yes thats the way i would go if i were in your shoes. Cut out the bad and weld in some new edgesCan you get a template from someone living nearby? Would be easier to cut out and replace with new metal
cut out the edges?
- Joined
- Nov 7, 2013
- Messages
- 1,594
- Reaction score
- 286
- Location
- Amsterdam, The Netherlands
- My Car
- 1973 Mustang Grande 351C 2V, built on the very last production day (July 6, 1973) for Grande's.
Found Mustang time!
Used it to get rid of the bumper reinforcements or whatever they are called:
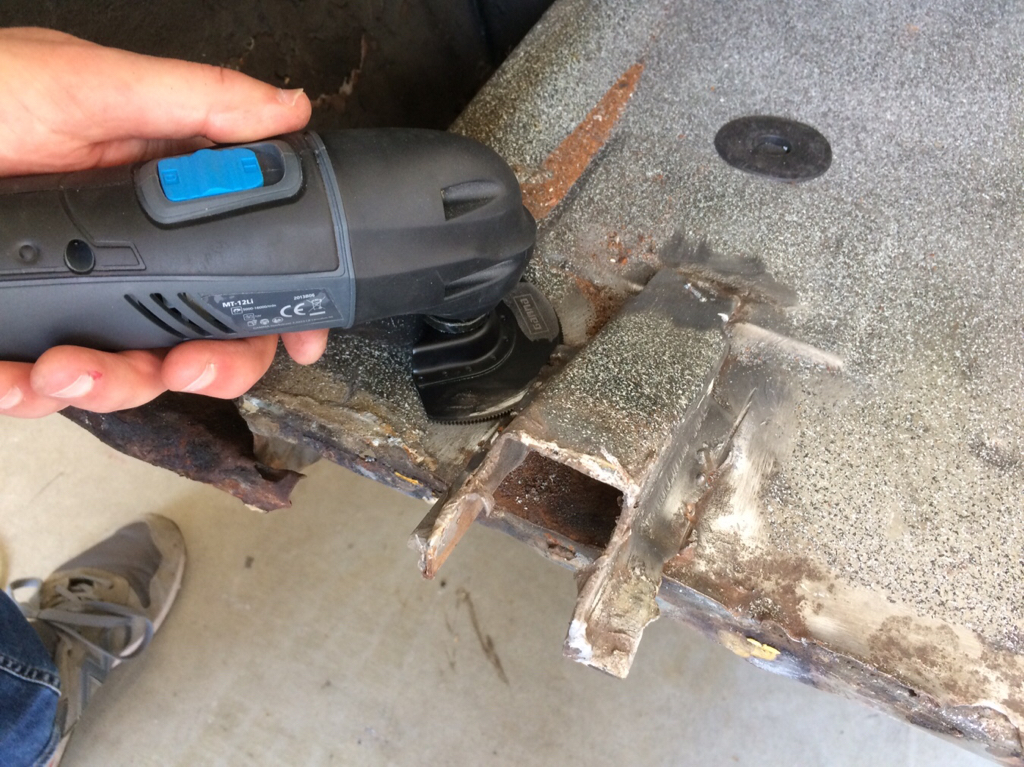
Instead of a grinder I used my multitool with a saw blade, worked like a charm! No sparks and no fire hazard")
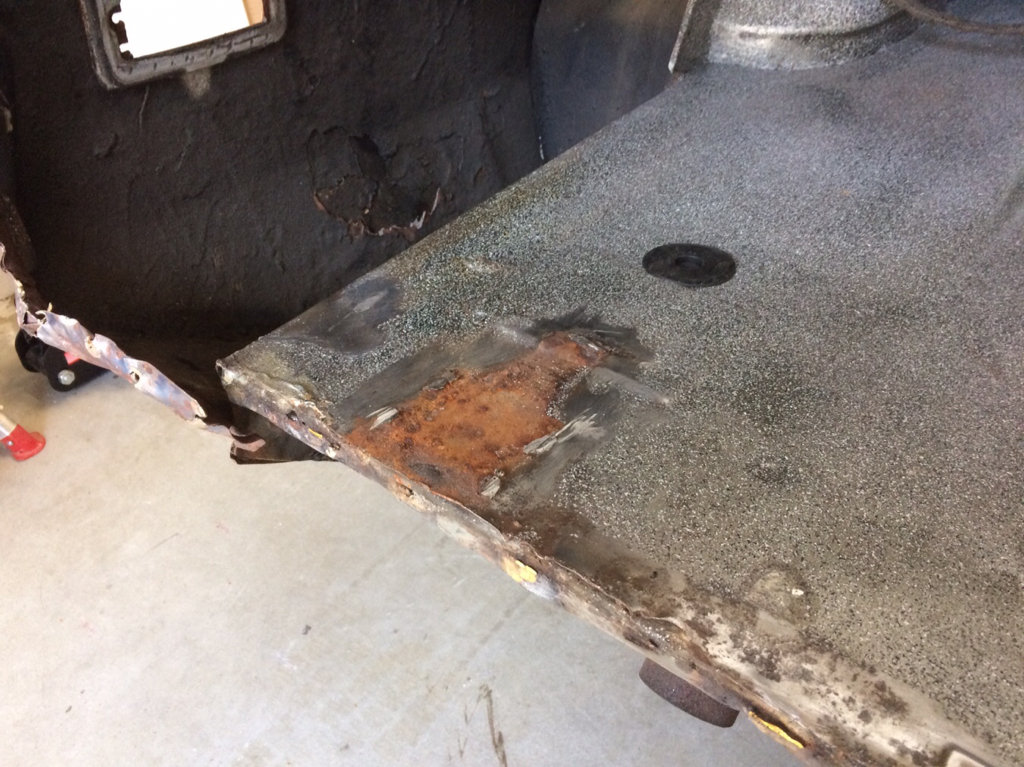
Decent amount of rust underneath, not sure if it needs to be cut out...
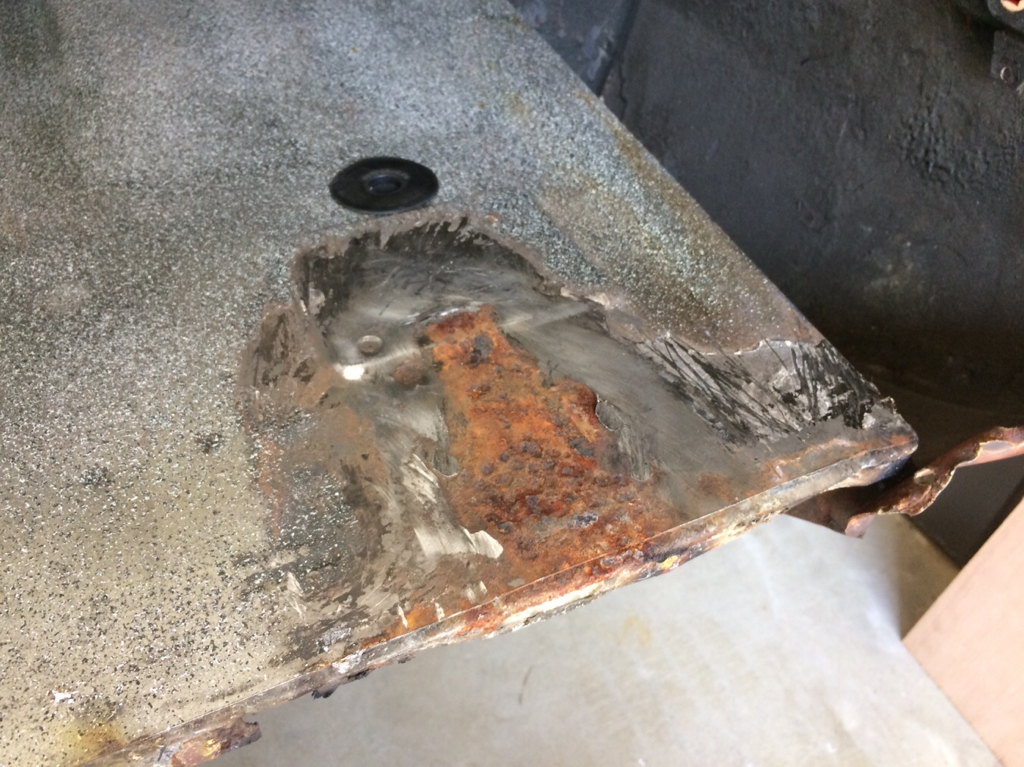
I also noticed a crack in the metal beam underneath:
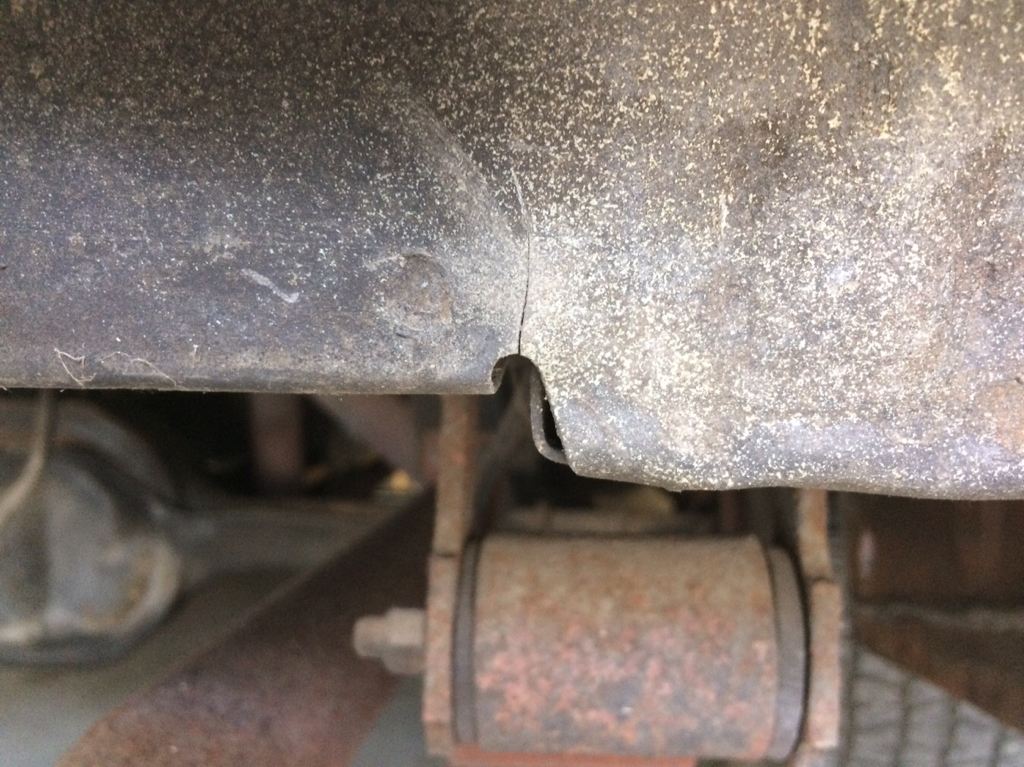
What should I do with that crack? There is one on the other side as well....
Used it to get rid of the bumper reinforcements or whatever they are called:
Instead of a grinder I used my multitool with a saw blade, worked like a charm! No sparks and no fire hazard
Decent amount of rust underneath, not sure if it needs to be cut out...
I also noticed a crack in the metal beam underneath:
What should I do with that crack? There is one on the other side as well....
- Joined
- Mar 30, 2017
- Messages
- 2,337
- Reaction score
- 817
- Location
- The Netherlands
- My Car
- 73 Grande 351C
71 Mach 1 429CJ
[What should I do with that crack]
If you like cracks, you should keep them, if you do not, weld a a few spots and you're done
The car prolly received a kiss in the past and the metal did not like the stretching. If you wire wheel the piece, you'll see if there is more and if you need to replace/fix something.
If you like cracks, you should keep them, if you do not, weld a a few spots and you're done
The car prolly received a kiss in the past and the metal did not like the stretching. If you wire wheel the piece, you'll see if there is more and if you need to replace/fix something.
- Joined
- Nov 7, 2013
- Messages
- 1,594
- Reaction score
- 286
- Location
- Amsterdam, The Netherlands
- My Car
- 1973 Mustang Grande 351C 2V, built on the very last production day (July 6, 1973) for Grande's.
Incredibly tiny update! ;-)
We (I, since the missus had surgery and can do f*ck all) are mainly busy redoing our garden. But tonight I did manage to visit my pony quickly and hammer on one of the trunk corners a bit. It was relatively easy to get it in a much more workable shape. Not finished but already usable
We (I, since the missus had surgery and can do f*ck all) are mainly busy redoing our garden. But tonight I did manage to visit my pony quickly and hammer on one of the trunk corners a bit. It was relatively easy to get it in a much more workable shape. Not finished but already usable
- Joined
- Mar 30, 2017
- Messages
- 2,337
- Reaction score
- 817
- Location
- The Netherlands
- My Car
- 73 Grande 351C
71 Mach 1 429CJ
oooh nice, a shrink hammer, me want!!
- Joined
- Jan 1, 2012
- Messages
- 8,357
- Reaction score
- 1,200
- Location
- Eugene, OR
- My Car
- 1971 Mustang Sportroof M code
That's the way to do it, most replair panels need some tweaking. I like your anvil, a chunk of railroad rail. I have two or three small pieces, too.
- Joined
- Nov 7, 2013
- Messages
- 1,594
- Reaction score
- 286
- Location
- Amsterdam, The Netherlands
- My Car
- 1973 Mustang Grande 351C 2V, built on the very last production day (July 6, 1973) for Grande's.
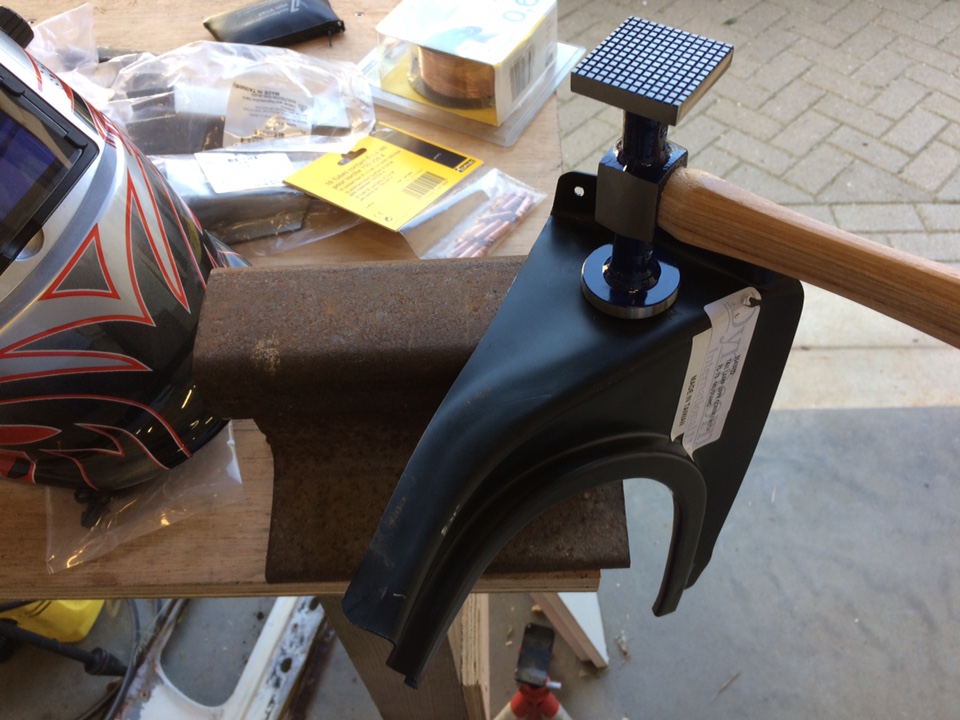
The best thing is that it used to be my dad’s. He got it from our old neighbour who worked at the Dutch railroad co. My dad is a retired carpenter and as a kid I always wondered what it was for. He recently let me have it after I told I needed to do body workThat's the way to do it, most replair panels need some tweaking. I like your anvil, a chunk of railroad rail. I have two or three small pieces, too.
- Joined
- Nov 7, 2013
- Messages
- 1,594
- Reaction score
- 286
- Location
- Amsterdam, The Netherlands
- My Car
- 1973 Mustang Grande 351C 2V, built on the very last production day (July 6, 1973) for Grande's.
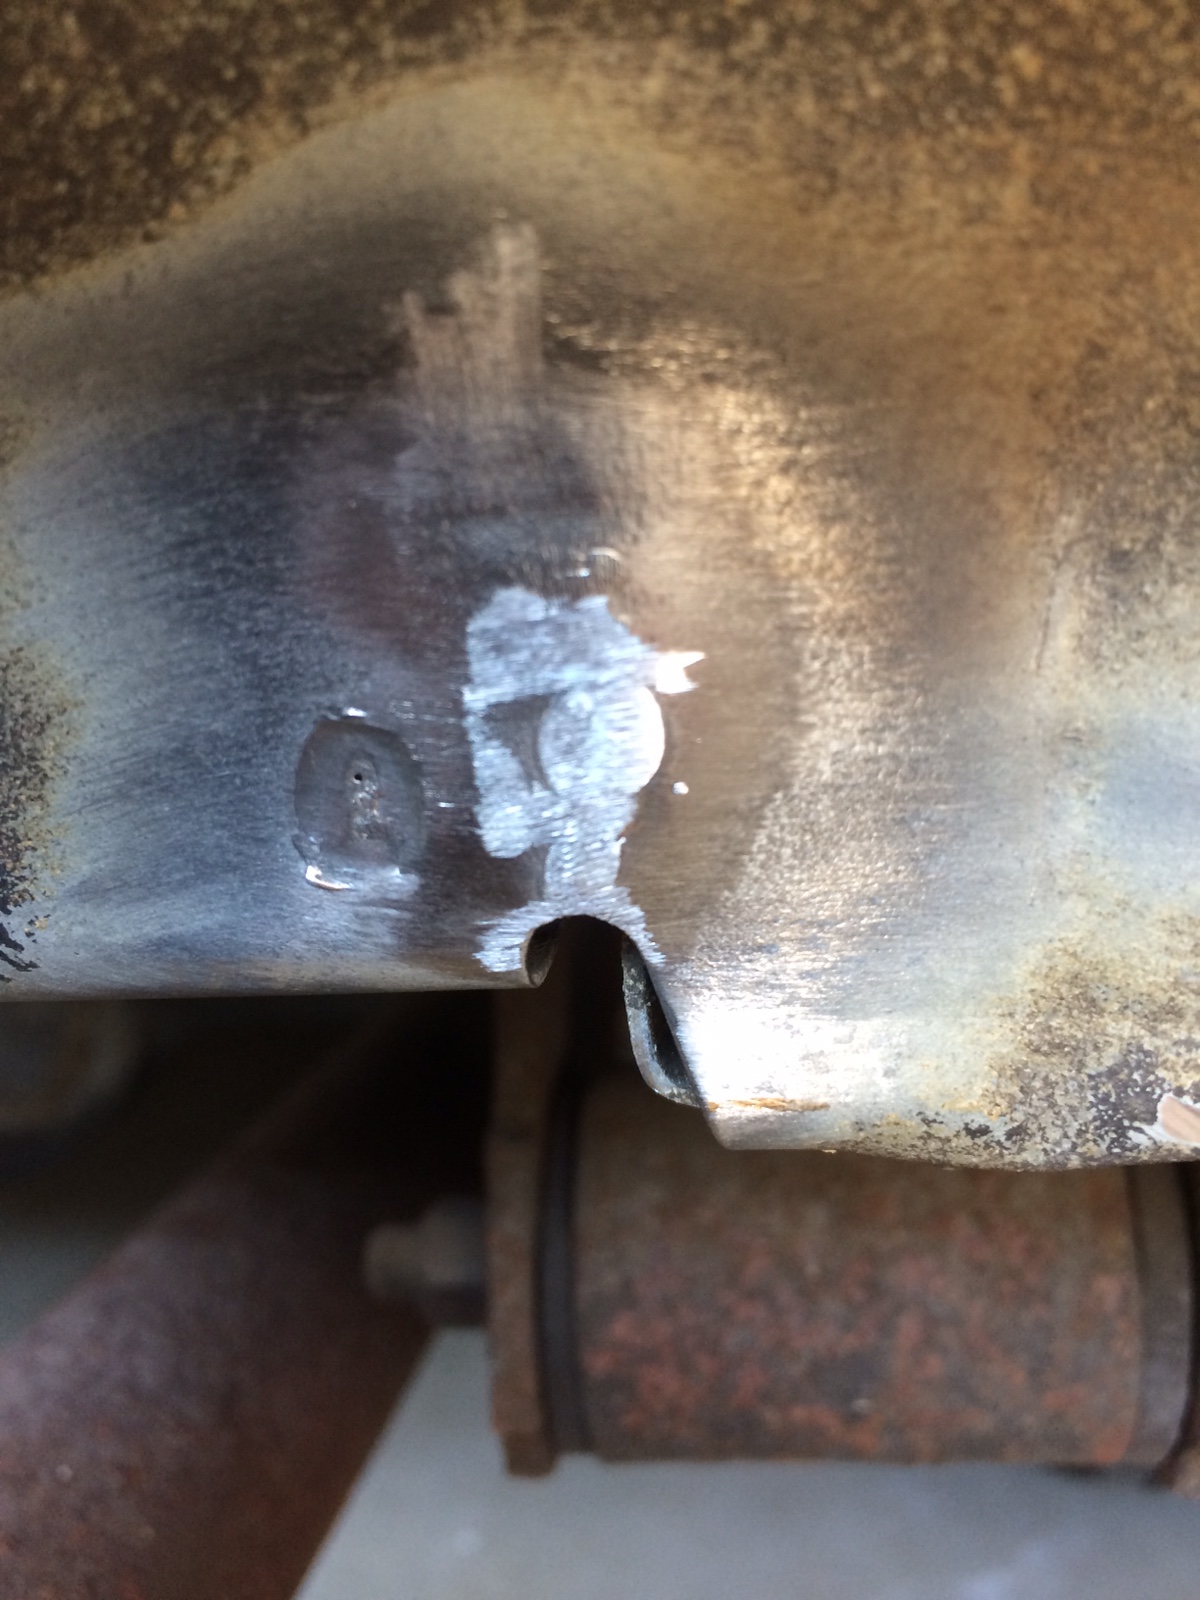
Finally our garden rebuild is done and today I went to work on my car again. In a previous post I showed cracks in my car’s rear end (sounds weird...). So today I put in thinner wire in my mig welder, did a couple practice beads and then for the first time ever put the torch on my car. It went better than I thought, the cracks are gone!
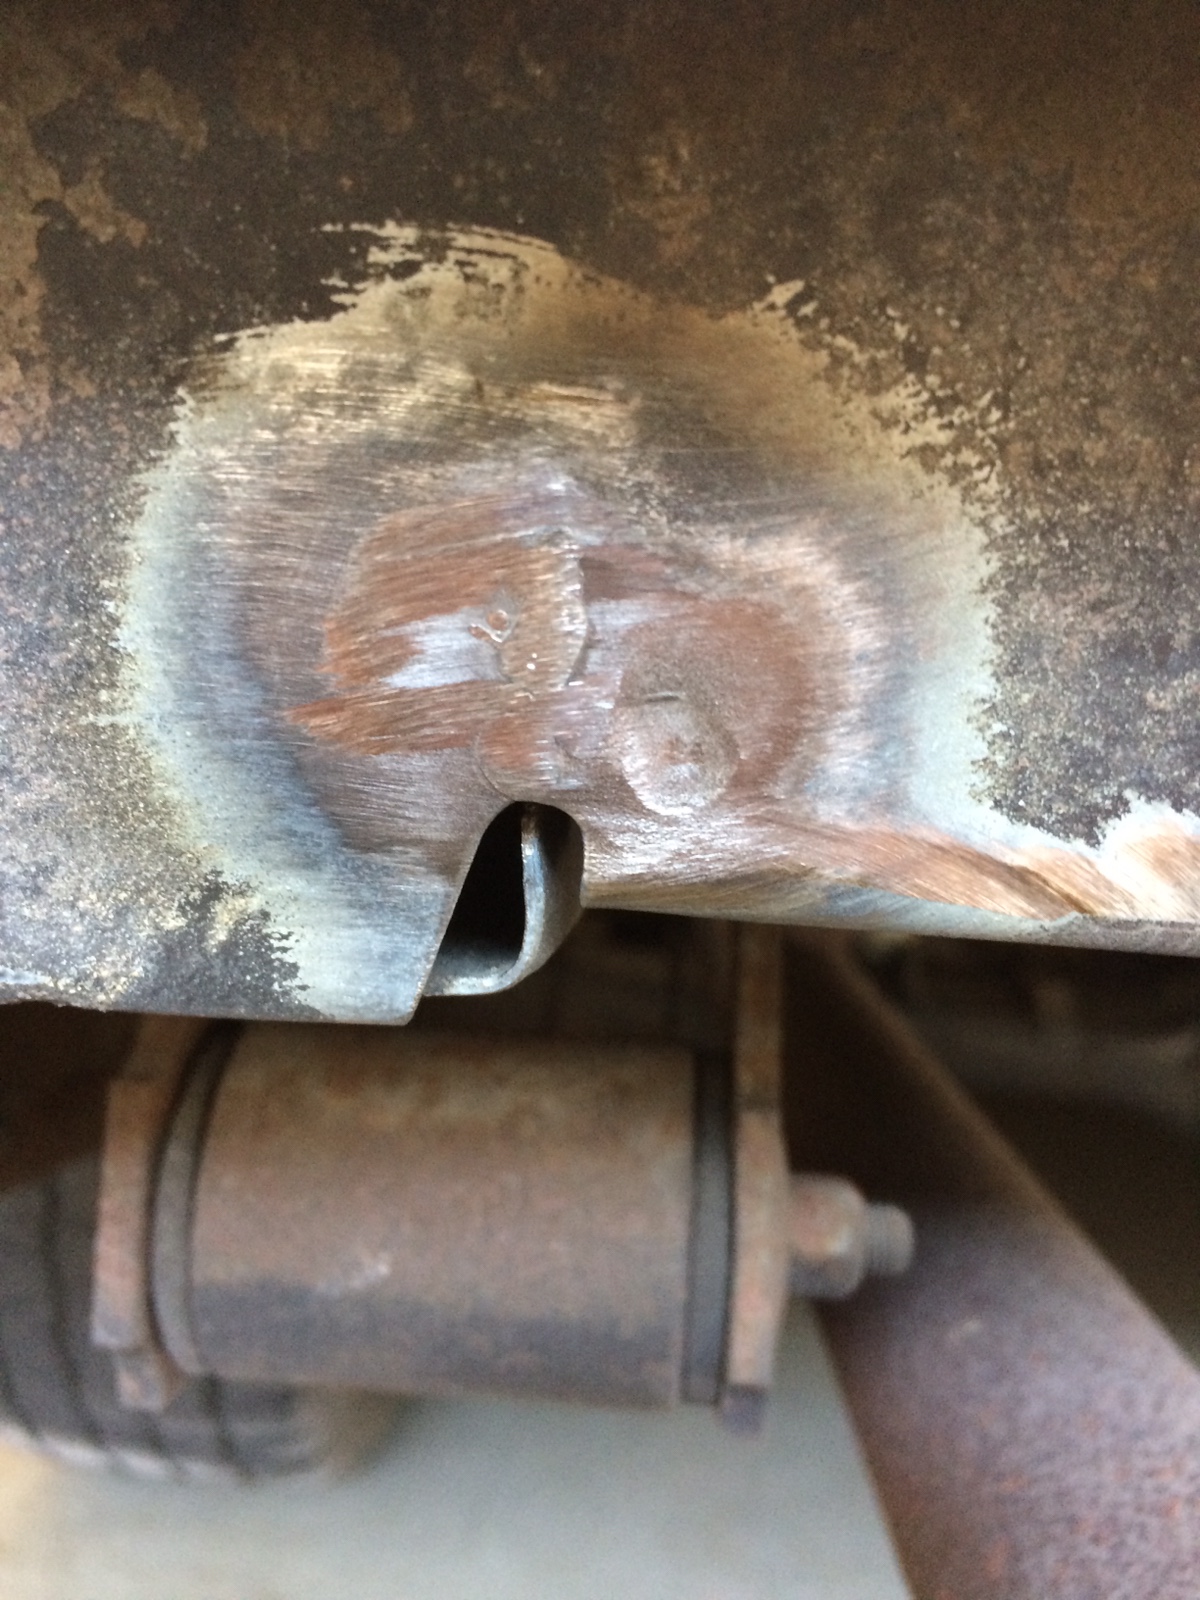
Then I started smoothing out edges I roughed up when ripping out the taillight panel and worked on the trunk corner a bit more. It was a fun day!
Then I started smoothing out edges I roughed up when ripping out the taillight panel and worked on the trunk corner a bit more. It was a fun day!
- Joined
- Nov 7, 2013
- Messages
- 1,594
- Reaction score
- 286
- Location
- Amsterdam, The Netherlands
- My Car
- 1973 Mustang Grande 351C 2V, built on the very last production day (July 6, 1973) for Grande's.
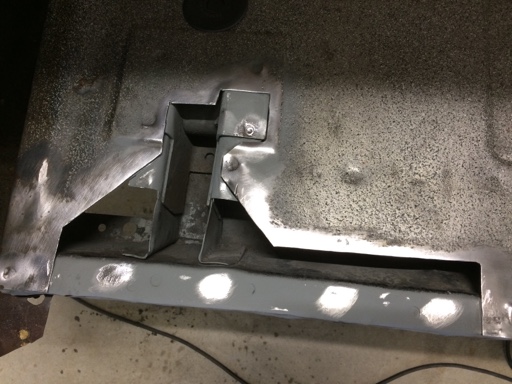
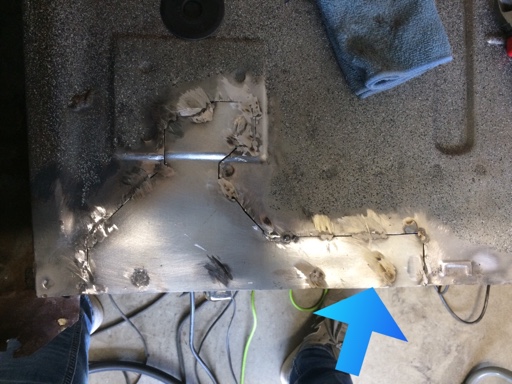
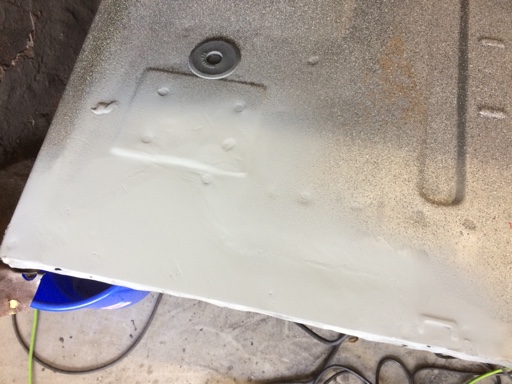
My trunk floor needs fixing as it’s rusted under the bumper reinforcements and around the filler neck hole. I cut out the crap under the LH reinforcement:
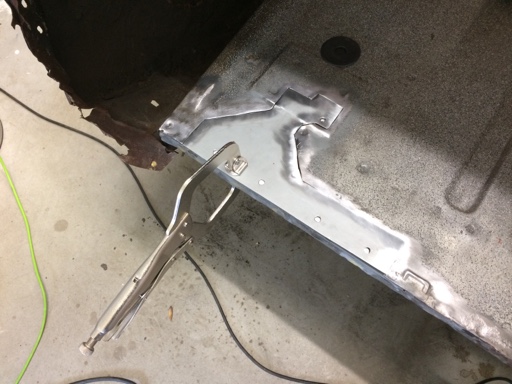
Yesterday I did my first metal work for my car! Made ghe patch:
Today I started welding:
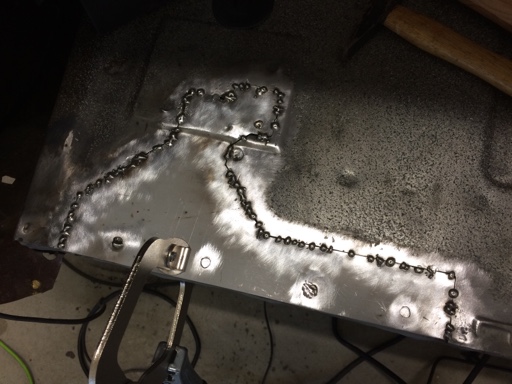
Now this is my first ever sheet metal replacement. Some welds look good and some don’t. Some folks tell me to do it like this making spots and some tell me to do 1/4 to 1/2 inch beads at once due to less penetration around the spots.
And then I noticed some warping going on:
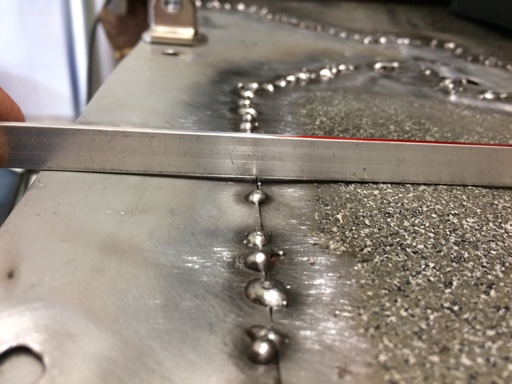
That was enough adventure for one day... I’m unsure of how to proceed now. Any good advice on the welds/welding and how to deal with the warping would be appreciated!
Yesterday I did my first metal work for my car! Made ghe patch:
Today I started welding:
Now this is my first ever sheet metal replacement. Some welds look good and some don’t. Some folks tell me to do it like this making spots and some tell me to do 1/4 to 1/2 inch beads at once due to less penetration around the spots.
And then I noticed some warping going on:
That was enough adventure for one day... I’m unsure of how to proceed now. Any good advice on the welds/welding and how to deal with the warping would be appreciated!
- Joined
- Sep 2, 2012
- Messages
- 1,622
- Reaction score
- 221
- Location
- Blue Springs, MO
- My Car
- 1971 Mach 1, Grabber Blue w/Argent stripes. Original 2V 351C Auto, Tilt, rear defog, Black Comfortweave Interior. Under restoration. Original colors, 4V 351C, 4-Speed, Spoilers, Magnums, Ram Air. All Ford parts.
Based on that last shot and my experience (Limited) I suggest the following.
1) If learning how to weld, get some practice metal and work on settings. Your picture looks like too fast on the wire feed and possibly too low on the heat. Yes, do short bursts and space them several inches apart. Try using a copper backing plate for support and cooling. I got a piece of copper plumbing pipe, sliced it longways and flattened it out to use for backing.
2) Remember that is the trunk floor you are patching. NO ONE will EVER see the warpage when you get the tail light panel and all in there. But it is a good learning area, You can always fill it with putty, or JB Weld to seal the rest of the cracks. For grinding those welds down I recommend a flap disk on an angle grinder.
kcmash
- Joined
- Nov 7, 2013
- Messages
- 1,594
- Reaction score
- 286
- Location
- Amsterdam, The Netherlands
- My Car
- 1973 Mustang Grande 351C 2V, built on the very last production day (July 6, 1973) for Grande's.
I do think the wire speed was too high indeed. During welding I have constantly lowered it. On my machine the wire speed dial is already near zero for some reason...
And lots of people have advised to hold a piece of copper or a big chunk of iron behind it but the thing is... you can't, because this (where it warps) is closing a hollow space, you can't get behind the welded area unfortunately...
And lots of people have advised to hold a piece of copper or a big chunk of iron behind it but the thing is... you can't, because this (where it warps) is closing a hollow space, you can't get behind the welded area unfortunately...
- Joined
- Sep 2, 2012
- Messages
- 1,622
- Reaction score
- 221
- Location
- Blue Springs, MO
- My Car
- 1971 Mach 1, Grabber Blue w/Argent stripes. Original 2V 351C Auto, Tilt, rear defog, Black Comfortweave Interior. Under restoration. Original colors, 4V 351C, 4-Speed, Spoilers, Magnums, Ram Air. All Ford parts.
Understood.
If you are like me, everyone said practice practice practice to improve the weld and not warp, but I found I had little time to weld and little material to practice, so I dialed it all in on my floorboards. ( I am NOT a GOOD welder.)
You said your wire speed is low, almost zero. Where is your heat? On my 110 welder I had the heat up around 2/3 to 3/4 of max for the best weld. I dialed the wire speed up to match that heat for a good bead.
You can also research some welding tips for use of wet rags to cool the metal. You might also set something on top of the trunk floor. Get it as close to the weld area as you can without interfering with your work. Maybe some of those aluminum beer bottles as a heat sink?
Good luck! It is not the easiest or most intuitive thing in the world. It is an art. We all think we can buy a wire feed welder and make perfect welds on a classic car when we plug it in. But that would be like someone saying, gee I want a really cool tattoo, buying the equipment, and going to town on their arm.
kcmash
- Joined
- Nov 7, 2013
- Messages
- 1,594
- Reaction score
- 286
- Location
- Amsterdam, The Netherlands
- My Car
- 1973 Mustang Grande 351C 2V, built on the very last production day (July 6, 1973) for Grande's.
Understood.
If you are like me, everyone said practice practice practice to improve the weld and not warp, but I found I had little time to weld and little material to practice, so I dialed it all in on my floorboards. ( I am NOT a GOOD welder.)
You said your wire speed is low, almost zero. Where is your heat? On my 110 welder I had the heat up around 2/3 to 3/4 of max for the best weld. I dialed the wire speed up to match that heat for a good bead.
You can also research some welding tips for use of wet rags to cool the metal. You might also set something on top of the trunk floor. Get it as close to the weld area as you can without interfering with your work. Maybe some of those aluminum beer bottles as a heat sink?
Good luck! It is not the easiest or most intuitive thing in the world. It is an art. We all think we can buy a wire feed welder and make perfect welds on a classic car when we plug it in. But that would be like someone saying, gee I want a really cool tattoo, buying the equipment, and going to town on their arm.
kcmash
My situation is similar indeed. The trunk floor is a good place to start although I did already practice some time ago. The heat is on 4/6 (= 2/3). I will do some tests again before I continue now that I'm getting a little more feeling for welding.
I'm now first going to try and shrink the warping out, then put in some plug welds and then continue with the patching. I could've gone about it a bit more structured instead of randomly placing welds. Also I think I should've started a new spot against the previous one instead of spreading them out like this. Oh well, I can try again next week
- Joined
- Nov 7, 2013
- Messages
- 1,594
- Reaction score
- 286
- Location
- Amsterdam, The Netherlands
- My Car
- 1973 Mustang Grande 351C 2V, built on the very last production day (July 6, 1973) for Grande's.
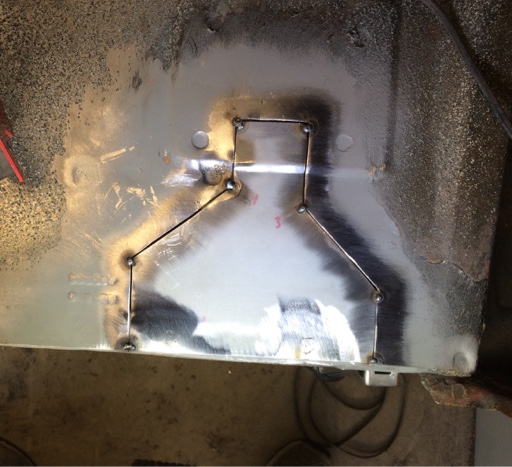
I had a second go at the trunk floor patch, was very unhappy with the first one. So I cut it out yesterday and started over with this temporary result:
Last week Fabrice watched my welding and gave some good pointers resulting in better welds. Unfortunately the right plug weld popped off just before I left. Otherwise it looks OK.
I learned a lot. If only it would result in getting more done ;-)
Last week Fabrice watched my welding and gave some good pointers resulting in better welds. Unfortunately the right plug weld popped off just before I left. Otherwise it looks OK.
I learned a lot. If only it would result in getting more done ;-)
- Joined
- Nov 7, 2013
- Messages
- 1,594
- Reaction score
- 286
- Location
- Amsterdam, The Netherlands
- My Car
- 1973 Mustang Grande 351C 2V, built on the very last production day (July 6, 1973) for Grande's.
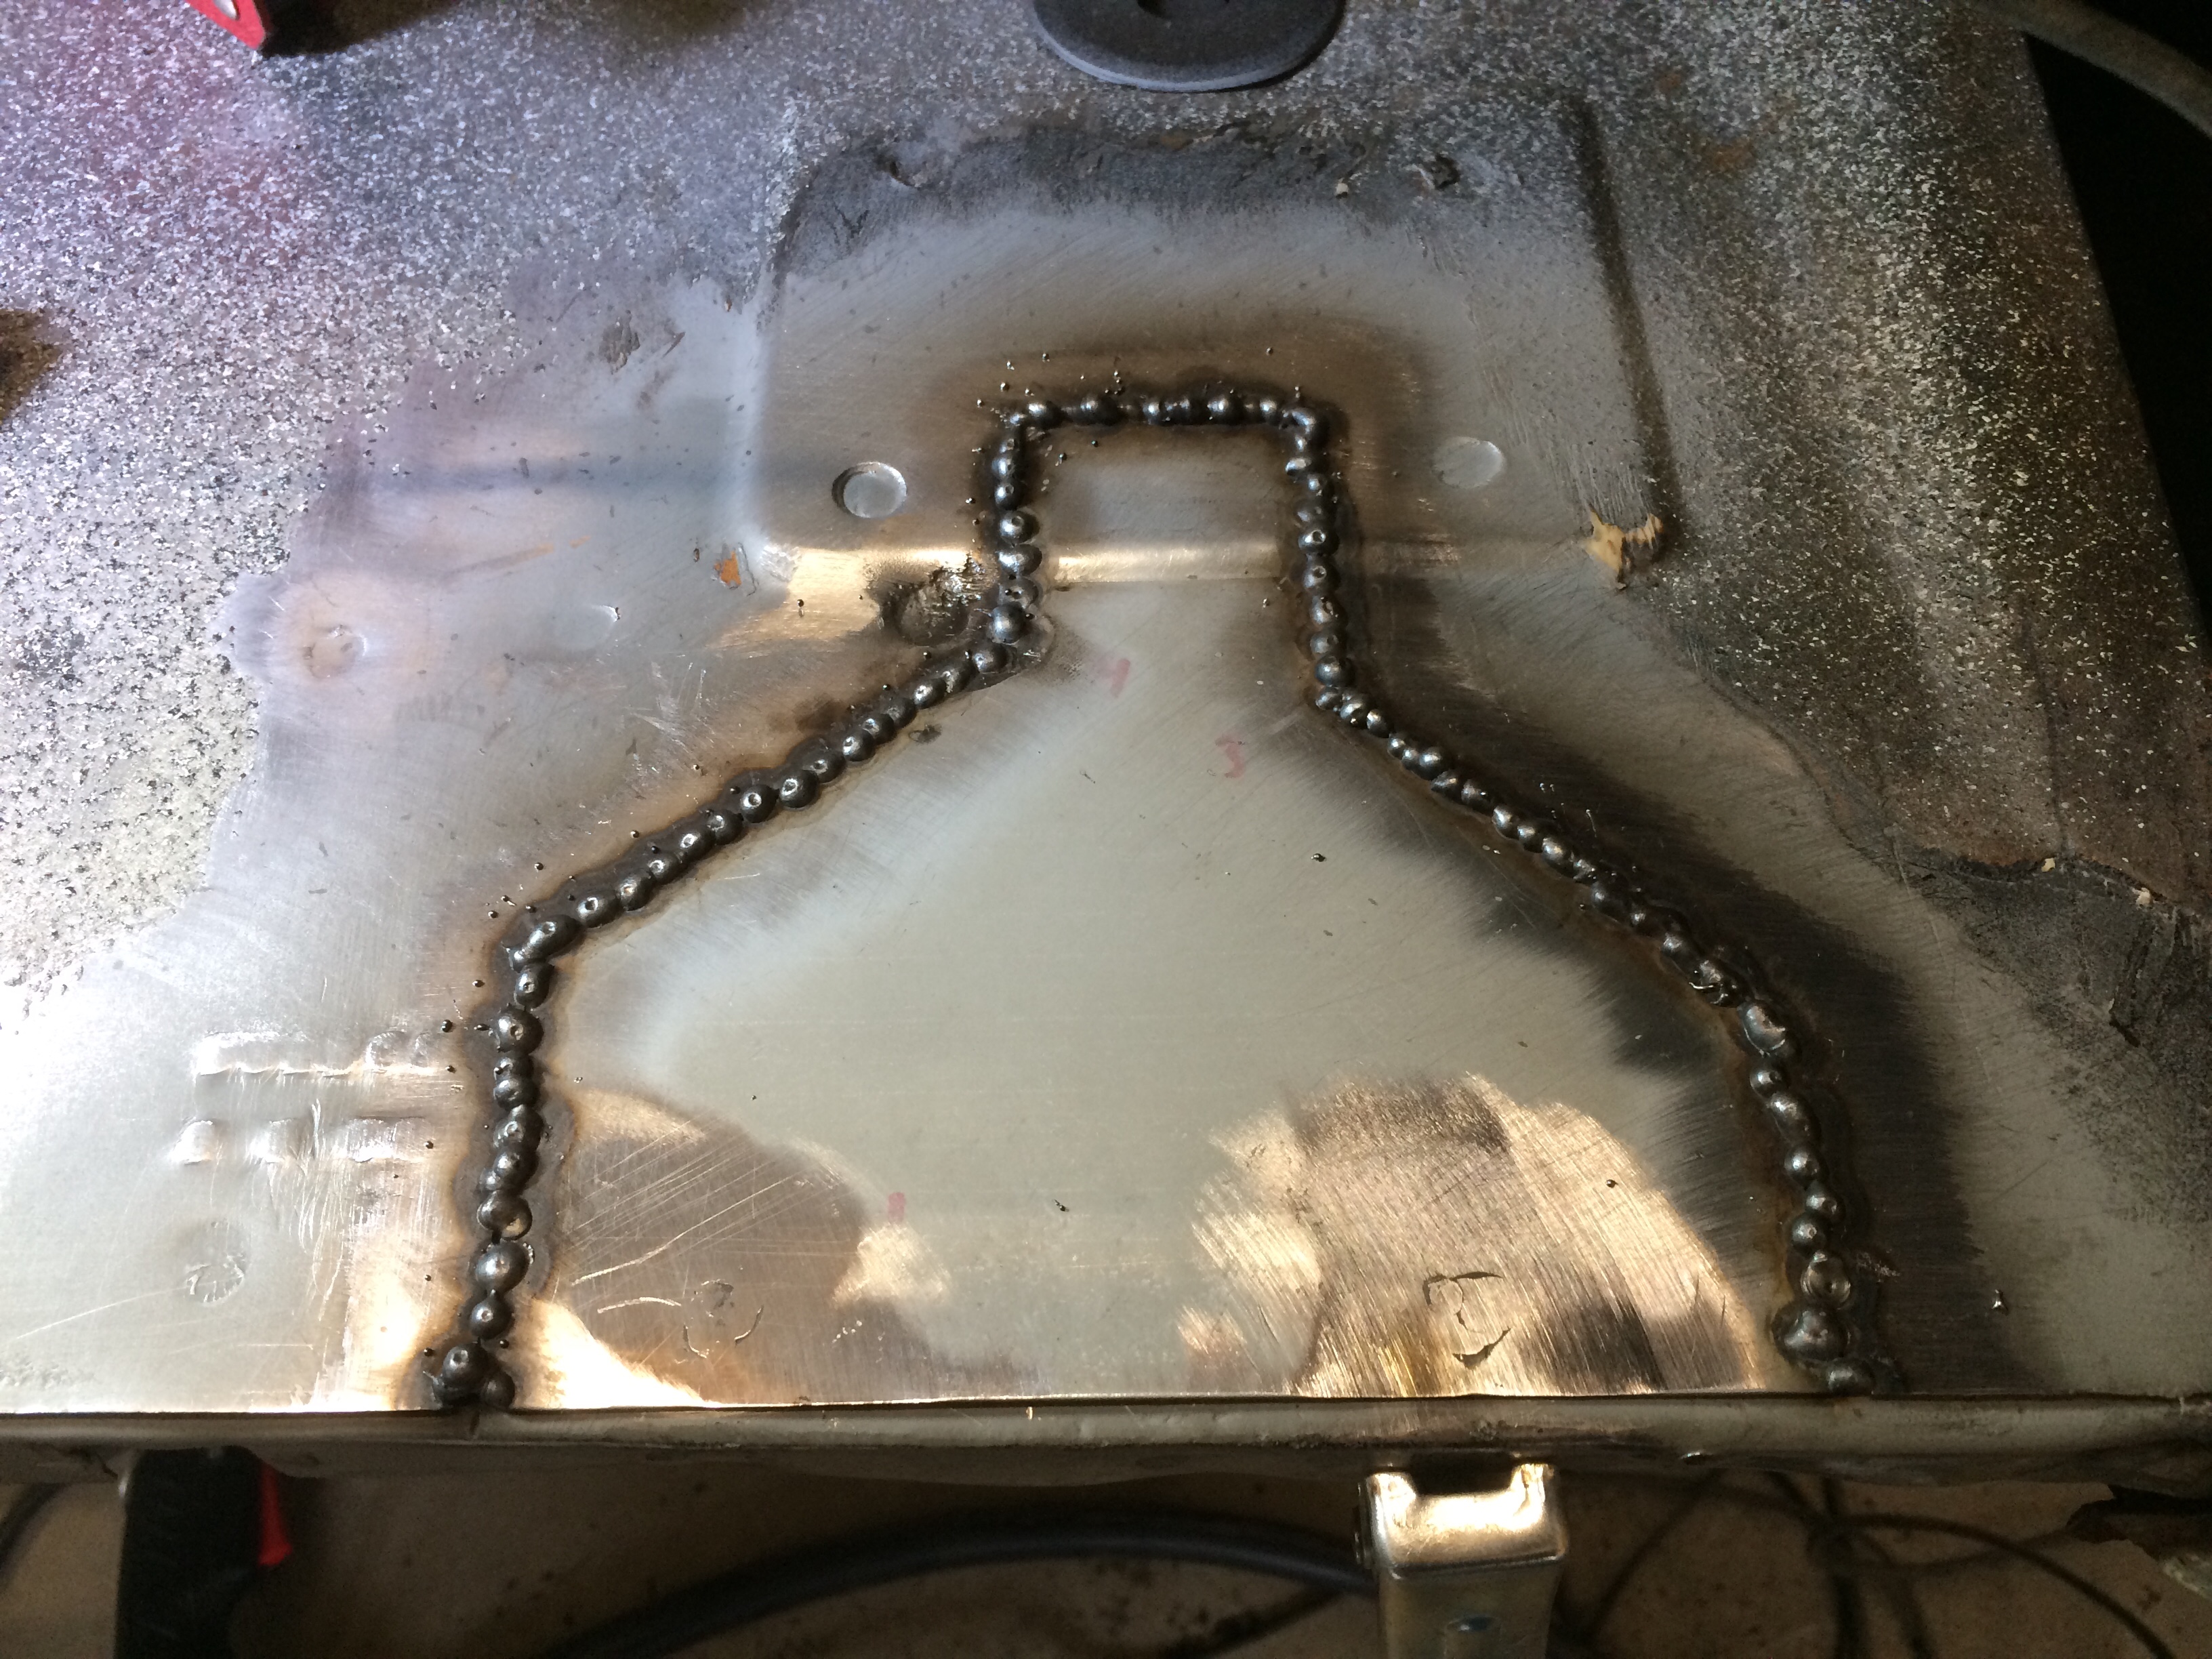
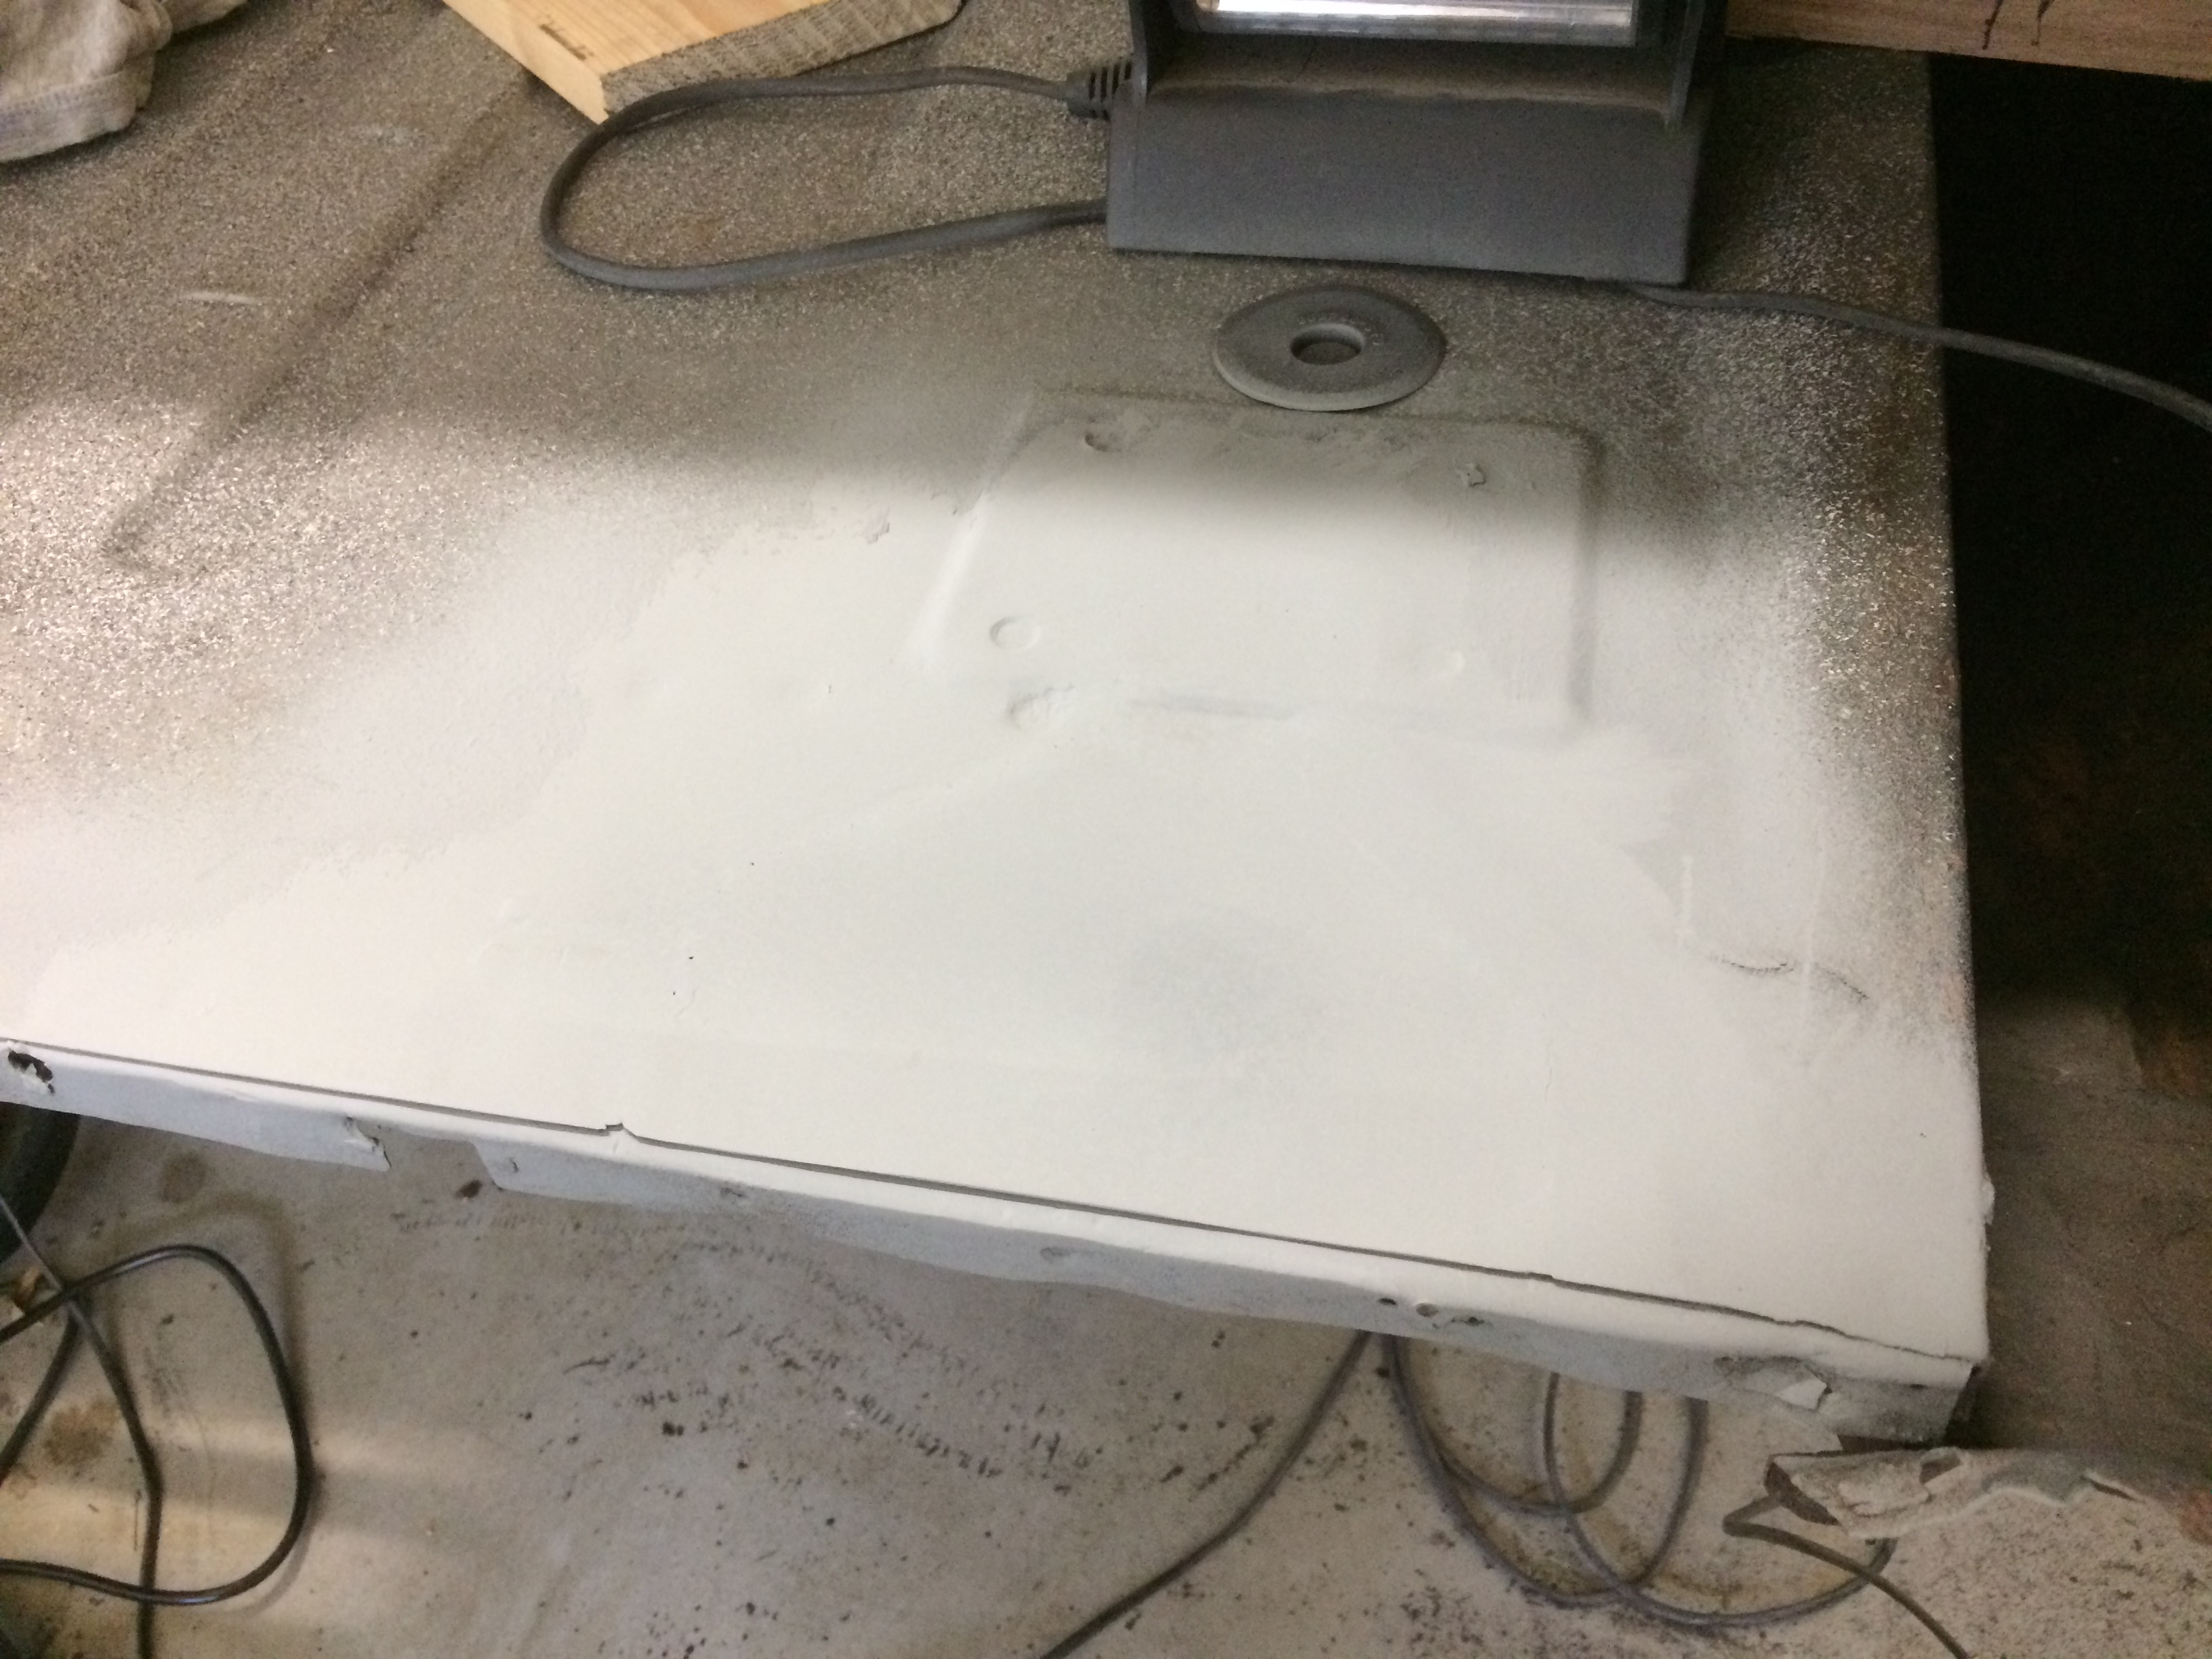
Trunk floor update.
Patch 1/3 is now done:
I learned so much about welding doing this patch! The importance of keeping the heat low but also that you can actually use TOO much shielding gas. By no means am I now a good welder but I’m getting better
So today I started on the second patch. Getting this far with this patch went sooo much faster than with the other one, even the plug welds went a bit better:
To be continued in 2 weeks. Is this resto slow enough for you?
- Joined
- Jan 1, 2012
- Messages
- 8,357
- Reaction score
- 1,200
- Location
- Eugene, OR
- My Car
- 1971 Mustang Sportroof M code
Faster than mine
- Joined
- Nov 7, 2013
- Messages
- 1,594
- Reaction score
- 286
- Location
- Amsterdam, The Netherlands
- My Car
- 1973 Mustang Grande 351C 2V, built on the very last production day (July 6, 1973) for Grande's.
Oohhhhh things are speeding up coz welding in this second patch only took me... today! Welding is becoming easier thanks to all the advice I’ve taken in like do not grind during welding, cool with a wet rag etc.
Proof:
Tomorrow I’m gonna start a patch around the filler neck which requires playing with one of my new hammers
Proof:
Tomorrow I’m gonna start a patch around the filler neck which requires playing with one of my new hammers
Last edited by a moderator:
Nice work!
Similar threads
- Replies
- 13
- Views
- 1K
- Replies
- 75
- Views
- 14K
- Replies
- 457
- Views
- 40K
- Replies
- 27
- Views
- 4K