Slowest resto ever - Project AmsterFoose / Current subject: The roof

7173Mustangs.com

Help Support 7173Mustangs.com:

This site may earn a commission from merchant affiliate links, including eBay, Amazon, and others.
Finally more progress and the new rear is in sight!

I positioned the trunk corner :

c26f3c6bb6332a476e5705db39b7f022.jpg


Plug welding it was challenging, I can’t seem to keep the torch inside the hole:

5bee823de14d11f38a0713c4c9554c8a.jpg


But in the end all was good:

9f07bd205182412aea4c98d13562657d.jpg


Rear look:

fa3f560333eda6cf20c9353f55c94047.jpg


I also welded back the trunk latch bracket:

0a33d91de668e64fa8dac59c501d73d6.jpg


All in all a good weekend, considering yesterday when I started welding I found out the shielding gas bottle was completely empty and I had to get a new one from... somewhere...

Next I can weld the panel itself back in.

 
Last edited by a moderator:
And there it is, the new taillight panel welded in place:


I put plug welds all around the edge, I finally seem to get a better feeling for them thankfully. The whole thing feels pretty strong too, better than expected.

Very happy about this part being done. Next are the bumper reinforcements and then the LH lower quarter and drop-off.

 
Last edited by a moderator:
With all this awesome weather we had here this weekend I managed to get a bit more done and move on to the next project!

First I welded the bumper reinforcements back in:


And now that the taillight panel is finished I've started digging in the lower LH quarter:


Unfortunately the car got hit in its previous life and while examining the pulled out dent I found a fair bit of rust in a nasty spot:


So now I'm thinking if I shouldn't only replace the lower quarter but maybe the full quarter so that any possible rust underneath the wheel well's edge can be removed as well. Any thoughts on this choice?

Meanwhile I've started putting in the drop-off but ran out of time so I left it at this:


More in 2 weeks :)

 
So this weekend I took out the remaining interior; carpet, ceiling and all the trim:

e5a870dd8d29fb8f3059327238ef4965.jpg


Good news is no holes underneath my vinyl roof! The floor however is a defferent story.

The rear floorpans have been patched. Is it me or do these patches look bad? Thoughts?

RH rear side:

acc6b48340d82897c24d2f18717a7e2f.jpg


LH rear side:

95dc5c2b7d9d2133aeab4e1bf1724500.jpg


In the front everything is still original but a little too crispy so I think I need to at least patch those pans:

RH passanger pan:

4e4e5814cc8b159f33e767eaf7a3cdf4.jpg


The LH side is only slightly better...

But all that is for later, I now need to get the quarter window and mechanism out. Anybody have any pointers for that job?

 
Bit more progress this weekend.

Managed to get the LH quarter window and mechanism out:

fd8a210da5d62252b3708545f7881c96.jpg


Also figured out how te remove the weatherstrip:

cd01b4d1cba4323939ff5445ddfdaa57.jpg


Then cut around the wheel well to assess amount of rot:

7210c6d3b1686de04cb013b6b074bca3.jpg


Took a look at the end of the rocker. Seems surprisingly solid:

396a3222b22b62aac477e532b71aa6fa.jpg


And finally cut out the patch to replace the rotted edge:

10bf48979772f7f94eb28fc54cc15a90.jpg


Can’t wait to have that welded in!

 
993c82605a906358439553a38b216e19.jpg


New wheelhouse edge is in. It is in the exact same spot as the old edge but when test fitting quarter patches the edge of the outer skin sits half an inch under this one. Gonna be doing lots of measuring this weekend...

 
Well, lotsa measuring turned into lotsa cutting and bending. But the edge is now pretty close to that of my quarter so next weekend I can hopefully really finish the wheelhouse and start on the quarter panel.

239d31c5a03b2c563f28ca47f4593d02.jpg


So while most people seem to have lots of time due to the pandemic, my progress has been painstakingly slow, mainly due to setbacks with the wheel house and the quarter. Third party reproductions that suck.

The wheel house is now done. First I thought about just replacing the lower quarter only to find out it was welded crooked like this:

IMG_2312.JPG

Then I found out I needed a whole quarter and the one I bought again had the bottom welded on like shit again. So I've been recreating that and now finally have something that looks OK (to me anyway):

IMG_4093.JPG

Finally I'm able to go forwards again and hopefully will be able to put the quarter in sometime this month.

 
A couple notes.

1)  The rockers on our cars were galvanized.  So they rarely look bad.

2)  I would try to find a 1/4 panel that has the one piece lower.  They form the bottom edge like the factory had it instead of spot welding a second piece on.  Just a suggestion.

kcmash

 
Finally, the bloody quarter panel is in... This was not an easy job (for me) but I got it done and although it looks rough and will require a bit of filler I think it turned out OK.

See for yourself:

IMG_4299.JPG

IMG_4305.JPG

IMG_4388.JPG

IMG_4434.JPGIMG_4435.JPG

 
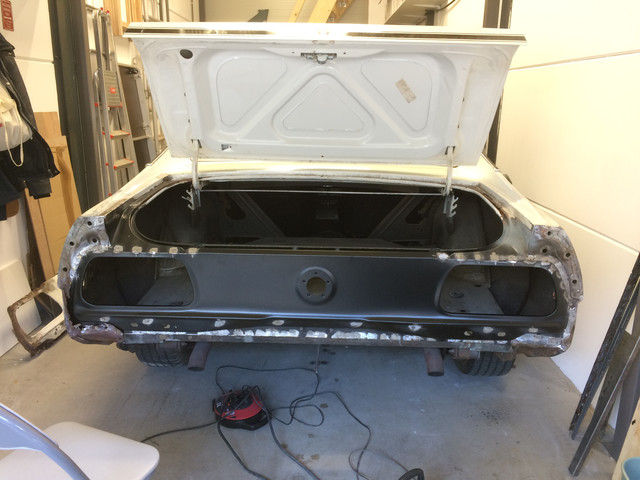
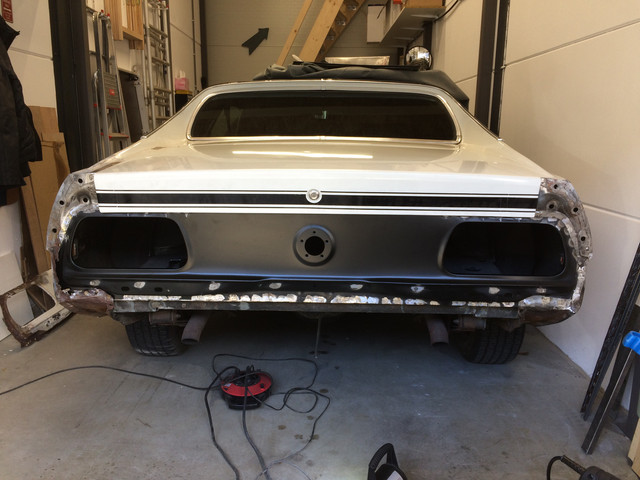
Great job, at this point, I would put the rear valance on and check for proper fitment. When I did mine, I did not do that and I ended up grinding out the welds at the tail panel, removing the section that goes from the quarter panel to the trunk drop off and making that piece more narrow so that my quarter panel and rear extension would line up properly and my valance would fit and have less of a gap between it and the quarter panel before welding that piece back in. 

You are doing a great job on your car and I have been following it, keep up the good work.

Tom 

 
Keep up the good work! Ryan

 
Back
Top