- Joined
- Jan 24, 2012
- Messages
- 4,628
- Reaction score
- 1,507
- Location
- Tucson, AZ
- My Car
- No Mustangs at the moment.
Lots of pictures in post #1 that I can see.


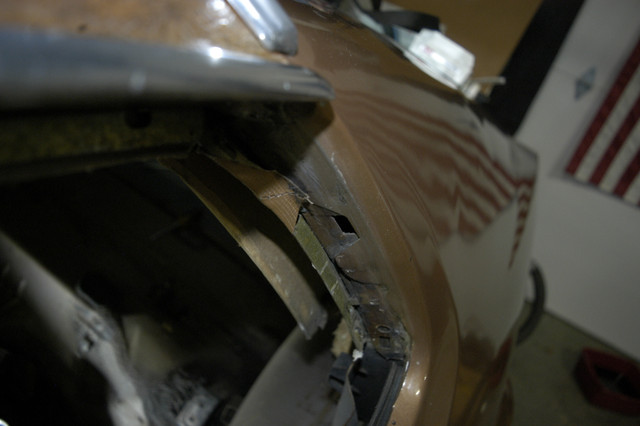
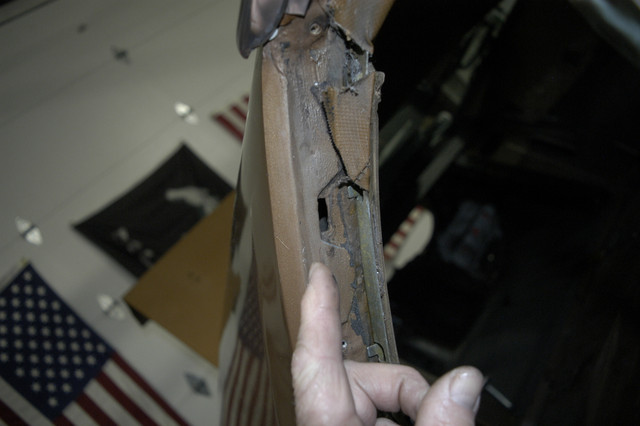
I began to dig into my leaking Rain Gutters on my car. I did not know my roof leaked until I was trapped in a downpour during the summer.
My headliner, and headliner rails filled with water and flooded the interior coming down the quarter panels and pooling up on my rubber floor mats.
everything was soaked including me I spent 2 days with the interior removed, a fan inside and 2 dehumidifiers running to get all the water out.
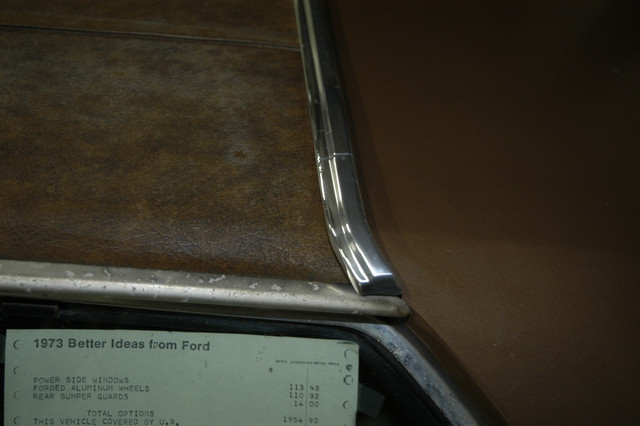
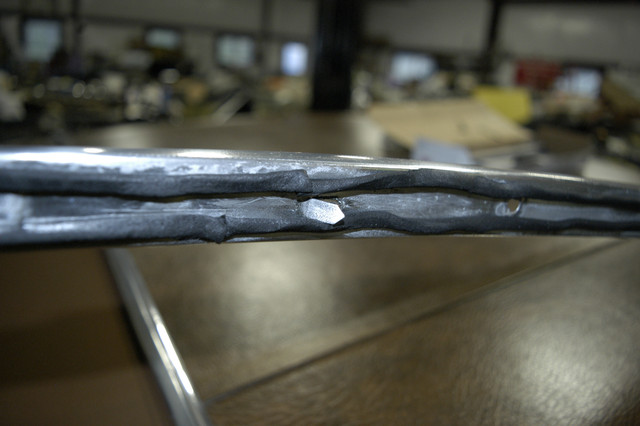
I've learned that contrary to what I've been told the chrome trim on the 71-73 mustangs is not Stainless steel, it is Bright dipped aluminum.
You can't really polish it because its polished aluminum that has a anti-oxidant coating on it. you can clean them up and make them look a little nicer but DO NOT wet sand them as you will remove the bright dip coating and the aluminum will Oxidize fast leaving them worse then before.
To access your drip rails if you DO NOT have roll down quarter windows:
(if your quarter windows roll down then you can have direct access to remove all the screws and seals, and work around the windows, then you can skip all the way to number 5)
1) Remove back seat. this will vary depending on if you have a trap door fold down seat or not.
2) Remove C pillar trim.
3) Remove interior Quarter panel trim.
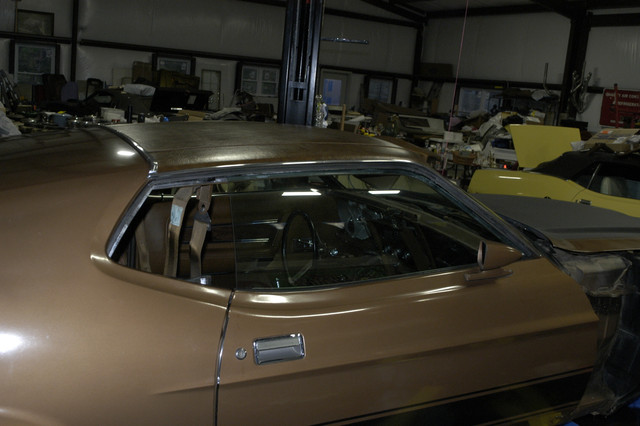
4) Remove Quarter Windows.
The back half of your interior should basically be empty now with the rear quarter windows removed.
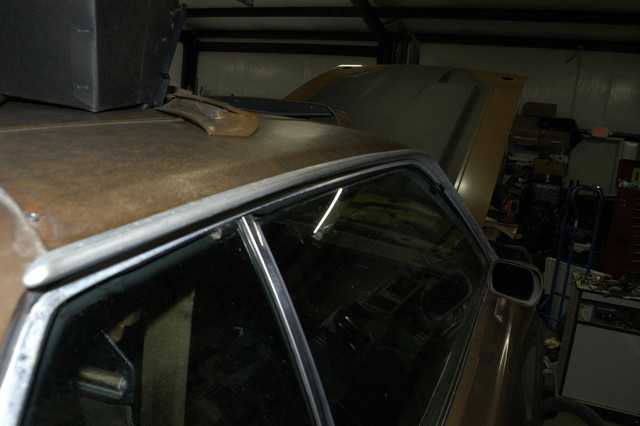
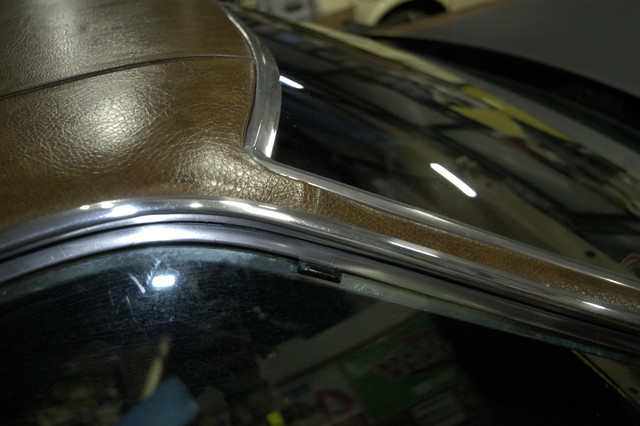
5) Pull the rubber seal from the roof belt line window frame.
6) remove the screws from inside the channel of the window frame. These will most likely be rusted and can snap off, have a dremel handy.
7) remove the window frame: Easier said then done: glue, sealant, seam sealer, and dirt and 38+ years of garbage is holding it on.
Use a plastic trim puller or credit card, and slowly work your way around trying to loosen it. This will help prevent damage to the aluminum
because it is very soft. work slow, a heat gun might work to help loosen any glue but be super careful you can cause damage to the paint or headliner.
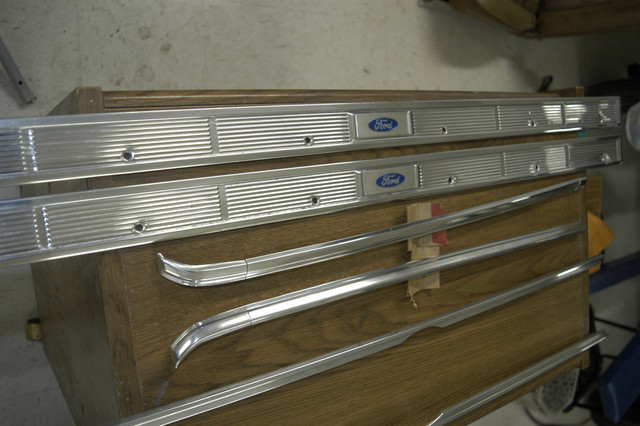
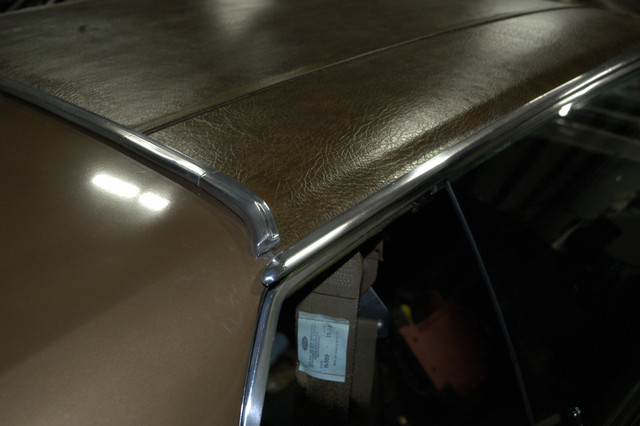
The window frame is 2 piece. The second piece on the lower part of the A pillar its about 1 1/2 feet long and travels down the front of the door by the hinges.
the Larger piece runs the entire roof line, be careful removing it so you don't cause any paint damage.
on early cars these chrome parts can be riveted in place. so you may need a drill handy. Some cars will have seam sealer instead of foam sealer, the seam sealer is harder to remove.
Its possible in the past somebody complained about leaks and ford addressed this issue by taking things apart and using seam sealer in an effort to stop the leaks. Basically the way the car was designed its impossible to prevent all leaks.
With the window frame out of the way.
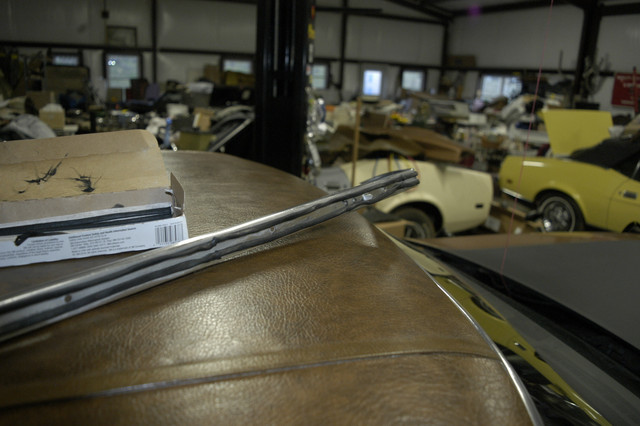
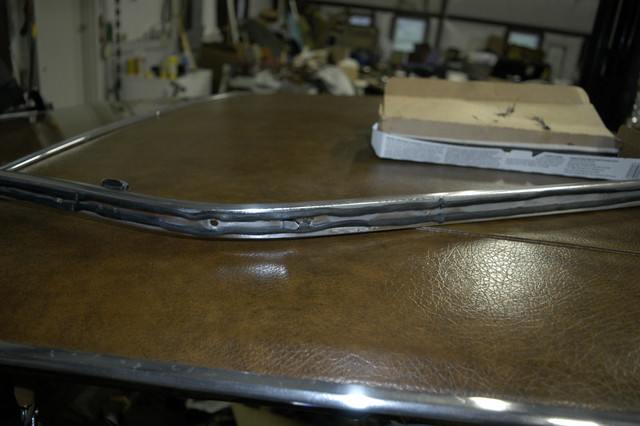
8) You now have access to the chrome roof drip rail, there are 4 screws or Rivets holding it in place along with a ton of factory seam sealer or foam tape.
The 4 screws especially the 2 on the roof towards the rear will be rusty and will either snap off or the Phillips heads will round out, i recommend using a cutting tool and score the tops of the screws for a flat head screw driver. It will make things much easier to remove.
I found it best to start working the piece from the bottom edge where the window frame way, and try to roll the trim piece up evenly over the roof, slowly pull the piece of trim breaking the glue, or sealer, or foam tape away. use a plastic scraper or trim puller to prevent damage to the trim piece always apply even pressure to keep the piece from bending or deforming.
9) now that all the trim is removed. you can inspect the roof and see how rusted out things are. cross fingers.
If you find major rust and holes in the roof, this can be the case with cars that had a vinyl roof, then you will need to address this with either fabrication or donor parts.
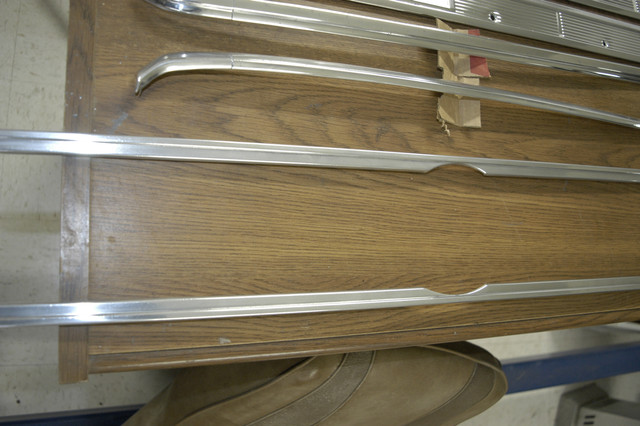
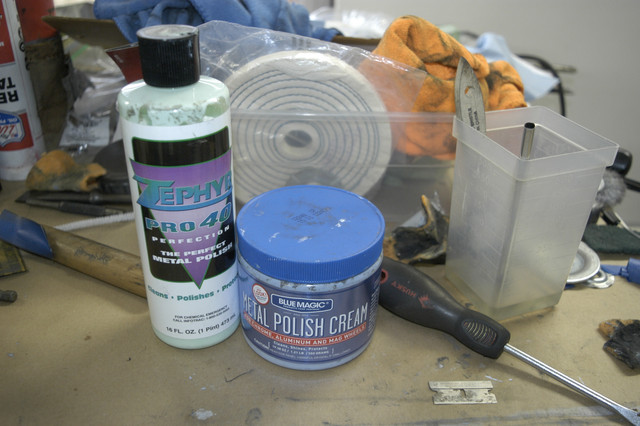
10) proceeding: Is cleaning up the aluminum trim to get it ready for new sealer. repair any damage to the trim and you can try cleaning the bright drip coating
a little with a 0000 steel wool pad.
Clean off all the old foam or sealer or glue you want a nice clean surface for the new seals.
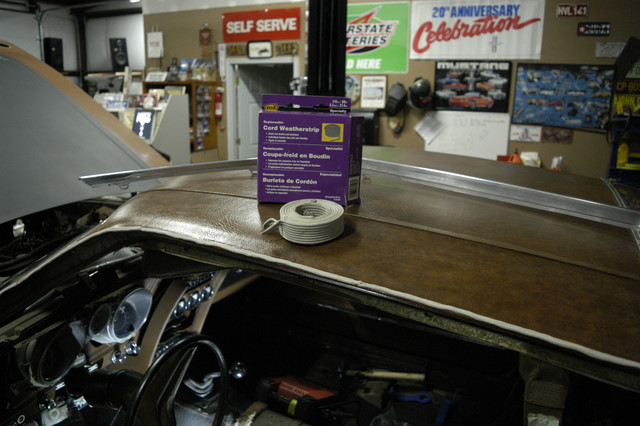
11) where to find the parts you need.
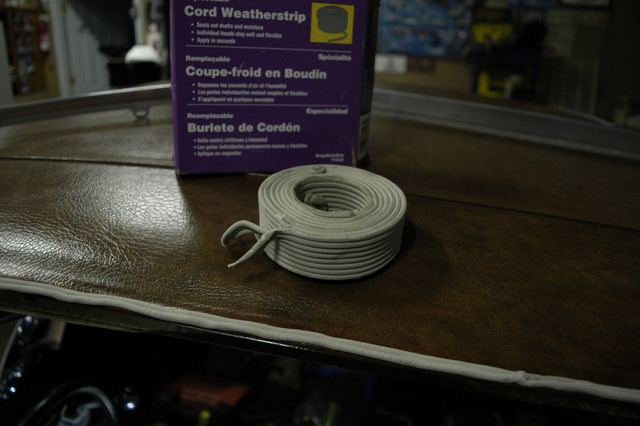
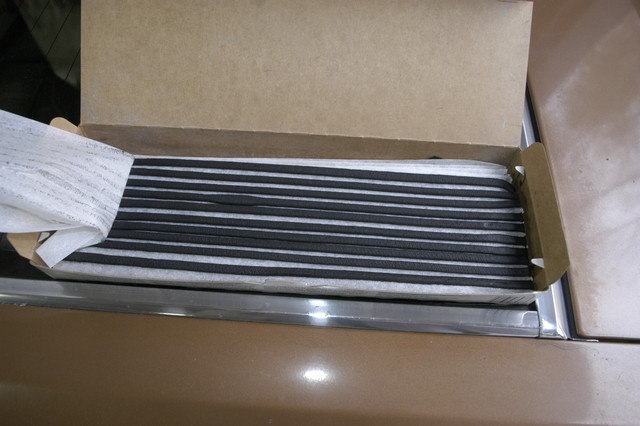
Contact our member 'Hemikiller' he sells kits of foam sealer that matches what the factory used.
In the kit will be larger tape to use on the window frame top roof belt line and thinner foam tape that you insert into the Curled edge of the rain gutter trim.
For the hardware:
Mustangs unlimited sells both types types of screws you need: for the roof trim you will need 8 of:

https://www.mustangsunlimited.com/itemdy00.asp?T1=754194%2001
This was an exact match to the factory Screws.
next for the window frames:

https://www.mustangsunlimited.com/itemdy00.asp?T1=PE772%2001
Again this was an exact match from the factory, you will need 2 bags.
At this point you have the option of changing the belt line seals for the windows or replacing your roof line rubber seals if they are dried out or falling apart.
Don At Ohio Sells complete rubber seal kits for our cars. Please contact http://www.ohiomustang.com
you might also replace your window guides. these get rusty and fall apart and since you have everything apart you could replace them, these get riveted into the window channel there are 2 types.
you have the door clip.

https://www.mustangsunlimited.com/itemdy00.asp?T1=122244A%2001
This is installed on the front part of the window frame, in the area of the A pillar.
You will need 2.
and the Quarter window clip.

https://www.mustangsunlimited.com/itemdy00.asp?T1=122204A%2001
this is installed above the Quarter windows in the area of the B piller if the car had one.
you will need 2


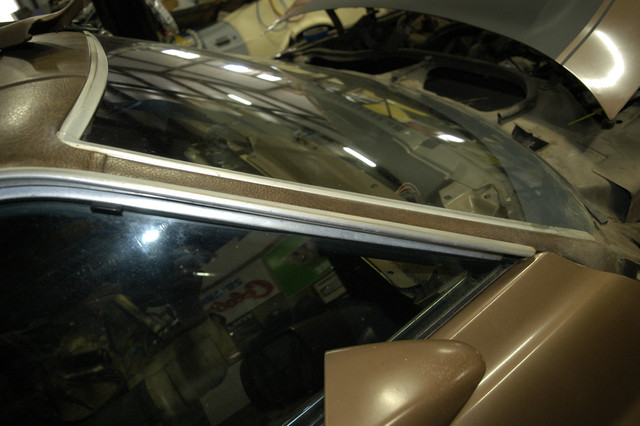
12) with everything cleaned and new hardware ready to be installed, i recommend mocking up everything to check for fit. Do this before installing any new foam tape. place all the pieces back on the car and see how everything goes back together. you want to spot any problems now.
so with everything cleaned up lets mock it up:

from front to back on the drivers side. this is what you will see. there are 14 pan head screws that hold the window frame on to the body and 4 button head #8 screws that hold the rain gutter on along with sealant.


now lets put on the chrome to show you how it assembles.

here are the 4 button head screw mounts.


These body holes are important they key into tabs of the window frame to help alignment.


here is where things can change, from the factory there was a lot of laziness on the assembly line. there are special tabs that are punched into the window frame parts that help align the window frames to the correct spots.
on my car the drivers side fit like a glove, on my passenger side some YO YO decided not the use the tabs for alignment and completely threw off the installation. This is why you need to mock things up first because you may decide to change things from the way the factory built your car.
putting the frame in place. There are 5 tabs to help you align it into place.


This is the separate lower piece of the frame and where it is positioned.

Here is the front piece slid into place with the rest of the frame.

One thing to note. Buried in the seam sealer or foam sealer of the rain gutter is this little clip. make sure you don't accidentally break this little clip or remove it.

I cleaned up my car and added some paint to help protect it from rust and to fill in some missing paint areas.


13) Once your happy with the fit and finish of your parts then install all the foam tape. mark the alignment of the 2 piece window frame parts take a little sealant and put it on the smaller frame piece then slide it into position in the larger frame. This will help seal it and keep it from moving around as you install the foam tape. it also makes sure all the screw holes are in alignment for faster installation.
Be careful installing the tape, once its stuck down it will never come off again.
If you are using the alignment tabs when you install the foam tape just allow the tab to punch through the center of the foam tape as you lay it down. Also try not to move the tabs around they can break off.
The thinner tape goes inside the roof rail chrome, its a little bit of a pain to install well. push the side with the glue into the curl so the tape sits nice and level where it will contact the roof line.
Because of the foam tape you need to to really push things back into place, an assistant will help since one person can hold the parts tight as you align the screw holes.
When you install the window frames, push the new screw into its correct hole and through the foam tape so you can see the tip of the screw and align it into the correct hole in the roof panel.
leave the screws loose and work back to front so each screw is re-aligned in its original hole. once every screw is loosely installed, now start to tighten them down evenly. The foam will compress keep going until you feel no more movement, the key here is tighten everything down evenly . do not crank down on one screw it will bend the aluminum frame and kink it.
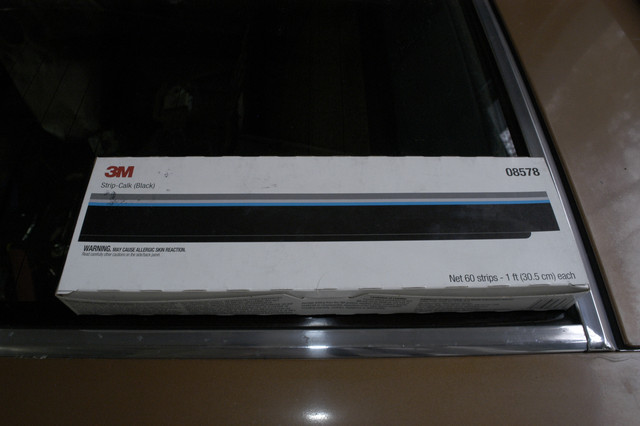
Finally you will need some silicon sealant, some areas are just lacking in a proper water seal, the rear part of the rain gutter just over the back window there is a roof weld seam, and i found it left a gap on my car so i filled in some silicon in that area to get a better seal. The biggest area will be the lower part of the quarter windows where the frame sinks into the body line. i had a huge gap here and filled the area with silicon then cleaned it up to make it as neat as possible.
14)The finished product.


How good is the repair? well i feel better now with the work i did, before everything was completely deteriorated, now at least most of the water will stay out of the car.
The ford design is pretty bad.
They expected any extra water to fall into the quarter panel and go out from the rocker area this would explain why they put vents down at the bottom of the B pillar since they expected water to pool up in that area.
the B pillar seals for the Quarter window are very open as well, as you drive water would go that route and end up inside the quarter panel as well.
But back then a car only lasted 5 years especially in the rust belt.
Good luck on your project.