Preparing for Paint

7173Mustangs.com

Help Support 7173Mustangs.com:

This site may earn a commission from merchant affiliate links, including eBay, Amazon, and others.
Joined
Jan 25, 2017
Messages
733
Reaction score
23
Location
Tavares, fl
My Car
71 Mustang Mach 1
302-2v
C4

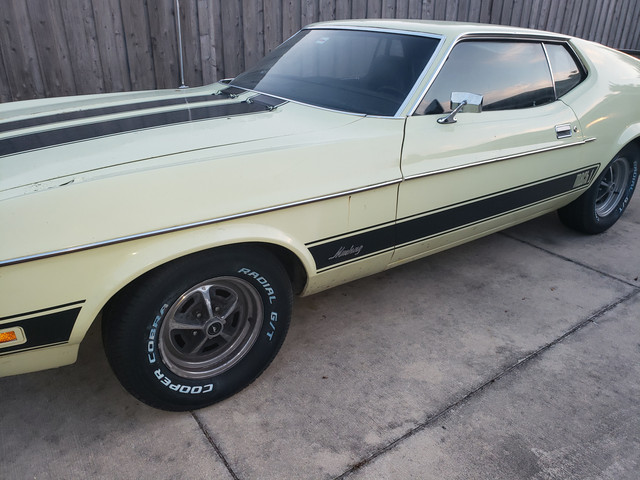
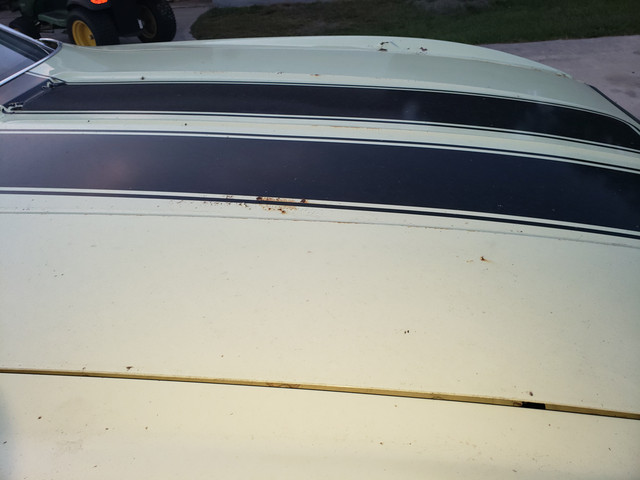
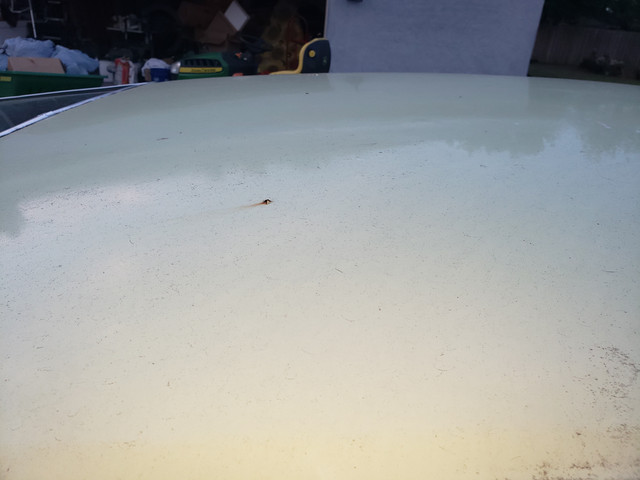
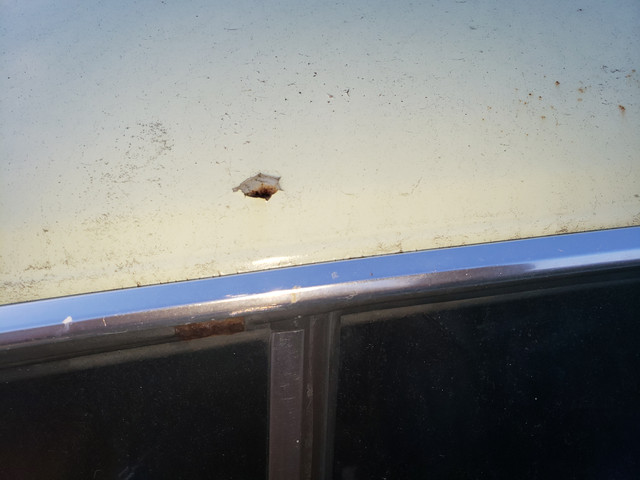
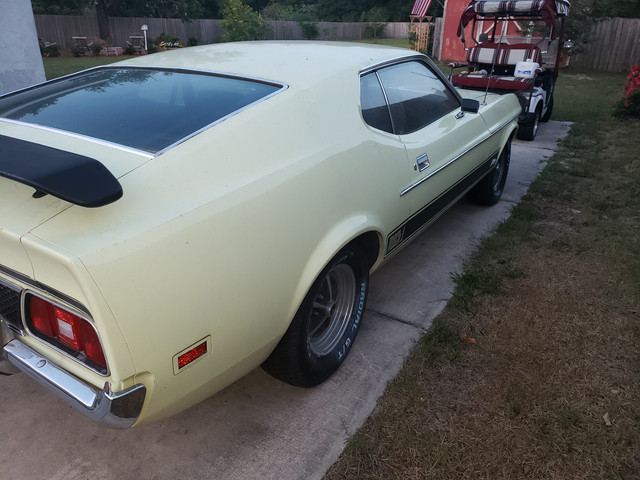
My 71 is nearing its date with the paint shop and I need help to figure out what parts I need to change while its somewhat taken apart.

I know there are many parts that probably should be changed while its apart for paint.  So Im asking for some advice on what all of you guys have replaced while your car is apart for paint.  

Here is what I plan on removing, If im missing anything please let me know.  If im going too far, let me know that too.

Coming apart plan.

Front bumper - Remove 2 bolts each side that bolt the bracket to the frame.  Remove and stash

Chrome Strip across front of Hood - No idea how this is fastened, I assume theres bolts, are there replacements?

Grill and headlight doors (Rings) - Done this before, just needs cleaning

Chrome Strips on front of Fenders - There seems to be some black plastic in there and Im not really sure how these come off.  Any help would be great.  Do these come off before or after removing the fender?

Front Side markers - Simple enough

Remove Hood Latch/grill brace mechanism - What is the correct Color?

Remove lower Valence/Stone Guard

Headlight Buckets - They look like *** and id really like to blast and paint them, worth the trouble?  Or should I buy replacements? Correct Color?

Windshield Trim - Not exactly sure how this comes apart. I assume theres a Hook tool you use to release clips.  Ive done it on my Bronco, but it was a pain in the butt to figure out.

Chrome Above the doors - I think this just screws on

Front Fenders - I would like to remove them.  Remove Antenna, Clean up inside, prime, paint with bedliner inside.  Inspect/replace splash shields. Should I re-use the original fender bolts or replace them?

Doors - Remove the doors for pre-paint and jambs and to generally clean the inside and inspect for rust.  Bed line the inside bottoms for protection.  Change all weather strips, lube window regulator, inspect parts for wear. Remove door handles and latch mechanism, remove mirrors, sand and paint.   How do you know if you should replace the hinges?  Are the replacements any good?  

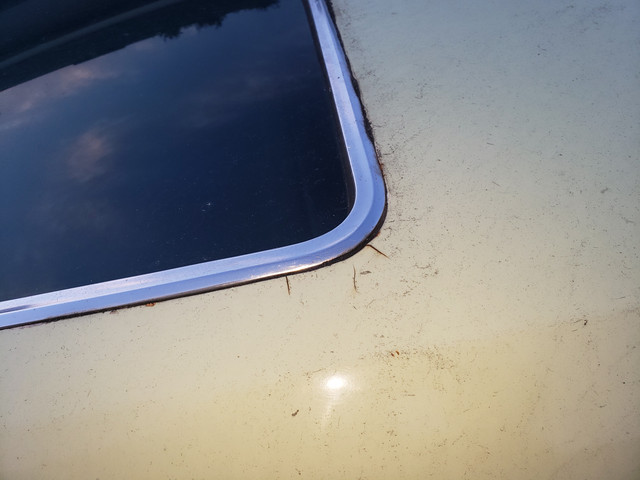
Quarter Windows - Remove, remove trim, remove weather strip and replace.

Hood - Remove, Blast and Paint Hinges/springs - What is the correct color?

Body Side Molding - My car has Body side molding.  This is the main reason I want to remove the front fenders and doors.  The holes have to be welded shut and ground to shape.  This is my biggest worry.

Rear Window Trim - Hook tool again?

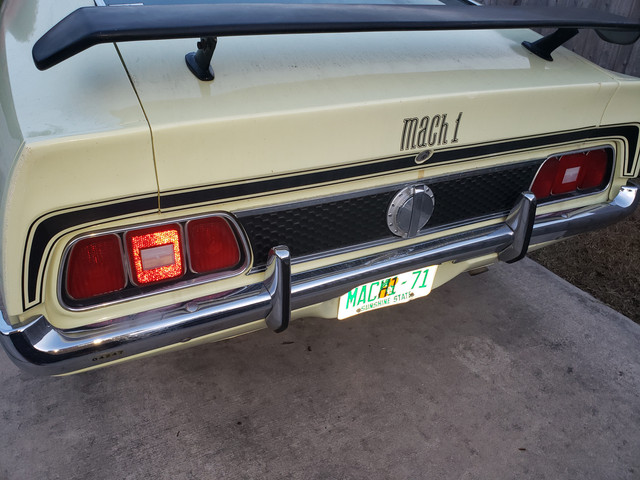
Rear Spoiler - should be straight Forward

Trunk Key lock mechanism - Should be Straight Forward

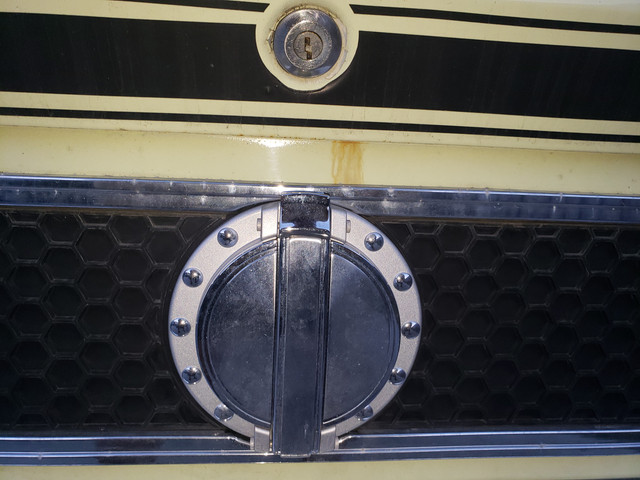
Rear Tail light filler panel and gas cap - Done that before

Rear Tail Light housings - Replace Gasket, Clean and inspect, Paint black accents - Correct Color and finish?  Flat Black?

Remove rear Side Marker Lights

Remove rear Bumper

Remove rear Quarter Extensions - Replace Gasket

I want to make this job go smoothly.  So Im trying my best to be prepared.  Any help would be great.

 
Last edited by a moderator:
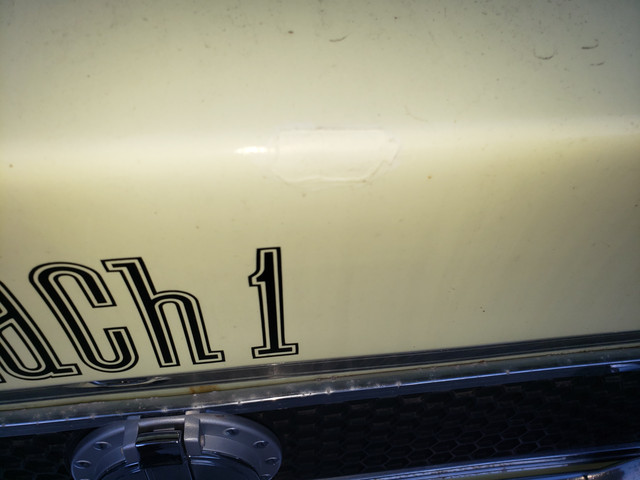
It will be so nice to get the hodge podge assortment of decals removed and correct decals applied. I wanted to ditch the 69/70 spoiler and put the correct one on but my son likes it being different.

 
Last edited by a moderator:
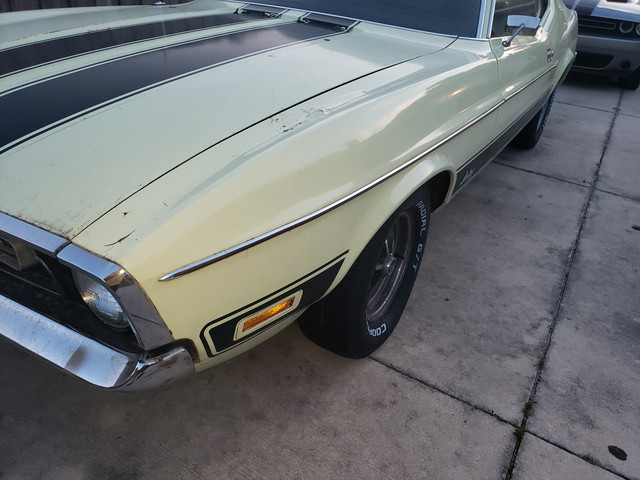
What's the VIN on your car? It has a bunch of non-Mach features that don't make sense to me to have been added.

I'd recommend you pick up the Osborne assembly manual for 71/2, it has exploded diagrams of many of the items you're asking about, and the Body manual in the 71 Shop Manual does as well.

 
It will be so nice to get the hodge podge assortment of decals removed and correct decals applied.  I wanted to ditch the 69/70 spoiler and put the correct one on but my son likes it being different.
Be careful when removing the body side molding - it has some decent value

If you clanged to a 71-3 spoiler, you would need to weld the holes and drill new ones... width is different between the spoilers - that is a bit of a challenge on the flat trunk lid

Something to consider ... look at that spoiler stands on the bottom... is it an original late 69 / 70 factory spoiler you might want to sell that and buy a repro

Other thing are you adding sport mirrors - now would be the time to drill holes and add the riv-nuts

ALSO be very careful removing any of your aluminum moldings

 
Last edited by a moderator:
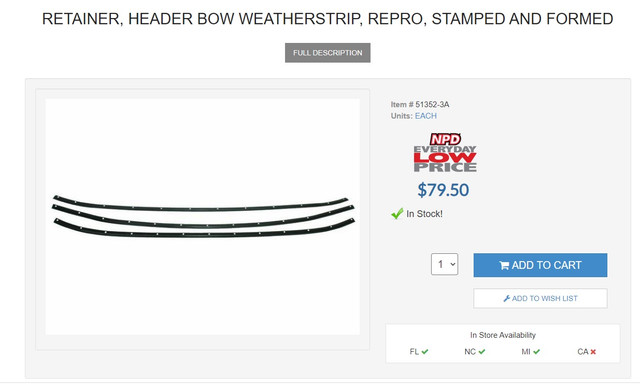
Looking at weatherstrip.

Where does the rear window weatherstrip go?  Does the rear window come out to replace this?  If so, ill pass on this one as its not leaking and it can be taped.

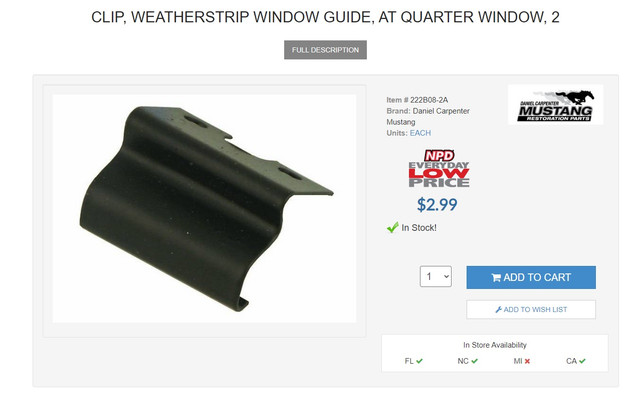
Where does this one go?  And do I need to replace it?


Think I will need this too?


Hemikiller,

Its a regular fastback non-mach 1 car. Im converting it over to full Mach 1.

Don,

Thanks, I will be extra careful with the side molding. We plan to remove it and weld it closed. Im going to have to figure out how to remove the clips from the inside. Since the doors and fenders are coming off, it shouldnt be rocket science.

 
OMS Don,

Do you have these?

"I'd recommend you pick up the Osborne assembly manual for 71/2, it has exploded diagrams of many of the items you're asking about, and the Body manual in the 71 Shop Manual does as well."

 
Coming apart plan.

Front bumper - Remove 2 bolts each side that bolt the bracket to the frame.  Remove and stash

Chrome Strip across front of Hood - No idea how this is fastened, I assume theres bolts, are there replacements? If the car were a Mach 1 the hood trim and fender trim would have been painted body color. There are acorn speed nuts along the inside of the front of the hood. I think the do repo but also has some issues with length I have been told.

Grill and headlight doors (Rings) - Done this before, just needs cleaning

Chrome Strips on front of Fenders - There seems to be some black plastic in there and Im not really sure how these come off.  Any help would be great.  Do these come off before or after removing the fender? You can get to the fasteners after you take fender off easier. Same as hood should be painted body color. 

Front Side markers - Simple enough

Remove Hood Latch/grill brace mechanism - What is the correct Color? The actual hood latch mechanism is not painted. It should have Iron Phosphate coating along with these other pieces. Hood hinges, caps on shock towers holding the shock, if you have AC the steel bracket with the belt adjuster and the adjuster are Iron Phosphate. On the inside of the car the emergency brake mech and the gas pedal bracket. 

Remove lower Valence/Stone Guard

Headlight Buckets - They look like *** and id really like to blast and paint them, worth the trouble?  Or should I buy replacements? Correct Color? The L shaped buckets are Satin Black. The brackets bolted to them going to radiator support are Slop Gray. You can get from NPD or any Mustang supply. The center bracket if you have just one is Slop Gray. The two little braces that go from fender bottom and valance to radiator support also Slop Gray. Your shock tower braces are also slop gray and when you pull the fenders off there is a cover over the spring and shock tower it is also slop gray. The actual hood latch mounted to the hood is zinc plated with yellow dicromate. 

Windshield Trim - Not exactly sure how this comes apart. I assume theres a Hook tool you use to release clips.  Ive done it on my Bronco, but it was a pain in the butt to figure out. The windshield and rear window trim do come off using a tool that does spring the clip in as you lift lightly on the trim with plastic trim removal tool. The clip release tool can do both but it is metal I do not like to rub metal on the window.  If it does not come off easy you are not getting the clip released do not force it. Rear window trim same except the two pieces along the bottom just have screws. 

Chrome Above the doors - I think this just screws on The roof rail screws are under the roof rail seal so you have to scrape it off to find them. The trim goes down the A post and one screw at the end of the rubber. As you find the washer head phillips screws holding the roof rail trim put in a bit and hit with hammer to break the rust bond loose. The little black clip you had pic of is on the roof rail and helps hold window in rubber when at speed. Daniel Carpenter makes perfect fit roof rail rubber molding to go back. Headliner has to be replaced with roof rail, windshield and rear window out of the car. I do not use the foam tape on the roof rail I put two beads of the 3-M strip calk which lasts forever and seals much better. You can polish all the aluminum trim but is tricky if you have not done before. There are several threads on the forum on how to.

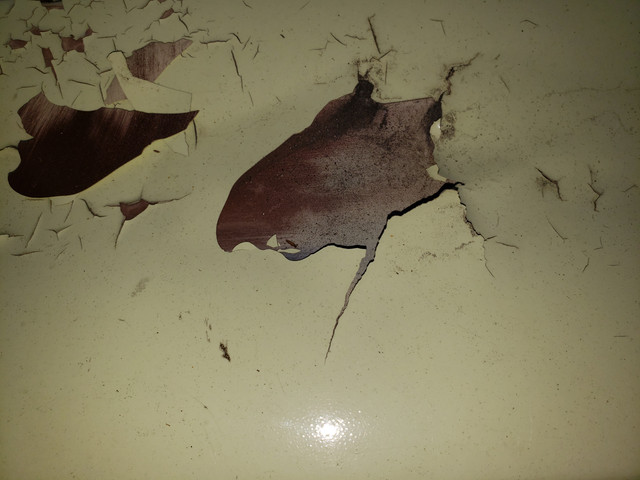
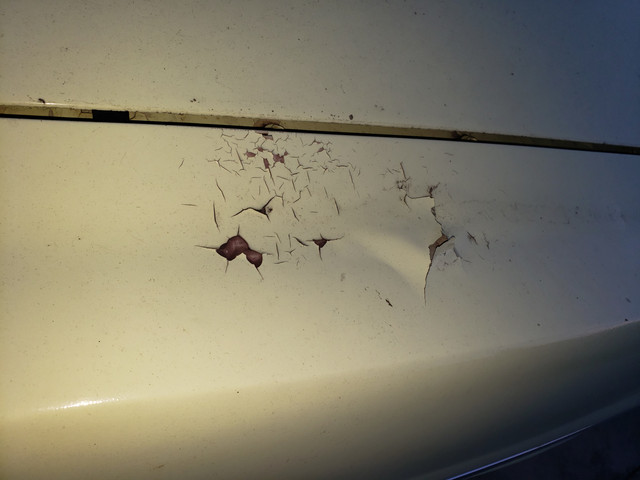
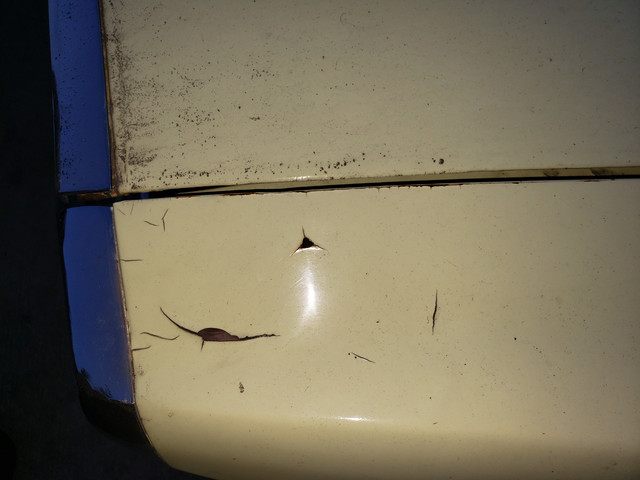
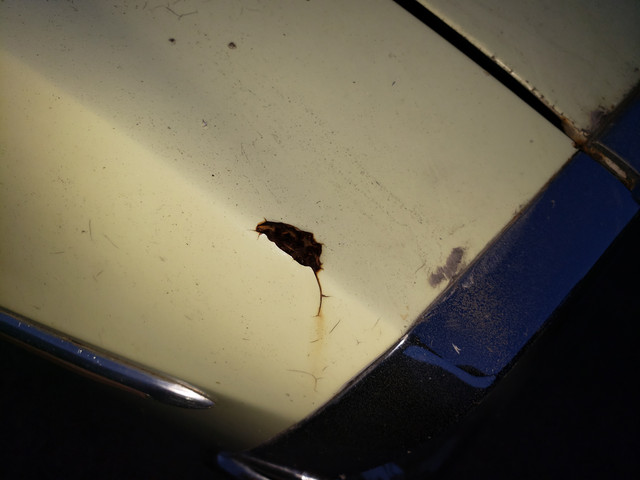
Front Fenders - I would like to remove them.  Remove Antenna, Clean up inside, prime, paint with bedliner inside.  Inspect/replace splash shields. Should I re-use the original fender bolts or replace them? You will probably find that the sealer used around the firewall, A post and torque boxes has cracked letting water in and rust has gotten hold. You should scrape the old sealer off was put on raw steel so the cracks let water get on bare metal. Re seal and coat with some type of rust barrier. If you have not checked your cowl for leaks you should most have holes and need replacing. 

Doors - Remove the doors for pre-paint and jambs and to generally clean the inside and inspect for rust.  Bed line the inside bottoms for protection.  Change all weather strips, lube window regulator, inspect parts for wear. Remove door handles and latch mechanism, remove mirrors, sand and paint.   How do you know if you should replace the hinges?  Are the replacements any good?  If you remove the doors you will loose any alignment you have now. The hinges should be rebuilt with pins and bushings. For sure the body shop needs to put the doors back on and align before they paint. Be sure they add weight to door to simulate the glass and pieces you have taken out. Take the belt line window trim out also. Insid the doors the sealer is also cracked and coming loose in most so you might want to clean some out.

Quarter Windows - Remove, remove trim, remove weather strip and replace. Leave the windows out until painted.

Hood - Remove, Blast and Paint Hinges/springs - What is the correct color? Hinges are Iron Phosphate no paint.

Body Side Molding - My car has Body side molding.  This is the main reason I want to remove the front fenders and doors.  The holes have to be welded shut and ground to shape.  This is my biggest worry. Getting the trim off from the protection package should not be an issue. Like Don said do not just tear it off hard to find good set. Was never on a Mach 1.

Rear Window Trim - Hook tool again? It is a pretty good bet there is rust around the rear window especially at the bottom corners. Windshield is put in with urethane but the back glass has rubber seal. Easiest to remove by just cutting the rubber seal all the way around and remove window then the rubber. Get new Carpenter seal. Do not use the foam tape going back and leave window out until painted. You should hammer and dolly flange that the rubber goes on and remove rough places from spot welds and any rust. After paint trial fit trim before you install window. Window install threads are on forum.

Rear Spoiler - should be straight Forward

Trunk Key lock mechanism - Should be Straight Forward

Rear Tail light filler panel and gas cap - Done that before

Rear Tail Light housings - Replace Gasket, Clean and inspect, Paint black accents - Correct Color and finish?  Flat Black? If you need new tail light lens and frames again Daniel Carpenter makes perfect match. You will have to mask off and do the satin black details. There is  an area on each side next to tail light opening that gets painted mat black to match the honey comb panel. The actual honey comb panel was not painted just as molded. The trim needs strip and polish also threads on forum. Daniel Carpenter makes much better seals for the lights also. 

Remove rear Side Marker Lights

Remove rear Bumper

Remove rear Quarter Extensions - Replace Gasket Not really a gasket but maybe a bump strip to prevent the edge of the cap from chipping paint. Seal the nuts with the 3-M strip calk. 

I want to make this job go smoothly.  So Im trying my best to be prepared.  Any help would be great.

The more you get out of the body shops way the better. If they have to mask off windows, doors and such you will pay $50 - $100 and hour to put tape and paper on. Interior should be out and just a seat to move car around with. Hope the cowl is good but not likely. Do searches lots of info already on forum.

 
I ordered the Osborn books, couldnt find anyone with the body assembly book in stock but I found a CD on ebay.

 
Whatever you take off - take LOTS of pictures before you take anything off and after you take it off. Detailed pictures. With bits of painters tape to make labels so you don't forget what the picture is of. I have found it helpful to lay the parts out on the floor in an exploded view and taking photos of that so I remember how things go back together. You may think you can remember now, but once it's apart, life happens and it might be months or years before you can put it back together.

Get heavy duty ziploc bags and bag assemblies together - fasteners and all - and label the bags. Put the bags in plastic stacking bins that group assemblies together, then put labels on the bins that say what is inside. If the parts are too big for a bin or bag, use rugged waterproof labels to tag the parts. I find it helpful to clean parts as they go in the bags. You get a feel for the condition of your parts and what might need to be refinished or replaced. Take notes of what you want to replace so you can shop without having to dig into your bins and you are less likely to forget something. Clean parts store better and they are nicer to handle when you put them back on the car. Label things left or right. Storing a disassembled car takes up a surprising amount of space, and it's rare that you can leave parts in one place while you are waiting for the car to come back from the body shop. Being able to move things around easily is handy. And after a few shuffles, remembering where you put everything when you want to put it back together can be a challenge. See above...

Take photos of all the tags, stickers, stamped labels, paint daubs, writing - everything - on parts you are going to restore/refinish. You may want to put those markings back.

In short, overdocument EVERYTHING. It slows you down so you don't break or lose anything as you disassemble, you can answer questions from data rather than memory when the body shop calls, and you have the information you need to put things back together. And, if for some reason, you aren't the person who puts it back together, the person who does will appreciate your attention to detail. I have seen cases where a really good set of notes and photos for a project car has made the value of that car higher to the buyer.

 
Last edited by a moderator:
Good advice Mike,

I have planned on doing all of that.  Ive been thru this process on my Bronco, It helped tremendously.  One thing I learned from that project is, you can Never take too many pictures.  No matter how many you take, theres always another angle you wish you had when your putting it back together.

Im all for bag and tag.

Im just trying to decide if its worth the trouble to take the doors off.  I think my hinges are OK.  The door lines up good and isnt hanging on the striker.  I may leave it on, but I will always know theres ****** paint under the hinges and it will irritate me.

 
Last edited by a moderator:
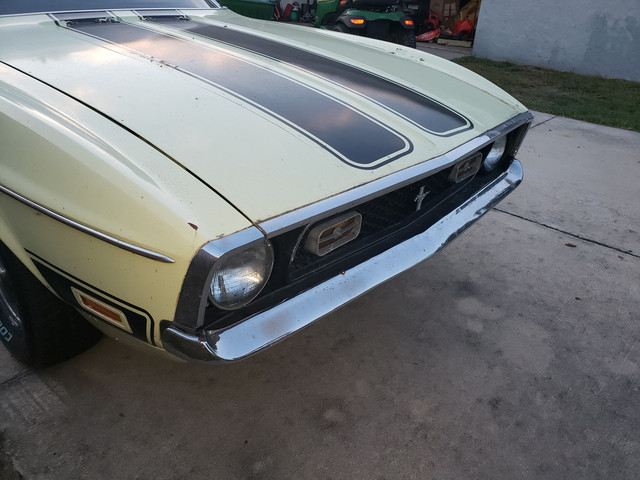
I was looking around and thinking about the hood graphics, is there a template anywhere?

David Fowler said the templates are all wrong, which I don't doubt. I would like a template though even if it's not exactly correct. I can use his hood as a reference to correct errors in the template.

 
I was looking around and thinking about the hood graphics, is there a template anywhere?

David Fowler said the templates are all wrong, which I don't doubt. I would like a template though even if it's not exactly correct. I can use his hood as a reference to correct errors in the template.
People have been using the hood templates for many years - the issue was with one magazine article that had the setback on the front of the hood off by an inch

 
Where can I locate one of these templates?
If you order one of the templates and have delivered here I will put on my car and take pictures to see exactly if right or wrong. I have been told by several members that they are wrong. I cannot say either way. But I do have three original hoods with the factory paint. What I see on lots is the radii are wrong on the front and how it transitions to the wider part.

 
My 71 is nearing its date with the paint shop and I need help to figure out what parts I need to change while its somewhat taken apart.

I know there are many parts that probably should be changed while its apart for paint.  So Im asking for some advice on what all of you guys have replaced while your car is apart for paint.  

Here is what I plan on removing, If im missing anything please let me know.  If im going too far, let me know that too.

Coming apart plan.

Front bumper - Remove 2 bolts each side that bolt the bracket to the frame.  Remove and stash

Chrome Strip across front of Hood - No idea how this is fastened, I assume theres bolts, are there replacements?

Grill and headlight doors (Rings) - Done this before, just needs cleaning

Chrome Strips on front of Fenders - There seems to be some black plastic in there and Im not really sure how these come off.  Any help would be great.  Do these come off before or after removing the fender?

Front Side markers - Simple enough

Remove Hood Latch/grill brace mechanism - What is the correct Color?

Remove lower Valence/Stone Guard

Headlight Buckets - They look like *** and id really like to blast and paint them, worth the trouble?  Or should I buy replacements? Correct Color?

Windshield Trim - Not exactly sure how this comes apart. I assume theres a Hook tool you use to release clips.  Ive done it on my Bronco, but it was a pain in the butt to figure out.

Chrome Above the doors - I think this just screws on

Front Fenders - I would like to remove them.  Remove Antenna, Clean up inside, prime, paint with bedliner inside.  Inspect/replace splash shields. Should I re-use the original fender bolts or replace them?

Doors - Remove the doors for pre-paint and jambs and to generally clean the inside and inspect for rust.  Bed line the inside bottoms for protection.  Change all weather strips, lube window regulator, inspect parts for wear. Remove door handles and latch mechanism, remove mirrors, sand and paint.   How do you know if you should replace the hinges?  Are the replacements any good?  

Quarter Windows - Remove, remove trim, remove weather strip and replace.

Hood - Remove, Blast and Paint Hinges/springs - What is the correct color?

Body Side Molding - My car has Body side molding.  This is the main reason I want to remove the front fenders and doors.  The holes have to be welded shut and ground to shape.  This is my biggest worry.

Rear Window Trim - Hook tool again?

Rear Spoiler - should be straight Forward

Trunk Key lock mechanism - Should be Straight Forward

Rear Tail light filler panel and gas cap - Done that before

Rear Tail Light housings - Replace Gasket, Clean and inspect, Paint black accents - Correct Color and finish?  Flat Black?

Remove rear Side Marker Lights

Remove rear Bumper

Remove rear Quarter Extensions - Replace Gasket

I want to make this job go smoothly.  So Im trying my best to be prepared.  Any help would be great.

Hello there,

 I had a paint and body guy do my paint job, the guy was anal. That’s the type of guy you want to do the job. He removed everything bolted on the car. He removed the complete nose, doors, valances, bumper, trunk lid, trim and any other parts that were attached to those parts. Each part was painted off the car then reinstalled. It’s a lot of work. I didn’t have any major rust problems. The cowl was solid, luckily there was a ton of rusty jones undercoating on the undercarriage. The only part I had to replace was the drivers door. He said it appeared to be hit a long time ago on that side but everything was repaired correctly. He thought the hit must of caused a leak into the door. The passenger door was solid. I’m doing what you are doing on my 69 Mustang convertible. It’s a long slow process. I don’t mind doing the work but I can tell you I have a lot of more respect now for the people who do this work because of there skill level and patience. I wish I had something good to add or more insight. I owe my cars outcome to my body guy. I just shelled out the money to have it done. That was painful enough. Good luck with your restoration. I look forward to seeing the finished product. PS. Don’t rush it. Sometimes you have to walk away and come back later.

Drive it like you stole it!
 
Back
Top