Fabrice's 429CJ 71 project

7173Mustangs.com

Help Support 7173Mustangs.com:

This site may earn a commission from merchant affiliate links, including eBay, Amazon, and others.
Past weekend was dry, warm...
Sooooo: barbecue time!!

View attachment 53515

All the new parts that I've received over past months were either not coated, simply oiled or covered with some poor paint. 
None had of course the kind of finish I had in mind for them. So spend a good part of my saturday cleaning & degreasing them and mask/tape all the parts I could not remove, rubbers, threads etc..
Then just like the restored parts, they did receive a primer, their respective colors and a nice thick finish coat.

View attachment 53516

Sunday was like xmas, lots to unwrap and it was even time to put some stuffs together, install nipples etc...

View attachment 53517

Reassembled the spindles done last weeks with ther hardware plated last year. 
Installed all back together after a good cleaning and copper greasing of each thread.
Was lots of work to get there, zinc plating them was not the easiest thing to do.
But now, boy do they not look like a million??! :D

View attachment 53522

Yes these are the same!! :D

I know btw I need some wires for their nuts, Anyone have some info on how it should be done the right way? Never done that before, but really would love to have them "twisted" the right secure way.
I will buy some SS wire for that asap.

View attachment 53518

Then it was time to put the top arms together... 50 years old and looking goooood :D

View attachment 53519

Then it was time to put all these babies together back into their original nest that is now making a nice contrast with its semi gloss black.

View attachment 53520

Nothing torqued to specs yet until all is on..

View attachment 53521

Also gave love to the koni's that were plated last year and gave them the car body color (no red), that will look nice into the light grey coils that were done last week...

All with all, it was nice to finally see all the work started last novembre come together! 
The other side fx is that I could get rid of many boxes and create some welcome space.

One regret is that the long part that connects both sides (rod assembly, the drag link I think is the name)
is still at a friend's place where it needs to go under press to correct the bow into it created at some point when someone jacked up the car with it...
No biggy tho, as once I will have the steering box revised, i will need to paint it as well, so will do both at the same time.

to be continued...
Really great work as usual. I like the contrast with the zinc plating.

 
I uploaded a pic of the safety wire you're referring too. I hope it comes up and you can see it Fabrice. In my opinion I think it looks neat and professionally done.

164134485.webp

164134485.jpg


Attachments

  • 164134485.webp
    606.5 KB · Views: 7
Last edited by a moderator:
Fabrice is a very patient man. I say that because of all his great work, but also because he's giving me some help to learn about plating, cause I'm a quick learner but I need a long explanation ;)

 
@bishoppeak
Thx, found same one in a NL online shop for same price, will order that baby. I need check first if it can handle 1mm wire tho.

@Kilgon

Thx, I'm pretty pleased too. Tho, I must say the colours these metallic greys have in real are extremely hard to be photographed. It's even a bit frustrating nobody will see that once the wheels are on :D

@rio1856

Oh that's nice!! I think I will play with different options once I'll have the twisting tool and wire in house.
It's totally overkill and not better than the original way for the purpose, but it surely looks much nicer! Thanks for posting this!

@Manu Mach1

You'll do much better than me in no time I'm sure! 

 
Last edited by a moderator:
Just to stir you thoughts. Remember to cut you a piece of wood to put on top of the frame rail to keep the upper control arm from dropping all the way down when you lift the front of the car. If you do not will crush the upper rubber bushing on the shock. The full pressure of the spring crushes the rubber and will split it. Ford had a special tool but wood block works fine. I had one fall out the other day when cleaning my wheels and sure enough split new rubber on that side.
Your package will go out soon so look for a message when it leaves.

 
Just to stir you thoughts
Actually there is wood already on both sides. just removed them for the picts.  My concern is more to not damage the paint as I do not use rubber on the shocks. Polyurethane made this prob a thing of the past for me. 

Package: (David has located the necessary parts to rebuild our big bad brake boosters and I'm going to operate at least one very soon)
Thx in advance ;) I'll need your lights for the thingy you made to keep it in place.

 
@Carolina_Mountain_Mustangs thx, yes I will do something like that. For now, the SS wire I bought is too thin, need order thicker one...

Time for a little update...
Been busy as usual on the mustang side of things, mainly on my 73 due to  some leak in my exhaust that caused the o2 sensor to go kookoo. AFR all over the place... engine flood... aaaah joys!

but I've also been busy on the 71 a little bit too

derustandplate.jpg

Because we're having an autumny wintery frankly crappy summer, I couldn't do much outside. So focussed on little stuffs that needs to be done anyway that I had planned for the winter. Such as restoring the proportioning valve or derust tons of little things.

A while back a forum member had a car that was going to the crusher, and because my car misses lots of details that I can't find over here.
So this nice gentleman (if you read this, forgot your name m8 sorry!! ) accepted to send me many of the rusty hardware he had on his Californian car for free.
Mainly I was after the big bumper bolts, the braces bolts and nuts, suspension plate, ...  and a few weeks later the rusty package arrived with even more rusty bolts and nuts... One funny detail, the customs had open the package, prolly thinking: "who on earth sends rusty bolts 1/2 way around the globe? there must be something hidden inside..." But no, no drugs, just strong original bolts with genuine rust from California !! :D

So while the rain was doing its wet things outside, I was busy making bubbles in inside and at some point I could even start to put back some parts with some of these freshly restored hardware...

springs.jpg

Managed to reinstall the coil springs. Bought a central compressor supposed to do the thing, but it's only when I've added 7 big nuts to create an offset for the compressing distance that it started to do as expected.
Of course you find out all this only for the second spring! :D

The restored koni's found their way back home, now in their car colour jacket.

placing_stuffs_back.jpg

With more hardware restored I could also put back the plate with the end rubber, And went back at the brakes after that, installing the guards also back from hell rust, all looking much fresher now! :)

placing_stuffs_back_2.jpg

At some point I realised I made a giant leap and could get rid of many empty boxes where all these babies were waiting in for that day... more space and the sight of this once misery looking engine bay made me happy, and even a little bit proud! :O

rotors.jpg

As it was dry for a few yesterday. I've jumped on the occasion and painted my new rotors in the same dark grey. More of a corrosion prevention thing but may be a little to please me eyes! :D
It cost ages to mask them but they should look pretty with the rest once installed next weekend... 

Did many more things here and there but don't recall what exactly!  Lol

To be continued....

 
Last edited by a moderator:
You should be much more than a little proud! :goodjob:

 
Time for a small update...

5 weeks ago, took my 73 with EFI for a spin, and pushed it a bit, ran super fine.
The next morning, it started it, and ran like crap right away. The AFR (air fuel ratio) was showing the max the bradband o2 sensor can show. 35.6. Which means the mix was too lean. In return the computer compensates with fuel. In other words: lean condition on efi means the engine gets flooded in matter of seconds.
Long story short, all pointed to a defect sensor, ordered one, which forced me to wait 2 weeks to test again. No change. Even swapped with the unit ment for my 429. Same except this time there was only one potential bad guy let over: the exhaust.

AFR35.jpg
The hedmans I have on my 351 are noisy by design, after I've changed the headers gasket with no change, I got so annoyed that  decided to remove the header for inspection, tired of assuming...

After enjoying a gym session to remove it on my driveway, it did not take long to spot holes that should not be there. 3 at the flanges. Placed where the tubes meet the flanges and where no gasket can seal. While at it, also flatenned the flanges to have more surface area on the heads and while doing this, also exposed more weak spots and holes in the making. 

I ended up welding in and out each and every flanges all around from behind, redid the sensor bung weld with extra thick hot welds and pressure-tested it. Airtight. High temp paint on them after a good brushing session and they were looking like a million again :D

Few bad words later, after I've replaced the sparkplugs that had seen too many flooded conditions and resetted the unit. Turned the key, and that baby was turning as a clock again, with ideal idle mix AFR values! The computer agreed it was air tight and there was no more false air with unburned oxygen coming in!

I plan to change these for a while but gld I did not as after looking at close ups of header from Hooker and others, even if coated and expensive, all the ones I saw are showing the same design that is ok for carb cars but will need correction. So instead of the nice coated headers I was thinking of I think, i will either let do custom SS headers here or buy cheaper version, correct and let coat over here...

For now, really happy it's running great again even if that costed me a full afternoon to fix.

safety_wire.jpg

That AFR issue fixed, it was time to return on the 71 and next was to secure 4 of the botls on the spindles with stainless safety wire. I had high grade SS 0.7 wire in house for that and as I couldn't find the same in 1 or 1.5mm, went over to plan b and tressed them before use them. Once in that state, they look thin, but man what a strong wire, I can tell you these won't let go for a thousand years at least!! It took a while but got them finally in place, similar as the original patern, but their twisted look made them look as if I knew what I was doing :D

rotors.jpg

Then 'installed my new rotors with all new goodies in and out. Where most work went into slaming in these new us (with chinese sticker) stamped dust covers without damaging them. Ended up using the left over races to do that. All lubed in a good bearing grease, they now turn and feel like new. Wait... they are! And oh boy do they not look good on the spindles?!! :D Glad I did the extra mile to paint them!

callipers.jpg

Then wanted to install the callipers but as they were not matching the greys and their protection could use a boost, I needed paint them first. As I was planning to install the sway bar as well, found out the hardware for it was also lacking long term protection.
Thanks to a hole in rainy clouds, I was able to spray all this Saturday and plan was to install them back yesterday...
But as always, plans changed and I'll be doing that next weekend!

strutrods.jpg

In between things, been busy restoring some of the last remaining rusty things on the front: the strutrods. As I wanted plate them this Sunday, I had to make sure they'd take a bath for the night. After a good brushing to remove the thick rust, that's exactly where they ended. By the morning the brown misery was gone and the metal back to a good a new state. Not super easy to plate, I ended up with a set of rods and their hardware in a zinc jacket by the end of the day.
The very hard to turn nuts are now moving on the clean threads as if new. Should spare me some muscles when I'll place them back (I still remember the removal!!). They'll receive their specific grey, which I'll apply together with my center link that is waiting on my friend to return from his vacation as it needs to meet his press first to fix a bending...

swaybar.jpg

As I needed do more than usually, to plate the rods (moving them around often, change anodes positions etc), I wasn't able to install the calipers but managed to place this new swaybar. 
The original one wasn't present on the car and bought one made for 429 last year.
No mickey mouse material for sure with its large diameter, after some gym I managed to have it almost in. But will need to wait till I can low down that car to have the right angle. As is, not in line, the polyurethane bushings do not allow me to play enough to bolt and have the last grommet on... I'll correct that and tight all the rest once back on the floor.

And thats how you start the week with muscle pain. Again! :D

To be continued...

 
Last edited by a moderator:
Quick small update...
Been busy on non mustang things these past weeks, but not entirely..

install_callipers.jpg

For 2 weekends in a row, I kept postponning the further install of my brakes.
Simply because after seeing similar parts installed this past december on my 73 that are already starting to rust (that I now regret to have trusted their finish, expecting at least to last a couple of years) So been busy protecting 99% of the new parts I've received... From pressure plate to brake flexible fittings.

Wanted install the idler arm to find out I forgot to handle the hardware that goes thru the frame that was still on the old one. So did that. 
The new strut rods rings/rubber were already starting to rust inside the box! So addressed that.
Wanted to lower the car with wheels on, but the rusty old cragars were looking so bad, even if I will replace them when the car is finished, I couldn't bare to see these wheels on my restore suspension, so fixed that...

draglink_restore.jpg

A while back, I found out the drag link was crooked. Left it at a friend's place having a press and plan was to correct it while we do the AOD swap on my 73, but last week he surprised me by bringing me the corrected link.
It was straight again, but also full of ancient hamering marks, rust etc...  so fixed that too

dragling_strutrods.jpg

A bit carried away on the prep, after a a good zinc bath, the baby was looking real good. So good that the strut rods done last week got jealous!! :O  So redid them using the same treatment, which is to polish the metal, re-zinc, paint and finish all with a layer of gloss coat. There are some flaws here and there, ancient marks still present etc.. but despite these, I'm pretty pleased with the way this original once rusted to death hardware is now looking!!  

Hopefully now that most parts are durably protected, I should now be able to install more parts back next weekend!

To be continued...

 
Last edited by a moderator:
Very busy with work lately, I've postponned to update and today after been asked why there was no update, I realise I've been lazy. 
Sorry for that!! :O

Soooooo, here some highlights of my past weekends! Not perse in chronologic order...

73wires.jpg

On the 73 front, totally annoyed at that hot start prob being back (despite having a new strong batt, high torque starter) , which left me stranded in middle of nowhere for 2.5 hours till it cooled off after I had the great idea to go enjoy a big mac menu far from civilisation. So basically redid all the wires and replaced all the old gauge 4 with gauge 2 and 1 ( 50mm2) wires and I finally have a car that does start again. Did salvage and renew the original bracket and other details for a safe and clean install of the new thicker lines.

Now very near of doing that FMX/AOD swap, I did a premiere for me which is to use proper tools (and reading glasses to actually see the tiny holes into the tools) to end up with my first waterproof connector ever. In this case, its the light switch on the trans side that will need be connected with the original one... Ok, I did F..up one pin and needed redo it! :D

and did lay quite a few enjoyable miles with that baby till the Dutch weather decided it was enough and I should stay in the garage to work on the 71 instead!

brakes_calipers.jpg

Brake calipers, you order: you install and you're done. Wrong!! Turns out, and not just the callipers, that NONE of the new parts I got were delivered with descent protection. In fact some were already rusting into their boxes!!!  So each part, from pressure plate to little hardware has been plated, painted etc...
Some parts, like the "pads tensionners", whatever these little brackets supposed to hold the pads on their position, were simply not of the right shape, so needed to modify them. Then found out not both sides were having same parts, worse, driver side was not even having all the necessary parts. So needed order extra to finally be able to install them, now all nicely bling bling in their matching metallic grays.

Question before I forget: I have also started install stainless brake lines. But classic tube does not provide holders. I did re-plate for now the old rusty ones: anyone know where I could buy stainless ones or at least know their name to ease the search?

strutrods_and_swaybar.jpg

The once rusty strut rods, now totally sexy are in place, not even close to their final adjustemnt, but just enough so all the bushings parts are all falling to their place.
The sway bar too. You think you order and install... of course not. After finally have the car back on her refreshed cragars, the problem to install them wasn't the angle, it was simply that the provided rod were at least 1/2 inch too short, and that was enough to not be able to engage at least a bit the locking nuts. So went to my fav special stuffs shop and found 2 of same dimensions except they were at the right length and install became a breeze. 10 buxx gone again, simply because I didn't get the right hardware...

Soon forgot all this as my eyes told me they were very pleased with what they saw once I was done with the gym session to secure the sway bar bolts! :D

nextpatient.jpg

Bling bling is nice, but you value the shine only because there are parts that are lacking of it! Meet my next patient: The brake booster.
This fine 50 years old piece of equipment known to be fine before the car was parked about 25 ago, was found to be soaked with brake fluids a few years back when I've removed it. Ordering one of these babies is no longer as before where you'd pay an extra 50buxx for the core if you did not send it back. Instead, nowdays, you pretty much have to send the unit, let it be repaired, and once back to your place after a zillions of weeks waiting, you found out that import fees, transport and the unit repair itself is an expensive thingy.
For that reason, 2 years ago, I bought a Leeds, bits smaller one, thinking it'd be ok for the 71. Thx to very weird brake probs on my 73, I ended up install it on it (to find out the booster wasn't part of the prob) and because it's quite some gym to replace it, it will stay on it for a while.

Time past and saw a post from David where he said he had located a kit to repair his. Long story short. I have a kit provided by David for this Bendix unit in house and because the planets were aligned the right way 2 weeks ago, I decided to repair that 71 booster...

booster_separation.jpg

Before to be able to do anything usefull on and in it, you need first to open it. The two parts casing is hold together by tabs. The rubber squeezed in between ensures all stays sealed. Because of the push rod and shape on the other side, you need some fixture to hold everything. Lucky me, my work bench has the deluxe option that was making this a breeze. A huge wooden vice with plenty space for the 4 bolts, enough depth for the rod to have the front on top, totally secured.

Note that if you plan to do this too, that its now a very good idea to mark both sides so you can realign them back exactaly how they were..
That's also when I decided to wrap the "hamburger" and keep it under pressure before slam the tabs open and have a way to prevent UFO's, as I knew there was a spring inside, but not much more.. Turns out not to be that wild!

booster_open.jpg

Once open, you discover it's not that of a puzzle. all you see is a piston with the rubber diaphragm, a spring and the rod that you saw going into the master cyl.
And good news, as said above, the spring isn't that strong.
In my case, as expected, even if I had removed loads, there was still plenty brake fluid. and while its not relly obvious on the pict, the corrosition where that matters the most (where the rubber seals), big chunks of rust had started to even ent rthe rubber. In this case, I was right on time, it will need some serious massage to ensure proper contact, but nothing really hard, also easy to reached.

booster_paintremoval.jpg

The fun continues! Time to remove the old paint( s) and inspect where the metal is really pitted and prep the guys for an acid bath...
Once more my new German friend paint remover did that painlessly and ended end up the raw steel and rust.

booster_derust_polish.jpg

Spread over a few days, it's been about bathing in acid, remove the most of the pits, polish parts...
At some point found out that kit isn't the right one :( 
Most parts like the valves rubbers are, but the diaphragm is different. Some reaserch online showed me there are 71 bendix models and 71-73 bendix models.

As David aka  @Carolina_Mountain_Mustangs  told me it did fine for his 73, I guess I was having the 71 only model which isn't having the same piston shape. (as you can see above the profile is different)
But good news is that the original rubber, in the nowadays very expensive PPPP rubber quality, was as new after a good clean. I only needed to give it extra love at the contact locations where the rust tried to push itself into it. Carefully massaging it with cloth with solvant gave me a clean smooth contact surface there. So I wasn't too disappointed the new ones were not fitting.

I did not manage to free the valve from the rod, locked by a mechanism similar to engine valves and some weird pin. Too afraid to break the bakelite as it's really not ment for maintenance. Especially after a good inspection and clean up with brushes and alcohol where all looked fine, not even sure the rubber valve of the kit was the right one either, I saw no reason to risk ruining the party.
If someone knows the procedure to open it, please come forward as I have a 73 to do as well! :D 

booster_plating_prep.jpg

sssssh, bublubblebubble, zzzzziiiiii, pssshii, zzzz, weeeeee.... lots of bubbles, friction and spray noises further, the love I gave to it started to be visible...

booster_assembled.jpg

Then it was time to put it all back. Knowing exactly where it was supposed to go helped greatly and once all the freshly plated and rubbery folk was sandwiched back and secured again on my bench, the tabs needed be pushed back. David warned me I might break one or 2, but none did. I even hammered them extra to even increase the pressure and in matter of minutes I ended up with a reassembled booster.
Basic pressure test told me I should be good, but I will as soon as weather permit will connect it on my 73 and let the engine run a bit to see if it really works.

If it passes, it will receive as soon as the weather permits it, a good spray. Together with other few details that need to be done in same colour. For now, under a zinc jacket, it can wait.

protecting_new_stuff.jpg

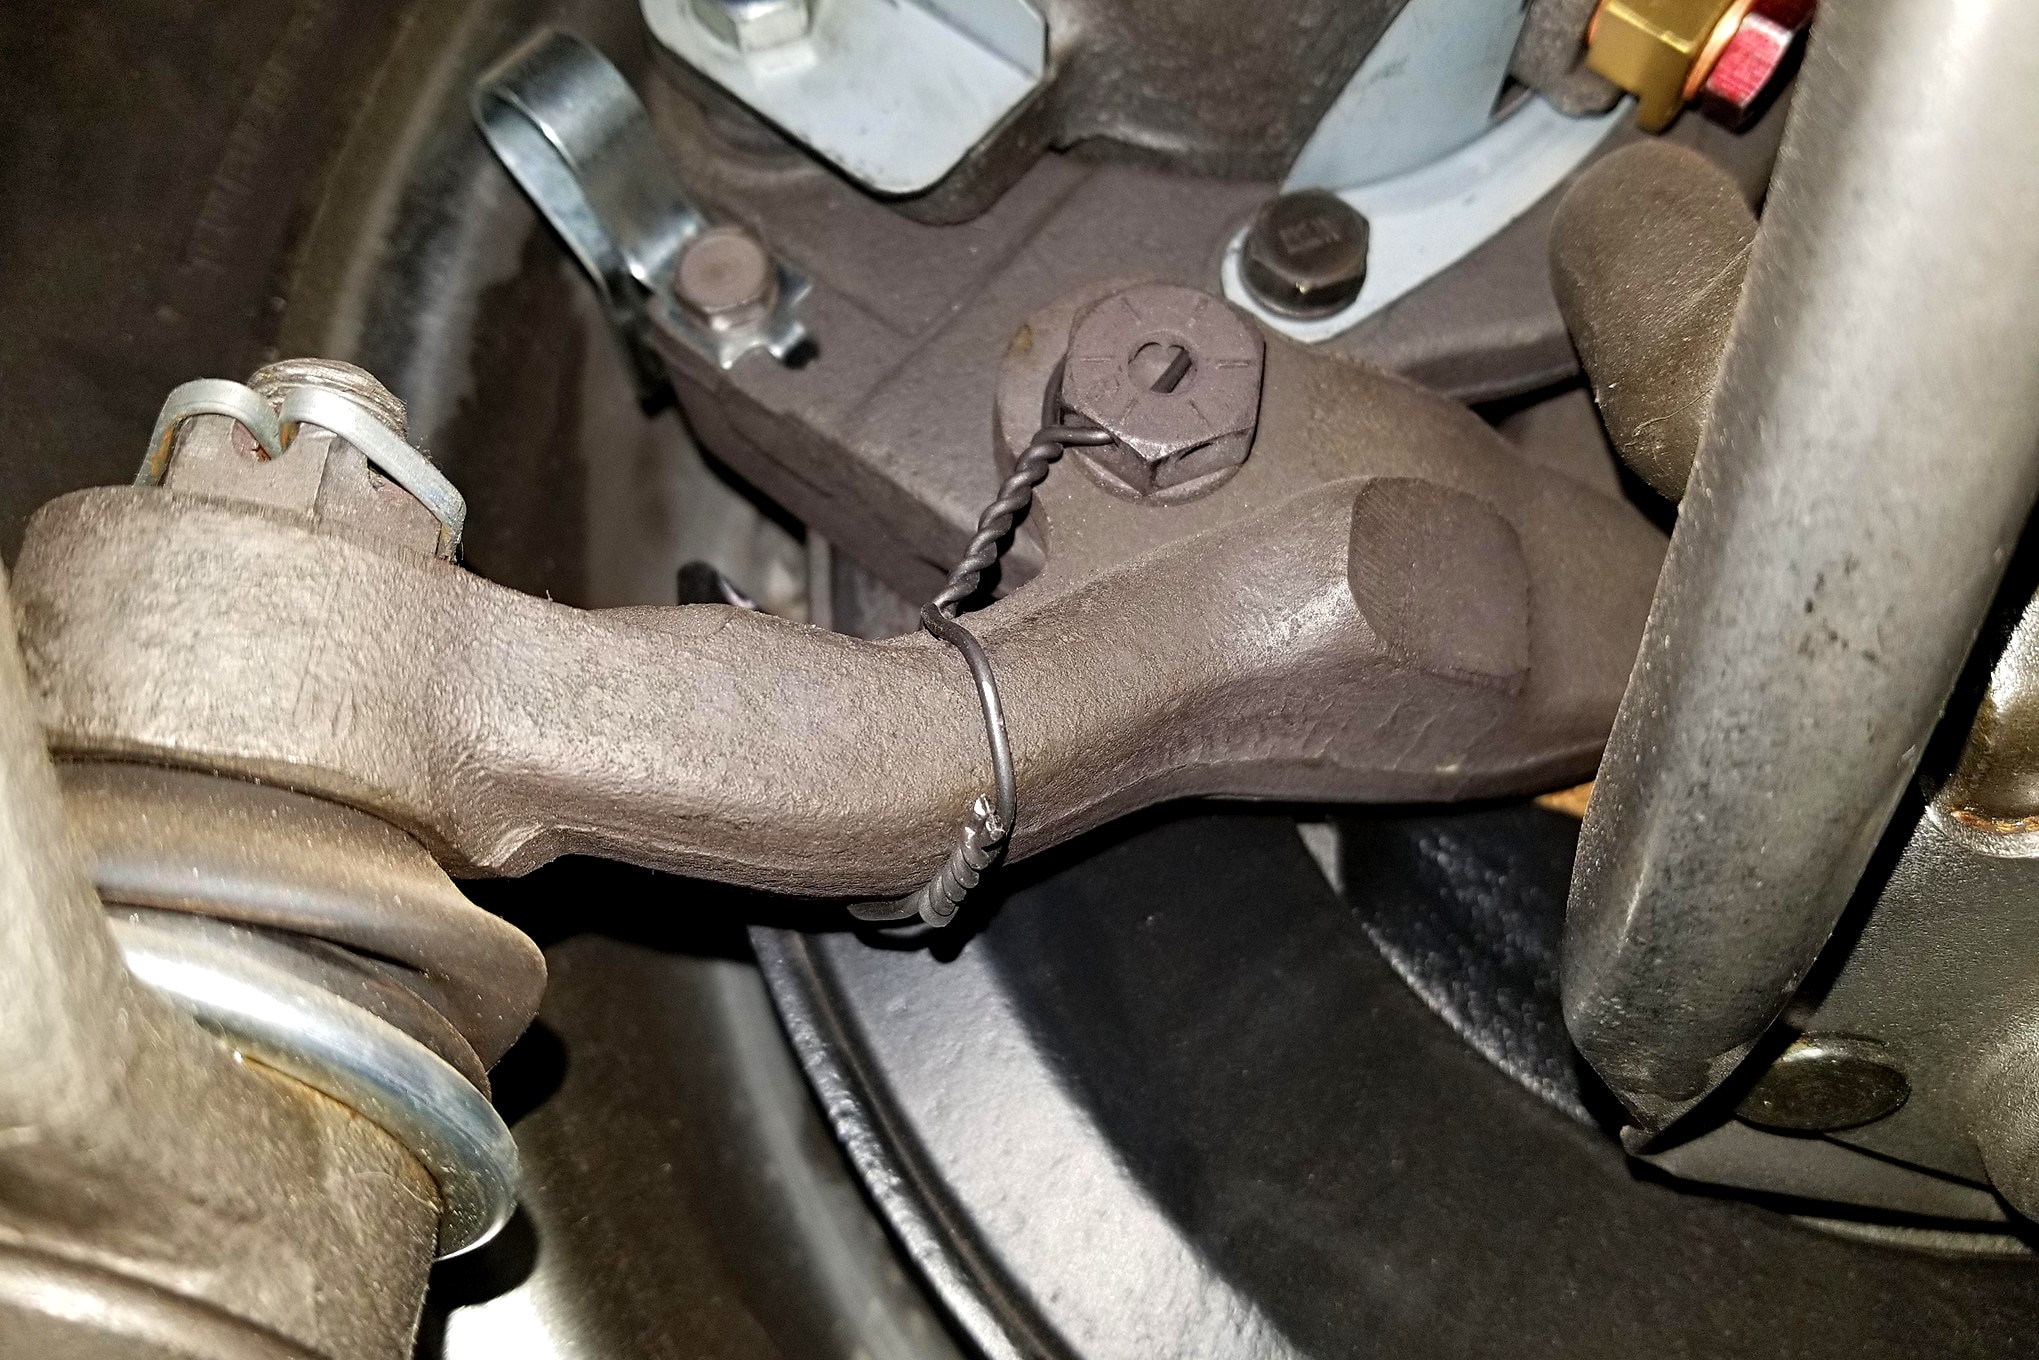
New stuffs really need be handled, top left you see that new tie rod end (that I forgot to order with the others that came last week) was already starting to rust. So after derust it also received primer, paint and coat. Each rod also got its threads plated and ended up with tie rod assembly that was looking as they should have.

Found out that the idler arm bracket from Moog's, wasn't machined completely to match the long bolts going thru the frame, so carefully drilled and filed to match using the old one and been able to install the idler arm as well without damaging the paint.
Another empty box could leave the garage yeeah! :D

idler_and_tierods_installed.jpg

After some gym session, loads of elbow oil, I finally could see all these goodies assembled together. Only lightly tighten as I have a few more to connect on the other side. Really pleased with the results so far!

next_victim.jpg

I did more stuffs that I have skipped for this already way too long update, but here's a glympse of my next patient and what you might see next time...

To be continued...

 
Last edited by a moderator:
Back
Top