Have started the long job of cleaning the 73 Mach 1

7173Mustangs.com

Help Support 7173Mustangs.com:

This site may earn a commission from merchant affiliate links, including eBay, Amazon, and others.
Looking forward to seeing the mustang all cleaned up David. Make sure you take lots of pics before you ship it to NC.

John J
John,

I only live about 100 miles from the museum in Charlotte. I live in western N.C. in Hendersonville. I go to the swap meet at the track every April also. I will probably take the car down myself.

 
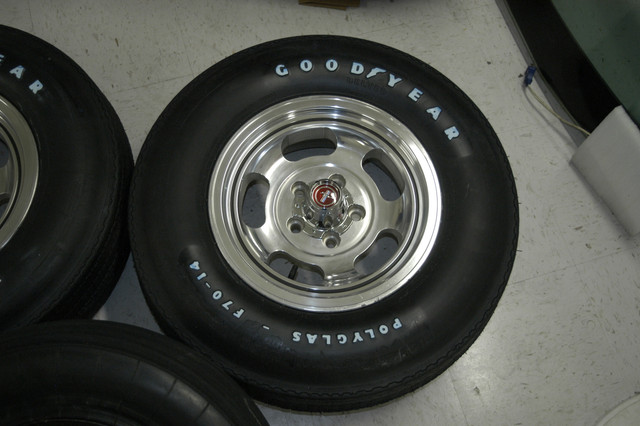
Ok got some pictures of the newly mount Goodyear tires on the polished Forged Aluminum wheels with NOS center caps. I use SS screws to mount the caps with never seize on the threads. The original screws were self tapping so they broke lots of times when trying to remove them. Self tapping wedges there way into the hole like the door hinge bolts do. The holes are 8-32 size so I used a GH-3 8-32 tap to clean out the holes. The GH is the amount of oversize the tap is. GH-3 is .0015" oversize. When doing tool work if you do not use oversize taps the holes shrink in heat treat and you cannot get the screws in or very tight.

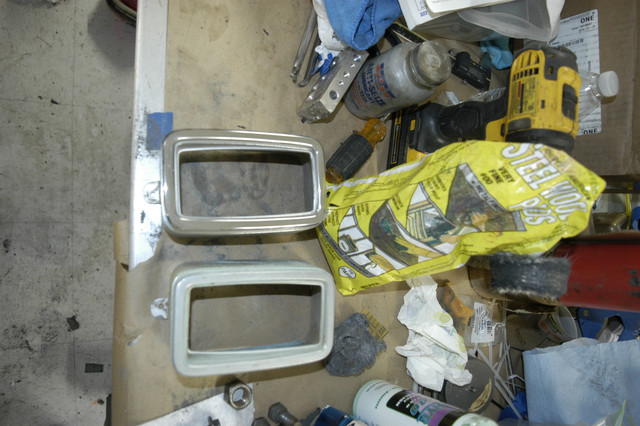
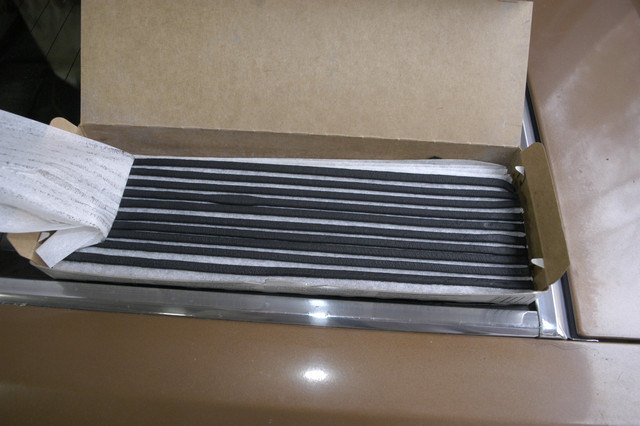
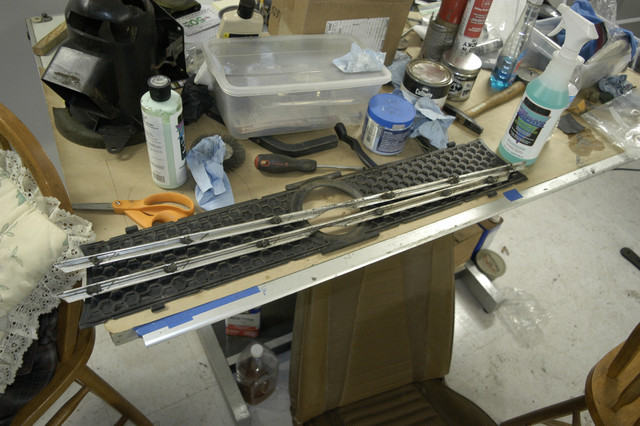
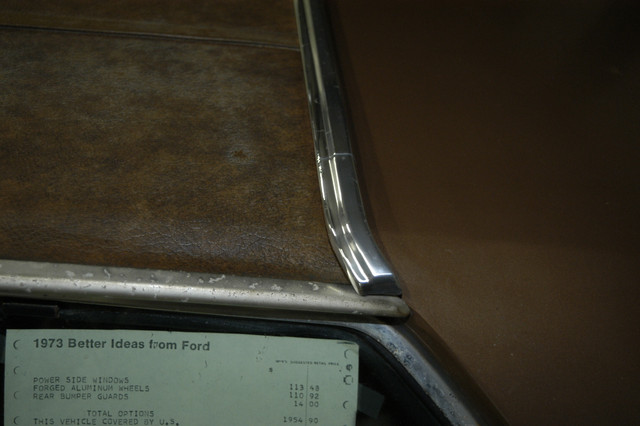
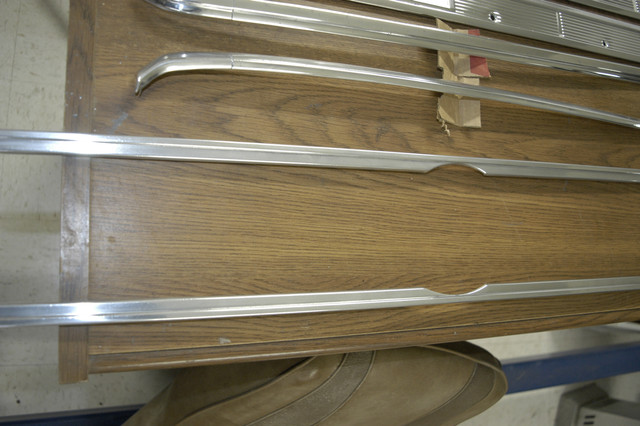
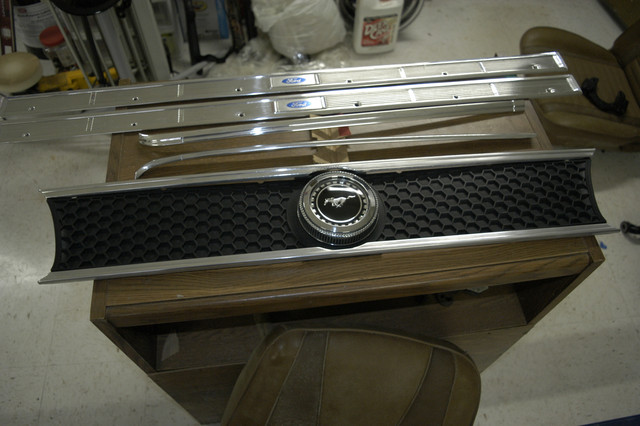
So got the trim for the honey comb panel polished, the trim for the 3/4 vinyl roof and one tail light and the gas cap done. Will spray some clear on them today if it is warm outside.

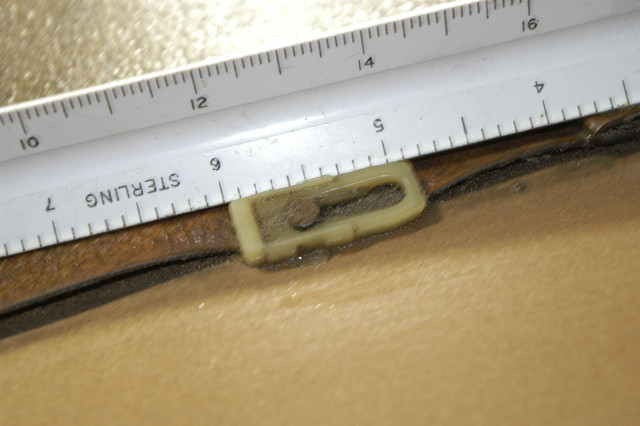
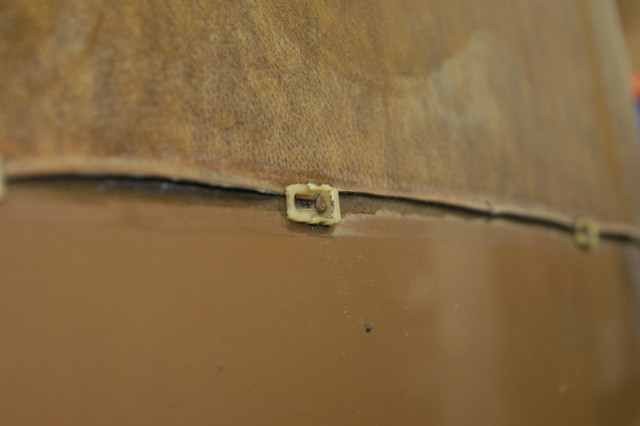
On the vinyl roof trim. Ford assembly line worker must have dropped one of the clips on the way to the car so one is missing. This is the first time the trim was taken off so has never been there. Does anyone have one clip they can spare? See the pic.

The Goodyear Polyglas RWL tires went on easy. Took to a friends tire shop and he took extra care lubing the beads and indesing all the tires the same. So Goodyear is up and tire valve next to the floor. These tires will never see a road but we did put one on the balance machine and it needed 8 OZ to balance. So we did not balance them. Will just be sitting there in the museuem on them.

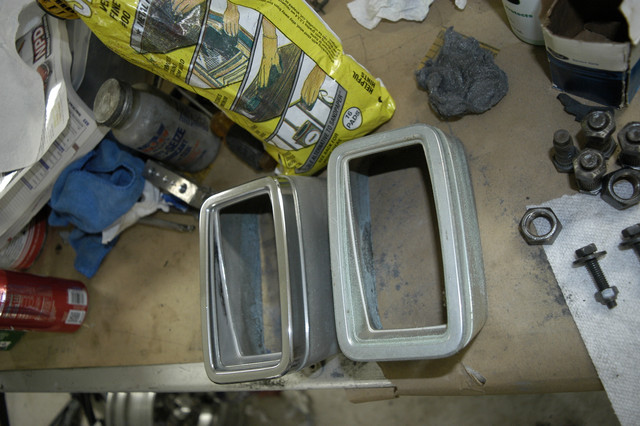
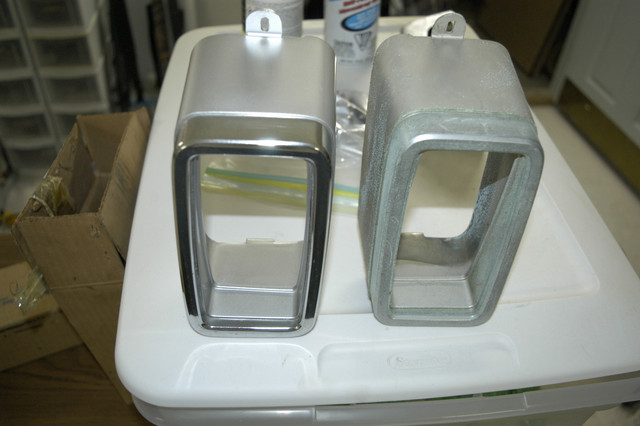
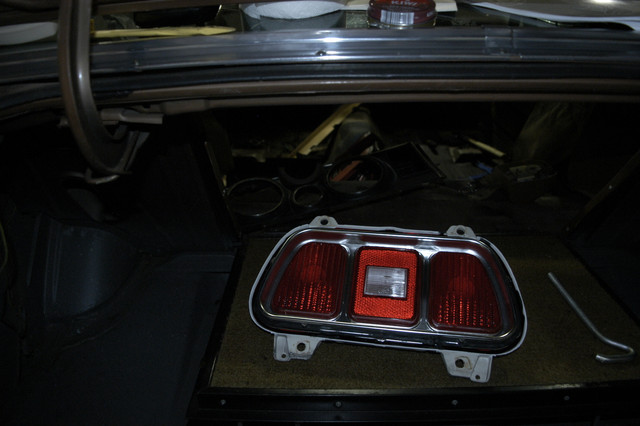
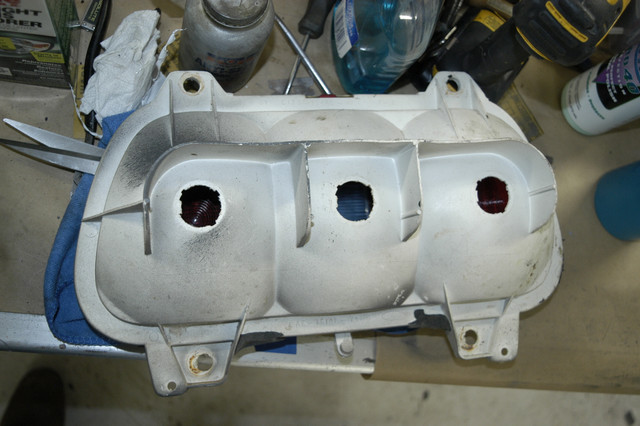
The tail lights are always a bear to get apart with that darn sticky orange glue that Ford put on. I will go back with Daniel Carpenter seals they are much better than the Ford sponge ones. Can't see them so nobody knows what is in there. I did clean the housings and sprayed the inside with Satin White to improve the lights. Left the outside of the housings as they came with the over spray from the trunk paint on them.

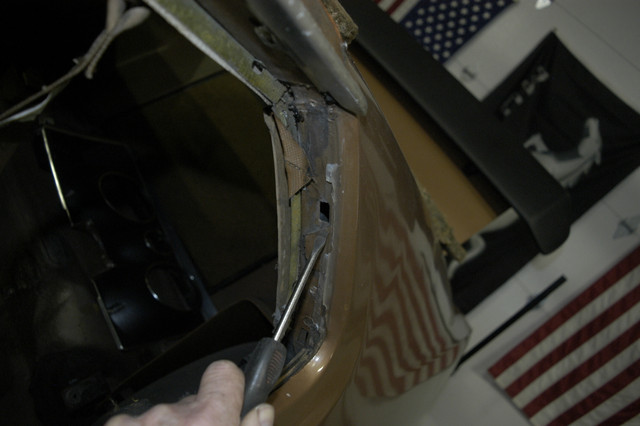
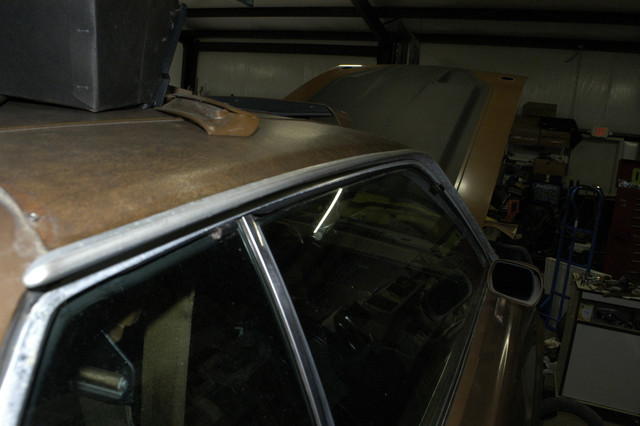
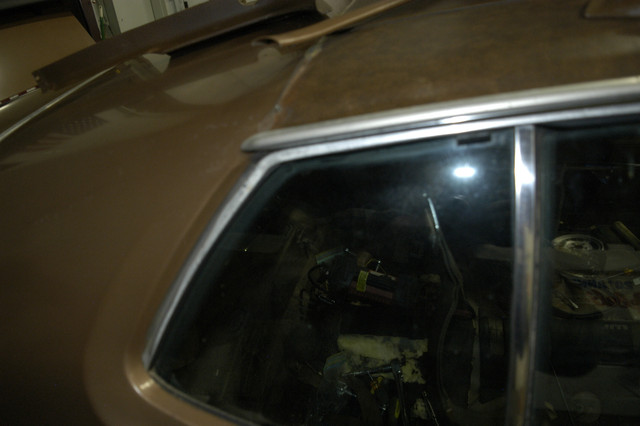
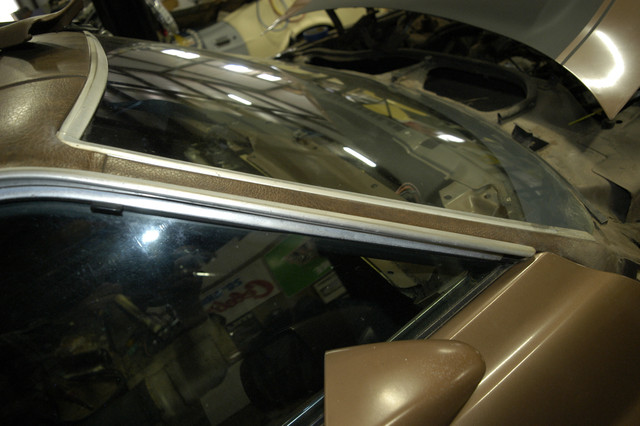
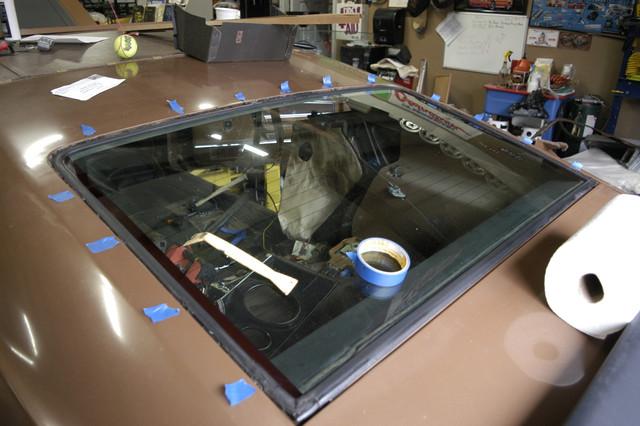
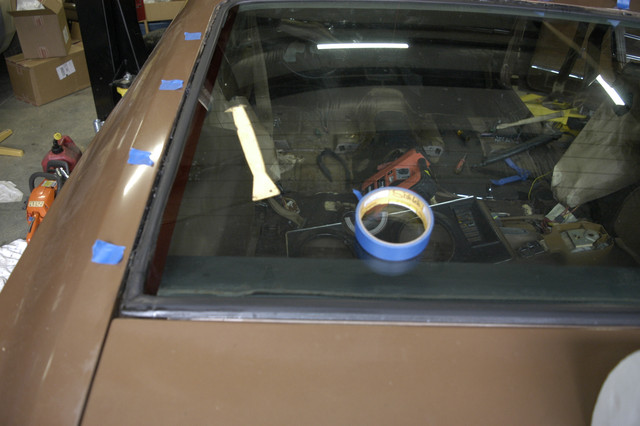
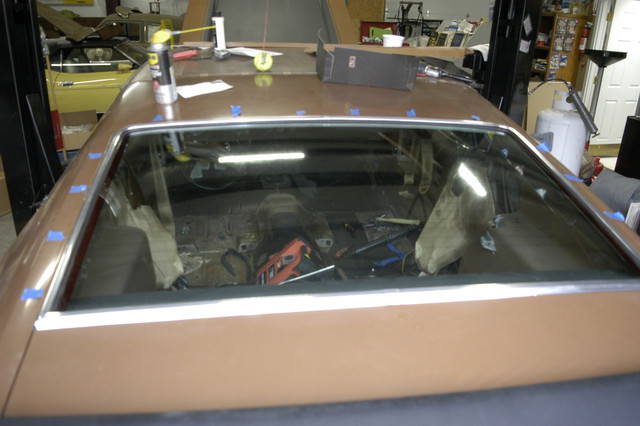
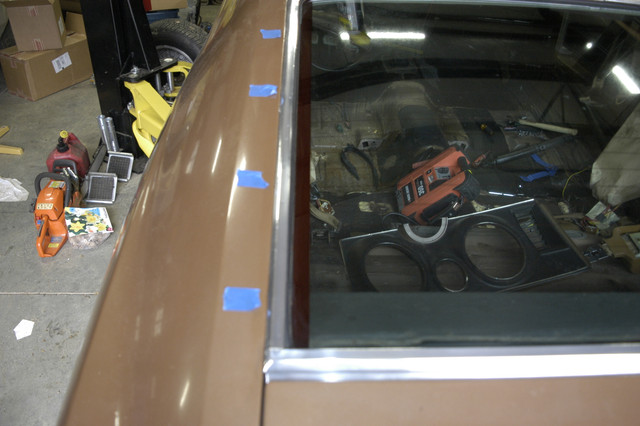
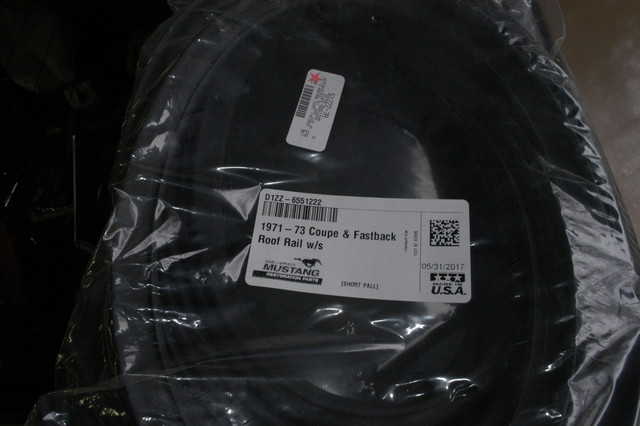
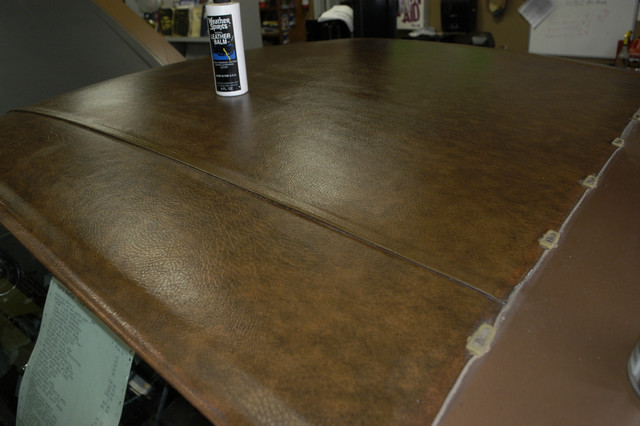
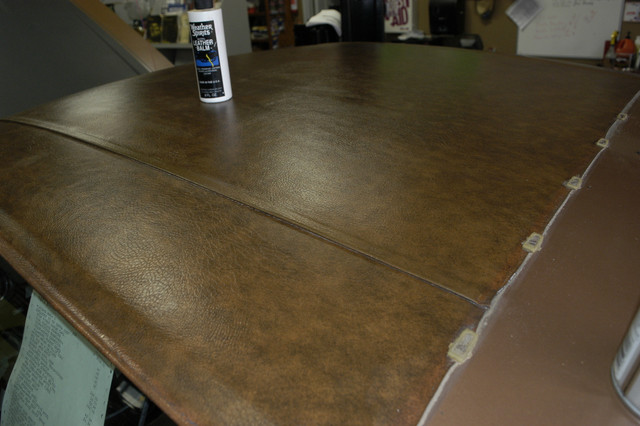
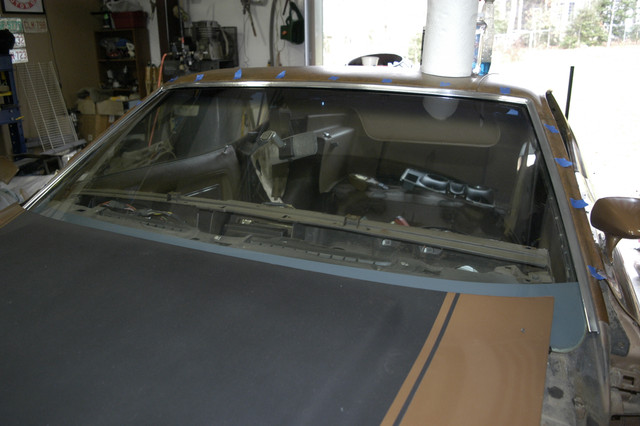
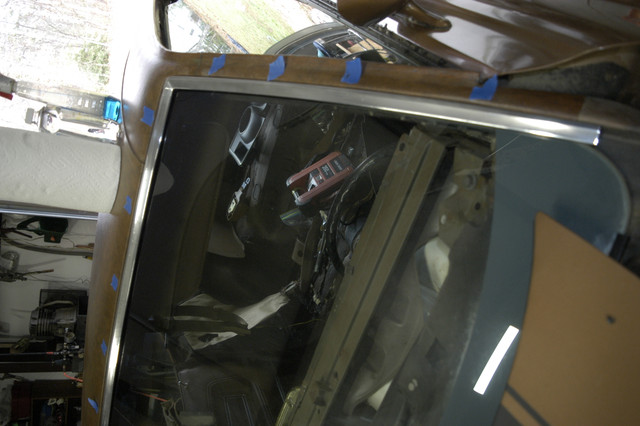
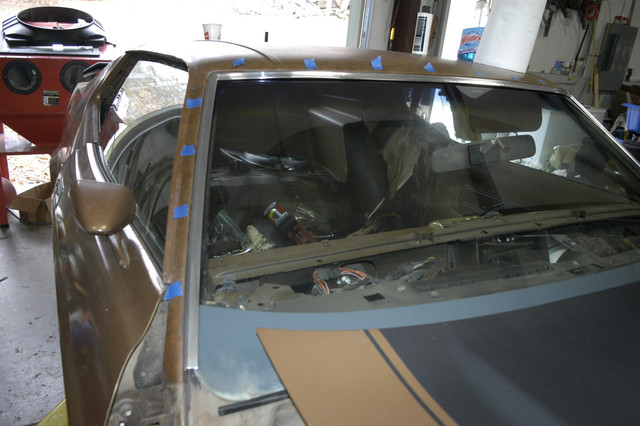
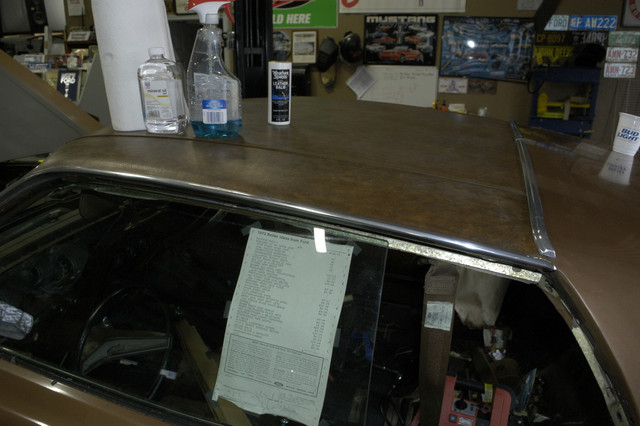
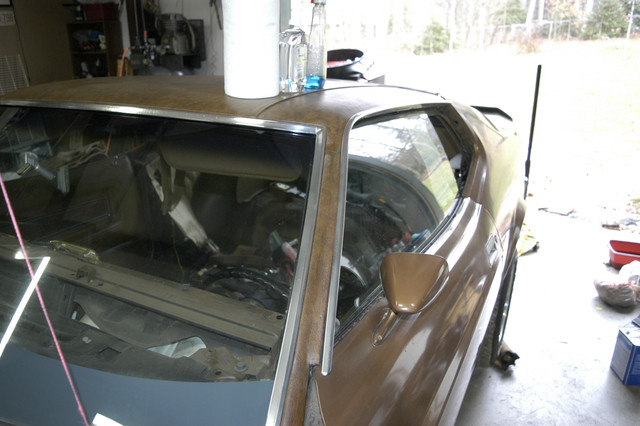
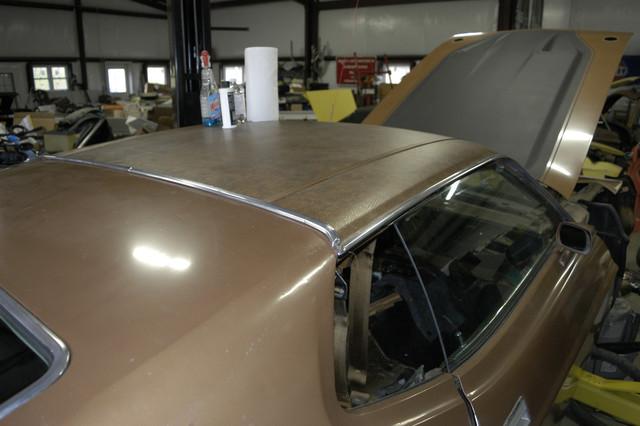
I got the other tail light out and apart and cleaned. Started taking the roof rail trim off you can see in the pics how the polished vinyl trim next to the roof rail looks.

You cannot polish aluminum to be really shiny. There are soft and hard spots in aluminum and the soft will wear down first making it look like an orange peel. This also happens if you polish a plastic mold incorrectly. You pull the carbon particles out of the steel and it will not go to a mirror finish. The Forged Aluminum wheels do better because of the forging process.

When I did the gas cap I did go find an example of an Autolite and also my car had the Motorcraft replacement with the cable on it. I put that on to prevent theft of the cap. If you zoom in on the two gas caps you can see that the lift one is Motorcraft and the right is Autolite. Ford was forced to sell off Autolite government said it was a monopoly making your own parts, lol. Good old government. So a 71 & 72 would need the Autolite cap and 73 the Motorcraft. I doubt that MCA checks that.

So today to get the roof rail trim off and soaking in oven cleaner.

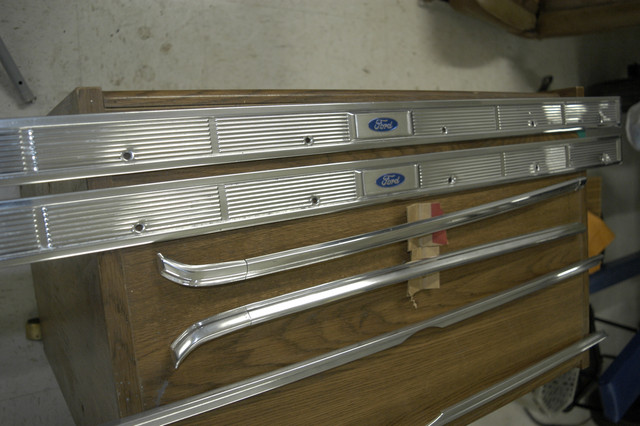
The trim for the rocker boxes does not have anodize on it so it does better polishing. I used pedestal buffer and couple different compounds. Red to rough it down and white to get a little better then the paste with pad in cordless drill then hand polish. To get into the groves in the rocker box trim I used pieces of a sham, which is like felt, and a flat blade screw drive the get into the low places. Those are the original parts not new ones. An easy one day thing anyone can do at home. I was always careful not to drag my shoes on the trim or paint.

I have lined up a two car enclosed trailer and my nephew has a dually diesel Ford pu and will haul the Mach 2 and the 73 Vert to the museum at same time. I will dolly the vert back after the show and the Mach 1 will stay, how long I do not know.

Should receive a bunch of stuff today from NPD and Daniel Carpenter to keep things moving April will be here too soon.

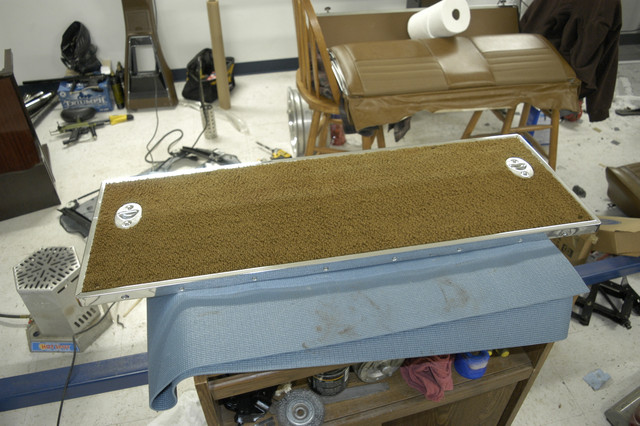
The honey comb panel is still in one piece most break in the middle. I washed it good and will blast with walnut shells to make it look new. Same with the grill. Both parts were molded with a frosty finish not shiny.

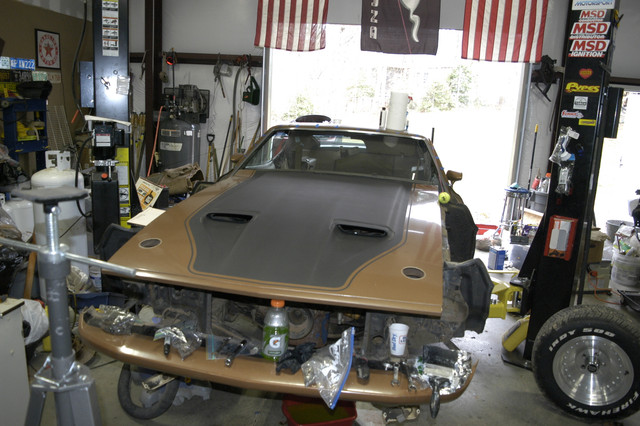
My help to remove the hood did not show on Saturday so I did not get the engine out as planned.

Will keep pushing to get this car taken apart, detailed and put back together.

The picture of the old Goodyear is one I took off the car. It was NOS and never was on the road just rotted sitting there.

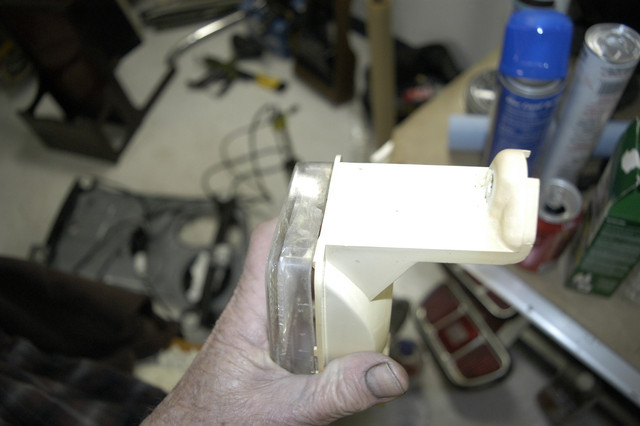
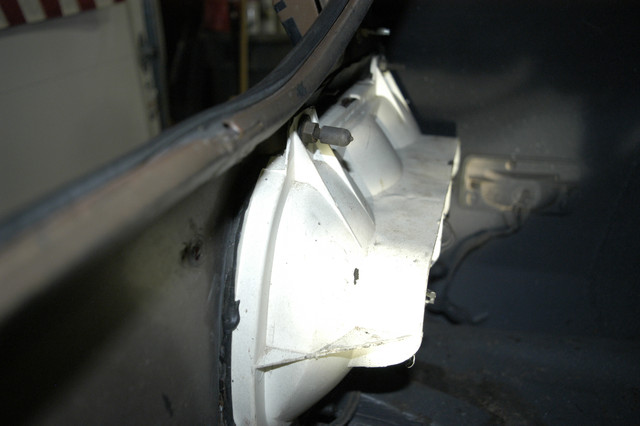
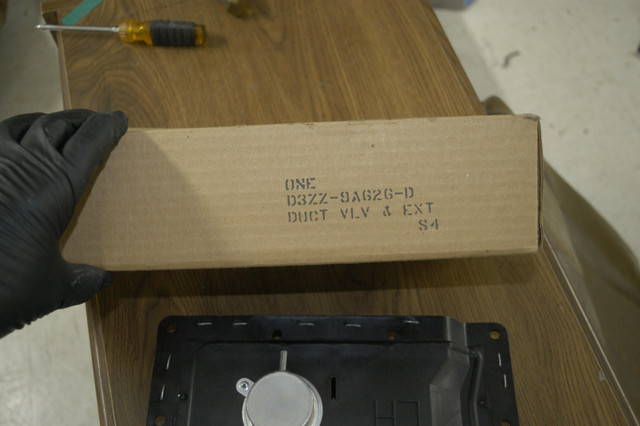
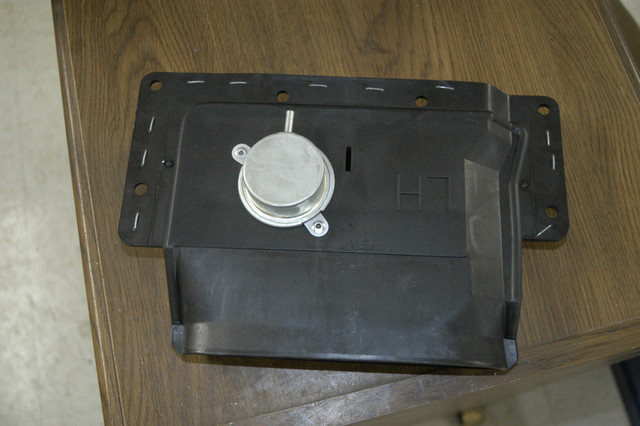
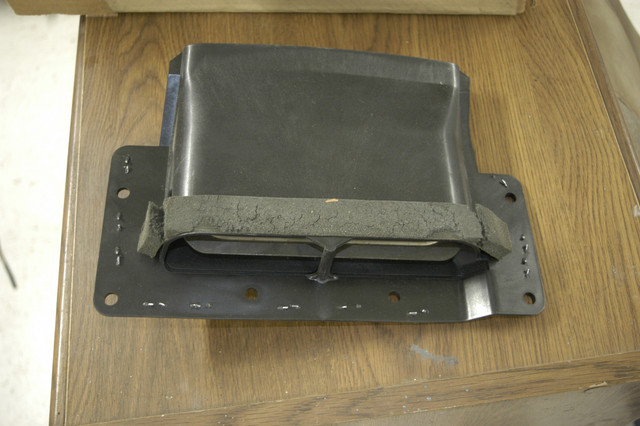
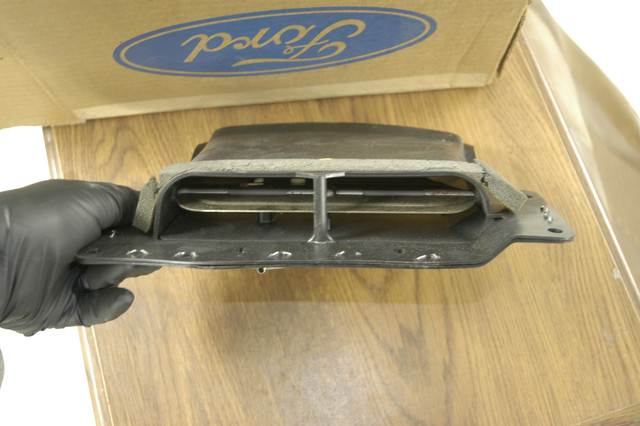
When I was in my stash of NOS parts I did find the NOS ram air flappers. One of the members had a question about them once and I do not remember who. I think it was the Pastel Blue in Canada. Anyway there are some pictures of a NOS one. The box has a D3 part number so must have been some change in 73 do not know what it was. I should have bought more of them and put up. There is a used ram air on ebay now and start bid is $3,500, lol. Car did not cost that much.

BTW I used headlight lens polish on the gas cap center and the lens for tail light. The two different cream polishes I used are about the same. Could not tell any difference in look.

If you are doing buffing you never mix the compounds on one wheel. I keep each wheel in a zip lock bag with the compound. You will never gain if you mix them. I did sand the trim with 1,200 grit before any polish and then used fine steel wool to get and even surface. If you fix dents you have to file the surface back flat before polish.

Most people do not get any closer that maybe 5 feet so do not be too critical when you polish or you will never get done. Remember they get $37.00 a foot to polish the trim.


Last edited by a moderator:
Ok today was not a good day, rain, sleet and getting colder, so no painting.

Did get some of my parts today should get the others tomorrow.

I cleaned the seats and the fold down today. They look brand new. There is no signs of wear on any parts of them with just 12,000 miles should not be much. I did not allow anyone to smoke in the car either not even me when I smoked.

I just used a little Lysol in warm water. The warm water is more for me than cleaning.

I also cleaned the seat guides and put new grease in. So seats are ready to go back in once I get the carpet out to clean and look for that build sheet.

The Ozone generator is getting any smell out even though I am nose blind. Had two sinus surgeries that wiped out taste and smell. You do not want to eat my spicy cooking, lol.

Here are some pictures of the seats they are great I think for originals.

I had mentioned that my console has a Cougar wire harness. The difference was that the Cougar got a light in the astray. The dummy on the line reversed the two light bulbs so they could not plug the wire harness plastic tabs into the console. I reversed the bulbs and they plugged in. No cracks no skinned places and the chrome still shiny on the console. It is bubbled up in the back. When we use to go to drive in movie in winter would sit a can of sterno on console in front of the ash tray. It gets cold in the car with not many clothes on, lol. Did not have to run engine and burn that expensive gas you could not get back then either.

I was shocked that there were no mouse nests under the rear seat. Only thing I found was a 35 mm film case lid. No bags of pot or anything, lol.

So if raining tomorrow get the carpet out and shampoo it and see if there is a build sheet.. 

You can see a line where the sun did fade the carpet where the fold up shades part of it when the seat is up.

I would work like 16 hours a day but damn neck will not let me. My longest time up working on a car was from a Wednesday to a Saturday would go to work and come home and work on the car no sleep the entire time. I did go to sleep on my date on Saturday at the drive in, lol. I put the whole drive line together, engine, transmission and rear and put into the car. Ran great.

Now I spend more time looking for stuff than working. Mind is gone.


So this morning I go out the door and boom there sits a box from NPD. I thought it was going to be a productive day. I opened it up and there was only one lower control arm and one disc caliper seal kit. Humm, went back to order and somehow it was changed to just one. So I get back online to order another and some other odds and ends. Was going to get new clamps for the heater hoses and went to garage to get a pic of what was original. While there I compared the new lower control arm that is said to be concourse made by Drake to the original. The Chinese put the bushing in for the sway bar the wrong way. Note in the pictures how most of the reinforcement that holds the rubber is on the bottom. The new one has the reinforcement on the top and shape is opposite.

I got on NPD facebook and will see what they say. I will also go look at pictures on other sites to see if the same. Other than that they look the same or close.

Scott Drake does not have a good reputation for sure.

The battery cable set was from NPD but has Marti's label on it will compare it also.

So my productive day of getting the front end back together went away and will loose two or three more days or more.

:mad: :shootself:


NPD was very good at getting info for me. Richard Schmidt sent email this morning and I ask more questions. NPD has the last convertible built in 1973 a Cougar with 475 miles on it. The arms are like the repo. My car is the odd man out on this one the repo is correct. I give NPD an A+ for all the follow up of my concerns.

So if you need arms the Drake ones are correct.

There are odd ball things each day on these cars.

Pic of the Cougar arm.


random dice number generator

 
Needed a brake from all the rust dust so I went to plastic dust, lol.

The front parking lights in my grill looked like no chance to make look decent. The chrome surrounds were all crusty and so was the housing.

I took them apart and of course there was trash isnide the lens that is sonic welded to the white frame. I put a small screw driver in the water drain hole and the lens popped right off so I can polish and clean.

I took fine OO steel wool and tried rubbing the chrome on the plastic. I used the Krylon paint for plastic on the white parts Satin like I use on the tail light housings.

To my surprise it comes back like brand new. So I scuffed the white frame with scotch brite and sanded the remainder of the chrome surround with 500 grit. It is painted with Argent paint. I was shocked at how good they came out. Will glue the lens back on and they are ready to go back into the rill. Going to get it in the bath tub with brush then blast with walnut shells with the honey comb panel.

I got everything loose on the engine and transmission now to find a helper to come get the transmission out. Engine is easy hood and transmission would kill my neck.

Took part of air cond. out under hood and will get rest tomorrow. I hate to see what is in the cowl and heater box. 

Here is picture of the Buck Tag. Should be about as crowded as they come. My car has about every option that alters the body that the buck tag shows. Sport mirrors, rear spoiler, NASA hood with locks, PW, Air, rear window defrost etc. If any of you Buck Tag gurus see something different let me know. What are the A stamped in the corners for? I am thinking the Ginger is for the vinyl top? Let me know what it all means, lol.

There is a number written with grease pencil on the L.F. lower part of the radiator support anyone know what it is? I know at some Ford plants when they had shift change they would write the number of the car built for the shift under where the rear license plate went. Might be similar just to track daily assembly production?   

More parts here tomorrow so I am behind. Lots of cleaning and I need that engine out to do it.

If I did not have the two post lift there is no way I could do this. I put the car where the least pain is to get it done.

Oh BTW. When I put the exhaust bolts in 37 years ago I put never seize on the threads and they came out with no issue.

All of the original belt had rusted to the pulleys so they are no good but will keep.


It never stops raining here already over 12" this year and several inches in last couple days.

Well took all the accessories off the engine pulled master cylinder and will get the booster next.

Found some more Factory markings that were hidden behind the alternator. Looks like stamps with inspectors initials on them and big OK stamp.

There was still quite a bit of antifreeze in the radiator the original hoses do not have markings like the repo does. So as usual different. Will clean them a little and get better pics.

Pulled the battery tray out zero rust on it or under it. I washed down with soda when parked.

The distributor had the Ford kit put in to make it mechanical advance only. The arm is cut off going to the vacuum. The points are totally corroded and the condenser that is in there is not the right one. Last time I tried to start it wouldn't and I just stuck any condenser I could find to start. I bet that I won't be able to find but I seem to remember it was the same as used in a flathead Ford and I bet they still make those.


Well got most of the interior out carpet up and yes there was a build sheet but sadly I do not think the FBI could piece it back together.

It was under the padding under the carpet behind the drivers seat. When the car was new like second day the roof rail leaked and there was 2" of water in that area so it has been dead since new.

There is no rust anywhere in the floors so that is great.

There were a couple big mouse hotels behind the rear side panels.

Got one of the roof rails off and will polish today. Pretty warm might get some of the trim I have polished clear coated also.

Engine is ready pull just need someone to help.

Like other cars I have taken apart there was cigarette butt under the carpet from Ford worker smoking in the car. I found one in another car under the long console and it had melted the carpet. Lit cigarette was laying there and someone put the console on top of it.

There were also some suspicious packets under the edge of the carpet, humm.

Power window still works which is good.

The last picture shows the big hole where the water was getting into the car. The foam tape was not covering all of that hole. Ford dealer had shot lots of RTV into the gap to stop it.

Well off to polish.


That's a real shame about the roof leaking and water in the car destroying the one and only build sheet. Fortunately no rust, you're so lucky there.

I'm enjoying reading all on your progress.

Thanks,

Geoff.

 
What is the difference between cleaning the car and restoring the car ?
Humm, For me at 70 years of age would probably take two years to restore the car. I am just taking apart cleaning and detailing and replacing a minimum of items in two months.

I am not even going to buff the paint just rub it a little.

The interior is pretty much done and all the trim has been taken off and polished. If I were restoring I would send the trim to a shop and have the anodize redone.

With a restored car you are trying to make it all perfect. I am just trying to make it presentable again. I am not into concourse car showing I think that ruined the mustang world. You could put 3 or 4 times the value of a mustang in a concourse restoration and can never enjoy the car. Some people never let the tires hit the ground either use cardboard or do not put them on until located.

I am replacing absolutely noting in the interior or trunk. Will pull the engine pull the pan and check for any rust. If there is rust I will pull the engine apart and do that. Engine is easy and simple just days. Body and interior has hundreds or thousands of parts way more time consuming.

Anyone can detail a car few have the resources or money to restore a car.

 
I feel like I am making progress I actually put parts back on the car instead of taking them off. I got all the aluminum trim polished and clear sprayed on to protect. The correct way would have been to send off and have new anodize put on but at $37.00 a foot not going to do that.

Also worked on the vinyl top some. They do not really make vinyl top dressing anymore so I looked to the shoe world. I have applied some shoe polish and it makes the top look brand new.

I got most of the rear back together. Did some hand polish of paint in rear and put the honey comb panel and trim back on and got the tail lights ready to go back in. I cleaned the trunk so the rear of the car is getting close to done.

The bumper sucks. Rust has pitted it I did put in molasses tank today and will see how it looks in a week. I do not want to chrome it that is crazy expensive also.

I wire brushed, steel wool scrubbed the tail light sockets and bulbs. Could not find my electrical lube to seal them with. I use on camper and lights always work.

Here are some pictures of before and after on trim. I did not try to do perfect most people do not look that close and only have about 30 days until I have to deliver to the museum.

The 3-M sealer 08578 is what I will use on the roof rail and tail lights to seal out the water. Do not even try to use rubber gloves with this stuff it is supper sticky.

The pieces of blue tape around the windows mark where the trim clips are. It took all of 3 minutes to put the front and rear trim back on. Just push down where the clips are with thumb and they snap right back on.

BTW the rear window had lots of non hardening window sealer not just the foam tape that most say to use.

So I should have the rear of the car done tomorrow except for the bumper and hope to finish buffing the roof rail channels out. Rained all day today so I could not spray clear on them so did other stuff.

The Daniel Carpenter staff were great at getting the tail lights. I could have polished the originals but time is short. You cannot tell original from repo without looking for the DC logo on the back edge of the lens.

Also using his tail light seals. I have couple sets of NOS Ford but they suck compared to his. I will sell on ebay to some sucker that wants NOS. You cannot see what is in there so no reason to use.

Well off to have an adult beverage and then get some sleep and back on it tomorrow.

BTW I found out why I was missing one trim clip for the vinyl roof trim. If you put the clip on the trim will not snap on. The pin is out of alignment with the others so the Ford fix was leave it off. So Jeff I could not put the clip on, lol.


Back
Top