Have started the long job of cleaning the 73 Mach 1

7173Mustangs.com

Help Support 7173Mustangs.com:

This site may earn a commission from merchant affiliate links, including eBay, Amazon, and others.
Well yesterday I took one step forward and two backwards.

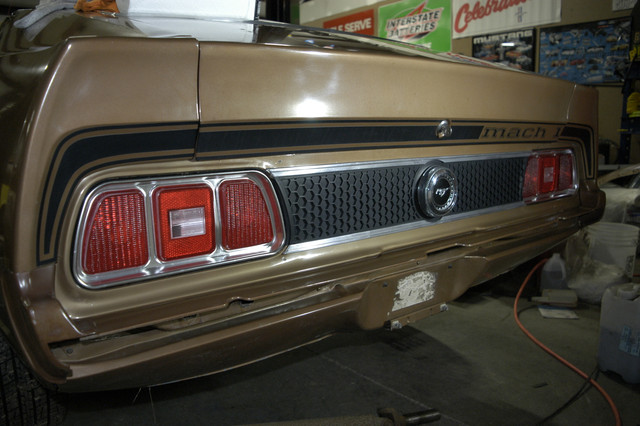
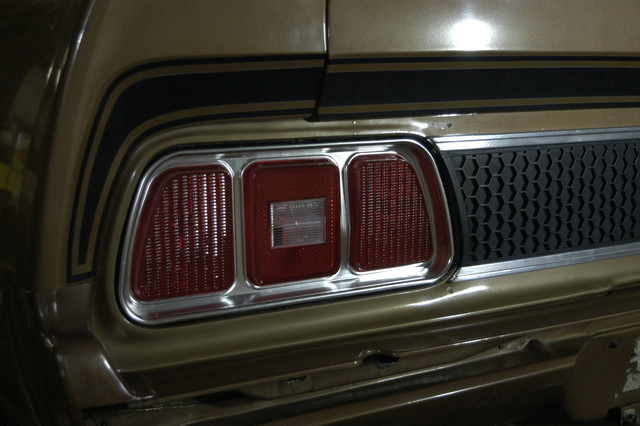
I got the tail lights back in with the new Daniel Carpenter rubber seals that are much better than the Ford ones. They just do not tell you which way to turn them but common sense kicks in and they work great.

I did find what I think is the best solution for bringing back a vinyl roof. With the car sitting for 37 years the top had dried out for sure. Back in the day when lots of cars had a vinyl roof you could buy top dressings that make them look better. I use to use a foam made by Simonize but they do not make anymore.

So I went looking for a solution. I looked the the pantry where I keep the shoe polish and found a bottle of cream that is made for leather or fake leather which is vinyl. The top on my car has the grain that is more like an animal skin not a consistent pattern. I put a couple coats on the top and it did look 100% better. Then I took a can of Kiwi past wax shoe polish in brown and tried a little spot hidden under front fender. It look even better so I applied to the whole roof. WOW I could not believe how good it looks better than when new.

So not I am ready to put the drip rails back on so I get the strip caulk out and place on the edge of the roof on the vinyl. I push the drip rail back on and put the screws back. BTW I had no rust in the top or under the vinyl which is big plus.

So I get the channel that holds the rubber seal and test fit and boom. I did not polish the drip rail far enough back where it wraps under the roof. So pulled back off and stripped the clear off and did several more hours of buffing and polishing. So both are back to shiny but could not spray clear back on due to rain. It is cold today so I doubt I will get that done.

I have also decided not to buff the paint just leave it as is with the orange peel showing. Will hand mirror glaze and apply carnauba wax.

When I put the tail lights in I brushed some POR around the seal area and put a strip of the 3-M strip caulk to seal out any chance of water getting. I do not wash with hose either so unless in rain will never see water. 

I also took the time to put a scale on the hood black out and will post a new thread showing the dimensions from edges and front of hood. Mine is right at 1 3/4" from the front edge including the trim.

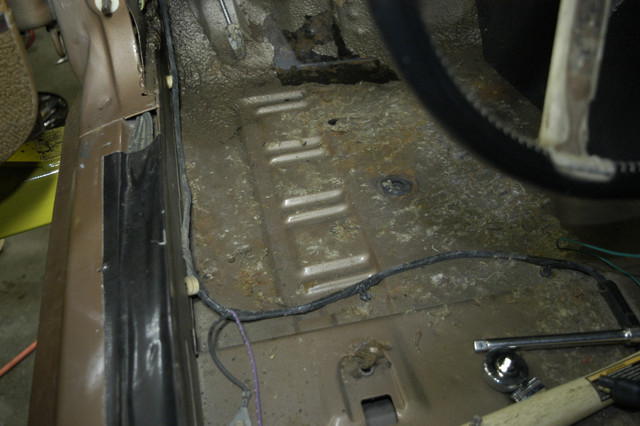
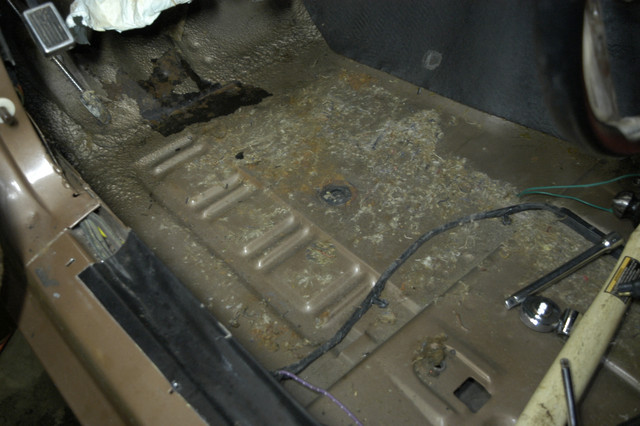
I did get the door jam washed on the drivers side and behind the front fender on the drivers side. I got a plastic kids swimming pool to keep the water out of the floor when scrubbing. Will probably do more of that today.

Got most of the interior trim washed and ready to go back. I keep running the ozone generator inside the car to eliminate any odor.

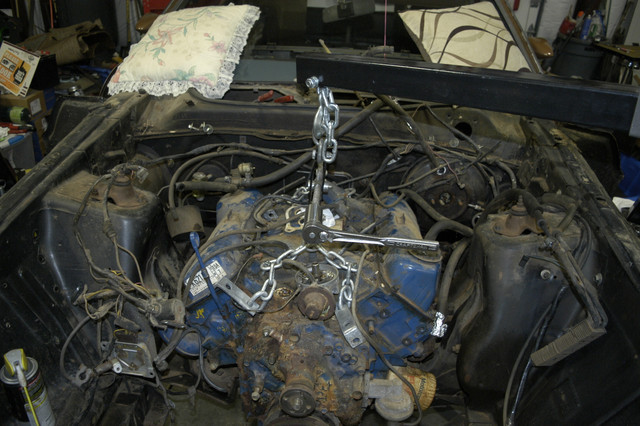
I will pull the dash when I get the engine out of the way to pull the heater box and clean and replace heater core.

Just need to keep going back together as much as I can.


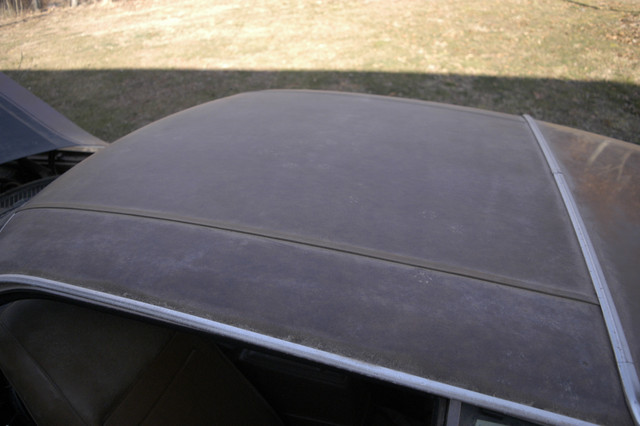
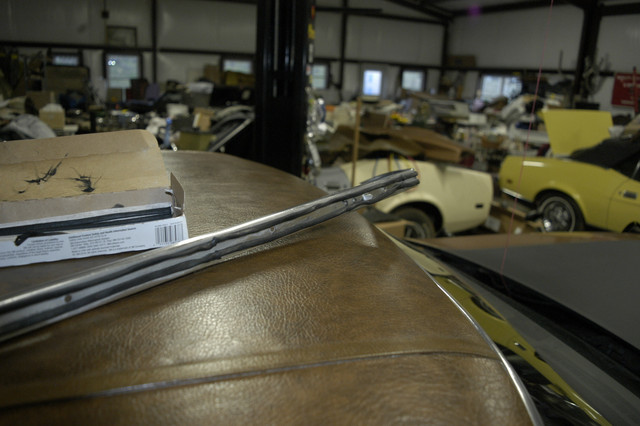
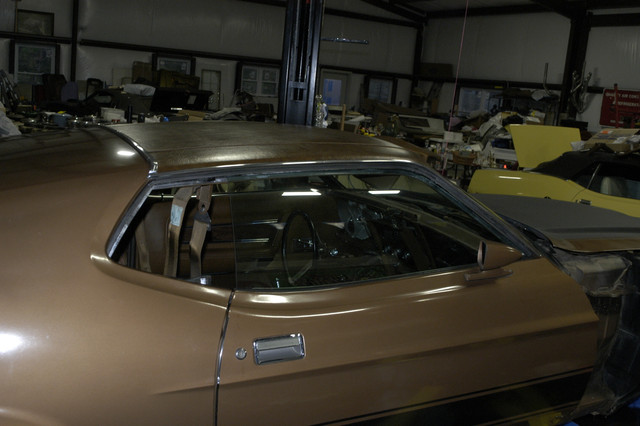
How the top looked coming out of the barn.


Dull no color or pattern to speak of and the trim is frosty.


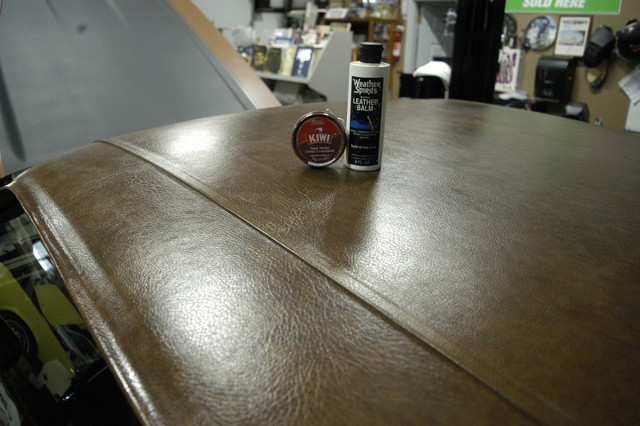
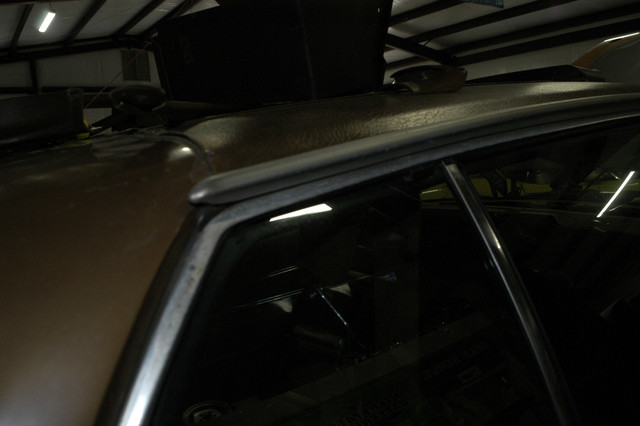
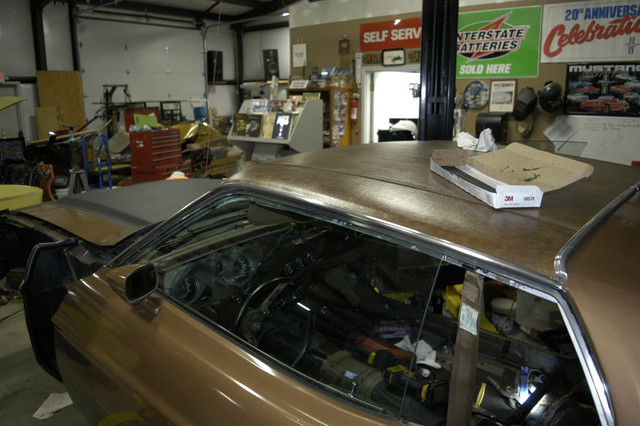
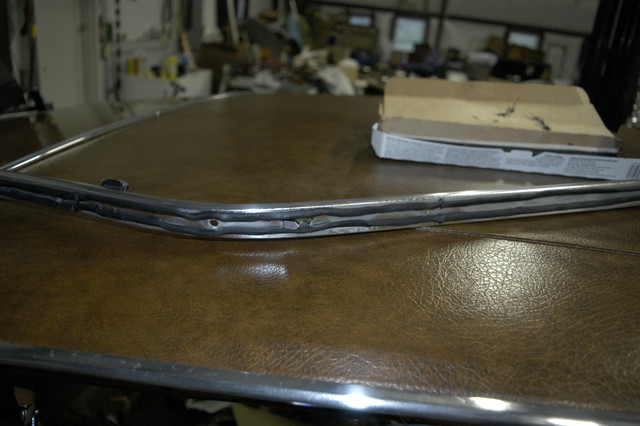
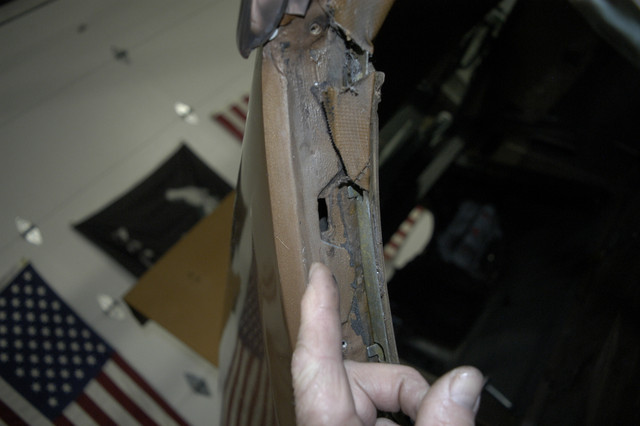
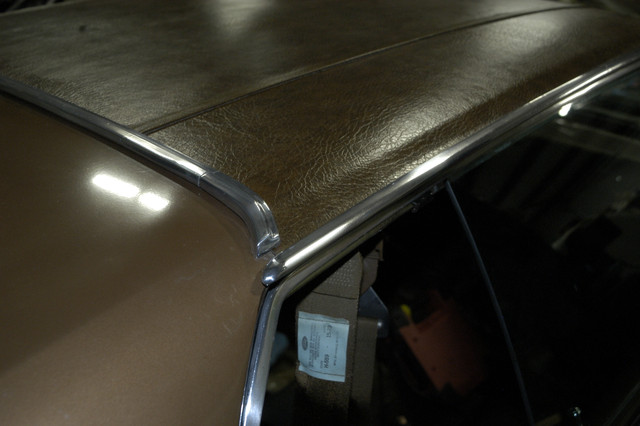
With two coats of the Leather Balm and two coats of the Kiwi wax shoe polish. Note how the vinyl top wraps around the edge of the roof and goes back under.
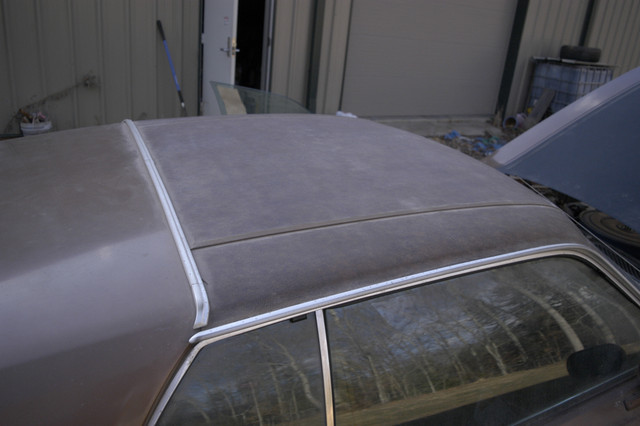
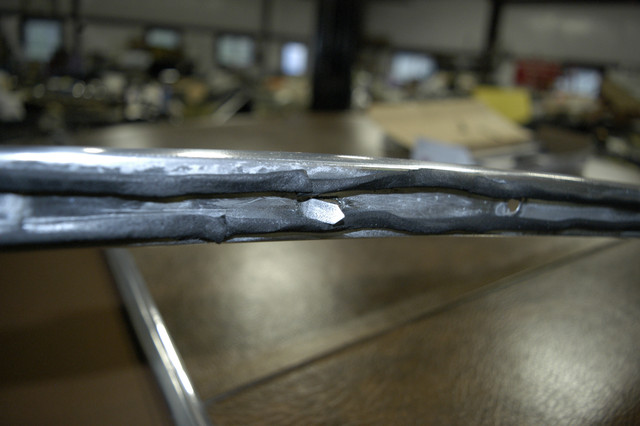
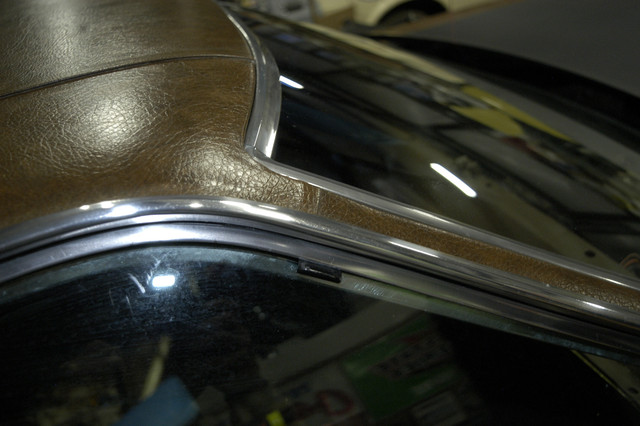


Trim before polish.


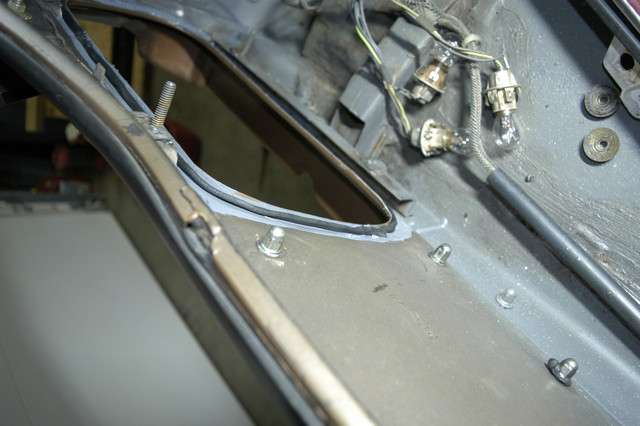
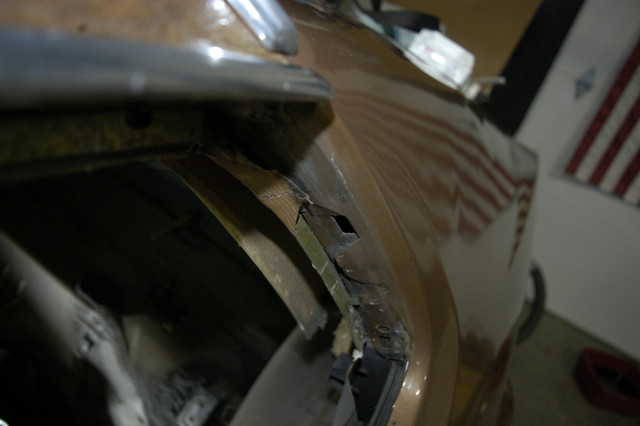
Bead of 3-M strip caulk around the tail light opening. I slowly tighten the nuts and let the seal close off.


The rear bumper and bumper guards are in the molasses tank both have rust but no time to get re plated.


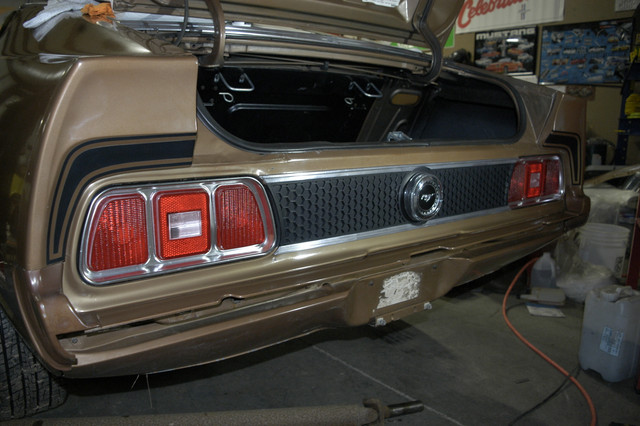
Will adjust trunk some to get stripes back in alignment. Will twist it.


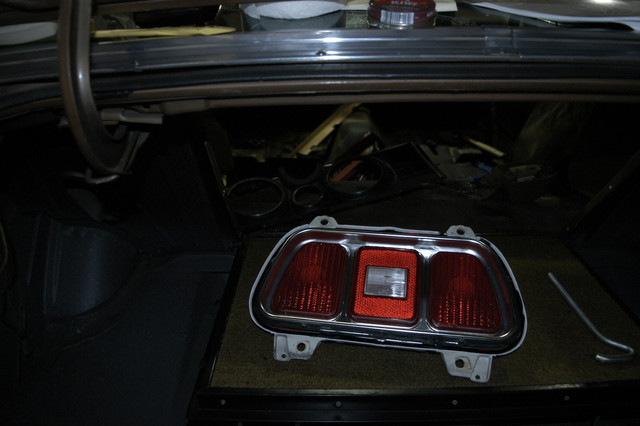
I did not paint the outside of the white plastic tail light housing left the trunk spatter over spray on it. I did spray the inside with satin Krylon plastic paint so lights show up better.

 
I had to go into town and pay my overdue taxes that I forgot and took trim removal tool back to my friend that does restore. He got me worried about the engine being locked up. So I got home and put the drip rails back on and all sealed up. Polished the trim on the grill and I pulled the spark plugs and put bar on the crank. You can turn engine with one hand. So flooding the engine with oil kept the rings from rusting up to the cylinders. I am still pulling engine to allow good detail and will pull pan and check some bearings and crank for any signs of rust before I crank it.

So hope to have engine out tomorrow. No hope for any help. All my friends are either using walkers, in wheel chairs or have back worse than me or are pushing up daisies. You have to do what you have to do. I pull a 4 speed by myself tomorrow and I turned 71 today. The engine is easy with lift but will get creative with the transmission.

Pics of progress tomorrow I need some sleep.

Trim is all shiny and clean.

 
Here are some pictures of the drip rails being installed. The area that usually leaks is the rectangle holes that Ford had for the "Toy Tabs", the pointed tabs on the roof rail, that fit into the slots to located it inboard and outboard. These are common on lots of parts to speed up the assembly process.

I did not use the what I consider useless foam tape I used two beads of the 3-M strip caulk #        . I put some extra around the two rectangle holes adjacent to the sail panel. That is where my car leaked when brand new. On the left side that leaked bad there was a big bump in the body assembly also that I to a BFH and beat it back in some before I installed the roof rail and channel for the rubber.

I also added the missing screws that the assembly line crew left out.

I bet 30% of the fasteners I have taken out were not even tight from the factory.

One great thing is that I have no rust to deal with anywhere.

I took a picture of the L.H. head with the valve cover removed. Looked like it had just ran yesterday. Oil still on all the parts. I did pull the plugs and engine turns easily. I then poured about an oz. of WD-40 into each cylinder and left for the night. That should penetrate the ring lands and make sure the rings can function. Not going to be driving it a lot just want to hear it run one more time.

Going to try to get transmission, engine and gas tank off today.

I suspect fuel pump will be bad and I do not want to get into the carb. for sure.

Here are some pictures of the now shiny trim installed and the rockers on drivers side.


The rectangle hole is what locates the Toy Tab on the trim channel and it where the car leaked when new. Just below it the tab was pushed forward and held the trim off as well. So BFH was used to move it back.


Two strips of the 3-M strip caulk will keep this sealed up.


One of the several toy tabs that located the part on the assembly line.


The leaky hole on the opposite side.


Trim Installed.


Looks much better with polished trim.


I was glad to see no rust or moisture in the engine.

 
That trim looks fantastic David. Prevention always better than cure when it comes to the engine. Experience and foresight like yours makes all the difference to the inexperienced like myself

Experience is Priceless

 
My friend Clay that does the restorations was in the area yesterday with his dad and they stopped in. That worked out they helped me get the 4 speed out and then after they left I realized they should have helped me remove the hood, lol. So I took a NASA hood off by myself holding it up with one hand and taking the bolts out with the other.

Then I got the lift over and pulled the engine out.

I pulled the oil pan and nothing in the pan but a little left over oil from draining it couple weeks ago.

There were a couple more grease pencil marks on the intake, bell housing and RH valve cover I found.

I pulled the rod cap off the back connecting rod and oil was still in the bearing and not a scratch on the bearing. So I put back on. The cylinder walls that you can see from the bottom end are shiny cast iron no rust.

I pulled both valve covers brushed some oil on the rockers and valves and turned the engine over several times with ratchet and no stuck valves either.

The outside of the oil pan is very rusty so I will clean and paint it but not the whole engine. Since the antifreeze was still in the car I will not change the water pump either.

Will do a vacuum check on the fuel pump and be sure I do not put any ethanol based fuel in the car.

So today will get the brake booster off to Booster Dewey and ask for a rush job.

Will get started scrubbing the engine bay down and get the heater box out to clean and put new heater core in.

Some pics of the engine and removal. Removing the engine is actually one of the easier jobs.

The clutch was stuck of course but not horribly rusty.

So if you keep an air cleaner on a car sitting and there is not way for mice to get up into the exhaust your engine can last many years.

I do not live in a dry area either we had over 100" of rain last year. It can go below zero in winter and over 100 in summer. This car was in a pole barn with no walls and dirt floor. I did have plastic down under the car and kept a car cover on all the time.

You can see the drops of oil still hanging on the inside of the engine and it has not been running in 37 years. I used Havoline oil in the past will use one of the zinc additives and keep using it. Nothing inside the valve covers will not even put new gaskets on except for the pan.

I know lots of people feel that they have to change the oil before starting into a new year. I do not feel that is necessary just wasting your money and tossing perfectly good oil. I had also sent a sample of the oil to Lucas for analysis and there was no water present.

Think I will brush some of the rust off and maybe spray some clear on to protect it some of the water pump and front of engine.

When lifting the engine with the transmission off you do not have to tip it just lift a couple inches and move forward some to clear the bell housing from the firewall. My lift is from Harbor Freight and has castor wheels on both ends so you can roll sideways also. Some only have castors on one end and do no move as easily.

Humm cannot post pics will post then come back and see if I can edit it.

Went off the forum and back on and still cannot load the pics. Got to get to work for now will try later.

Finally got pics to load.

Going to clean the garage up some too much stuff out, lol.


Last edited by a moderator:
[so I took a NASA hood off by myself holding it up with one hand and taking the bolts out with the other.]

Wow, shame this wasn't caught on camera, must have been something!

Moved mine in all possible directions alone to de-rust/weld/strip/paint it. But to remove it. I had to ask my daughter to give me hand.

Did you use the engine hoist to secure it by the latch on the front or were the hinges used as guides the only extra hands to help?

Great progress so far!
No I just held with left hand and put two pillows on windshield in case it slid back. Tilted it down once bolts were out and then lifted it off. I have put them on by myself also but not with this crushed disc.

 
Ok got the oil pan cleaned up some and did paint it to prevent more rust damage. I got it back on with fresh gaskets and end seals. Now I can clean the remainder of the engine some and go back in with it.

I did what I think is the worst job on one of our cars especially a straight drive. I pulled the power brake booster. I had the instrument cluster out but you can hardly see anything. Clutch rod is in the way so it has to come off and of course unhook the brake pedal and switch.

Lucky to have the two post lift. I raised it up so I did not have to try to lay in the floor. I stood beside the car but those nuts are the locking type so they are tight all the way off those long studs.

I did not even bother checking with vacuum pump. Contacted Booster Dewey and they are going to do a rush rebuild so I can get back quick. It will ship out tomorrow morning.

I have about 2/3 of the engine compartment cleaned. I put kids swimming pool under car to catch run off water keeps the mess down.

Next will be to get the heater box out and new heater core, again did not check never changed so coming out.

I did pull the thermostat. It was not one with hat but it is tall enough that when the plunger comes out of the center it would go into the plate in the block. I do not know if I ever changed it or not been too long ago. I am putting a Stant 192 deg. back in. The one that was in the engine was a Gates.

There was a rubber gasket between the block and the plate behind the flywheel. I guess I will just make something for that. I guess keeps oil of clutch if it leaks.

I will head to town on Monday to see if I can get points and condenser for the centrifugal advance distributor. The dealer changed mine when I complained it would not go over 120 mph when new. The points mount different in it and also the condenser.

Took the master cylinder apart but have not got the front piston out yet. Not really rusty that I can see. Usually blow them out with air but no luck yet. Yes I did take the screw out of the bottom.

Note there is not rust in the floors at all anywhere.

The speedo has 12,301 miles showing. I drove it very little was my date car, lol.


Lunch over off to clean clean clean.

 
Have you ever thought about just using Purple Power and hosing it down?

I did that to a 100,000 mile old daily driver about 4 or 5 car washes in a row, and Bam, it looked like a showroom engine compartment.

kcmash

 
Have you ever thought about just using Purple Power and hosing it down?

I did that to a 100,000 mile old daily driver about 4 or 5 car washes in a row, and Bam, it looked like a showroom engine compartment.

kcmash
That is about what I did. Not Purple Power that is tough on zinc plating. I used cleaner and big paint brush to get into the cracks. I will steel wool the brake lines.

Not going to paint engine or engine compartment leave original.

There was not much more than dust on everything and the rust on the bare metal parts.

Got the heater box out and core out will need to get new one. It was not leaking but I am sure would soon. Heater ranks right up there with PB booster removal as PIA.

 
Yesterday I sent brake booster to Booster Dewey he said he will do a quick turn around on it. I did not even test it after sitting that long.

I got most of my front end back on. Sway bar with new bushings, spindles, dust shields, tie rods, swing arm and radius rods back. Got one disc brake assembly ready to go back on and will dress out engine today to go back in.

Going to go searching for points, condenser and such today. Need a few other odds and ends.

I just hope there are no surprises when all back together.

Left camera in shop so no pics will get some tonight maybe.

Spring is here would love to go to Tenn to the Ponies in the Smokies show this month. Just too much to do.

 
A little update but still no pics, lol.

I got the heater AC box back together and have a suggestion for those doing this repair. When you take the heater AC box out and get the two halves apart you have to remove the three doors that control air flow inside. You replace the foam on them. To get them out the rods in the flappers are sometimes rusted in place. You have to support the case to prevent breaking it when you drive them out.

Once the rods are out you can wire brush or glass bead to clean them up.

Now since I was a tool & die maker I have lots of drills, reamers and such. When I was going back together the small narrow flap that mixes warm air to prevent the AC from freezing up the rod was very tight even with grease applied. I cracked the case. So I took back out and the crack was on the side to the firewall. I put fiberglass and epoxy on and fixed the crack.

I then took a long 10" 3/16" diameter drill bit and put the flapper in bench vise and ran the drill through it multiple times. The the rod slides in easily and no chance to crack the heater box. Did that to all three and no issue going together.

So all the brakes are done suspension back on and car is sitting on tires and wheels.

I also set the engine back in took less than 10 min. by myself. I do not put transmission and engine in together just much easier to do separate.

I have two long 7/16" bolts I cut the heads off to put in the two bottom bolt holes in the bell housing. This guides the transmission into place easily.

I will get the transmission cleaned up and take the shift rods to get the phosphate redone maybe today.

Took the 4300 carb apart and soaking in denatured alcohol overnight. Was not really dirty just want to make sure all the small passages are clear. Got to locate a rebuild gasket parts kit for it today.

Only have couple more weeks and has to be in Charlotte.

Trunk is done except putting rear bumper back on. It has been in molasses couple weeks will look at it today. Not enough time to get plated.

More dash work to do and booster might be back here today also.

No short list for sure still long as my arm but will keep knocking them off.

Spring is here and I wanted to get garden started but not time till the car is done. I love to can stuff and make at least 40 lbs. of salsa each year. I did battle with the ground hogs last year and took out 7 hope that was all of them. I actually caught two little ones by hand and took one miles away and let loose.

 
Got the 4 speed wire brushed and ready to go back in. Cleaned the carburetor and the kit will be here Monday from Mike's Carburetor Parts. He has lots of info on the Ford carbs on his web site. https://www.carburetor-parts.com/Autolite-4300-Technical_ep_292.html

The brake booster is back from Booster Dewey and I will put on today. Got to go buy a brake hone cannot find mine as usual. Have not used it in way too long. The master cylinder does not look bad inside usually has rust pits.

The shift rods had undercoating all over them so shaved it off and wire brushed them. Pic is before cleaning.

I checked the weight on the top loader only 97 lbs. without shift rods. A Borg Warner is like 115 lbs. Would have thought TL would have been heavier.

Gas tank has to come off today for sure. The long studs for the straps are a pain. I do not have socket deep enough and takes forever with the valance panel on. They sprayed undercoating on the studs also which was difficult to get off.

The new dryer for the AC came in from NPD but my AC compressor is locked up. I posted ad to find another but will go with this one and not put belt on until at the museum if I cannot locate a good one. I probably have one somewhere in all the stuff, lol.

I must have swapped the carb out I am told that it is a 72 model will have to see if I can find the original it is somewhere I am sure.


I was trying to clean up some of the little things. Got the rear bumper back on after soaking in molasses a couple weeks. Not so good but original. I was going over all the light sockets cleaning and putting the Silicone grease on. I found a broken connection for the alternator. How do I get the female connector out of the plastic housing for the alternator. I have 70 amp alternator. The lead is out of the connection and I nned to have the female connector out to solder the wire back in.

 
Well yesterday did not make much progress for sure.

Got the carb. rebuild kit on Monday so went to get it put back together and get that done. As most kits are they cover several configurations and there were parts I could not find a place for, lol. So I contacted Mike at Mike's Carburetors and he confirmed that the pieces I was questioning did not go in my carb.

The bad thing was after I got all the hard parts installed and tested the accelerator pump with liquid and everything worked and ball check valve did not leak or stick.

So I pull the gaskets out to assemble the carb and boom they are all the wrong ones. They were for previous to 71 did not have the wide spread bore. :mad:  
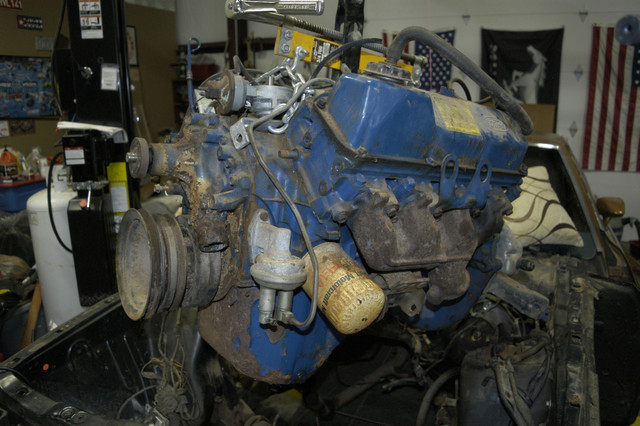
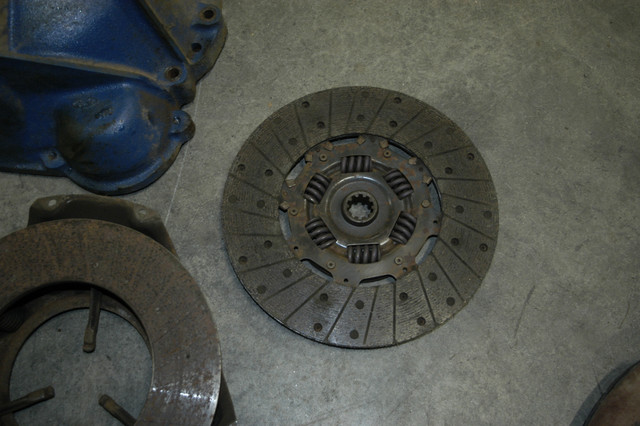
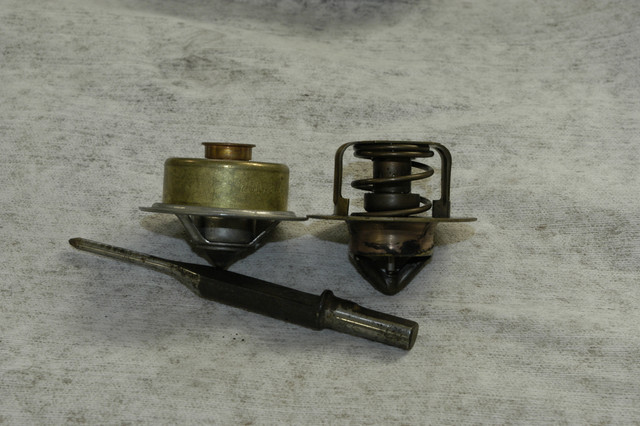
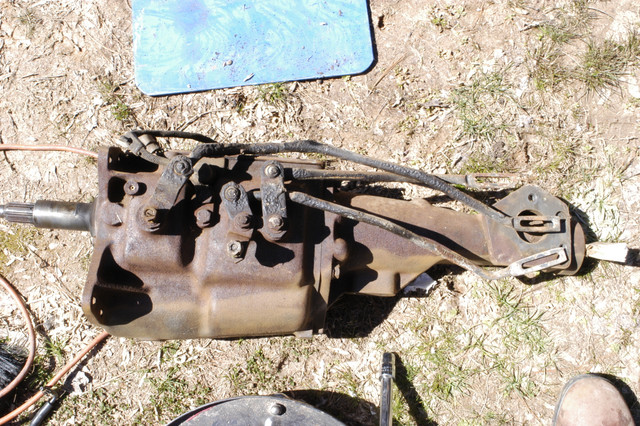
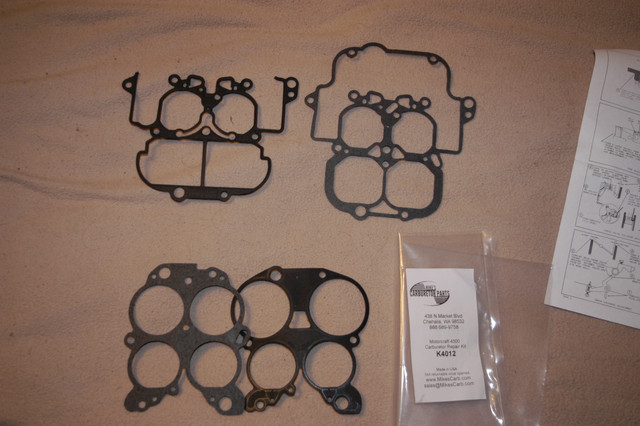
When I sent the order in I put in the message that it was for 73 Mustang 351 C 4-V 4- speed but guess they pulled the wrong one. They put another kit in the mail yesterday.

So I went back to the wiring and did manage to get the female terminals out of the alternator plug. There is a very small formed tab on the flat side of the connector that clicks into place inside the plastic.

After getting it out there was no way I could get the factory crimp spread back apart to put wire back. I had to take a standard connector and make it fit. I crimped and soldered so did get that repair done. Put wiper motor back on and a few other little things. Will get the spoiler back on the rear today and everything in the back is done except the gas tank.

I have delayed taking parts to phosphate until maybe Thursday and I can make our Mustang Club meeting before coming home.

Anyone thinking about doing a kit in their Motorcraft 4300 it is a pretty simple process. No special tools or tricks. Mike's Carburetors has video of all the things you need to replace and how to test. The Ford carb is way more simple than Holley for sure. Will see how it runs. I did not pull the throttle shafts and butterflies out he suggest not doing that. If you have ever taken the screws out of them you know how they stake them in place so they do not fall into the engine while running.

He suggested that I solder up the secondary fuel valve. Said Ford determined that it dumped too much fuel into the bowl. I left it had not had issue in the past.

When I checked the fuel pump the original Carter still holds a vacuum so did not change it out but will have a spare handy. Going to use leaded gas that is 95 Octane I think.

I expect the museum will want a minimum amount of fuel in the car for insurance reasons.

Going to put Hagertey's Insurance on the car even in the museum but not sure how much to get. There is 25,000 on the yellow vert. You never know some jerk might key the car sitting in the museum.

Or could be like the Corvette museum, ground open up and swallow bunch of one of a kind cars.

Pics of gaskets wrong.


Back
Top