Hood Arch.

7173Mustangs.com

Help Support 7173Mustangs.com:

This site may earn a commission from merchant affiliate links, including eBay, Amazon, and others.
Joined
May 15, 2011
Messages
3,596
Reaction score
530
Location
PA
My Car
1971 Mach 1 Mustang
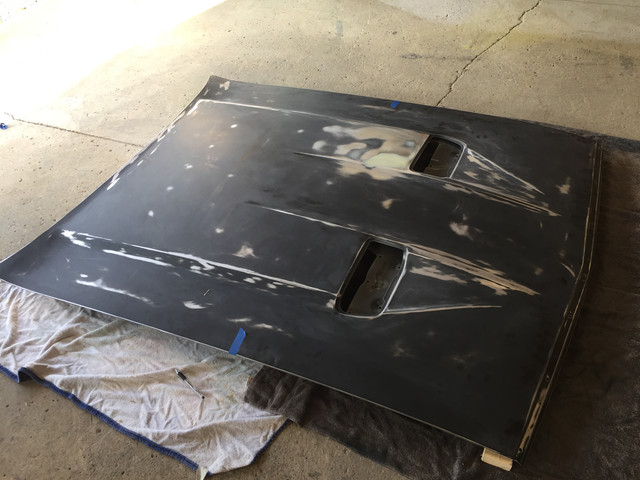
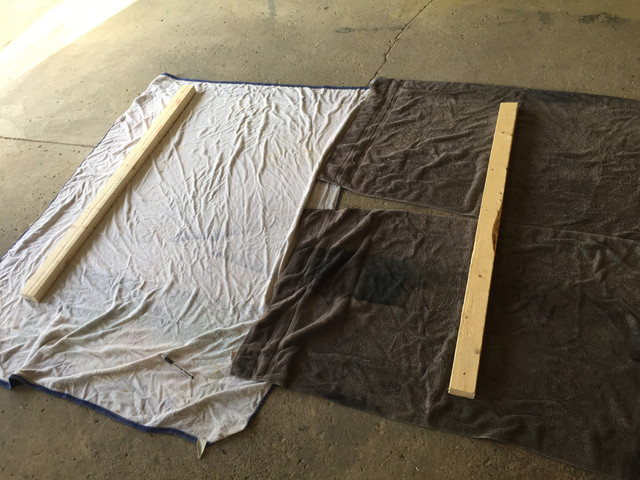
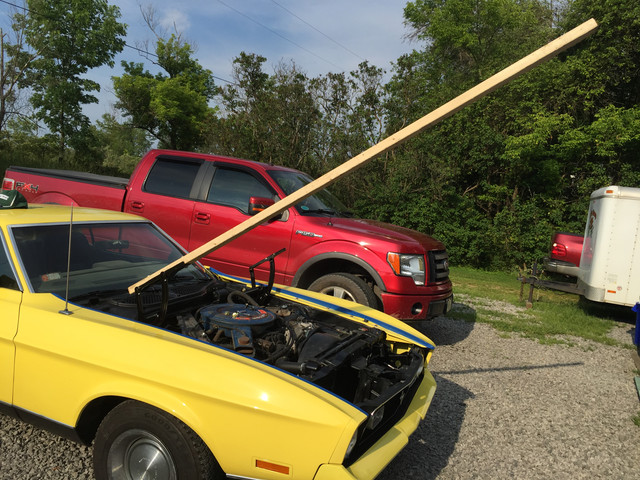
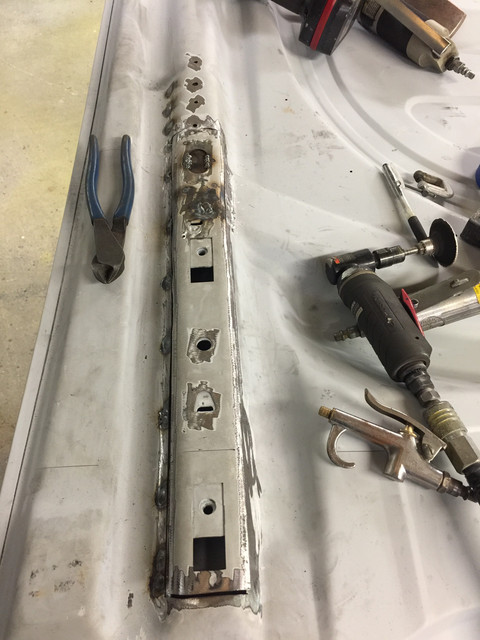
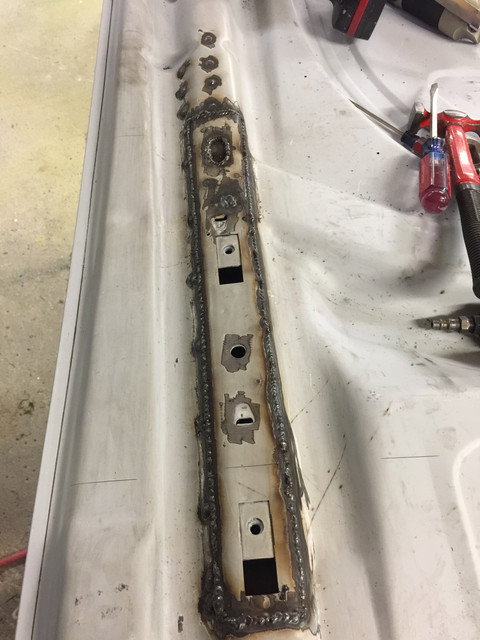
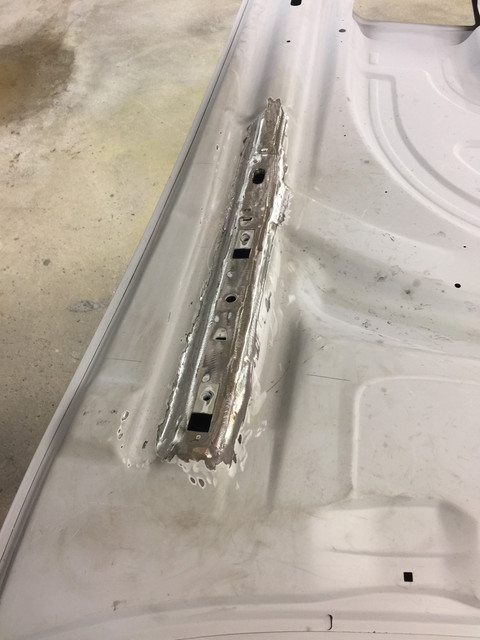
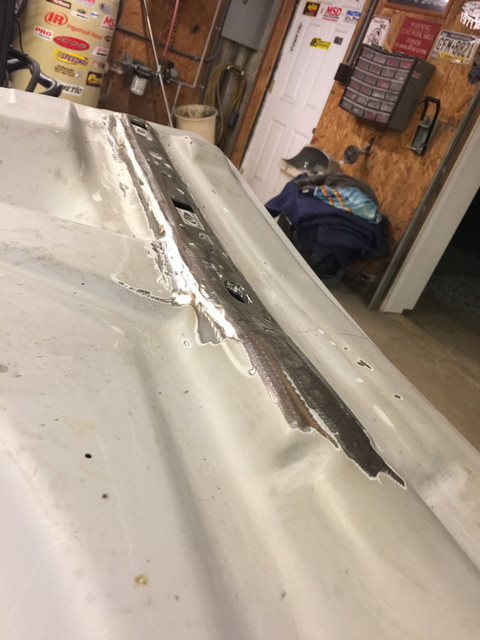
Hey guys. Had a question about trying to change the arch of the hood for a better fit. I am installing a dynacorn  Hood on this 71 and got all my gaps pretty nice but it has way too much arch in the center and doesn't match the fenders for ****. I have quite a few shims under the centers of the fender but I cant really make them arch more.  My question to you fellas is, how did you de-arch your hoods?? Seems like dynacorn cant get their **** together on these arches. I fit the hood and it looked decent but the arch is really bothering me. Unfortunately I didn't get a pic of it on the car. I was thinking of going a little cave man on the hood and laying it on some cardboard on the floor in garage and taking a 2x4 down the length of each side and pressing down and try to get the hood arch to relax a bit. Any other suggestions??
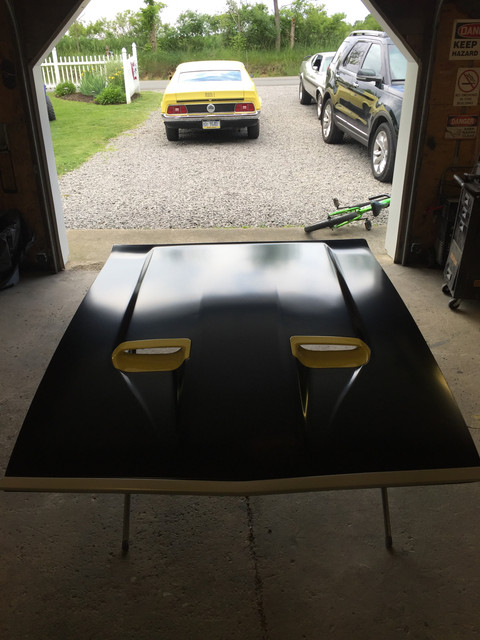


image hosting cdn

 
Last edited by a moderator:
Kevin,

This is a common issue with the repo hoods of all makes. My friend that does restorations has to re-arch hoods and trunks all the time. In fact my son works at the BMW plant and they also have to tweak brand new hoods and hatches for them.

Clay tells me that is the reason they do not spot weld the hem around the hood so that you can change the arch. Here is what he does.

He puts the hood on the floor and puts blocks of wood under the four corners. He then puts blocks under the center of the hood on each side along where the fender aligns. Measure to the floor to get a start point.

He then physically stands on the hood and bounces to bow it back. The blocks in the center keep from going too far and you keep reducing the stack height until you get the result you need.

I have a video of assembly line at Ford, not mustang, and they had an air operated machine on the line to change the arch in trunks to make them fit the quarters.

The repo hoods have no seam sealer either so you will need to go around the hem and seal to prevent rust bleed in future.

Take some pictures so others will learn. It will work.

 
Are you talking about an arch like this?

attachment.php


Mine's the original hood and Dynacorn fenders.  According to some of the purists here at the site, that arch is how it came from the factory.  Granted, the smooth, perfect gaps and lines look better, but there was supposedly an issue with the NASA hoods that caused the hood/fender arch issues.

More than likely though, I'm guessing nobody cares about the 'hood heritage' and would rather have the better fit. ;)

 
My suggestion would be to go the route of placing the hood on a smooth level surface. Probably garage floor.  If you can get enough flex with the current gap under the hood that's where I would start. If you need to raise the hood for more flex to reshape it I would it with some 2x4 the entire width front and back.  Take a measurement from where the crown is to the floor and right that down on a piece of masking tape at that location on the floor.  Now the tricky part....  I would use a length of 2x4 in the area of the crown and above the inner and outer seam on the outside edge of the hood and put some pressure on that to avoid distorting the outer skin.  I would start with just leaning on it first to see what progress you can make.  Baby steps in my opinion are best in this area. Give that a go several times before moving on to more aggressive methods.  I hade to take some crown out of mine up near the front passenger side.  After paint. We placed a 2x4 on the core support and worked it a couple of times that way and very happy with the results.  Good Luck. Let us know what you do and how it works out.

P1010524.JPG

Replaced the front bumper after this picture for better alignment on left front fender front trim.

P1010542.JPG

 
Last edited by a moderator:
Thanks Guys!! This bumper is also sitting out just a touch on the drivers side. I fought it for 3 hours the other day and gave up. I think the front end was hit underneath at some point. The front cross member has a pretty nasty dent and even a small tear in the metal. To get the bumper bolts in, I had to put a ratchet strap on the front bumper frame rails and pull them together. I cant wait for this project to be done!!!

 
well my suggestion is going to be anticlimatic

An experienced body man/panel beater can hammer and dolly that hood to the right contour to match the fenders-it is a more expensive fix, but if you can find one that does side work it might not be too bad.

I would put a 2x6 under the front edge and the rear edge and sit on it at the high spots, then jump on it, then hit it with a sledge hammer and buy a new one
rofl

 
You should see them in the assembly plants today. They do not just bolt them together and fit. My Son is the inspector on the assembly line at BMW for the X6. They hire really big guys to do the final fits on doors, hoods and hatches. They do bend the brand new BMW sheet metal to fit. It is common. They did fit better than that new on our cars. I have a couple never painted cars with low miles and they are not off that bad but I am going to get excited about it, lol.

As I stated in my first comment they did not seam seal or weld the hem on the repo hood so you can change the arch.

 
Thanks for the input guys. I ended up laying down some towels and a couple 2x4 for the hood to sit on at front and back. Then I measured the height on each side. Then layer another 2x4 along the arch and pushed really hard few times getting a little each time. Kept checking measurements as I went. I end up getting around 3/8" out of each side. I am going to check the fitment tomorrow when my buddy stops by to give me a hand. Do the final tweaking tomorrow. You could really feel the hood flex when you pushed on it. I will keep you posted how it turns out. 


I will find out tonight if I went far enough. Hood's too damn heavy to handle by myself. I can definitely get more flex out of it, but didn't want to go too far. Hopefully my buddy can stop up and we can finish the final tweaking.

 
After you get it where you want, you can put some spot welds [ or tack welds ] on the inside seam.

This will keep it from moving - Don't seam seal the front and back ends as water needs to drain out

 
Thanks Well I had a bit of a set back last night! Me and my buddy were adjusting the hood, had it almost perfect, right where we wanted it. Opened the hood checked everything, and noticed the hood was flexing quite a bit every time we closed the hood. It was flexing right at the hinges. The hinges were hard  as hell to get to go up and down. The driver side was really bad. It kept changing where the hood was located when closed. On the next time we closed the hood, it buckled right in front of the hinge! F*cked it all up! Inside the hood there is a reinforcement plate where the hinge bolts to, it bent right at the end of the mounting plate. Buckled the hell out of it! :mad:  I was not happy. I think it was a ****** bound up aftermarket hinge and a shiity repop hood. Combination of both that caused the failure. Im just glad it wasnt already painted when it decided to buckle.

I unbolted the hood and checked the damage. It bent the mount pretty bad, but not much damage on the top side luckily. One small spot on the topside. I ended up taking a 8'  2x4 and bolted it to the hinge. I was able to work the driver side pretty easy and smoothly. I bolted the 2x4 to the driver side and it was a bear to move. It got looser the more I worked it,but it was flexing the hell out of the inner fender and the actual hinge was flexing a ton! I am going to see if I can send it back to CJ pony parts and get another one. These aftermarket hinges are a joke! And we bought the "premium" ones. Just about destroyed a $500 hood. And the hood is flimsy as heck!!  O well, im don't ranting!! :shootself:   Now to fix it!!

I started by cutting out the entire hinge mount area. Hammer and dollied it back into shape. The support brace inside was barely even welded to the hood. So I weld it up better. Then took a piece of 1"x24"x3/16" flat stock and welded  it to the inner structure of the hood. Then I took another piece of flat stock 12" long and welded it to the factory bracing inside and extended it inside the hood. Welded everything up solid, then welded the big ******** I cut in the hood back up.  I don't think it will be flexing on that side again anytime soon. I will do something similar to the other side but not as extreme because it didn't buckle as bad.

Heres some pics of damage and fix. I will also try to get a video up of the hinge flexing.


Last edited by a moderator:
Wow, sorry to hear about the additional complications. What doesn't kill us only makes us stronger!! OR Results in a lot of four letter words and thrown tools. Glad to see you are back on track after the derailment.

 
Back
Top