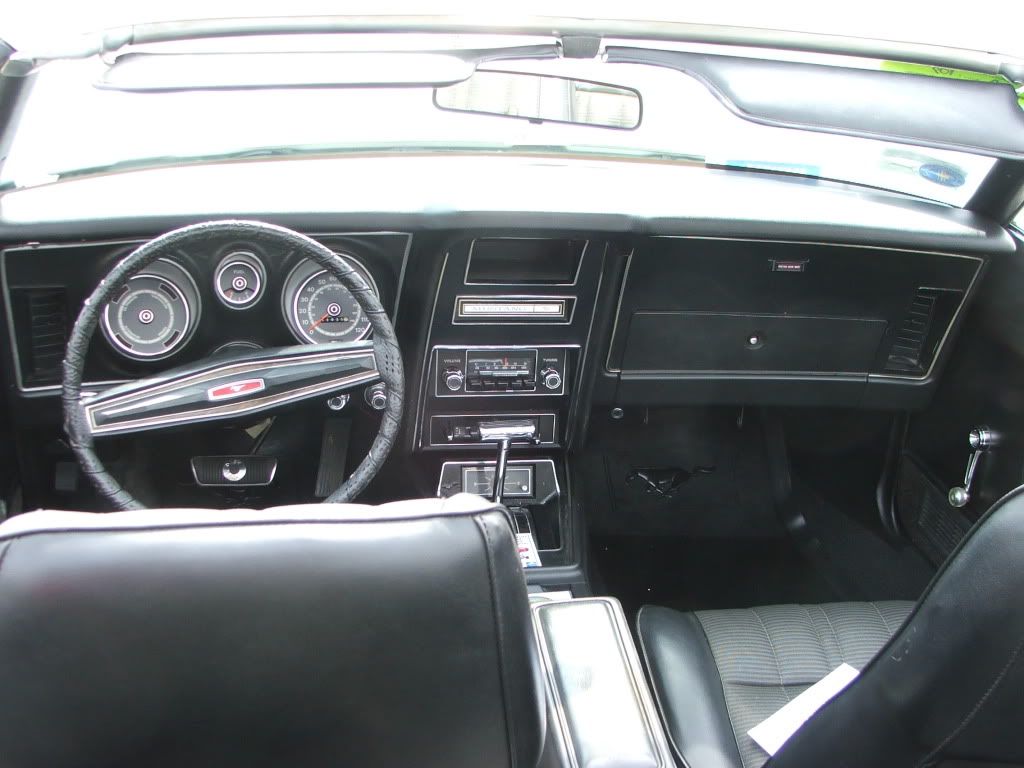
How to replace your 71-73 dash pad

7173Mustangs.com

Help Support 7173Mustangs.com:

This site may earn a commission from merchant affiliate links, including eBay, Amazon, and others.
Hi where are the six screws on the top across front of the dash that your talking about

How to replace your 71-73 Dash Pad.

1. First, obtain your new dash pad from your favorite Mustang parts vendor.

2. Start by removing the original dashboard from the top. Unscrew the six screws aligned across the front of the top and also taking out the three screws above the instrument panel.

3. Continue by taking out three additional screws laid across the top of the passenger side. These are the ones that keep the top of the dashboard in place.

4. Lift the top of the dashboard and pull out the entire assembly being careful not to scratch the a pillar trim.

5. Remove the five tinnerman nuts on the back of the dashboard panel assembly. Use an 11/32-inch socket.

6. Now, separate the dashpad and crown as shown in the photo. You will be installing the new dashpad in the same fashion.

7. There are two locations for nut clips on each side of the dashpad. Drill these locations with a 3/8-inch bit to make way for the nut clip. Remove the material in the middle of each side to make room for the nut clips to be attached to the dashboard.

8. Be sure to drill pilot holes in the two locations on each side first. Then, drill them with the 3/8-inch bit as shown—again, this is for the nut clips. The new 3/8-inch hole will allow room for adjustment.

9. Transfer the nut clips from the old dashpad to the new Just Dashes dashpad.

10. Be sure to remove that material from the middle of each side to make room for the dashboard nut clips. If you need a reference, look at your original dashpad to see where you need to remove the material. To do this, you can use a jigsaw.

11. The dashboard crown is retained with screws and three retainer clips that slip into three square openings in the top of the dashboard. Be careful with these clips! If they break, you’ll be forced to look around for a parts car.

12. Now, to complete the install of the new dashpad and crown, simply slip the clips into the square openings, pushing the assembly in place. Keep in mind, this part of the install requires you to temporarily remove your vehicle identification number (VIN), as it is attached to this assembly. Check your state’s vehicle laws for VIN removal and transfer, as you may have to have a law enforcement officer or motor vehicle administrator witness the removal to keep this thing legal.

13. Reinstall the screws that keep the dashboard crown and dashpad fastened. Now, just enjoy your new dash! Hopefully, it took you less than an hour…
 
It's metal so paint is fine. When I painted mine years ago I used gloss. It looked good but the glare back onto the windshield was horrible.

I repainted it about a month or so ago and went flat black. It looks just as good (I think) and there is almost no glare.

My recommendation is flat black. If you go gloss, keep a towel or something you can throw onto the dash when the sun hits it right.
HMMM??? Glare...something I didn't think about. Maybe I'll go with a satin black just to have some shine on it to match the dash pad.

Thanks

 
I removed the 6 screws, + the 2 on the top of the dash, the dash is moving up and down, but I can't remove it, I try to pull it but afraid to break something. Maybe it's better to be 2 guys to pull it, one on each seat?

 
I removed the 6 screws, + the 2 on the top of the dash, the dash is moving up and down, but I can't remove it, I try to pull it but afraid to break something. Maybe it's better to be 2 guys to pull it, one on each seat?
You have to pull it straight back. The 3 clips on the underside near the windshield prevents you from lifting it up. Mine was hard to remove too. Two guys would work better, just pull it straight back towards you and it should come off.

-jbojo

 
Update!!!

The original dash pad came off so easy that it was scary. I removed the 8 screws holding it in placed and just pulled. I also noticed that 2 of the 3 original clips were broken and lucky I bought 3 new ones. I made the mistake of paint brushing the crown. Ending up after it dried, spraying it primer black then satin black. Looks pretty good.

Putting it all back was an experience. Even though it was Ford Original tooling, things just didn't line up exactly. I ended up breaking one of the new clips, so lucky the one original that was still good, worked.

I also needed to get 6 new screws and clips which made it alot easier to put back. Unfort, it took me 4 trips to the hardware store to finally get it right. The 2 center screws still worked fine.

So now it's done, looking good and off to the next project. Replacing the rear center panel comb trim.

 
The various screws and attachments for the dash-top was modified from 71 to 73...maybe more than once.

The 71s had two screws on the top underside of the center-stack panel that were very near the edge of the panel. My 73 convertible had these two screws moved inward a couple inches, much closer to the a/c register. And the '73 had the two screws on the top side of the crown near the windshield...nowhere to be seen on my 71.

These production changes were probably done for one of a couple possible reasons: to cut down on customer complaints of squeaking and rattling, and/or to improve the process or safety of assembly on the line.

The leading edge of the crown, the part that wedges in under the windshield originally had a strip of compressable foam attached. Once installed, this foam "snugged up" the panel to prevent squeaks.

Like all the foam that FORD has used for 40+ years...it deteriorates completely from heat after only a few years, leaving dust in its place, and brittle yellowed tape on the panel where it was attached.

Install a strip of new foam on the underside of the leading edge of the crown before you reinstall it and it will DRAMATICALLY reduce squeaks and rattles.
Good suggestion with the new foam, but since my dash pad is back on, no way am I pulling it off again.

On the good news regarding squeaks, I think my flowmaster exhaust system will take care of any potential squeaks from the dash...:D

 
The various screws and attachments for the dash-top was modified from 71 to 73...maybe more than once.

The 71s had two screws on the top underside of the center-stack panel that were very near the edge of the panel. My 73 convertible had these two screws moved inward a couple inches, much closer to the a/c register. And the '73 had the two screws on the top side of the crown near the windshield...nowhere to be seen on my 71.

These production changes were probably done for one of a couple possible reasons: to cut down on customer complaints of squeaking and rattling, and/or to improve the process or safety of assembly on the line.

The leading edge of the crown, the part that wedges in under the windshield originally had a strip of compressable foam attached. Once installed, this foam "snugged up" the panel to prevent squeaks.

Like all the foam that FORD has used for 40+ years...it deteriorates completely from heat after only a few years, leaving dust in its place, and brittle yellowed tape on the panel where it was attached.

Install a strip of new foam on the underside of the leading edge of the crown before you reinstall it and it will DRAMATICALLY reduce squeaks and rattles.
Screw location in the center bezel to dash pad did not change.

You might be thing of the map light block off plate.

 
Screw location in the center bezel to dash pad did not change.

You might be thing of the map light block off plate.
Sorry, that is incorrect. I will post a pic of the alternate screw location on an old panel once I dig it out of the garage. Definitely not thinking about the map light mounting holes.

 
Here are some pictures of an old OEM center stack bezel. It is clear to see thgere are three sets of mounting holes near the top of the piece on it from the factory.

The upper-most set of holes is very near the edge of the panel, the second set of holes is for the map light or the map-light block-off plate.

And the third lower-most set of holes are another attaching point. These are the holes in question.

It is clear to see that these holes were all molded into the panels from the backside of the piece...the mounting bosses molded in give it away.

Some versions of this panel do not have this lower set of holes. I know the currently-available reproductions do not have them.

Part #: D1ZB-6304302-AWA

"MADE IN USA" stamped prominently on the piece also.

zpfile003.jpg

zpfile005.jpg

zpfile006.jpg

 
Last edited:
No, the non-a/c cars' cubby screws onto the same two mounting bosses on the back of the unit that the a/c register screws onto.

 
Last edited:
I know this is kind of an older thread but just wanted to say thank you. I have bookmarked it and will be doing this as well as some instrument panel upgrades soon. Ive had the dash pad in a box at home for a couple years but had trouble getting things apart. I thought it was bolted down in a few places that are probably just clips. Im going to see if I can upgrade the bulbs in the clusters and probably the voltage reg while I'm at it.

Again thank you for this post.

 
Back
Top