


- Joined
- Jul 10, 2011
- Messages
- 2,056
- Reaction score
- 606
- Location
- Germany, Southwest, Black Forest
- My Car
- 1973 Ford Mustang Mach 1 T5 Q-Code 4-Speed
Hey guys,
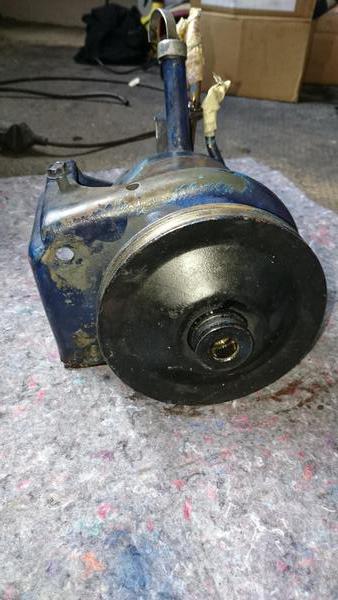
now it is time to go over the power steering pump - it is the Thompson-style one which came usually with our 71-73 cars.
You need:
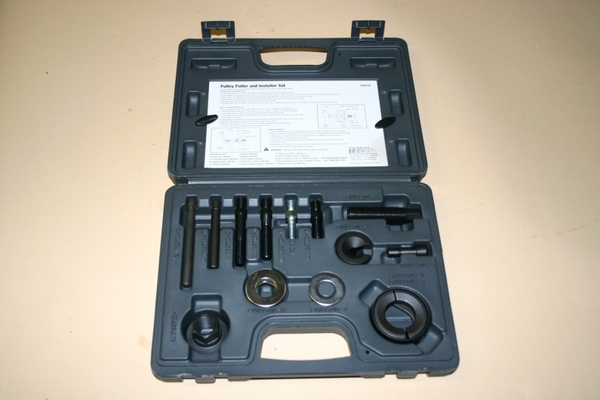
- pulley-puller toolbox for deinstalling and installing the pulley
- lot's of elbow grease for deinstalling and installing the pulley
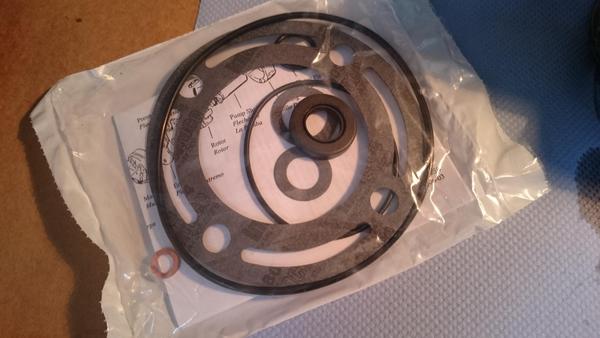
- power steering kit with new seals
- some fine brushes for your drilling machine for paint stripping
- fine sanding paper for cleaning the pump shaft
- rubber hammer
- common tools out of your garage toolbox
- satin black laquer for the original look - it seems that most of the 71-73 pumps were originally black
- some f-type fluid
- good mood and some hours of time
It is not rocket science but take your time and work properly...
1)
The first aim on your power steering pump will be to get off the pulley. Without that you will be not able to get it rebuilt, nicely lacquered and leak-proof.
So you need a pulley puller tool for sure! Do not use another puller with only 2 or 3 arms - they will bend your pulley that way you could throw it on the garbage after! There are immense forces by removing it so please do you a favour and use a pulley puller. It is worth it!
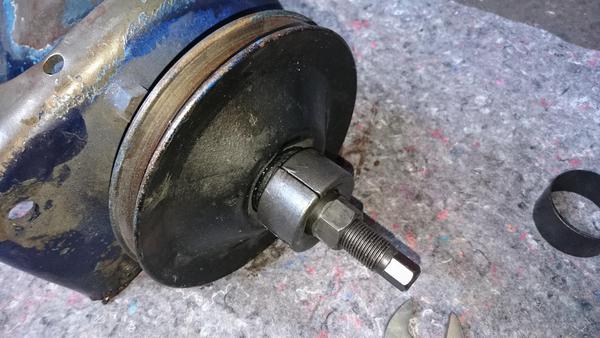
That is what you need:
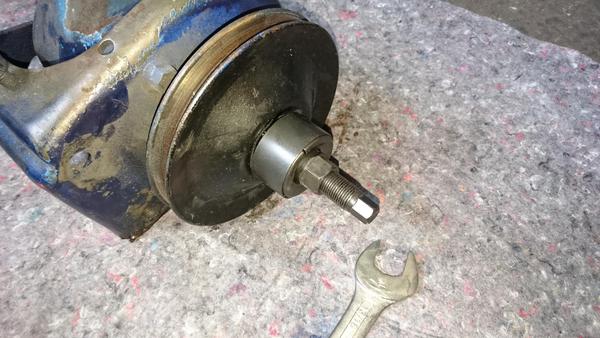
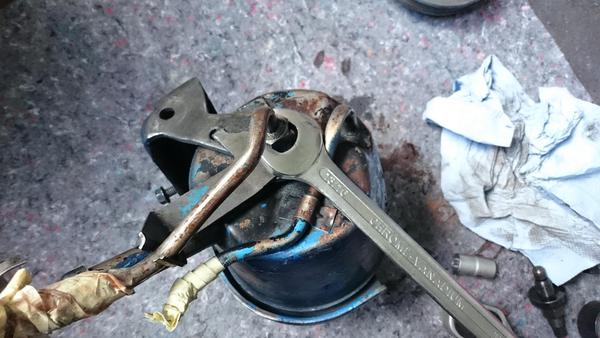
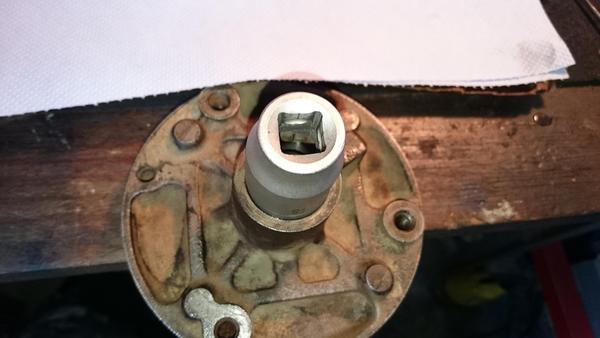
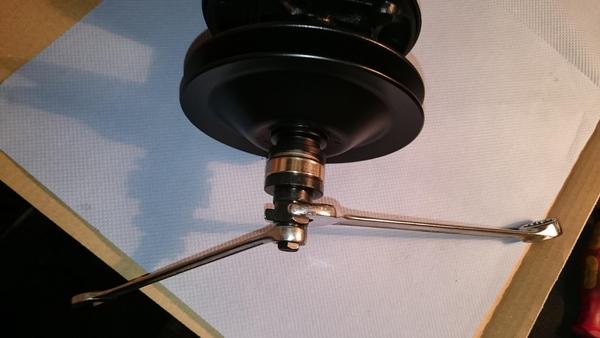
2)
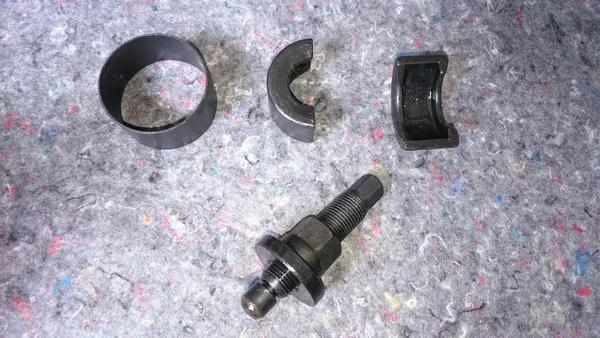
Place it on the pump pulley like pictured below and take a wrench and a ratchet. With the wrench you will hold against and with the ratchet you will pull the pulley out buy trying hard clockwise! Never give up - it will do after some time with enough elbow grease and some beer for motivation
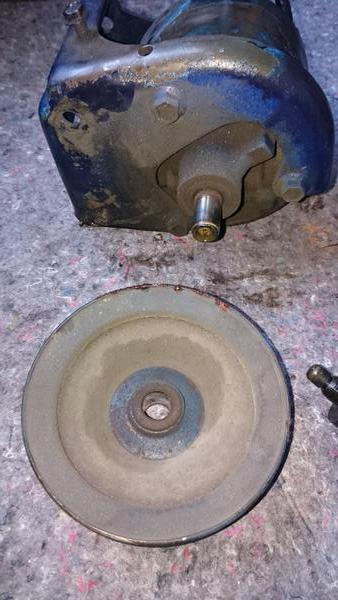
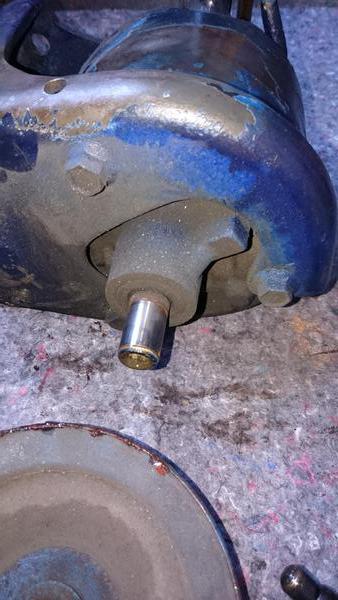
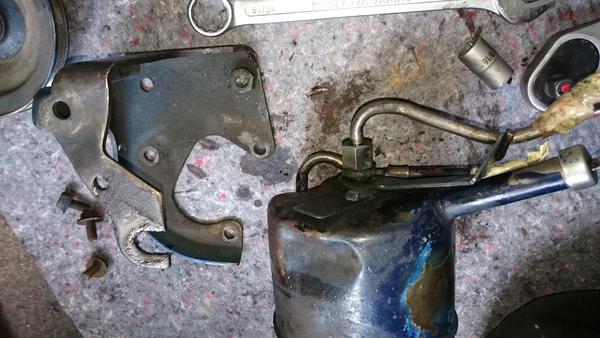
3)
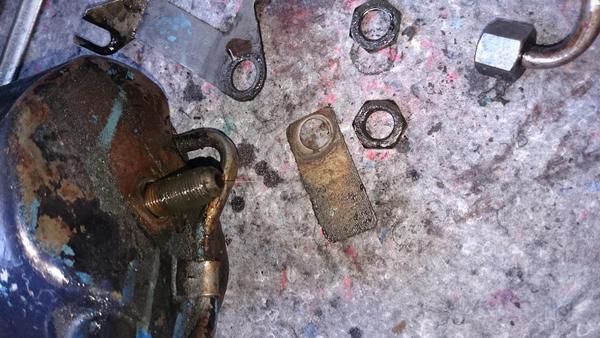
After that you could finally remove the pump's bracket
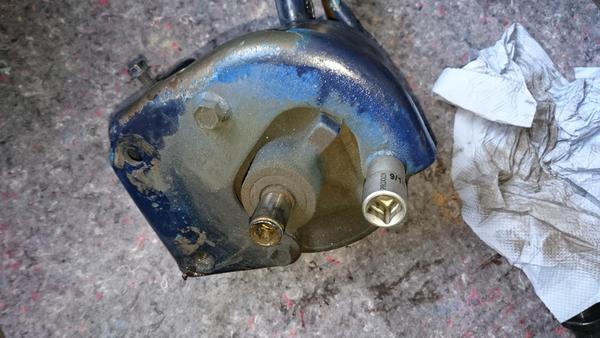
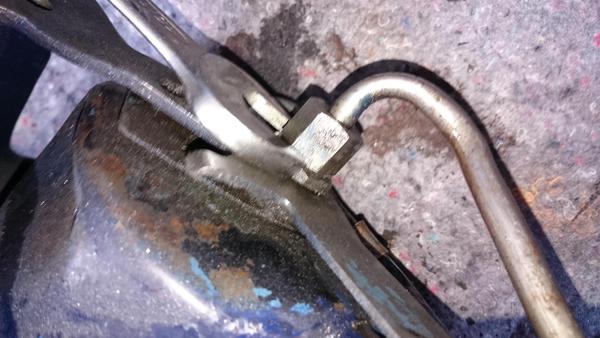
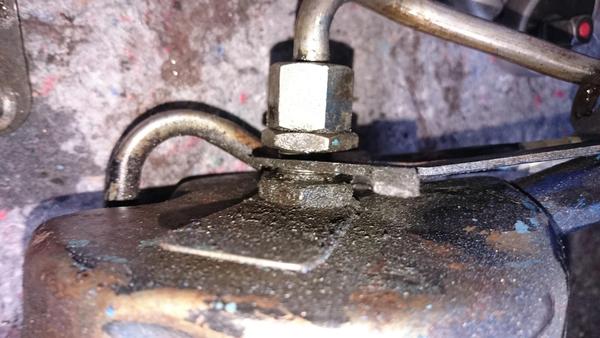
4)
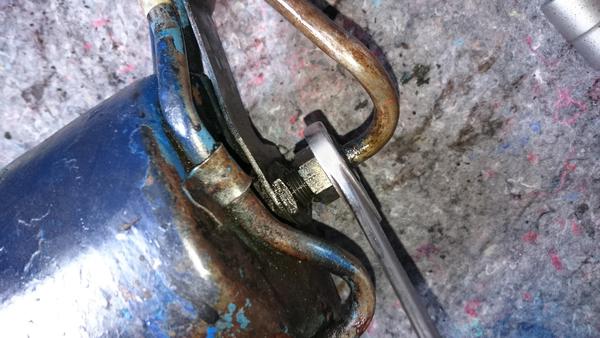
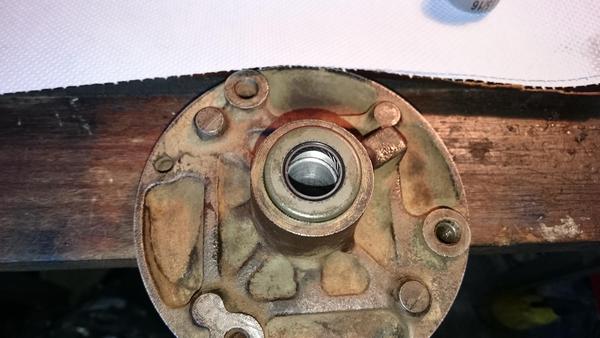
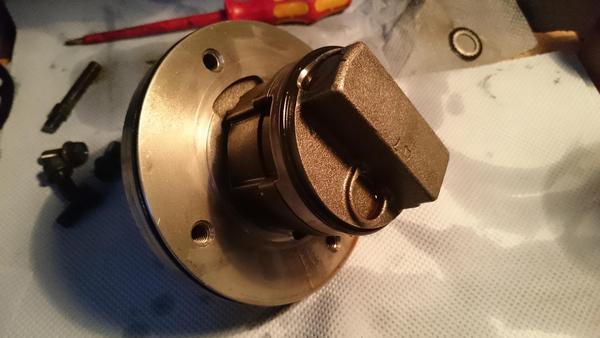
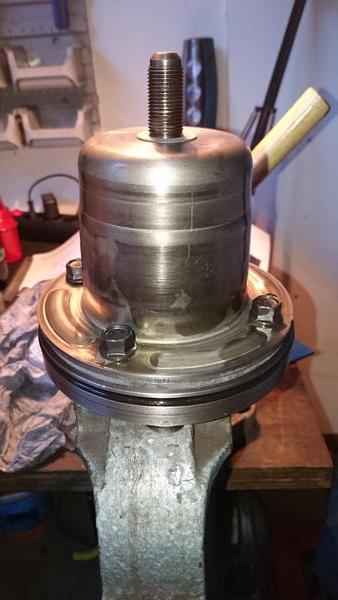
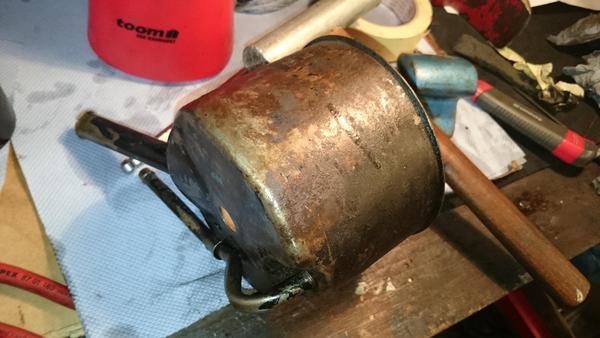
Now to the back of the pump - be carefull with the lines - do not bend them by attempting to unscrew them...

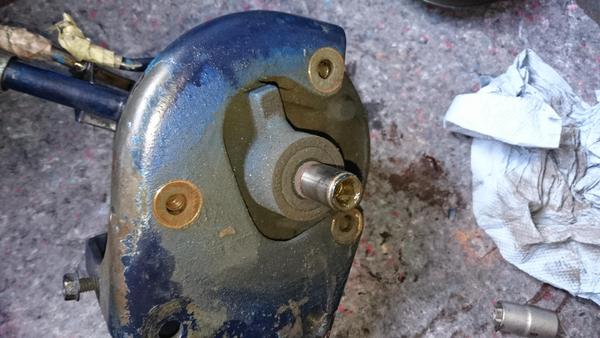
5)
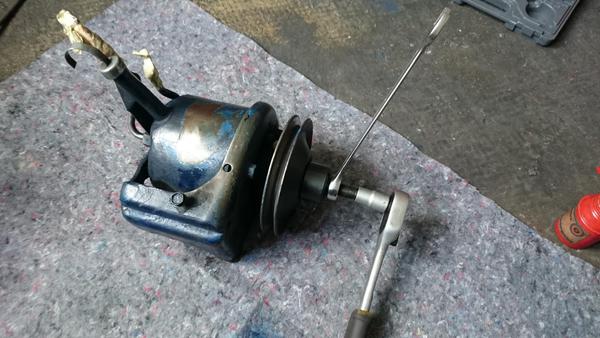
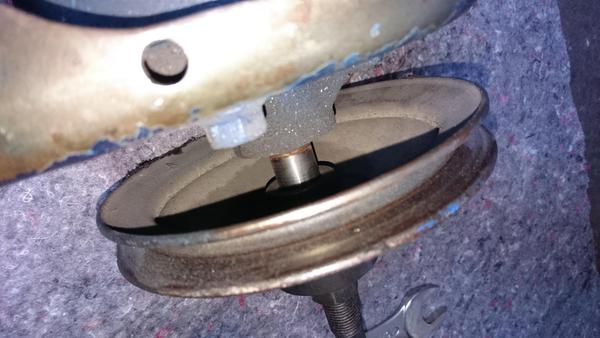
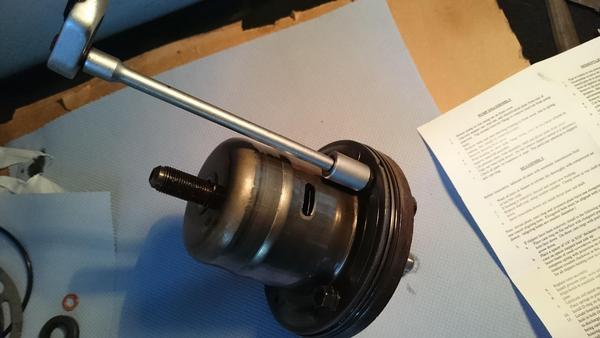
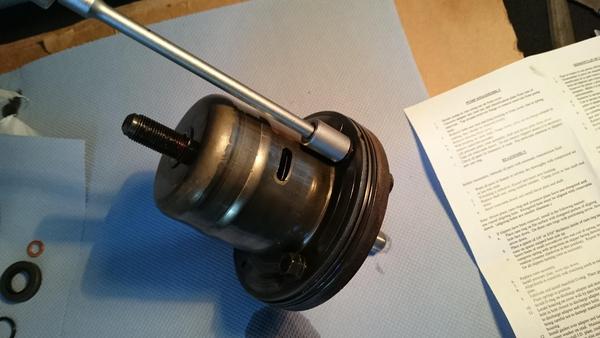
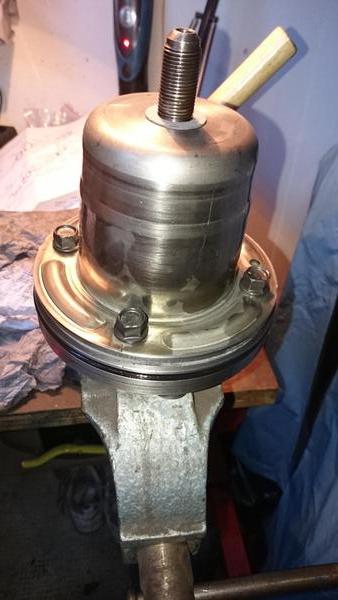
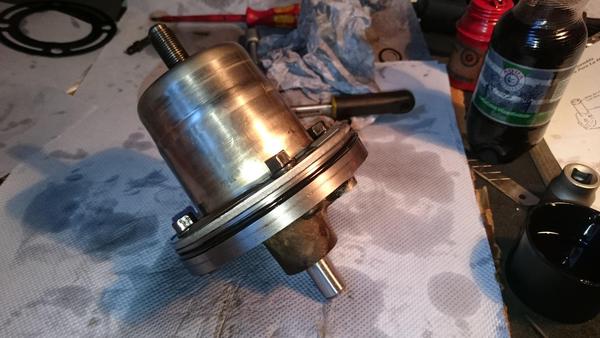
Another major effort: pulling the pump out of the housing. The best that will work is to lay it with the edge of the pump housing downwards on a bench vise. Do not tighten it to the pump's inner core - it is only for a safe stand!
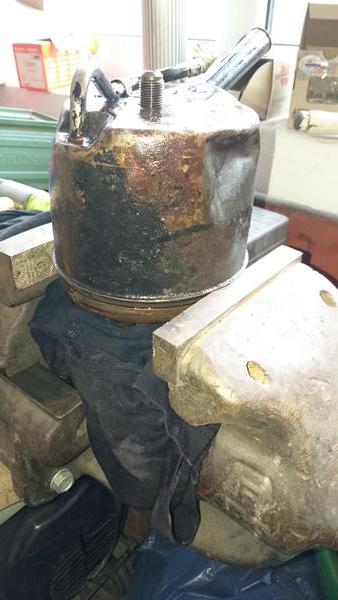
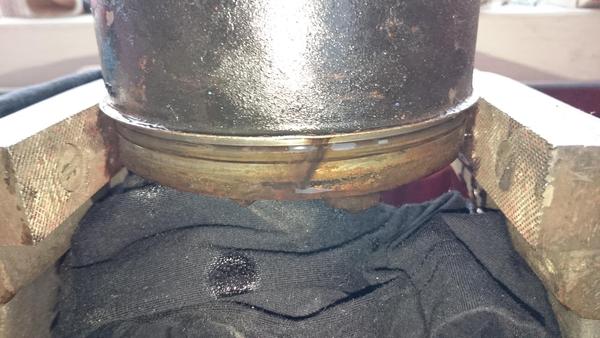
Now take the rubber hammer, a piece of wood and give it a few punchy strokes and look for the moving core. Take care of preventing it from falling to the floor. You could make a safeguard against by screwing one of the nuts back to the back thread of the core which looks through the housing.
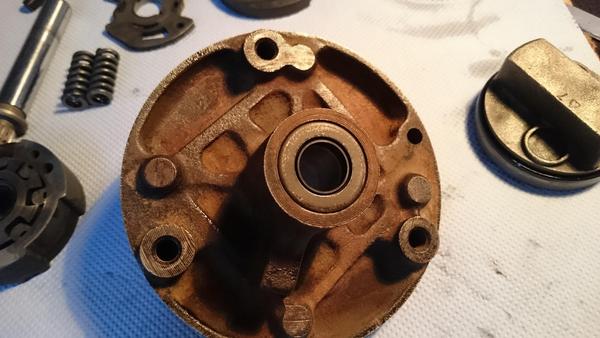
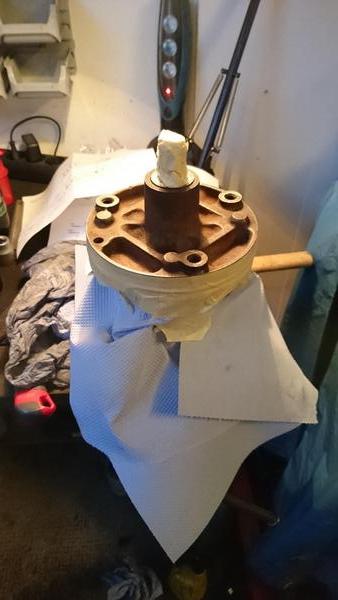
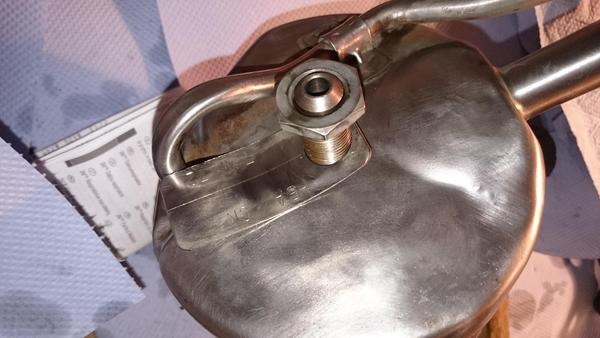
There it is
Nicely cleaned - looks good

6)
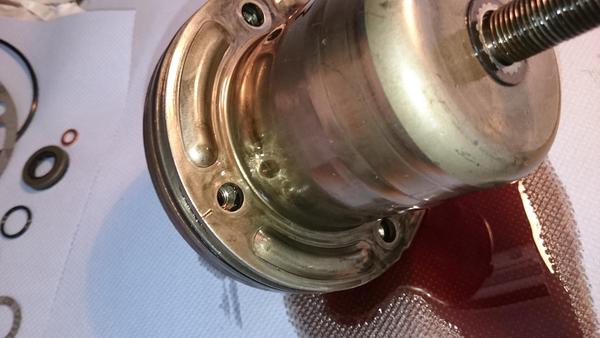
Now for the important part: disassembling the pump core and reassembling it with new sealings.

You will not use all of them - it is a kit for more than one sort of pump...
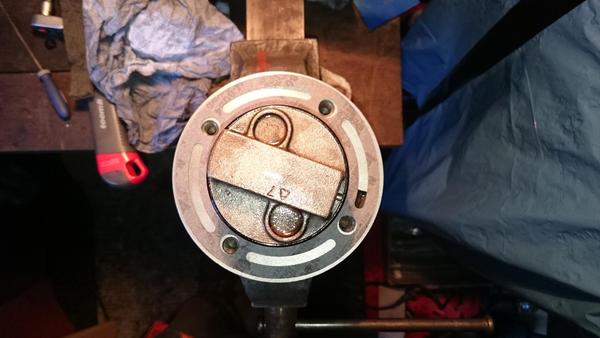
There is one mark on the edge of the top part of the core - it is important that you exactly reassemble it that way with the bottom part of the core. If there is no mark make one on the edges of the top and the bottom before you pull the two halfs of the core apart!
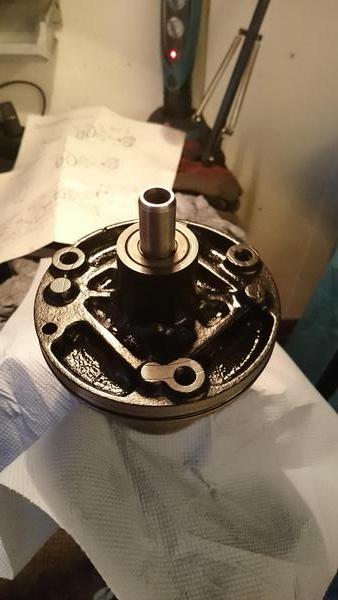
7)
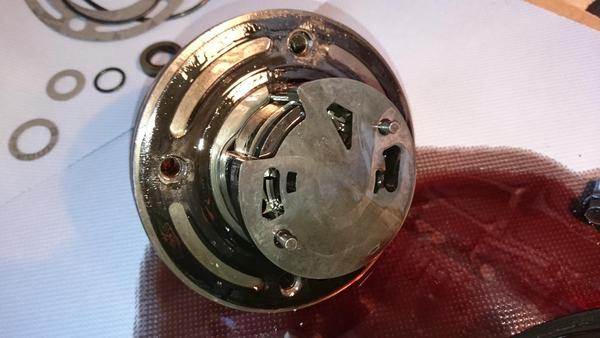
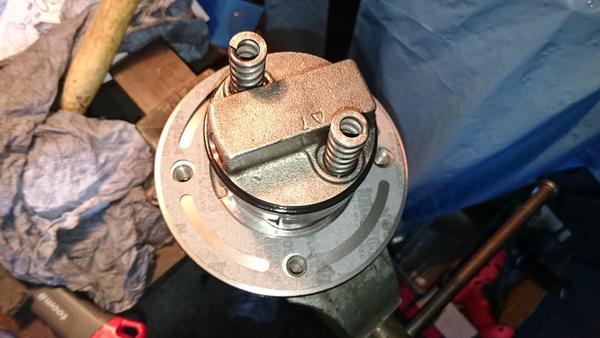
Take the inner core apart piece by piece - take care and remind their positions!
Be careful - you perhaps do not want that part to fall into pieces - that will cost you some minutes to reassemble it - later I will explain why... Hold the inner ring in parallel with the outer!

8)
Push the pump shaft out with the rubber mallet:
The pump shaft looks good and needs only some minor cleaning with fine sandind paper. The teeth of the pump shaft gear is also looking good and shows only minor wear - no time to worry!
Remove the shaft seal with some pliers
9)
Top of the outer core with the top of the inner core
10)
All the parts cleaned with brake cleaner and assorted:
Reassembling starts with installing the new pump shaft seal. Don't forget to give every part a little lubrication with f-type fluid before assembling - the seals and gaskets too!
Take a socket with the same size as the seal and push it in with a hammer
Done
11)
The sealing rings and the gasket
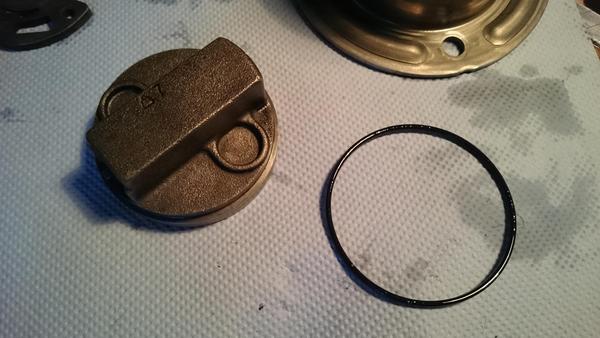
12)
Reassembling of the inner core - look for the correct order of the parts!
Now for the records: I pushed too hard against the gear assembly and it came as it only has to come: it fell apart. So I cleaned all the parts too, polished the inner gear parts and learned how to assemble them... If you have the same problem look exactly where the parts have been based on their signs of use! So be careful!!!
FINISHED!
13)
But that was not all - painting the core and flatten, paint stripping and painting the pump housing to give it that shiny almost new look it deserves and you are looking for
Lots of dents were flattened...
Yihaaaa - it is probably the original pump - dated 1972... ::thumb::
Don't forget the little gasket over the thread outside the housing on the back before you put on the first nut and the tag.
Painting!
Dry and reassembled core with housing. Take the core gently into the housing and look for the sealing ring - lubrication helps!
14)
Final spurt - on with the pulley! Use some lube, the pulley assemble kit and lot's of elbow grease. It could be necessary to hold the pump, support one wrench with the table and push the other wrench - because you have only two arms
DON'T forget to install the pump's bracket before you install the pulley! Ask how I know... Ok, it was really late !
NOW it is finished!!!
Have fun and success ::thumb::
now it is time to go over the power steering pump - it is the Thompson-style one which came usually with our 71-73 cars.

You need:
- pulley-puller toolbox for deinstalling and installing the pulley

- lot's of elbow grease for deinstalling and installing the pulley
- power steering kit with new seals

- some fine brushes for your drilling machine for paint stripping
- fine sanding paper for cleaning the pump shaft
- rubber hammer
- common tools out of your garage toolbox
- satin black laquer for the original look - it seems that most of the 71-73 pumps were originally black
- some f-type fluid
- good mood and some hours of time
It is not rocket science but take your time and work properly...
1)
The first aim on your power steering pump will be to get off the pulley. Without that you will be not able to get it rebuilt, nicely lacquered and leak-proof.
So you need a pulley puller tool for sure! Do not use another puller with only 2 or 3 arms - they will bend your pulley that way you could throw it on the garbage after! There are immense forces by removing it so please do you a favour and use a pulley puller. It is worth it!
That is what you need:

2)
Place it on the pump pulley like pictured below and take a wrench and a ratchet. With the wrench you will hold against and with the ratchet you will pull the pulley out buy trying hard clockwise! Never give up - it will do after some time with enough elbow grease and some beer for motivation


3)
After that you could finally remove the pump's bracket


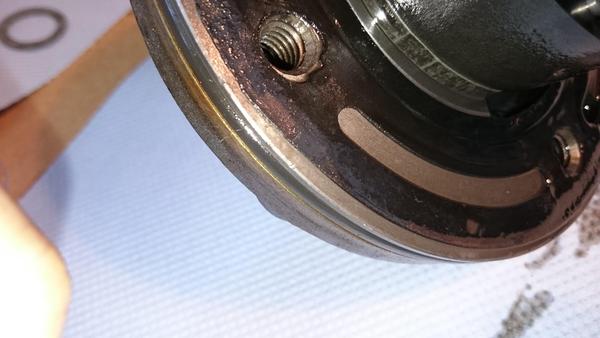
4)
Now to the back of the pump - be carefull with the lines - do not bend them by attempting to unscrew them...


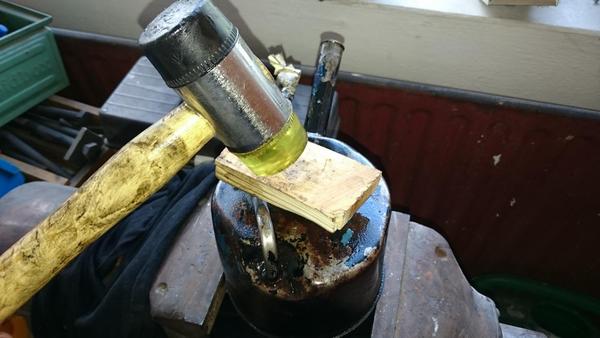
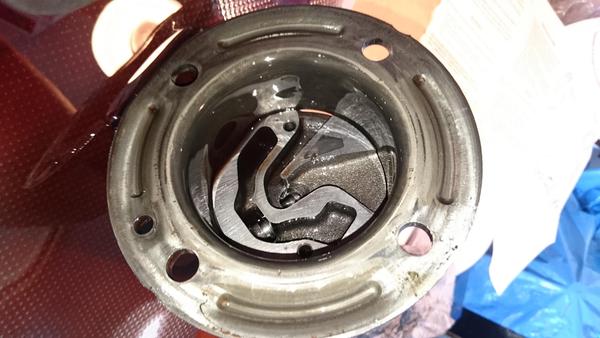
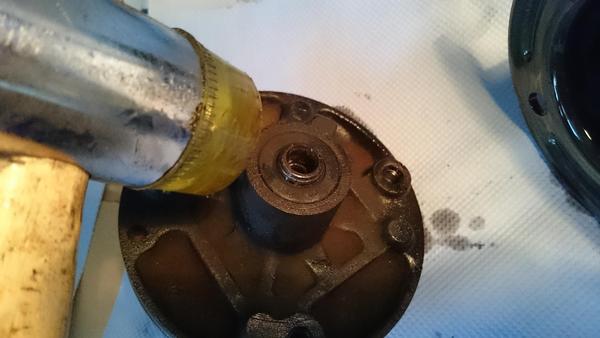
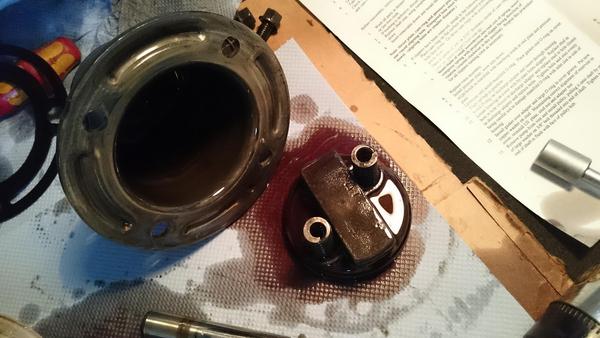
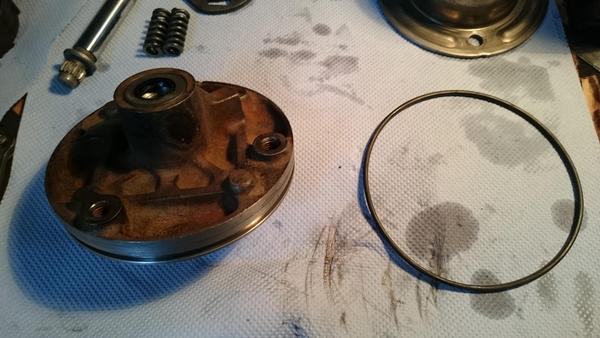
5)
Another major effort: pulling the pump out of the housing. The best that will work is to lay it with the edge of the pump housing downwards on a bench vise. Do not tighten it to the pump's inner core - it is only for a safe stand!


Now take the rubber hammer, a piece of wood and give it a few punchy strokes and look for the moving core. Take care of preventing it from falling to the floor. You could make a safeguard against by screwing one of the nuts back to the back thread of the core which looks through the housing.

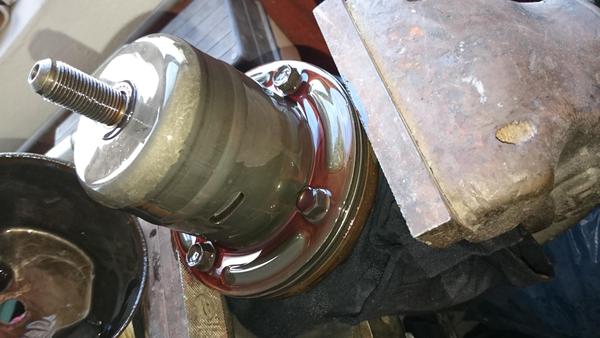
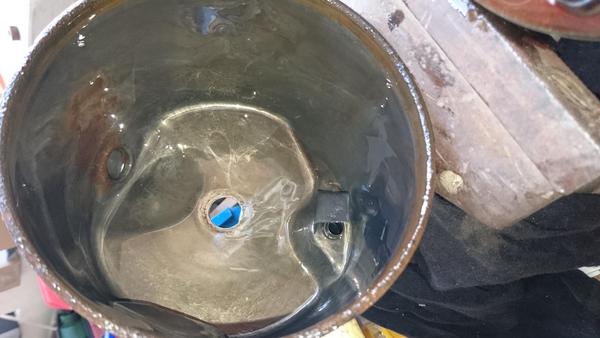
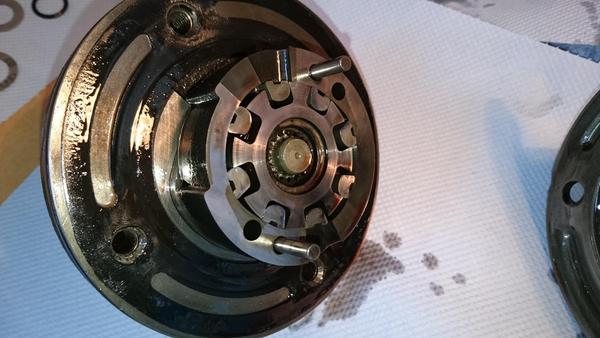
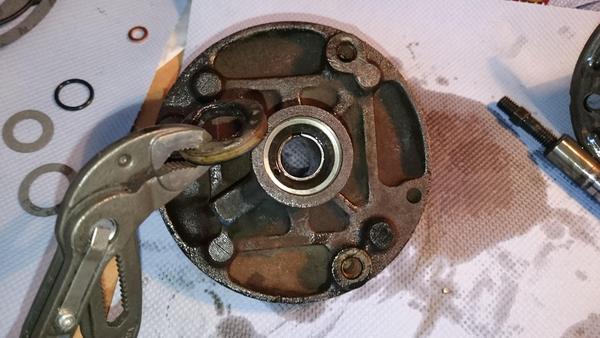
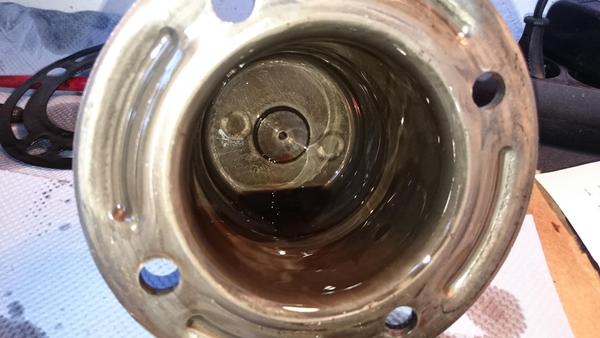
There it is


Nicely cleaned - looks good

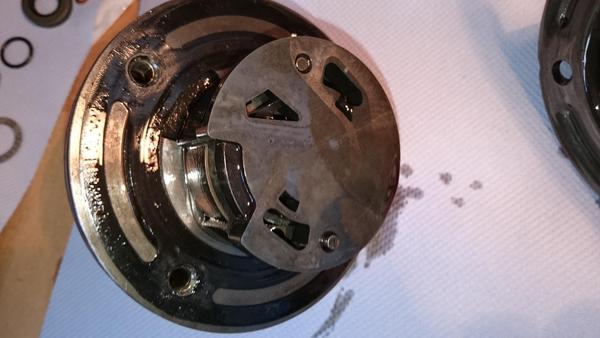
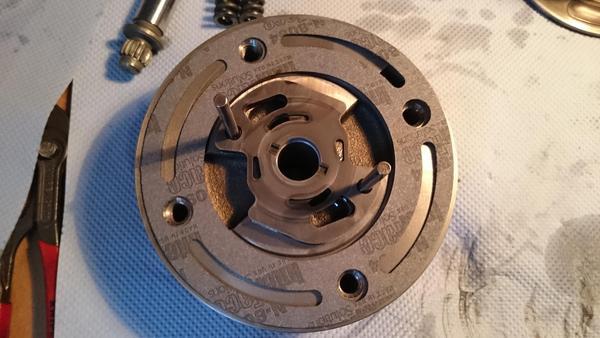
6)
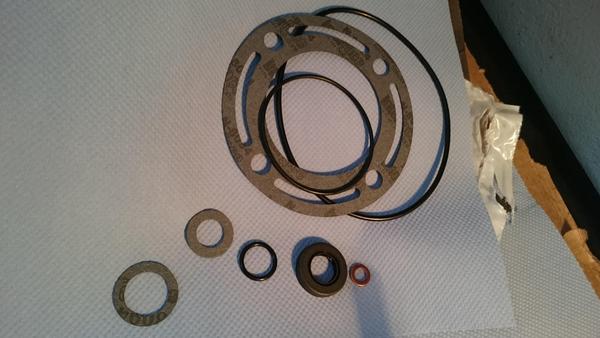
Now for the important part: disassembling the pump core and reassembling it with new sealings.


You will not use all of them - it is a kit for more than one sort of pump...


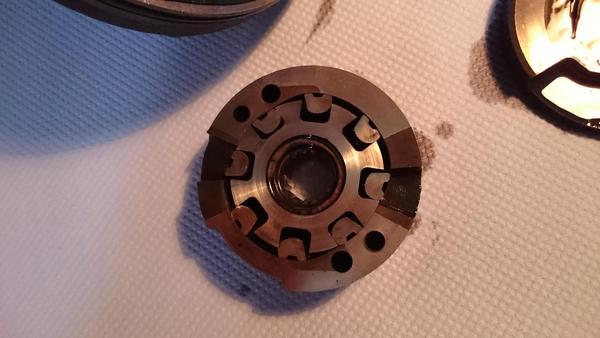
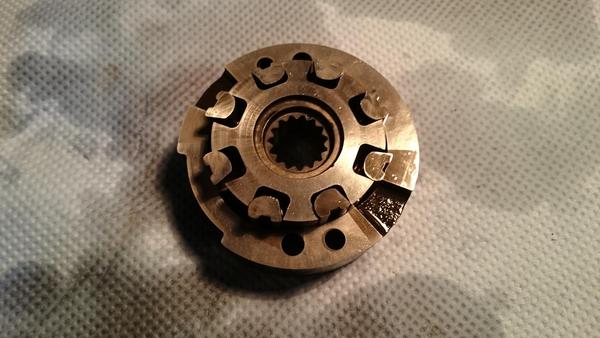
There is one mark on the edge of the top part of the core - it is important that you exactly reassemble it that way with the bottom part of the core. If there is no mark make one on the edges of the top and the bottom before you pull the two halfs of the core apart!


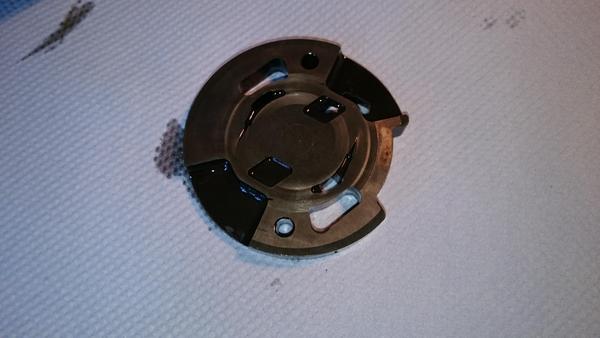
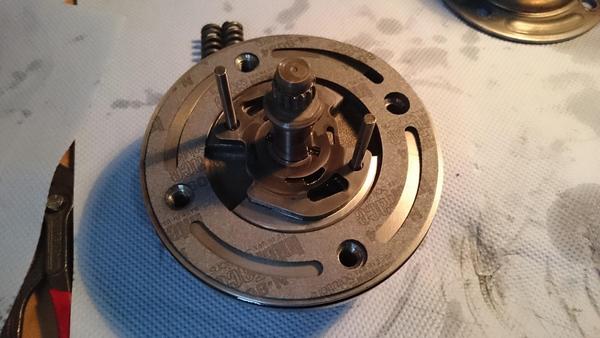
7)
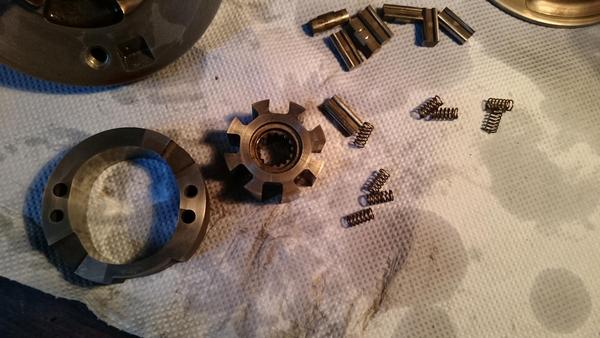
Take the inner core apart piece by piece - take care and remind their positions!


Be careful - you perhaps do not want that part to fall into pieces - that will cost you some minutes to reassemble it - later I will explain why... Hold the inner ring in parallel with the outer!


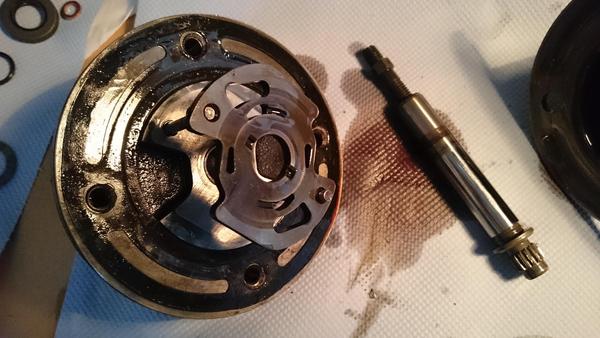
8)
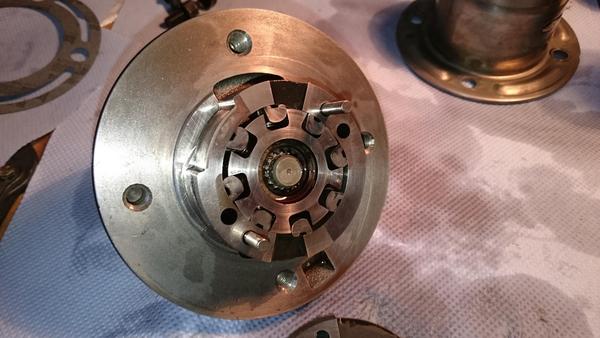
Push the pump shaft out with the rubber mallet:

The pump shaft looks good and needs only some minor cleaning with fine sandind paper. The teeth of the pump shaft gear is also looking good and shows only minor wear - no time to worry!

Remove the shaft seal with some pliers

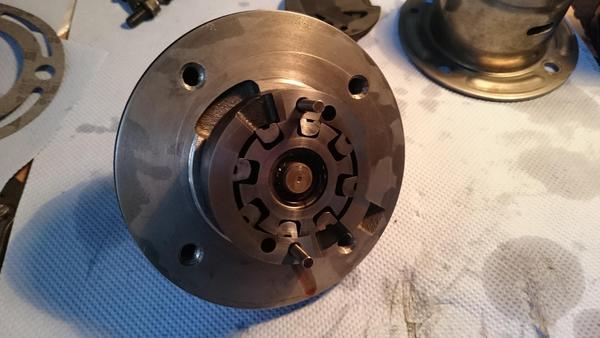
9)
Top of the outer core with the top of the inner core


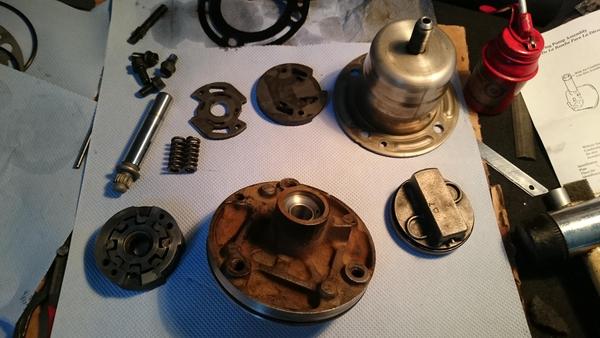
10)
All the parts cleaned with brake cleaner and assorted:

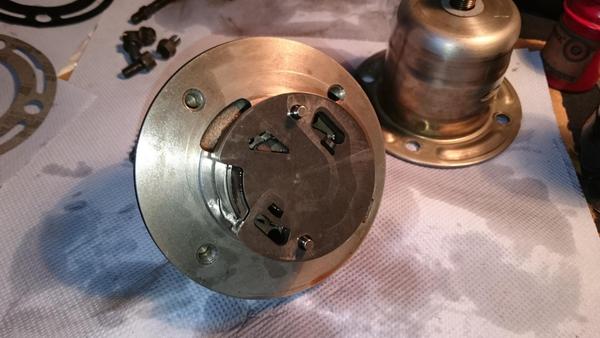
Reassembling starts with installing the new pump shaft seal. Don't forget to give every part a little lubrication with f-type fluid before assembling - the seals and gaskets too!

Take a socket with the same size as the seal and push it in with a hammer

Done

11)
The sealing rings and the gasket


12)
Reassembling of the inner core - look for the correct order of the parts!


Now for the records: I pushed too hard against the gear assembly and it came as it only has to come: it fell apart. So I cleaned all the parts too, polished the inner gear parts and learned how to assemble them... If you have the same problem look exactly where the parts have been based on their signs of use! So be careful!!!


FINISHED!

13)
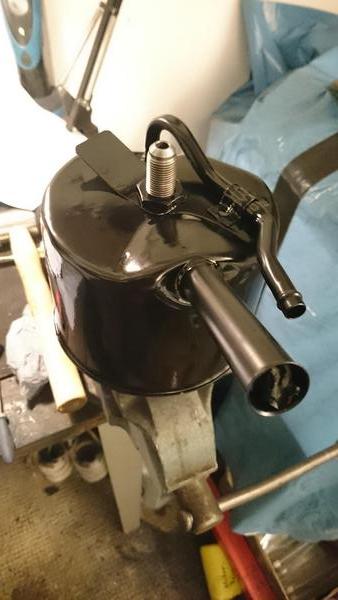
But that was not all - painting the core and flatten, paint stripping and painting the pump housing to give it that shiny almost new look it deserves and you are looking for


Lots of dents were flattened...

Yihaaaa - it is probably the original pump - dated 1972... ::thumb::
Don't forget the little gasket over the thread outside the housing on the back before you put on the first nut and the tag.

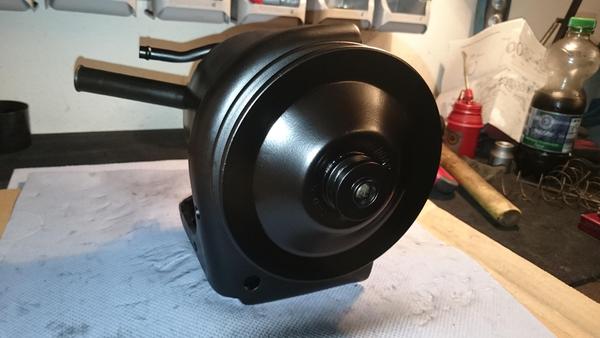
Painting!

Dry and reassembled core with housing. Take the core gently into the housing and look for the sealing ring - lubrication helps!

14)
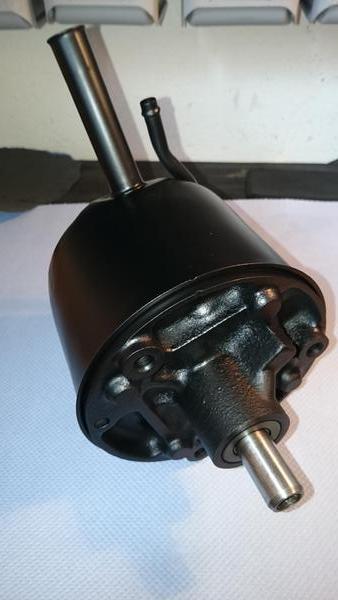
Final spurt - on with the pulley! Use some lube, the pulley assemble kit and lot's of elbow grease. It could be necessary to hold the pump, support one wrench with the table and push the other wrench - because you have only two arms
DON'T forget to install the pump's bracket before you install the pulley! Ask how I know... Ok, it was really late
!
NOW it is finished!!!

Have fun and success ::thumb::
Last edited by a moderator:


