Looking good. Just out of interest you wouldn't happened to know the name of the shop in Aus.
You are using an out of date browser. It may not display this or other websites correctly.
You should upgrade or use an alternative browser.
You should upgrade or use an alternative browser.
New 351c Build.
- Thread starter MeZapU
- Start date


Help Support 7173Mustangs.com:
This site may earn a commission from merchant affiliate
links, including eBay, Amazon, and others.
MeZapU
Well-known member
- Joined
- Feb 12, 2011
- Messages
- 830
- Reaction score
- 11
- Location
- Southery, UK
- My Car
- 12 GT
73 Mach 1
85 GT
66 F-100
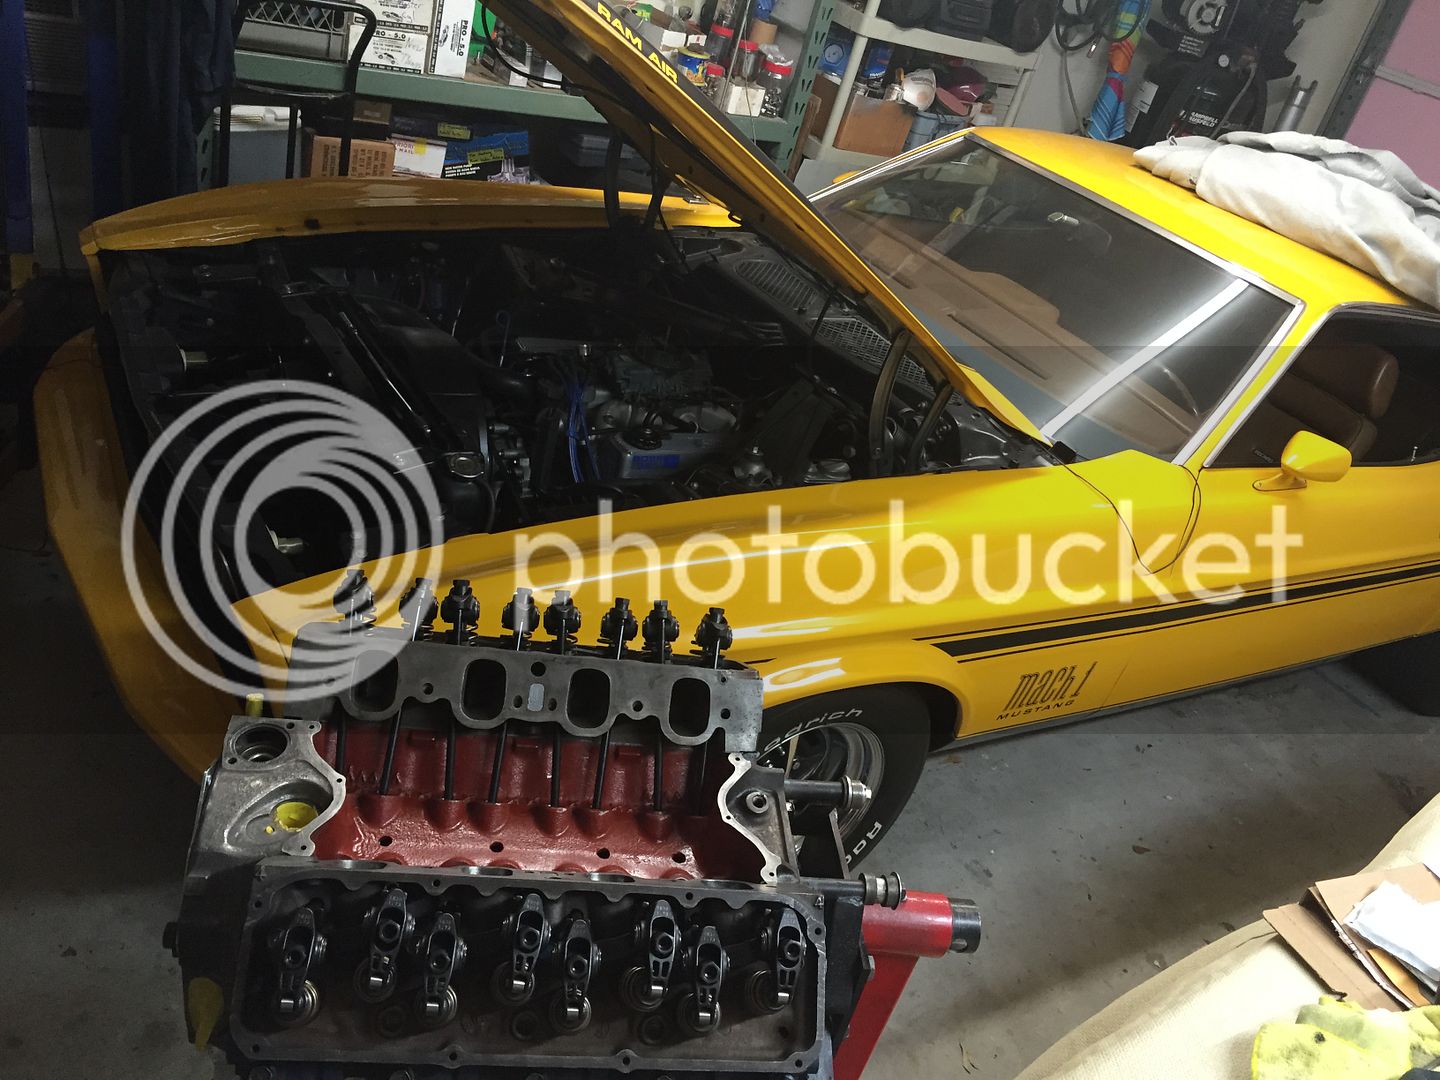
After eleven months I finally got my heads back from the machine shop. I will definitely never be going back to that shop again. Pretty much a one man show with his priorities elsewhere. Enough about that.
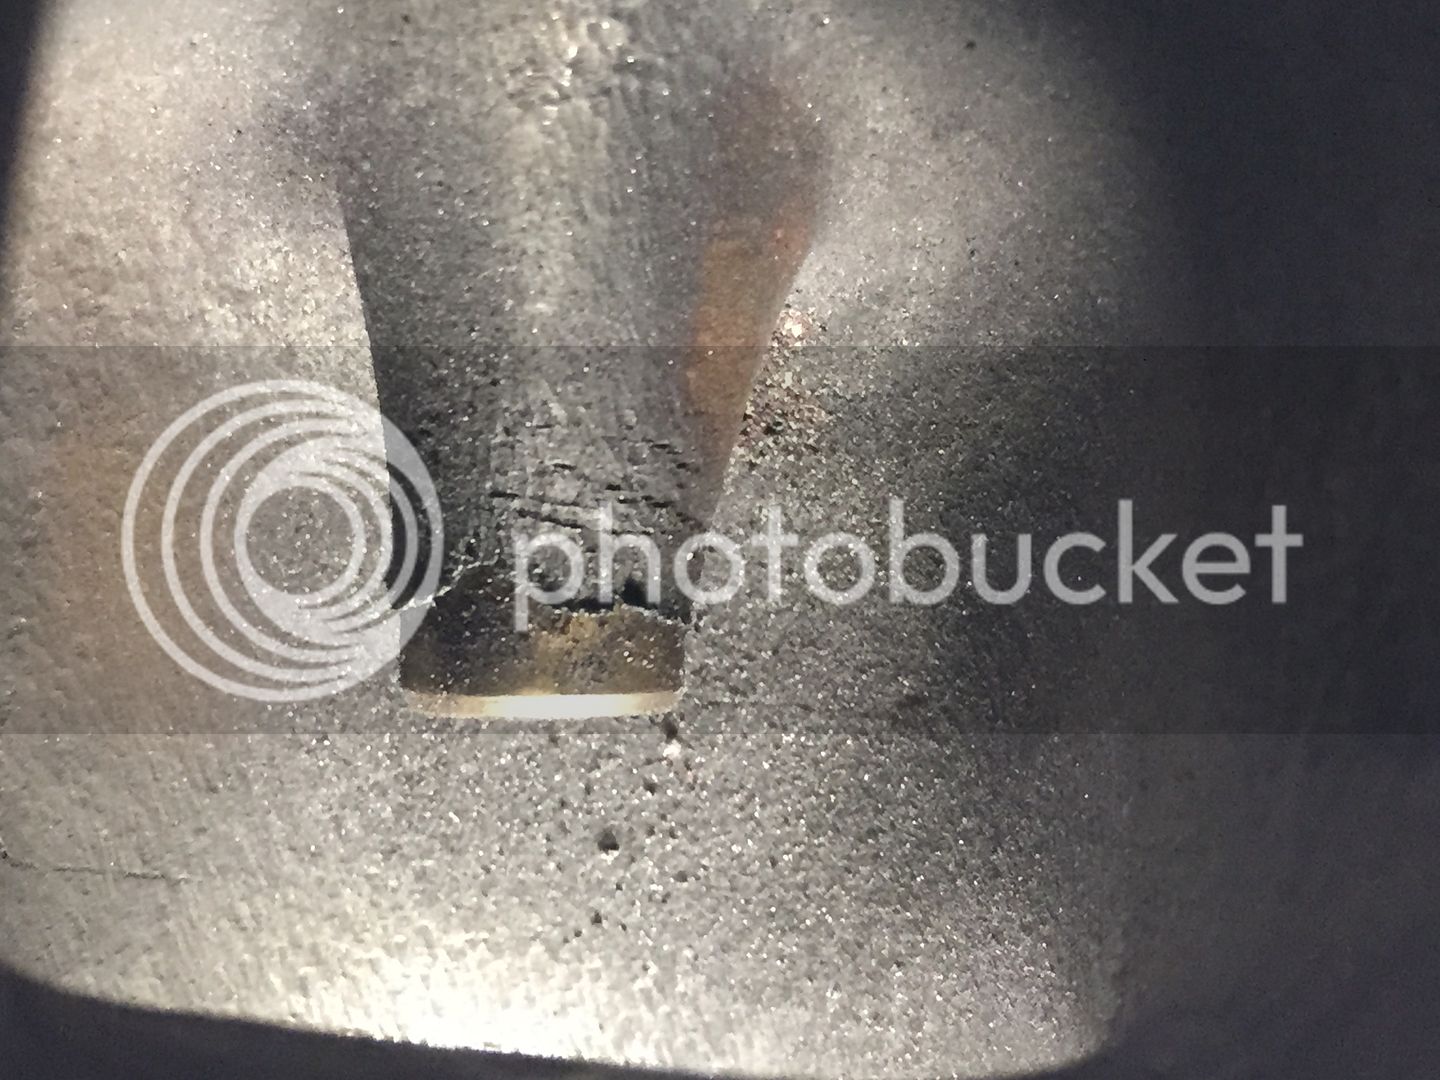
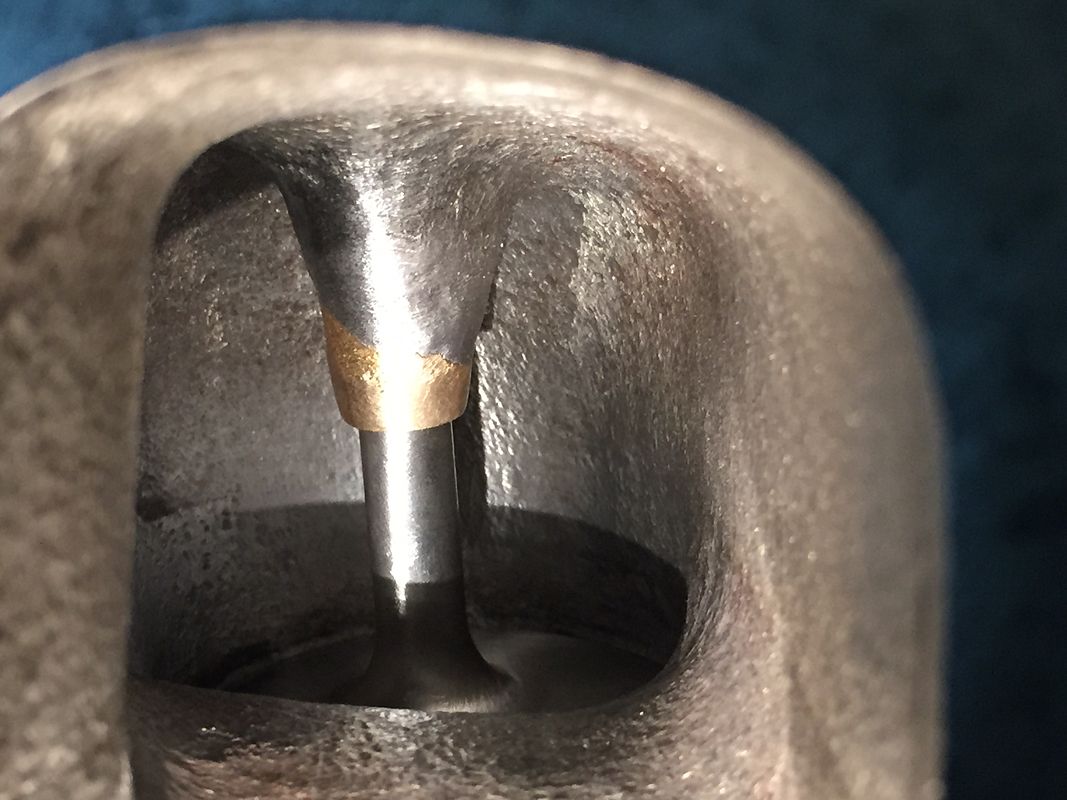
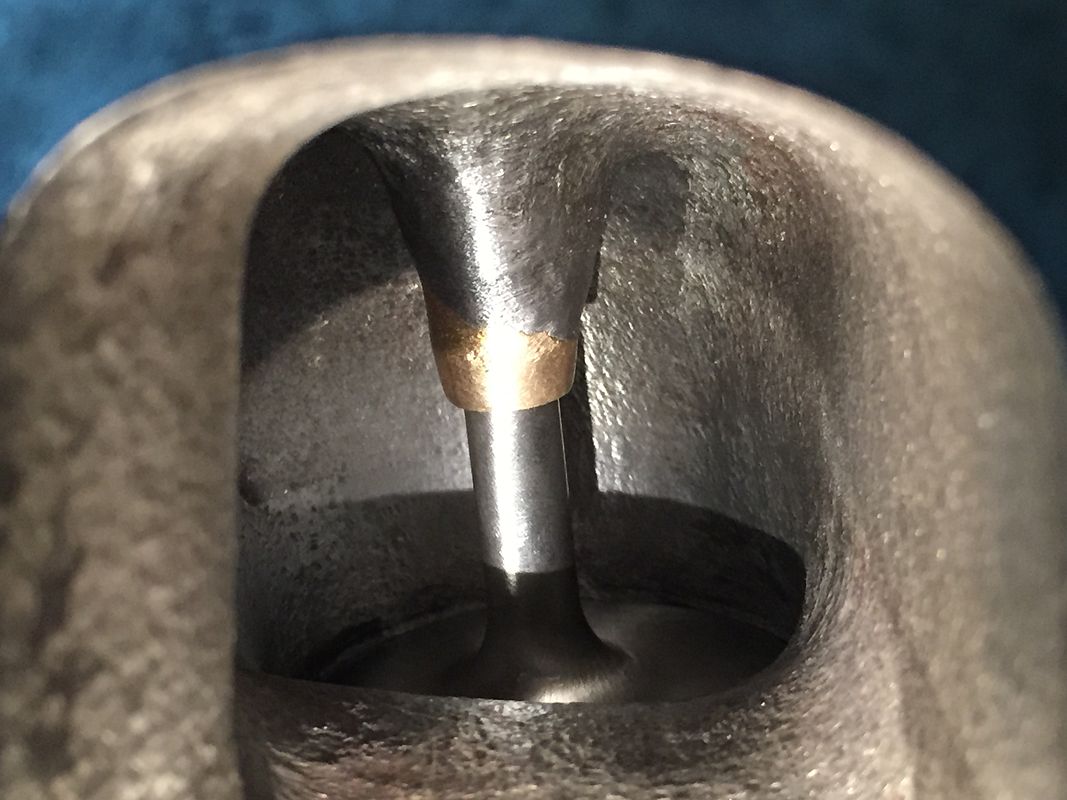
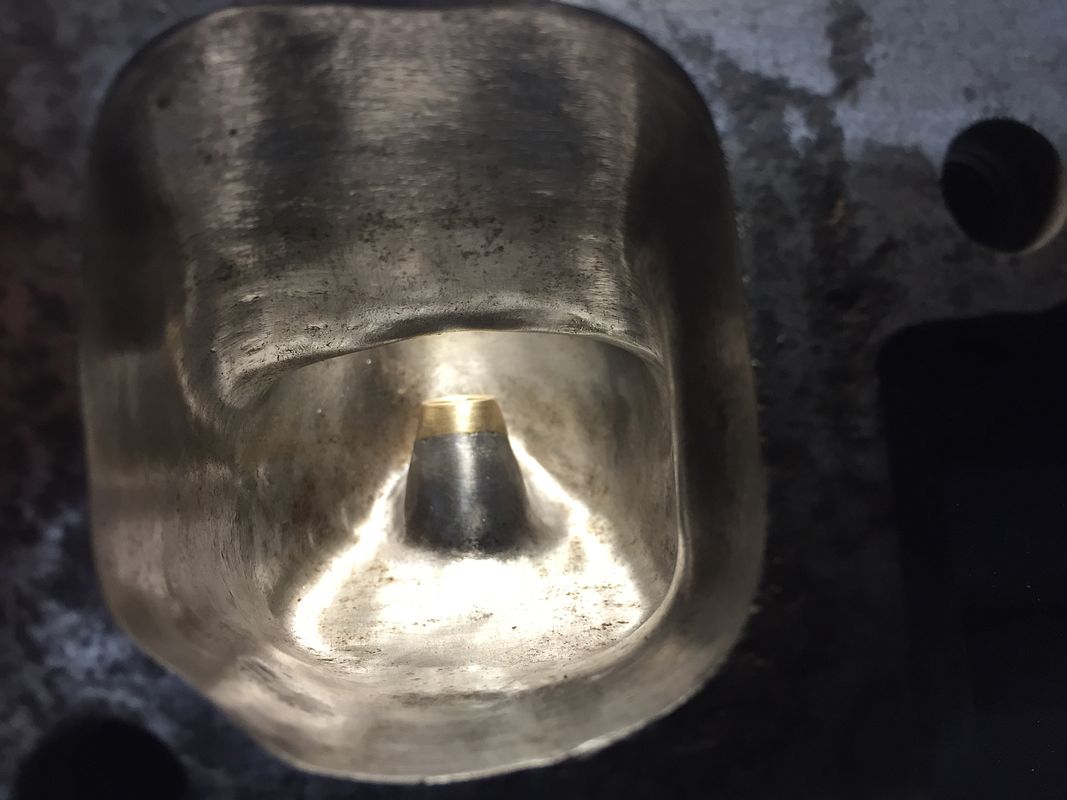
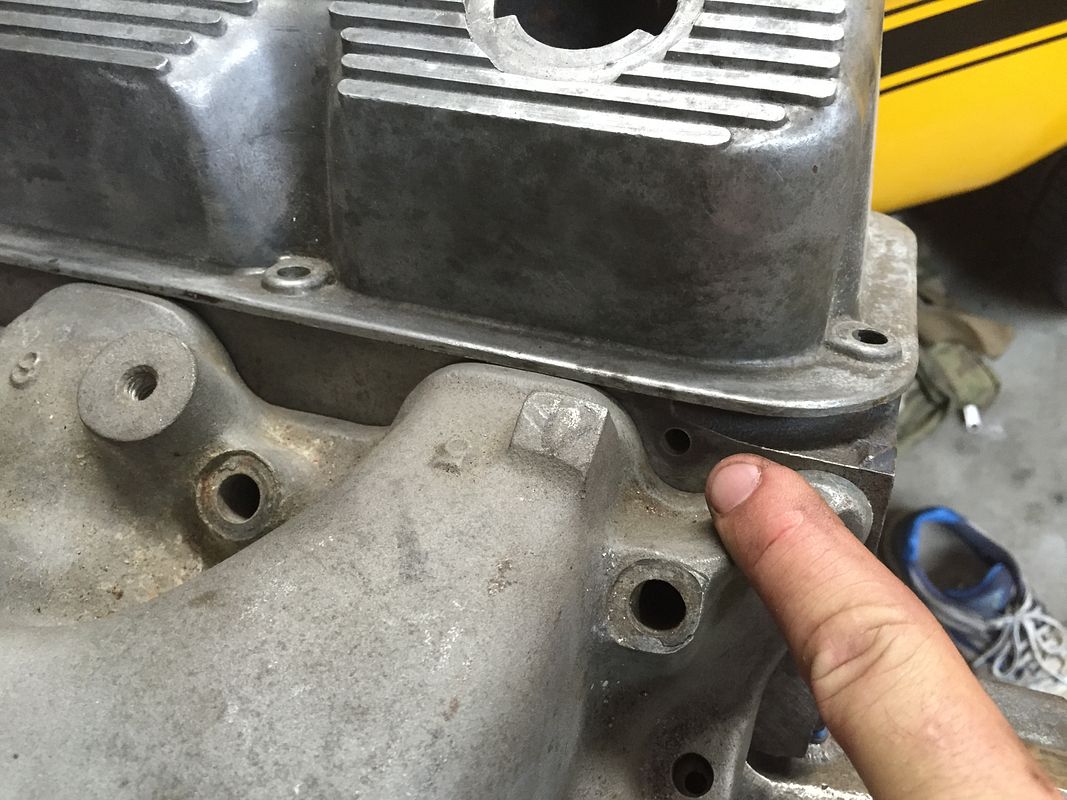
The work on the heads was pretty decent but there was one area of concern that I had and it was the casting flash left over around the new pressed in bronze valve guides. I "assumed" the shop would have spot faced the guides before pressing in new ones but oh well. I really felt I needed to double check everything anyways so I pulled the heads completely apart. Dressed down the guide stem areas, carefully did some more bowl blending after the valve job, and put a shine on the exhaust ports just because I was already dirty. I completed the 1st head, did the chambers and exhaust on the 2nd one but still have the intake valve stems to finish.
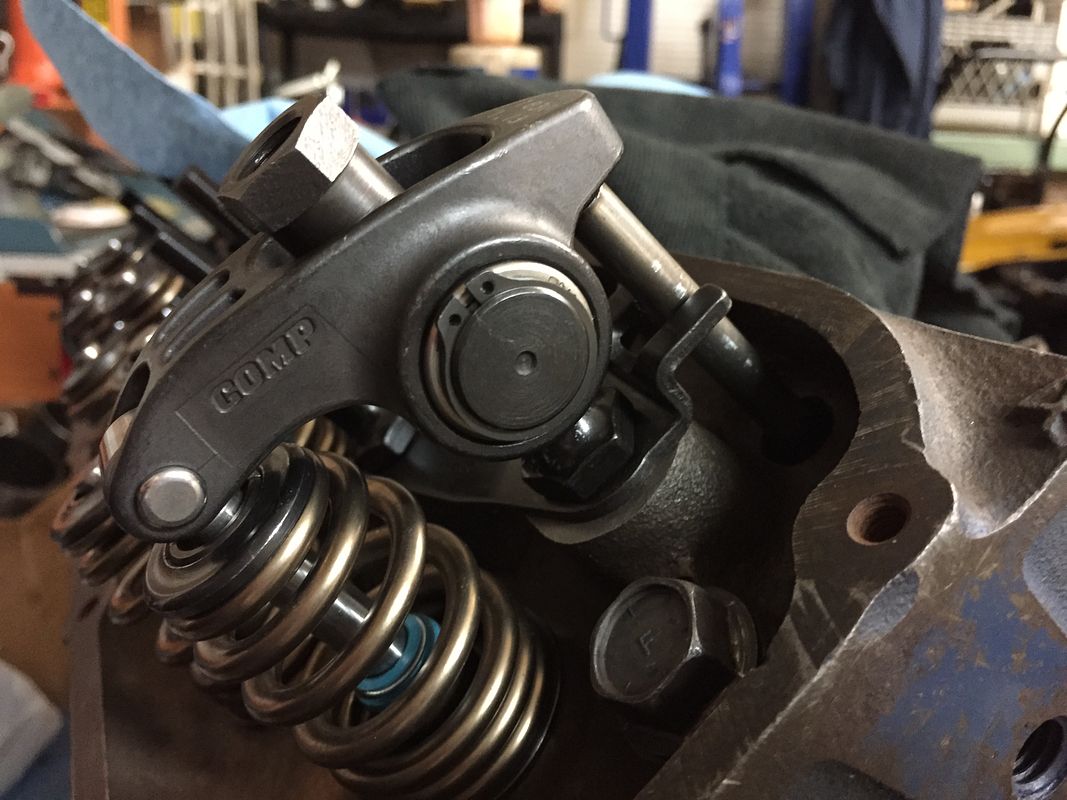
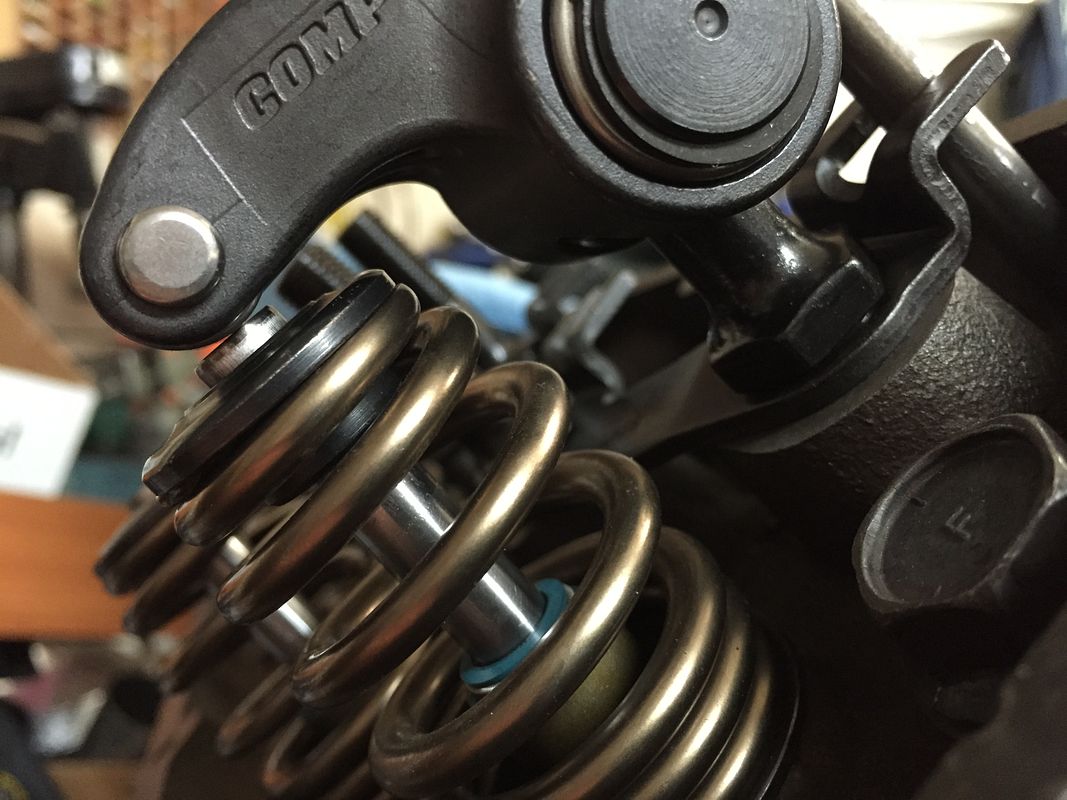
I mocked up the heads to the engine and went through the process of trying to achieve the proper valvetrain geometry and the correct pushrod lengths. Using the roller rockers off of my Mach 1 I could not get the proper valve tip pattern that I was happy with. Using my adjustable length pushrod I could not get a satisfactory contact pattern on the valve stem tip that was acceptable. I fiddled with it for a few hours before researching some symptoms. I borrowed a rocker from a friend and immediately noticed that his 1.73 rockers had a different geometry. I tried his rocker on my engine and was quickly able to get a desirable wear pattern.
I researched high and low to find out what rockers that I in fact had but could find nothing. I purchased then in 1997 and I could have sworn they were Harland Sharps, but they are in fact some no-name brand Rockers that are for a BBC application. The only identifying marks on them are 1.73 and USA. No part number. I purchased them from a P.A.W. back then and I cant find my receipt to verify, but that is what all my internet digging has come up with. I used my header money and needed to purchase some new rocker arms. In the back of my mind I'm kind of glad, as the old rockers were pretty chincy. Small bearings and questionable build quality. Now that I've been around a bit more I don't get distracted by cheap parts that are shiny. I bought some Comp Cams Ultra Pro Magnum XD rockers. I have an older set of them on my 85's 408w and really liked them, so that's why I chose them again for this build.
I ordered them on Sunday evening from Summit Racing and they arrived on Tuesday. I mocked them up and was immediately able to get a good wear pattern. Now that I verified the proper pushrod length I need to get them ordered up. Probably after next payday since I just blew $400 on these rockers that was not planned. Baby steps.


I must admit that all the machine work looked very good. Good attention to detail.
The work on the heads was pretty decent but there was one area of concern that I had and it was the casting flash left over around the new pressed in bronze valve guides. I "assumed" the shop would have spot faced the guides before pressing in new ones but oh well. I really felt I needed to double check everything anyways so I pulled the heads completely apart. Dressed down the guide stem areas, carefully did some more bowl blending after the valve job, and put a shine on the exhaust ports just because I was already dirty. I completed the 1st head, did the chambers and exhaust on the 2nd one but still have the intake valve stems to finish.
I mocked up the heads to the engine and went through the process of trying to achieve the proper valvetrain geometry and the correct pushrod lengths. Using the roller rockers off of my Mach 1 I could not get the proper valve tip pattern that I was happy with. Using my adjustable length pushrod I could not get a satisfactory contact pattern on the valve stem tip that was acceptable. I fiddled with it for a few hours before researching some symptoms. I borrowed a rocker from a friend and immediately noticed that his 1.73 rockers had a different geometry. I tried his rocker on my engine and was quickly able to get a desirable wear pattern.
I researched high and low to find out what rockers that I in fact had but could find nothing. I purchased then in 1997 and I could have sworn they were Harland Sharps, but they are in fact some no-name brand Rockers that are for a BBC application. The only identifying marks on them are 1.73 and USA. No part number. I purchased them from a P.A.W. back then and I cant find my receipt to verify, but that is what all my internet digging has come up with. I used my header money and needed to purchase some new rocker arms. In the back of my mind I'm kind of glad, as the old rockers were pretty chincy. Small bearings and questionable build quality. Now that I've been around a bit more I don't get distracted by cheap parts that are shiny. I bought some Comp Cams Ultra Pro Magnum XD rockers. I have an older set of them on my 85's 408w and really liked them, so that's why I chose them again for this build.
I ordered them on Sunday evening from Summit Racing and they arrived on Tuesday. I mocked them up and was immediately able to get a good wear pattern. Now that I verified the proper pushrod length I need to get them ordered up. Probably after next payday since I just blew $400 on these rockers that was not planned. Baby steps.
Sorry. No idea. The only bits of information I was told was that it was built about 8-9 years ago, lots of money spent (approx $6k), had a set of well prepped/ported 2v open chamber heads that my buddy ended up with.Looking good. Just out of interest you wouldn't happened to know the name of the shop in Aus.
I must admit that all the machine work looked very good. Good attention to detail.
Last edited by a moderator:
- Joined
- Apr 24, 2013
- Messages
- 899
- Reaction score
- 165
- Location
- SE MI
- My Car
- 1971 J Code Mach 1
1972 H Code Mach 1
Thanks for all of the details. There's a lot of information out there on rocker arm geometry and how to choose pushrod lengths, interesting debates between folks with different opinions.
I was also interested in your valve springs, the company I work for supplies valve springs for most of the GM LS engines and Ford Mod V8's and they are all beehives, some even with ovate wire. I don't work in that commodity, and it's been on my to-do list one of these days to sit with the Application guy and see if we make anything that could be adapted to one of these older Fords. Unfortunately most of the new stuff can't handle the mass of the older valves...
Thanks for sharing!
MeZapU
Well-known member
- Joined
- Feb 12, 2011
- Messages
- 830
- Reaction score
- 11
- Location
- Southery, UK
- My Car
- 12 GT
73 Mach 1
85 GT
66 F-100
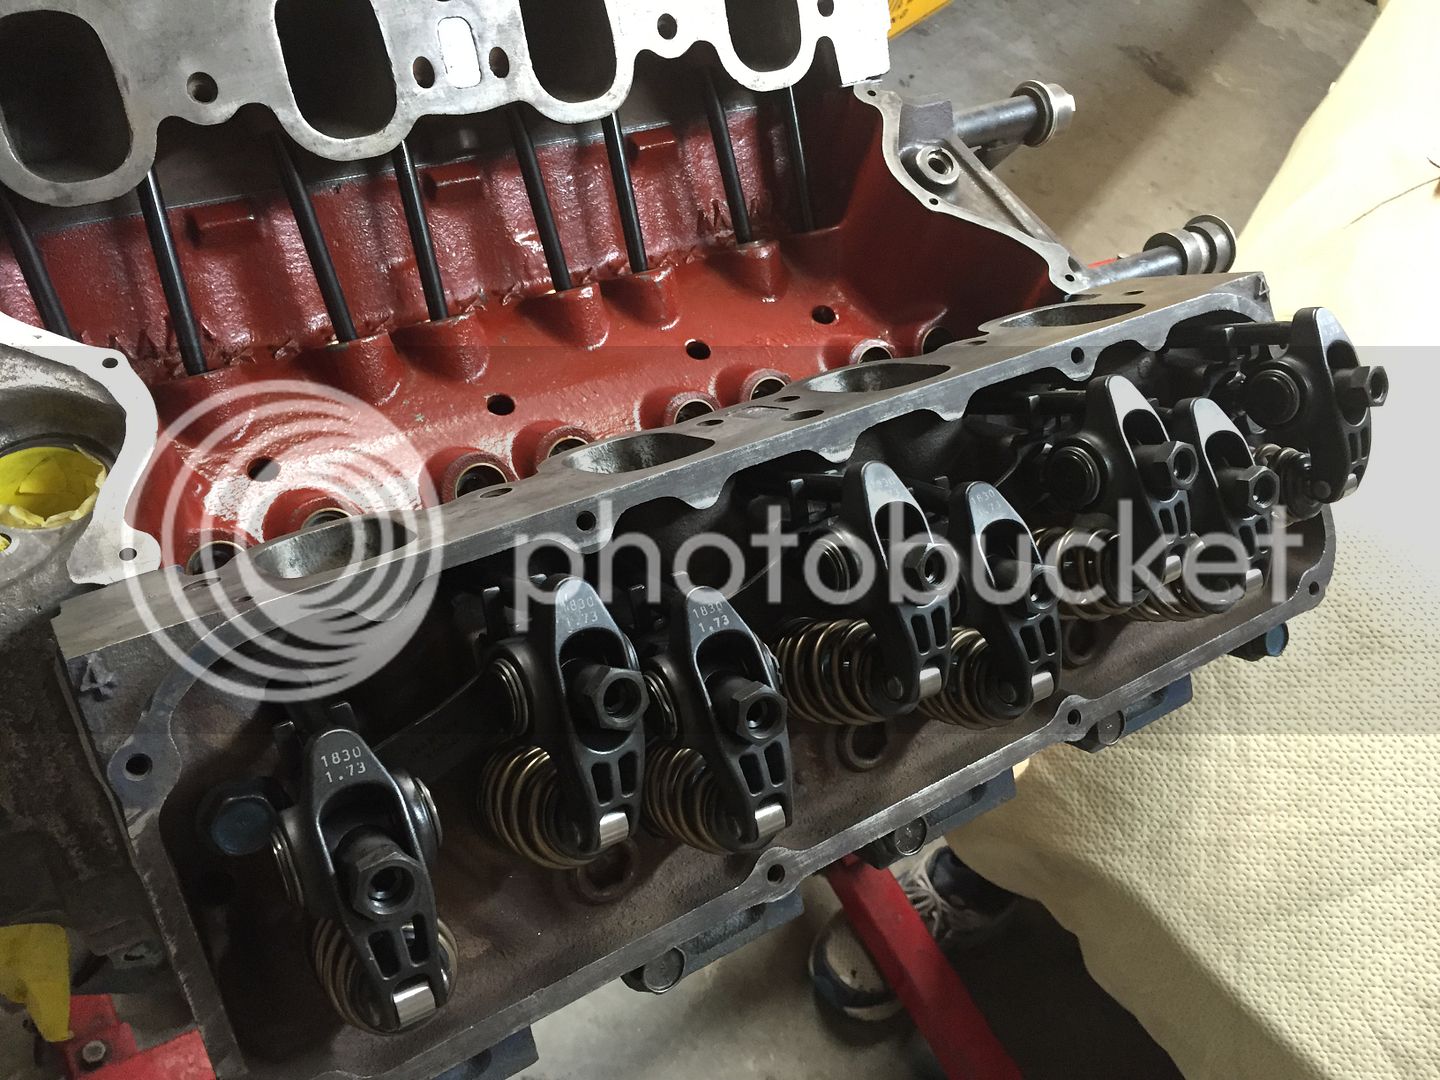
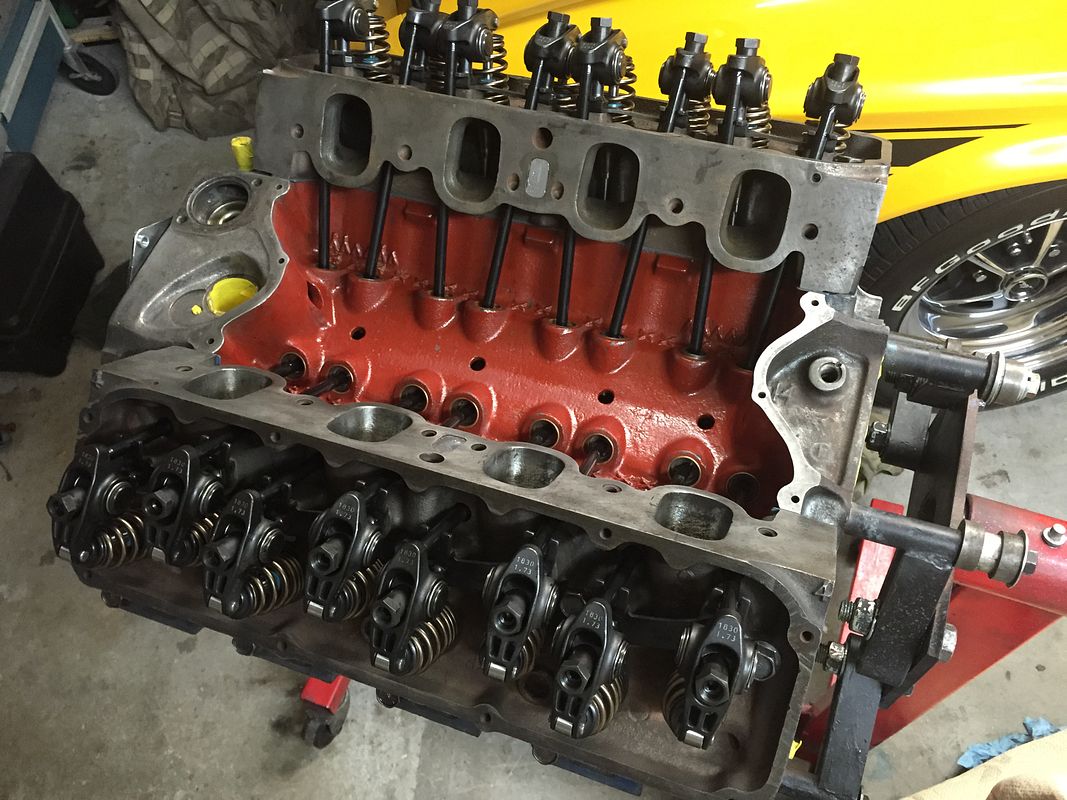
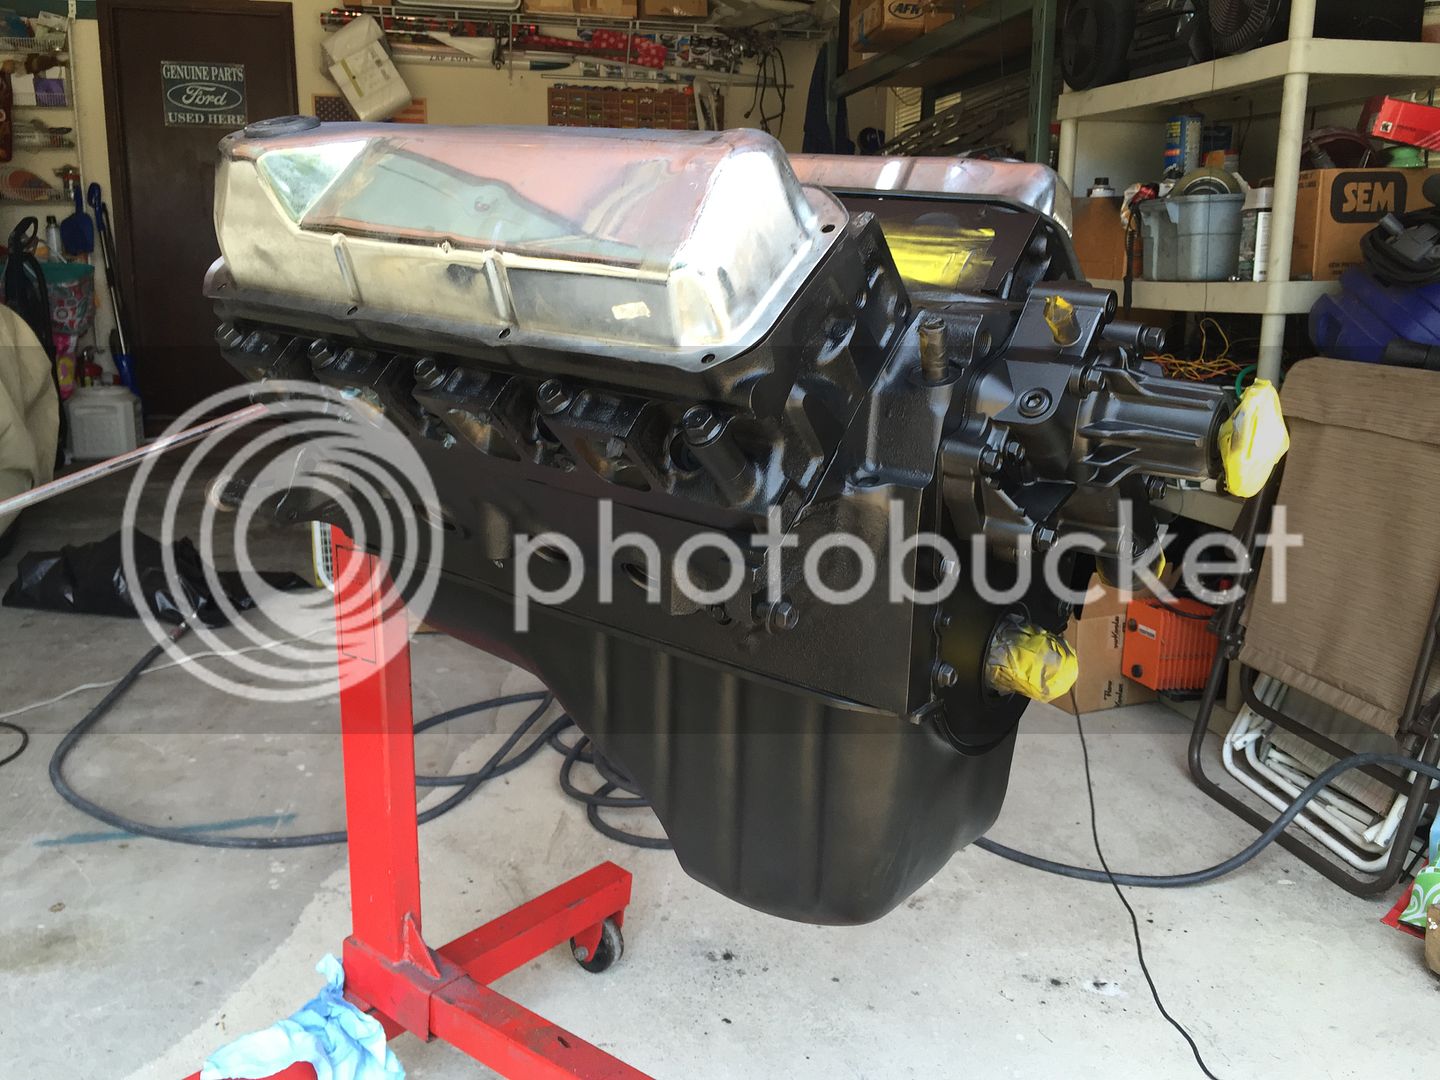
I received the pushrods in today. 3/8" and 8.600" long. I had to clean the rest of the head bolts, install and torque them to spec. It's always tough getting to the 105 ft/lbs spec by yourself without the engine moving around on you. I set the pushrods in place and then needed to adjust three of the eight sets of guide plates so the roller tip was centered on the valve stem. After everything was mocked up correctly I torqued the rocker studs and finally set the valve lash.
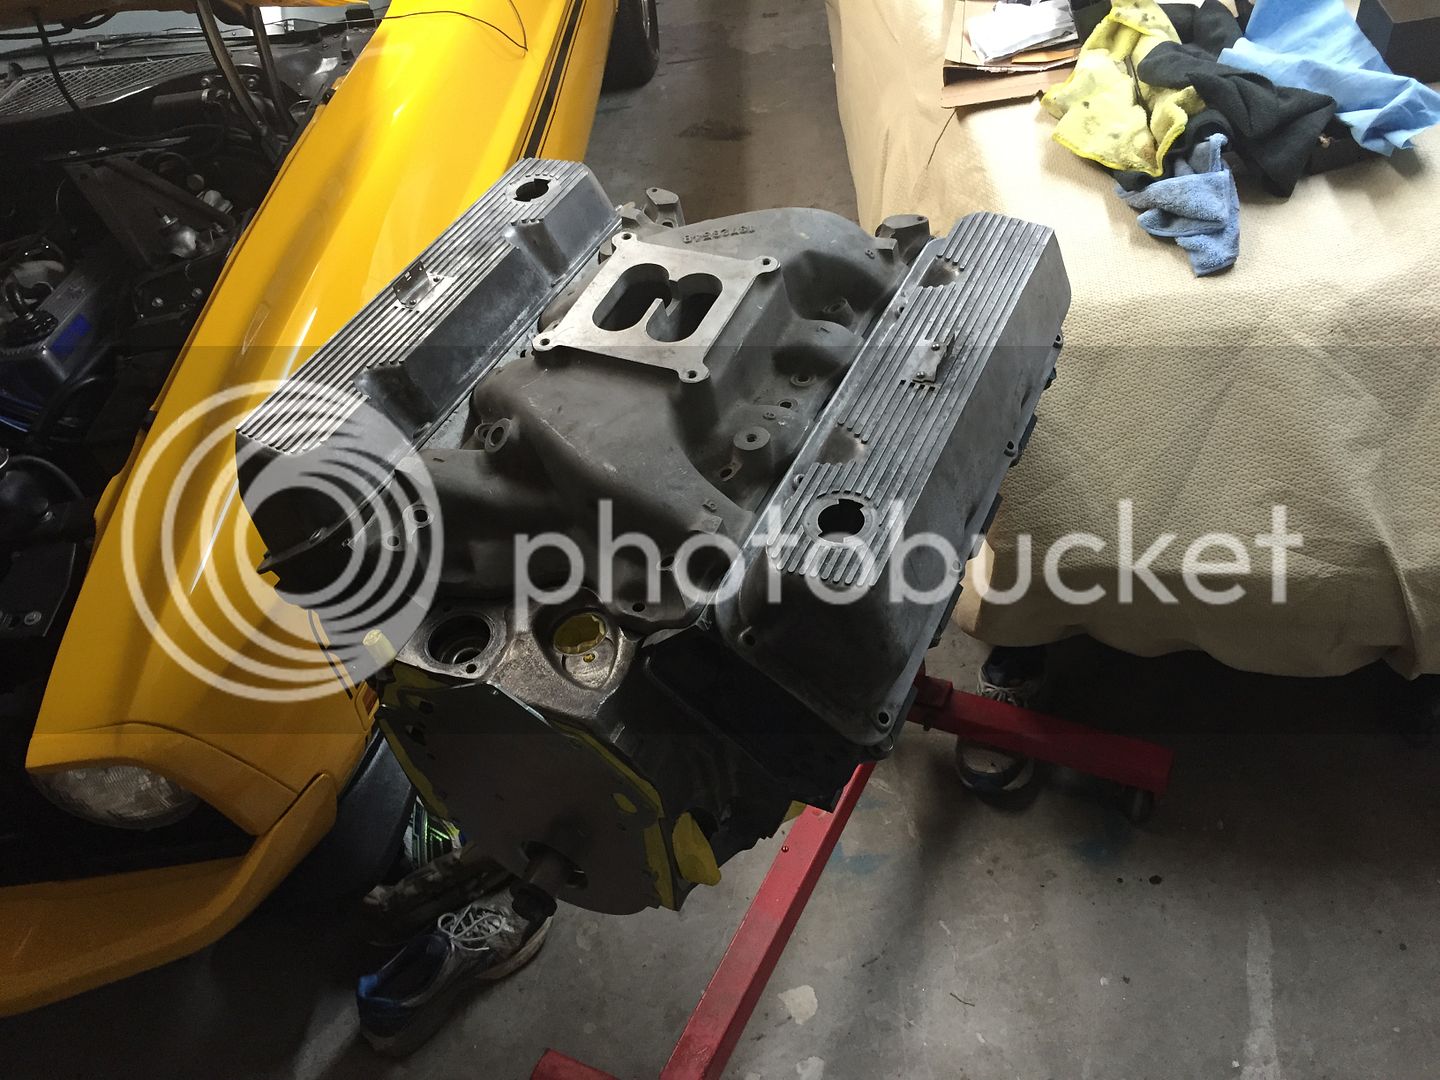
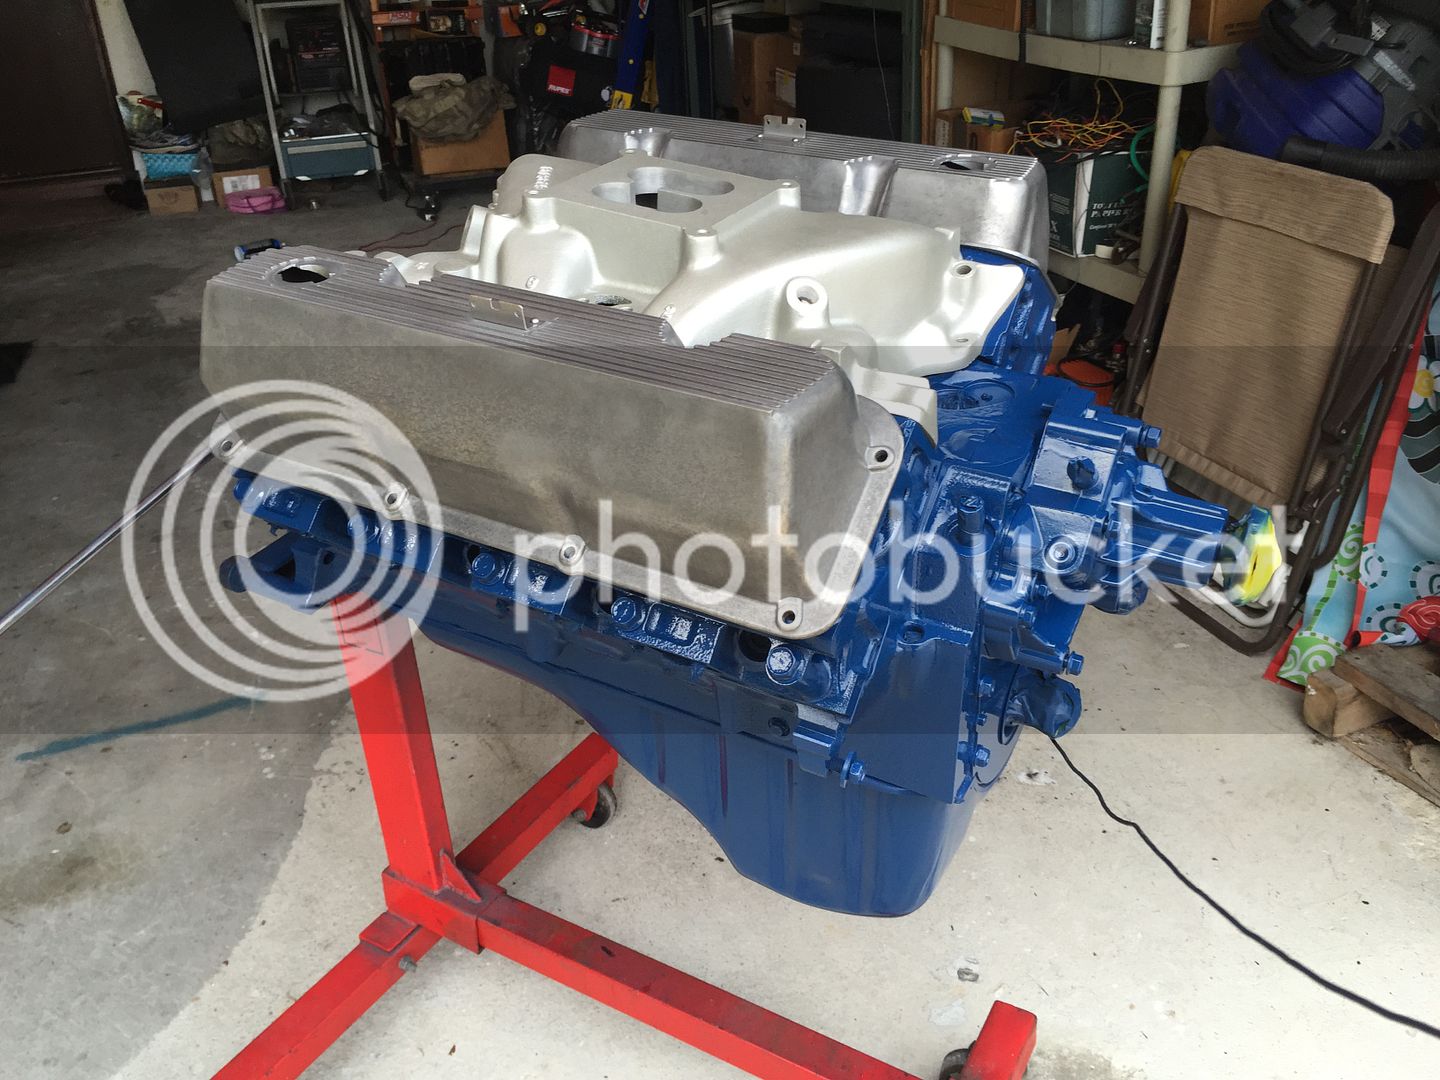
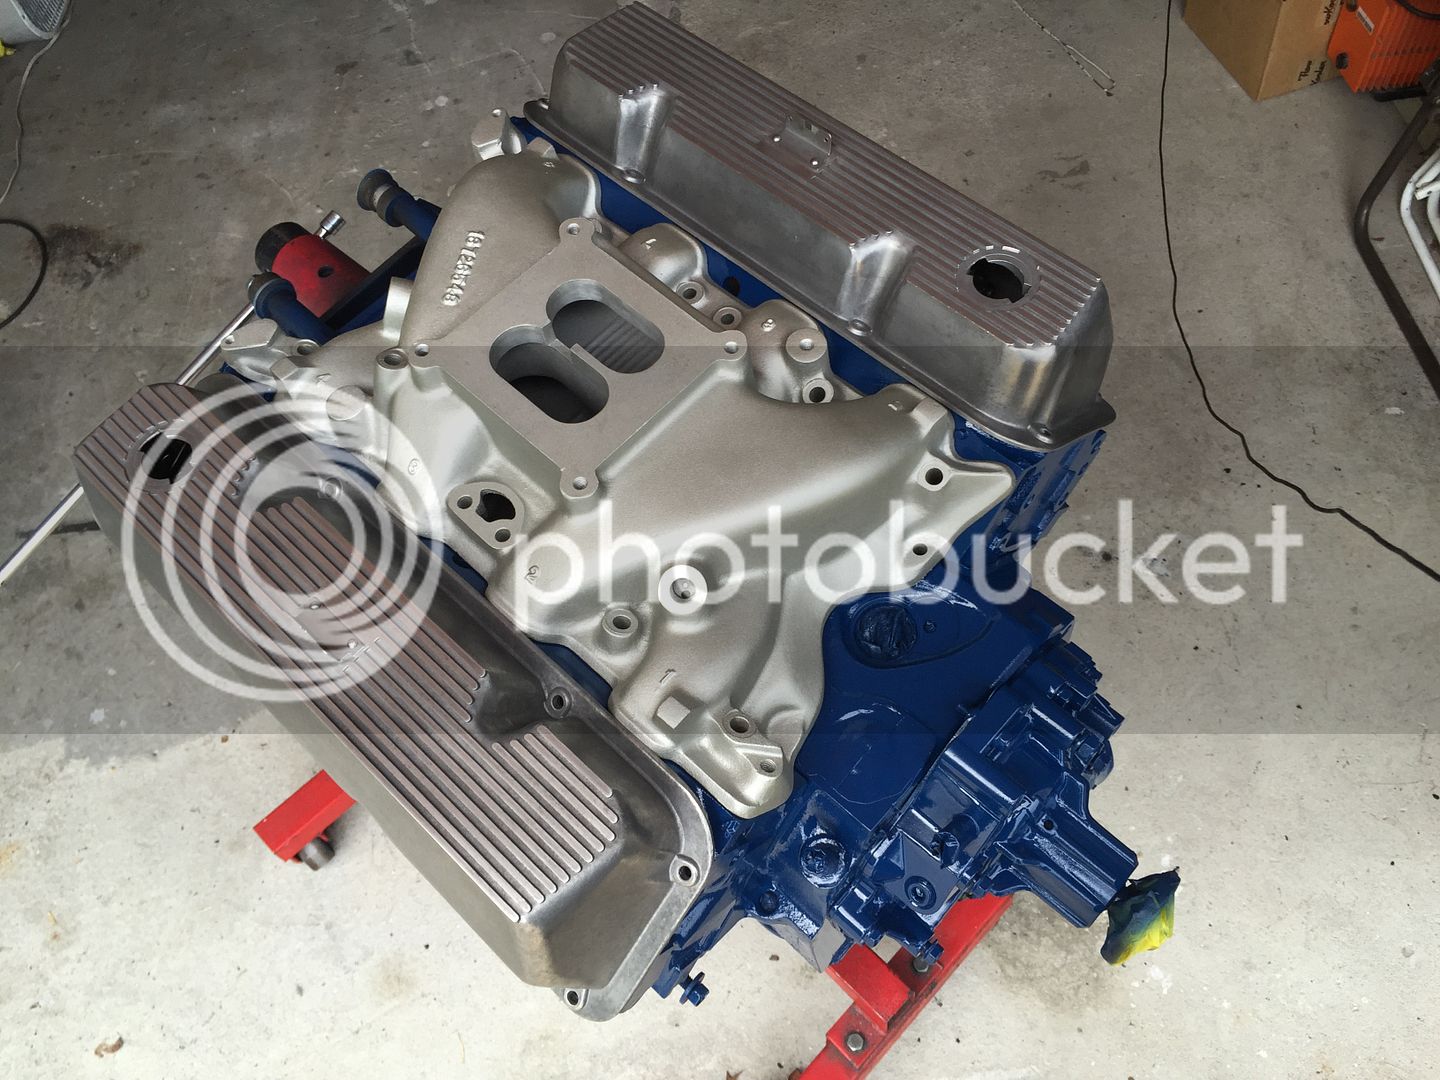
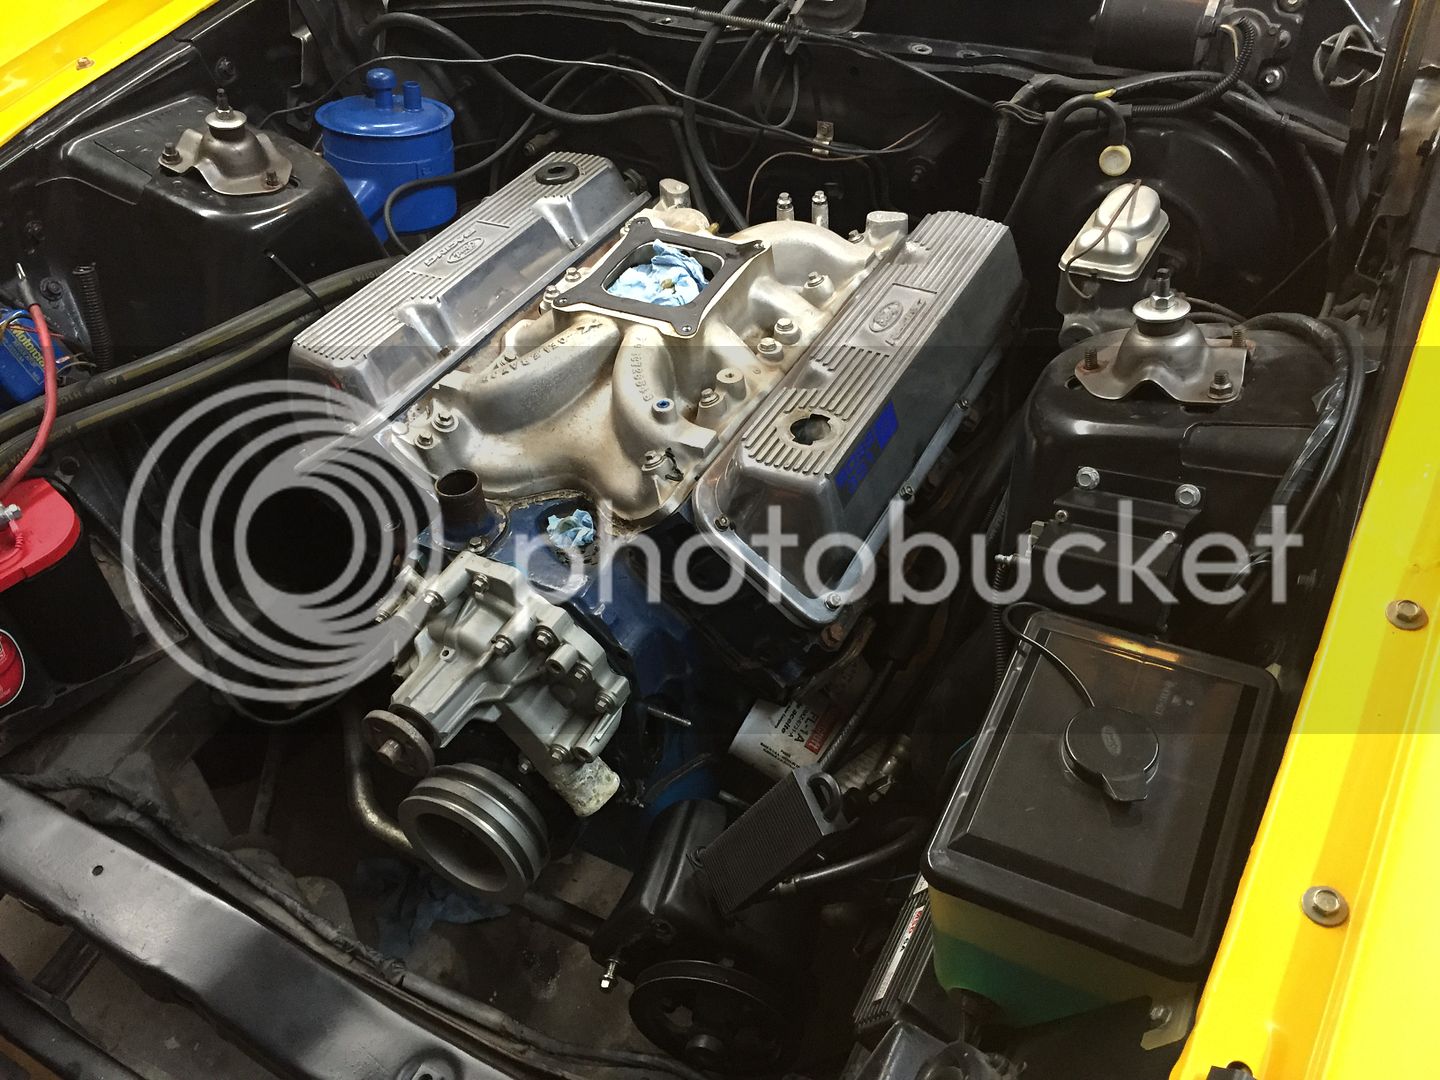
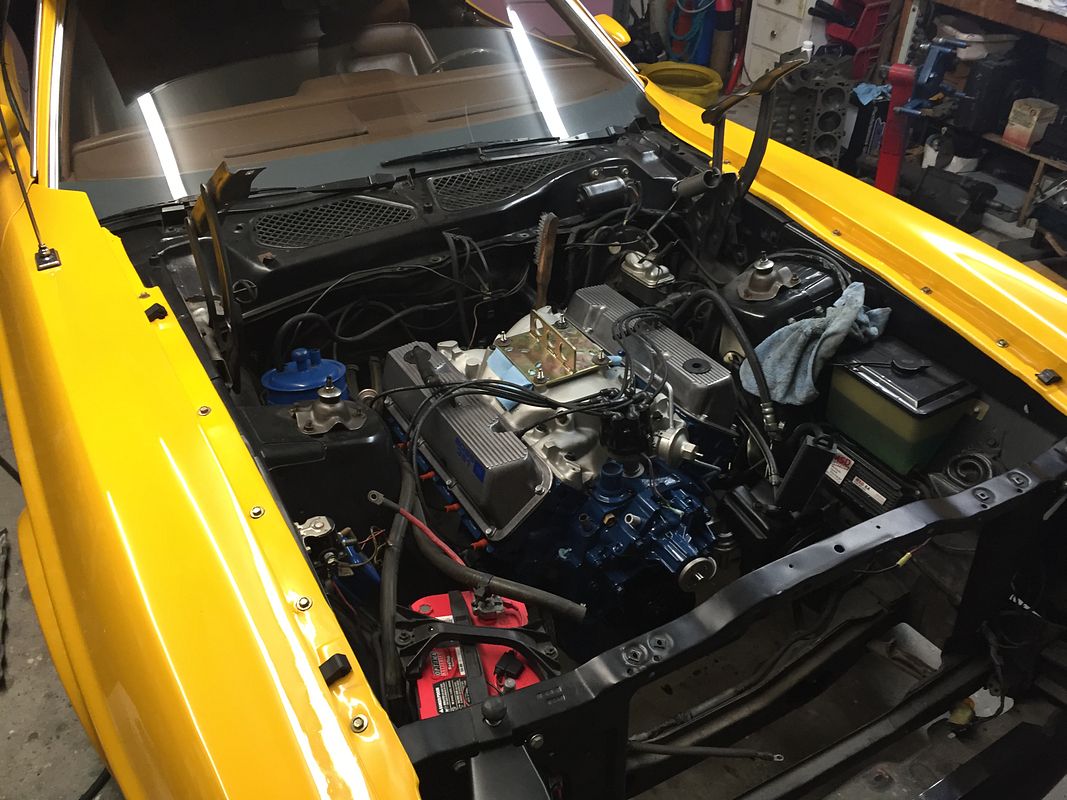
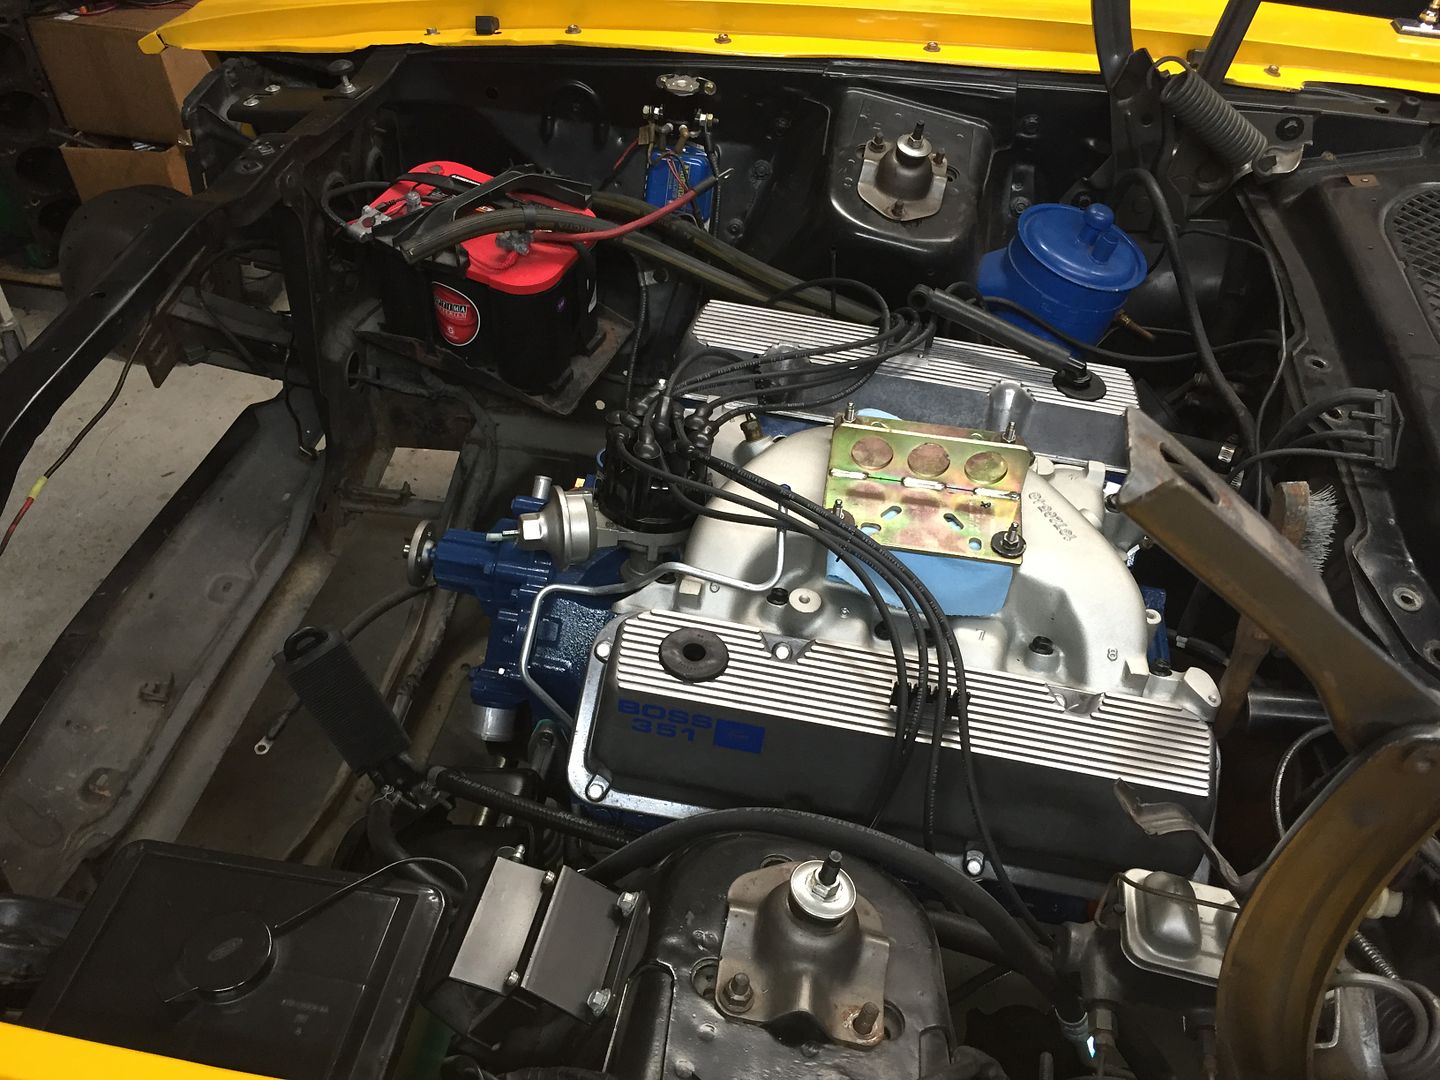
I set the Blue thunder intake and BOSS valve covers in place for a sense of completion even though I have a bit to go still. Still need a new oil and water pump as well as headers before I even think about starting the engine swap. Also need to get the flywheel ground, a new clutch, new plugs, wires, distributor cap, etc, etc, etc.
I can probably start cleaning the external parts now and even paint the block as soon as I get the oil pan installed. It will make it feel much more finished. Even though it looks a bit grody it's got it where it counts.
I noticed I'm missing the intake valley pan alignment dowels. I'll need to make some out of an old drill bit or something.
Last edited by a moderator:
- Joined
- Sep 30, 2010
- Messages
- 6,290
- Reaction score
- 1,240
- Location
- Mustang, OK.
- My Car
- 1972 Mach 1 Q code
2007 GT
1969 Cougar Eliminator B302
CSX 7000 Shelby Cobra FIA
2020 Edge ST
2002 F250 V10
Looking way good to me. Please keep the updates coming. Chuck


$99.99
Polished Rocker Panel Sill Plate Molding Kit with Clips Compatible with 1964-1966 Ford Mustang - Authentic Restoration for Classic Car Enthusiasts
Classic 2 Current Fabrication


$9.00
2016 Hot Wheels Vintage American Muscle 1970 FORD MUSTANG MACH 1 die-cast 4/10
Cards and Bobbles


$52.03
Scott Drake Ignition/Door/Trunk Lock Set, Compatible with 1967-1969 Ford Mustang, Model C7AZ-6222050-MK
Kentucky Mustang Parts


- Joined
- May 21, 2014
- Messages
- 295
- Reaction score
- 2
- Location
- Rhode Island, USA
- My Car
- 73' Mustang Hardtop- 302 2v V8
Your project is really coming around! I still have a lot to learn about engines and such. The depth of knowledge of some people on here really amazes me. I bet you can't wait to turn the key for the first time!
MeZapU
Well-known member
- Joined
- Feb 12, 2011
- Messages
- 830
- Reaction score
- 11
- Location
- Southery, UK
- My Car
- 12 GT
73 Mach 1
85 GT
66 F-100
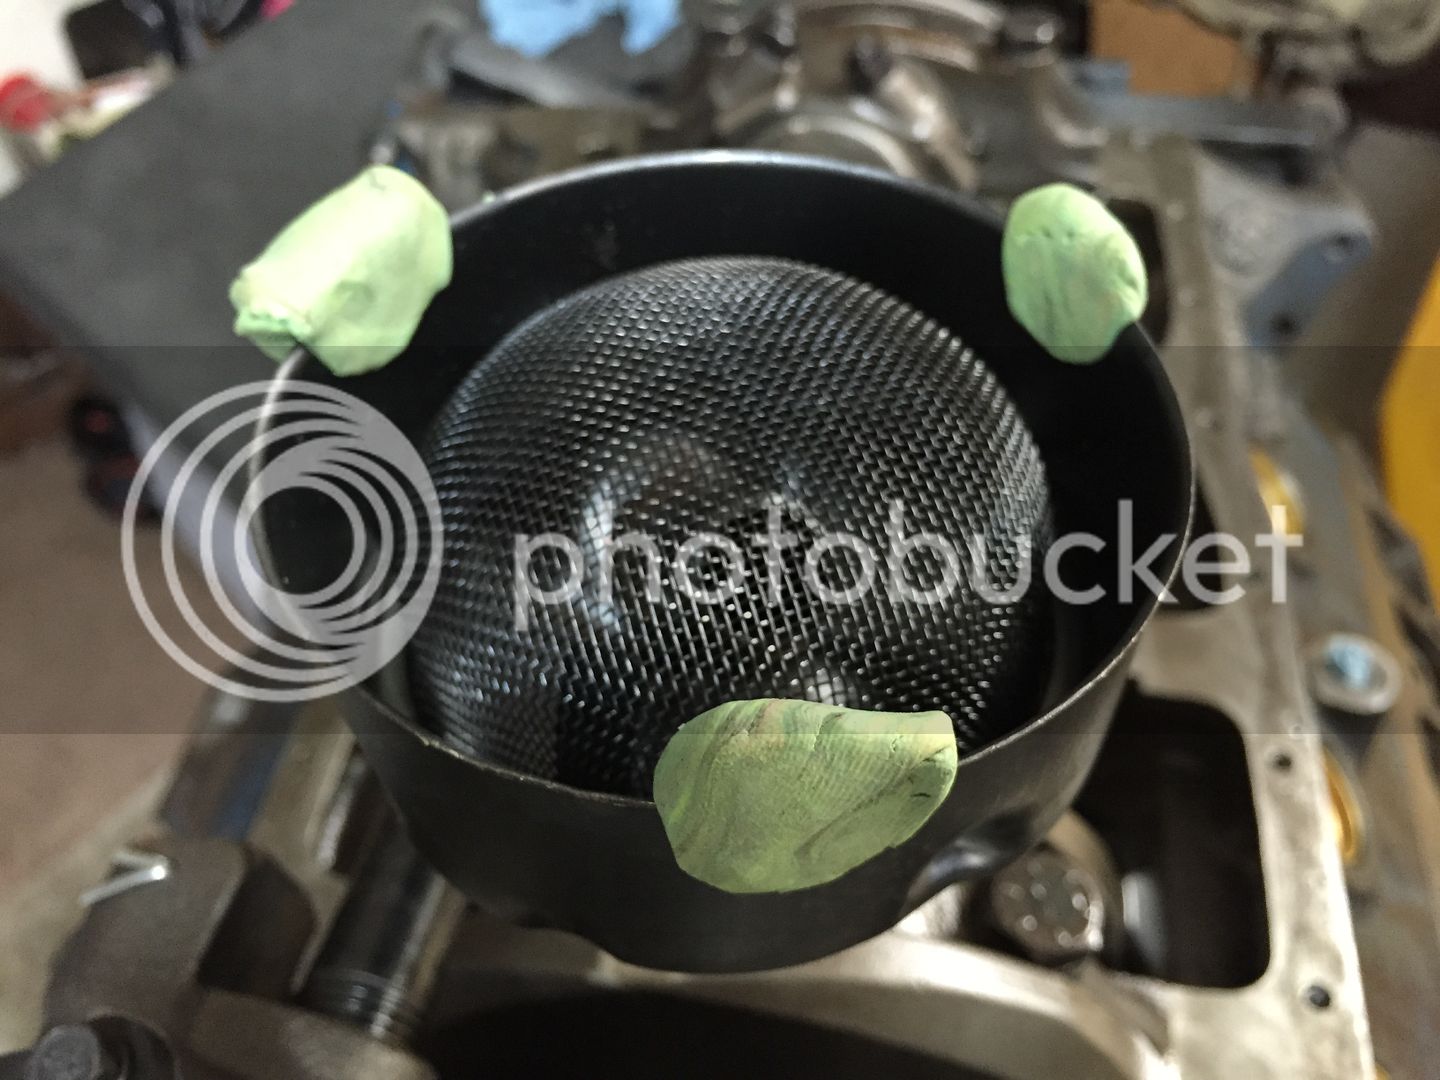
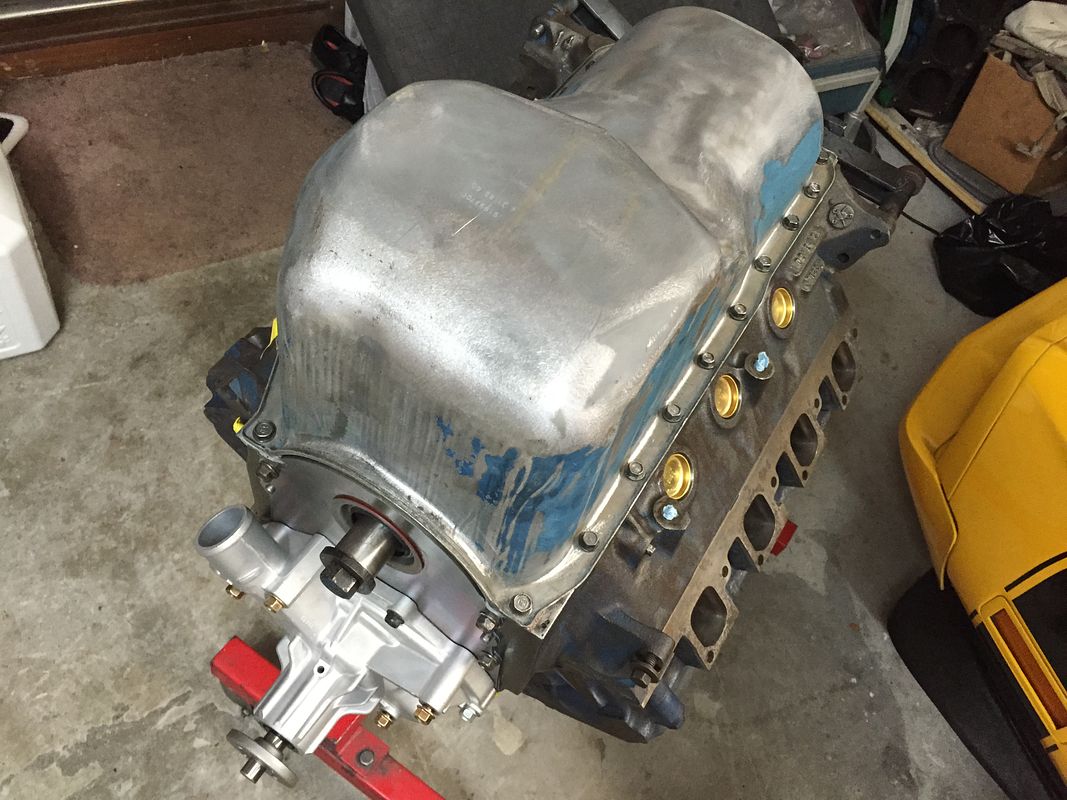
Still making slow progress. I got in a new std volume oil pump and a new pickup, as well as a new FlowKooler water pump. I have one of the FlowKooler pumps on my current engine and it has bee in place for the past 16 years without any issues. I figured it's done its duty and didn't feel comfortable swapping it to this new engine, so I bought a new one for it for the piece of mind. I checked the pickup to pan depth with some modeling clay. It showed about .210" clearance without a gasket on the pan. I took my time with the oil pan gaskets hoping to avoid any future leaks.
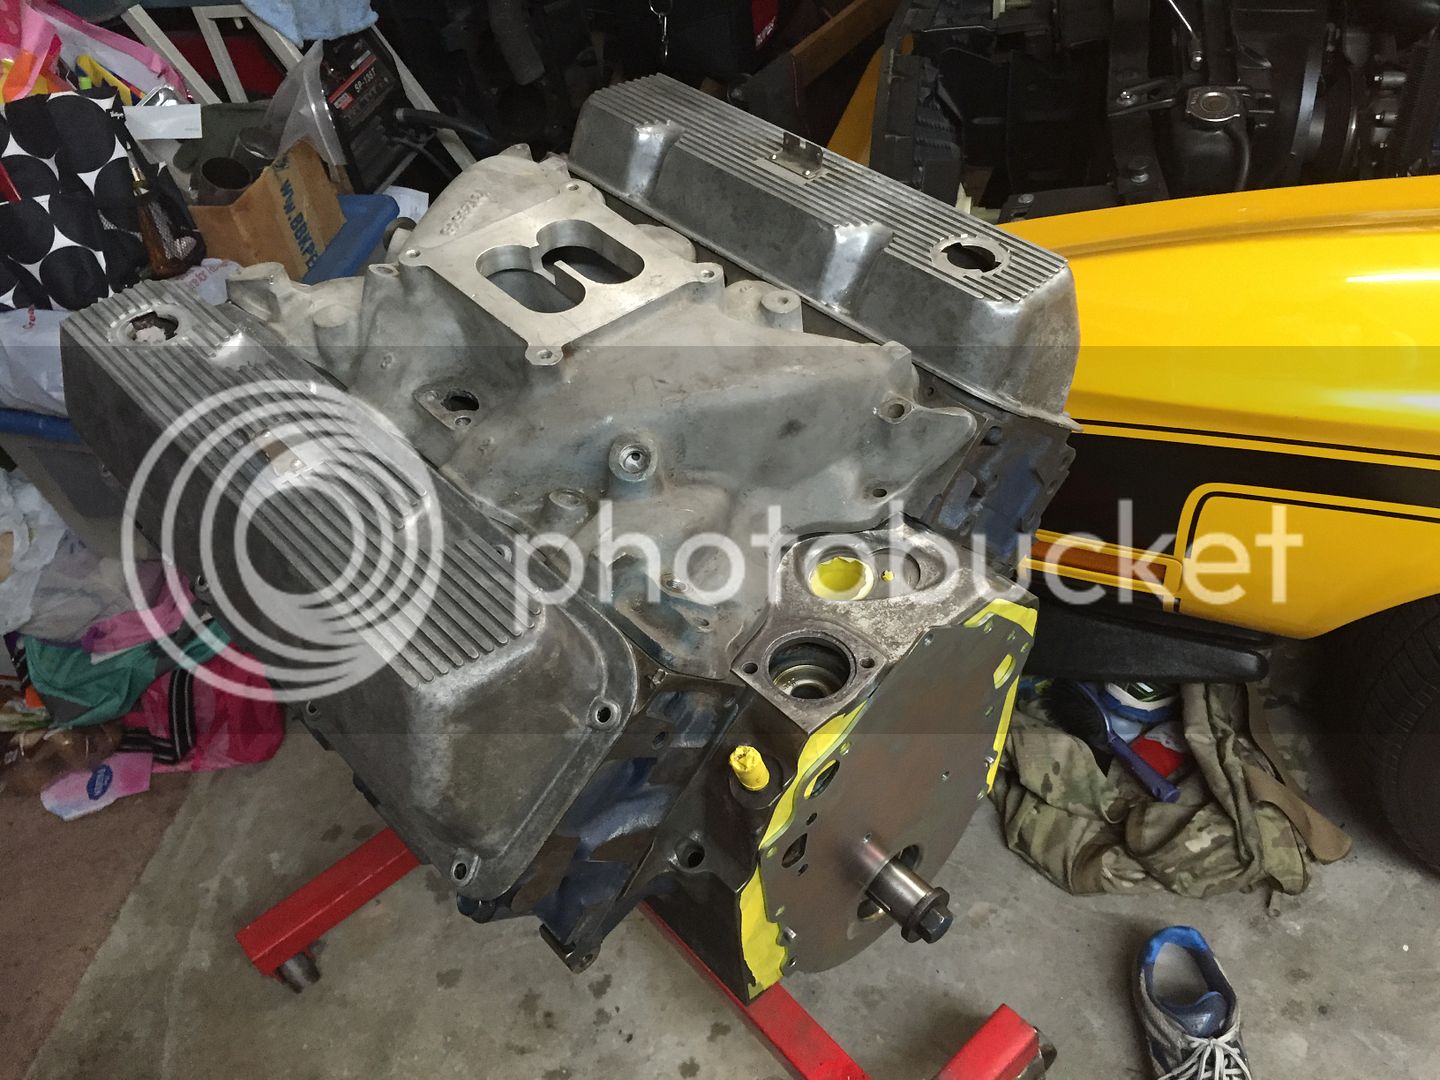
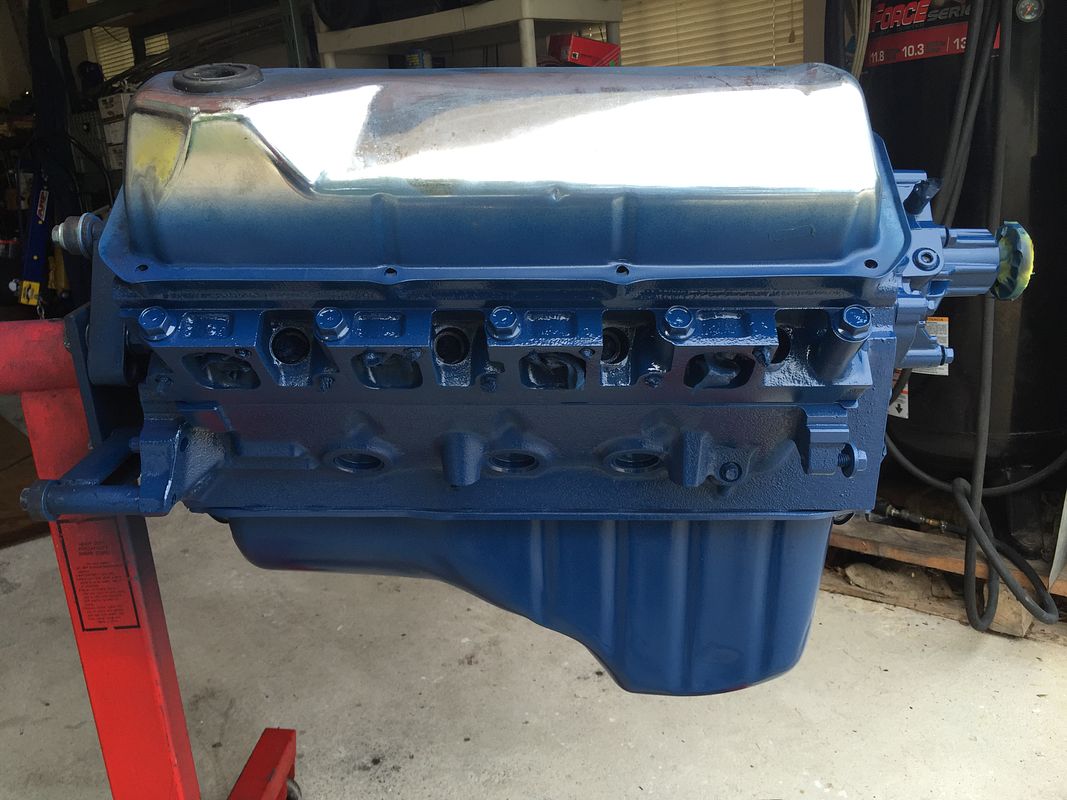
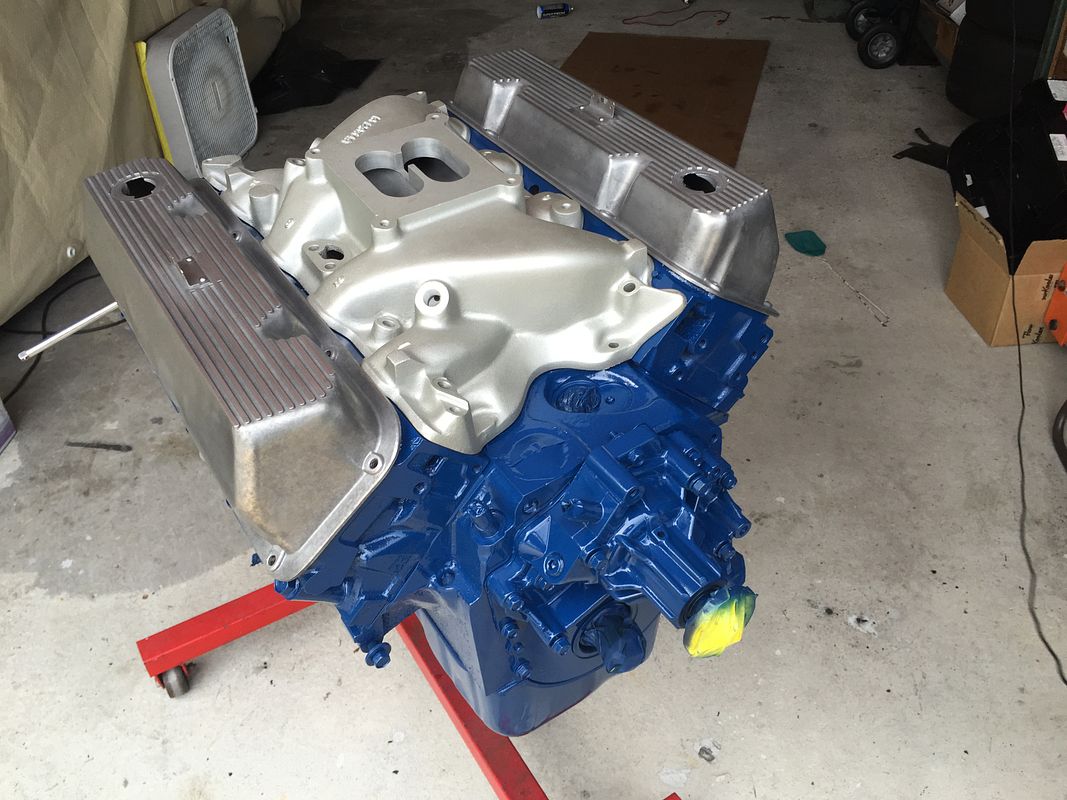
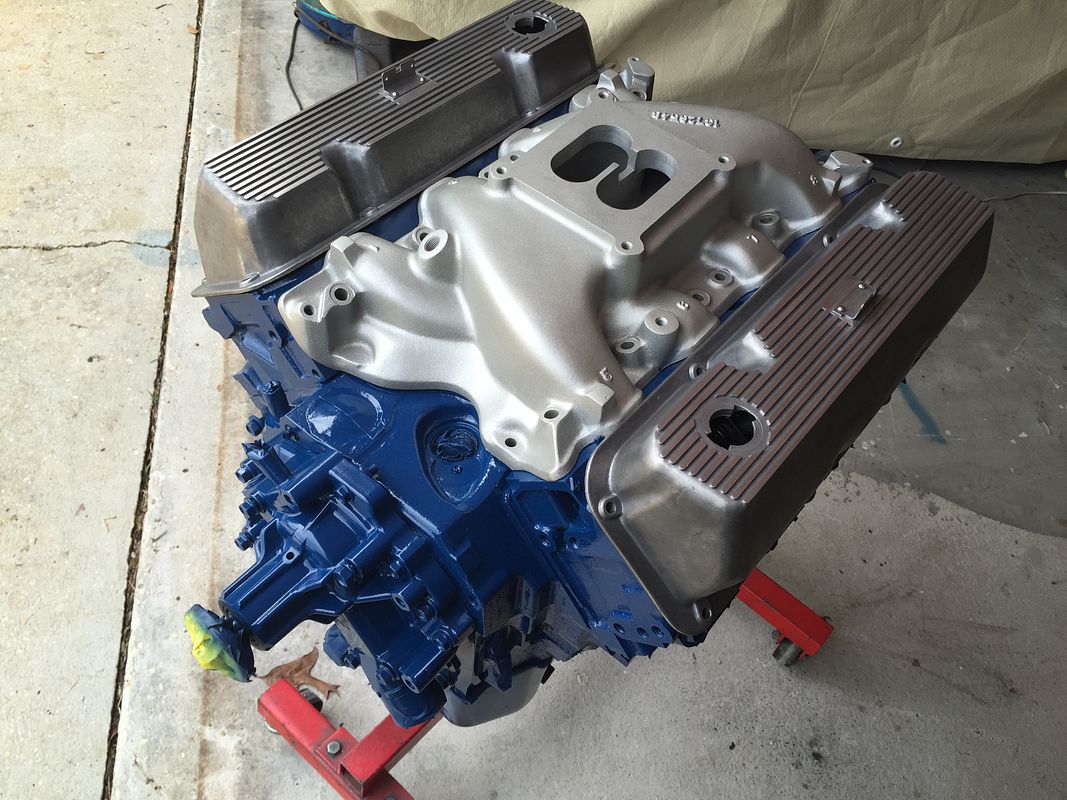
I did a lot of cleaning on the intake manifold and valve covers. Used some Eastwood Cast Blast on the intake, and used some very fine 0000 steel wool to clean up the valve covers and then sanded the fins down to 400 grit, finishing with more steel wool.
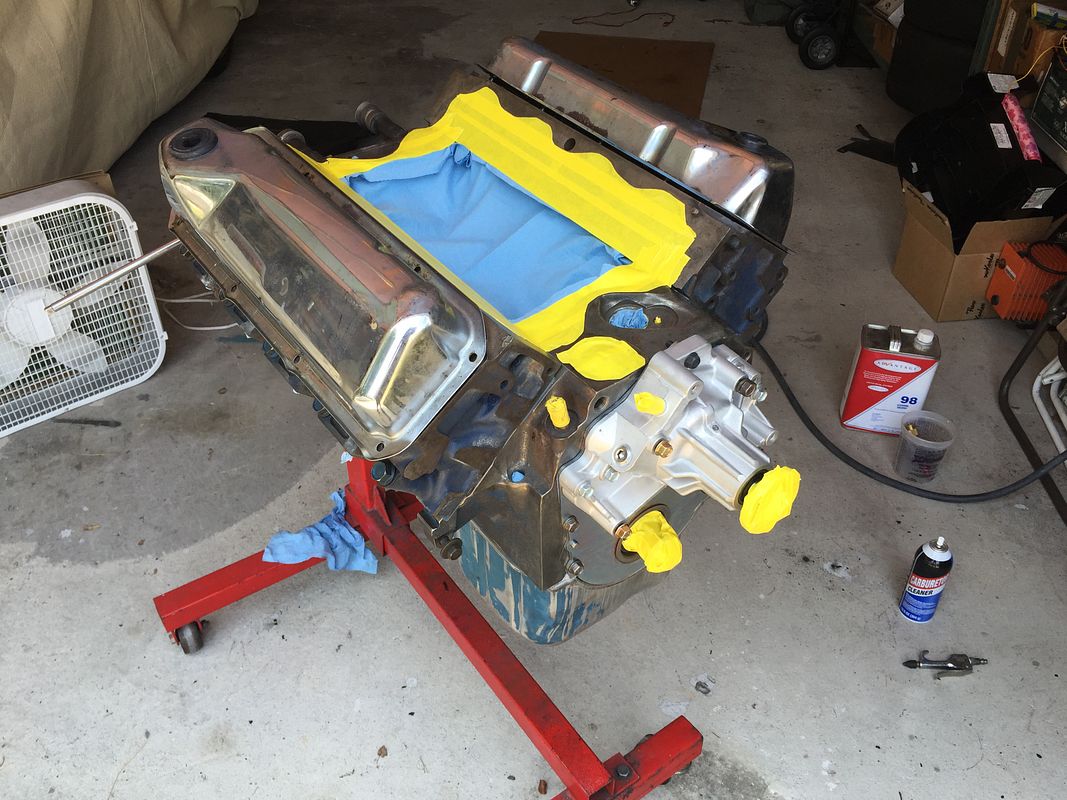
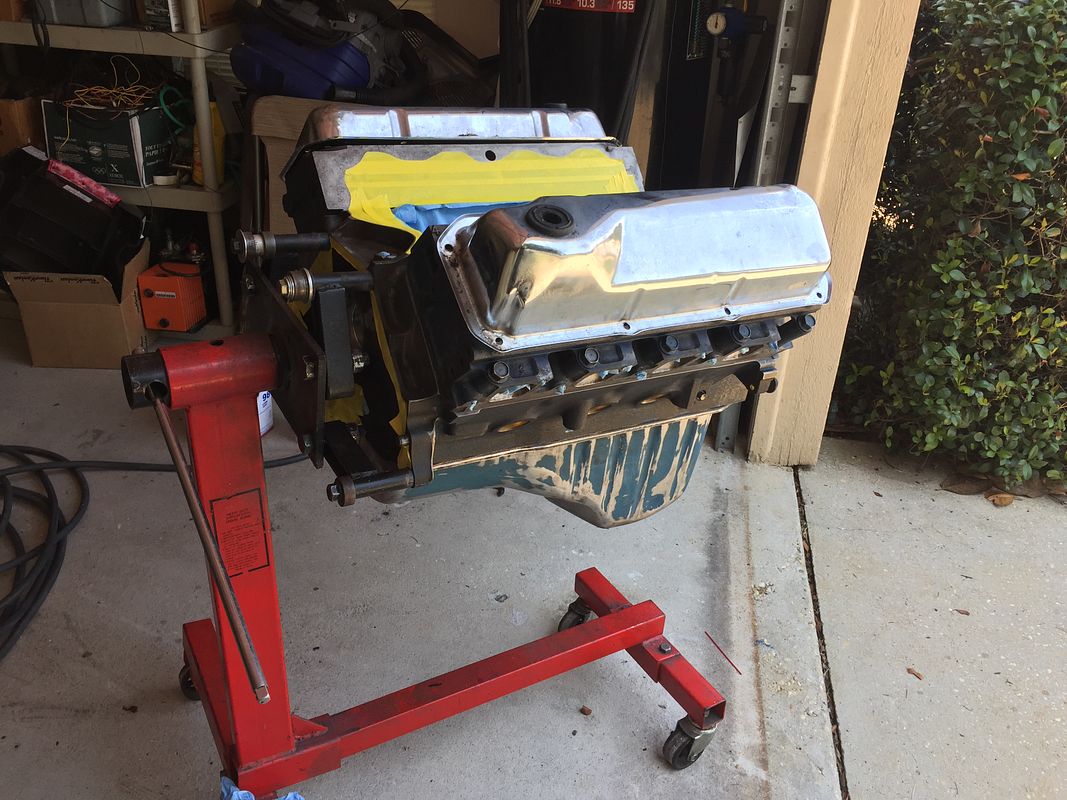
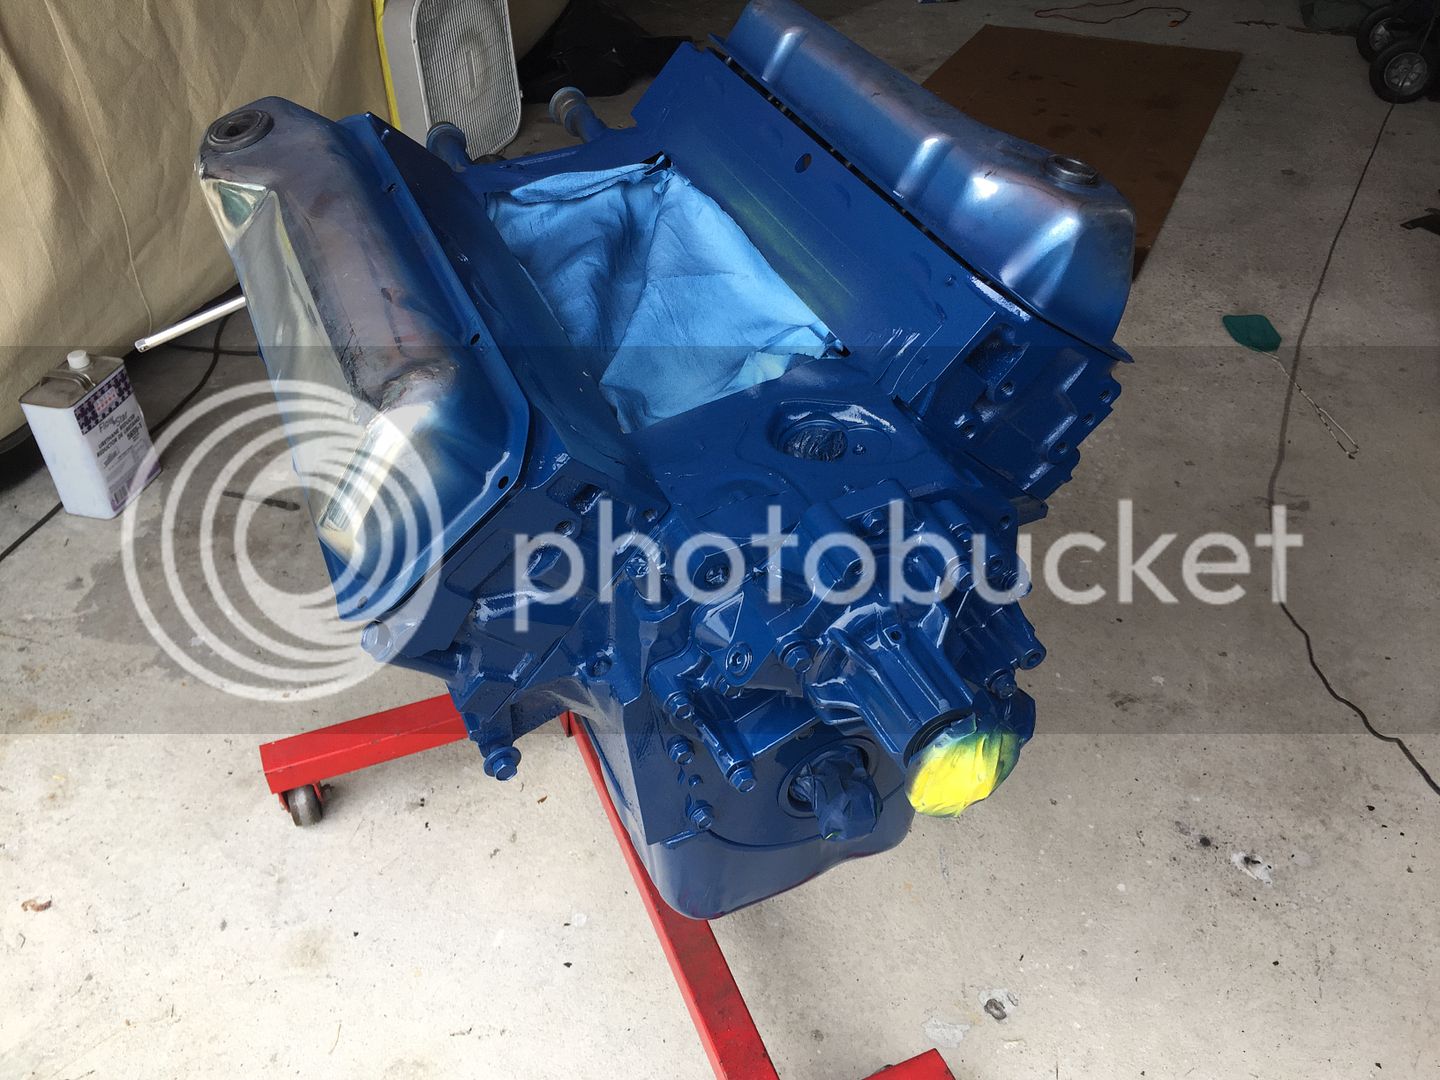
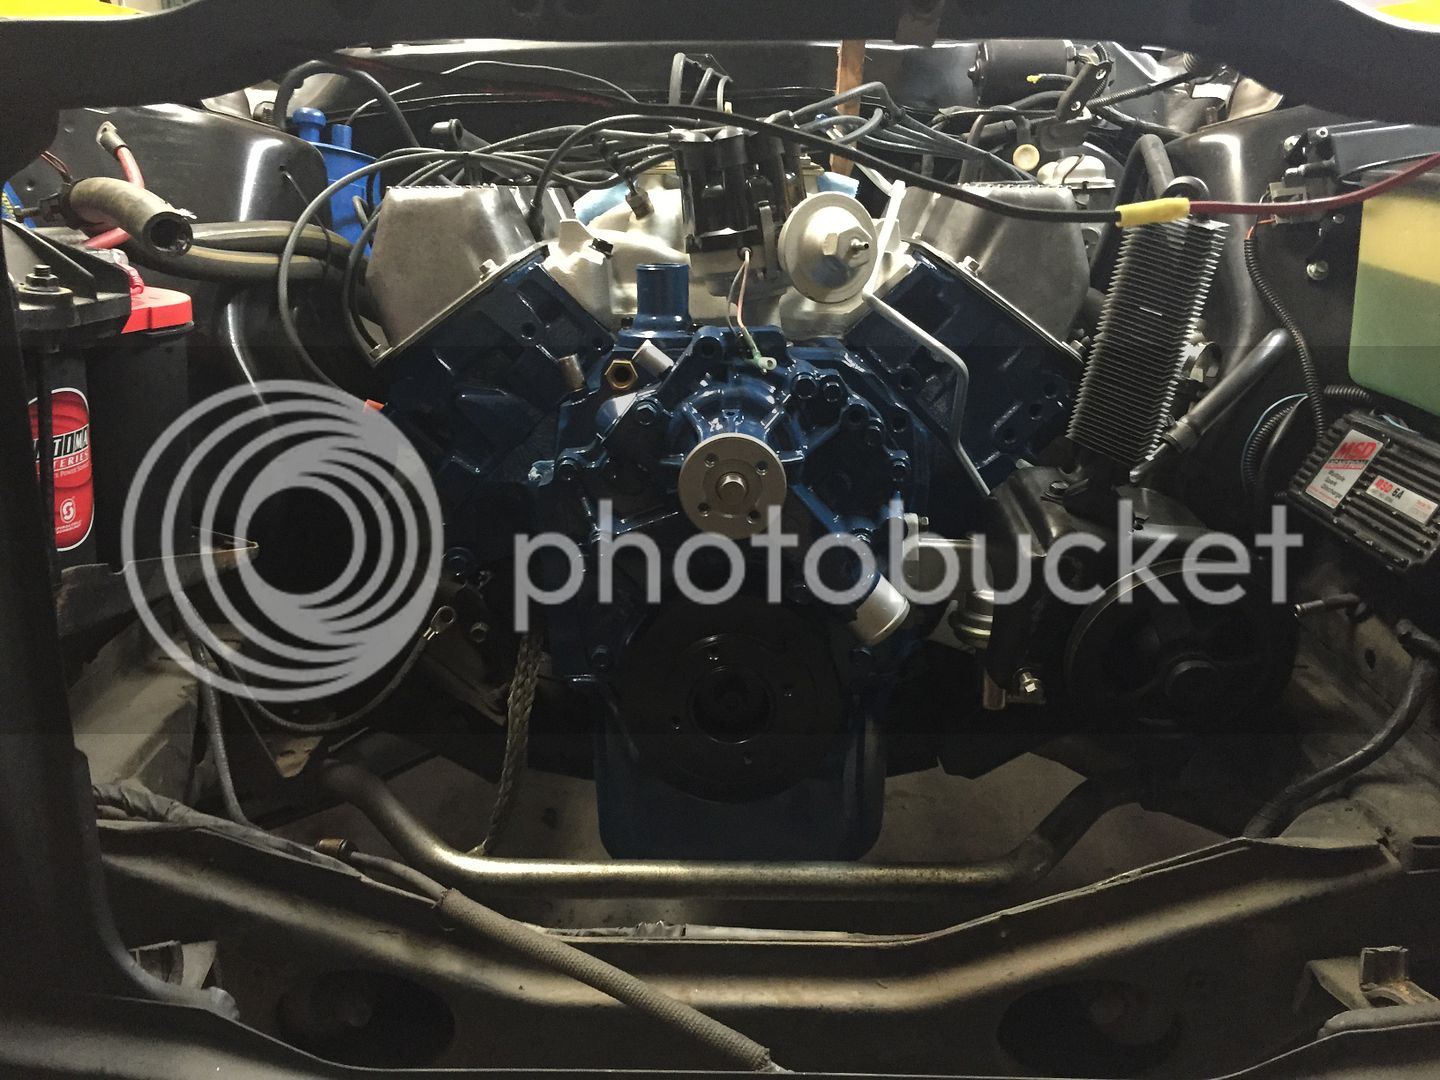
Today I tackled the engine painting. I hosed the entire engine off with a prestigious amount of lacquer thinner to get all the oils and contaminates off. I used almost 1/2 gallon. Dried it in the sun. The I masked up the rest of the engine, sprayed it first with some aerosol black SEM self etching primer, then topped it off with some of POR15's Ford Corporate Blue Engine enamel thinned with 50% lacquer thinner so it would spray easier. I used some crappy chrome valve covers to mask the valvetrain. It turned out really great. Good shine, color and finish overall.
Next I need to clean the intake manifold bolts and get that mounted permanently.
I still need headers, a clutch kit and some few other bits and pieces before the swap happens.

I did a lot of cleaning on the intake manifold and valve covers. Used some Eastwood Cast Blast on the intake, and used some very fine 0000 steel wool to clean up the valve covers and then sanded the fins down to 400 grit, finishing with more steel wool.
Today I tackled the engine painting. I hosed the entire engine off with a prestigious amount of lacquer thinner to get all the oils and contaminates off. I used almost 1/2 gallon. Dried it in the sun. The I masked up the rest of the engine, sprayed it first with some aerosol black SEM self etching primer, then topped it off with some of POR15's Ford Corporate Blue Engine enamel thinned with 50% lacquer thinner so it would spray easier. I used some crappy chrome valve covers to mask the valvetrain. It turned out really great. Good shine, color and finish overall.
Next I need to clean the intake manifold bolts and get that mounted permanently.
I still need headers, a clutch kit and some few other bits and pieces before the swap happens.

Nice job!
MeZapU
Well-known member
- Joined
- Feb 12, 2011
- Messages
- 830
- Reaction score
- 11
- Location
- Southery, UK
- My Car
- 12 GT
73 Mach 1
85 GT
66 F-100
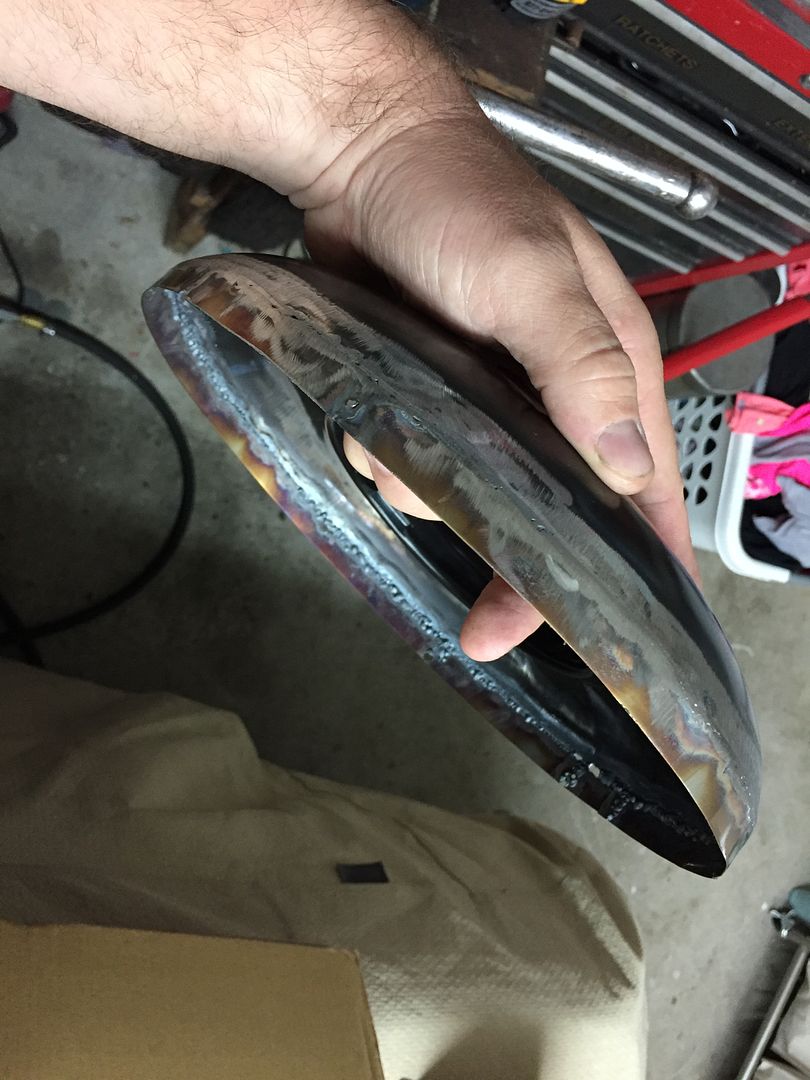
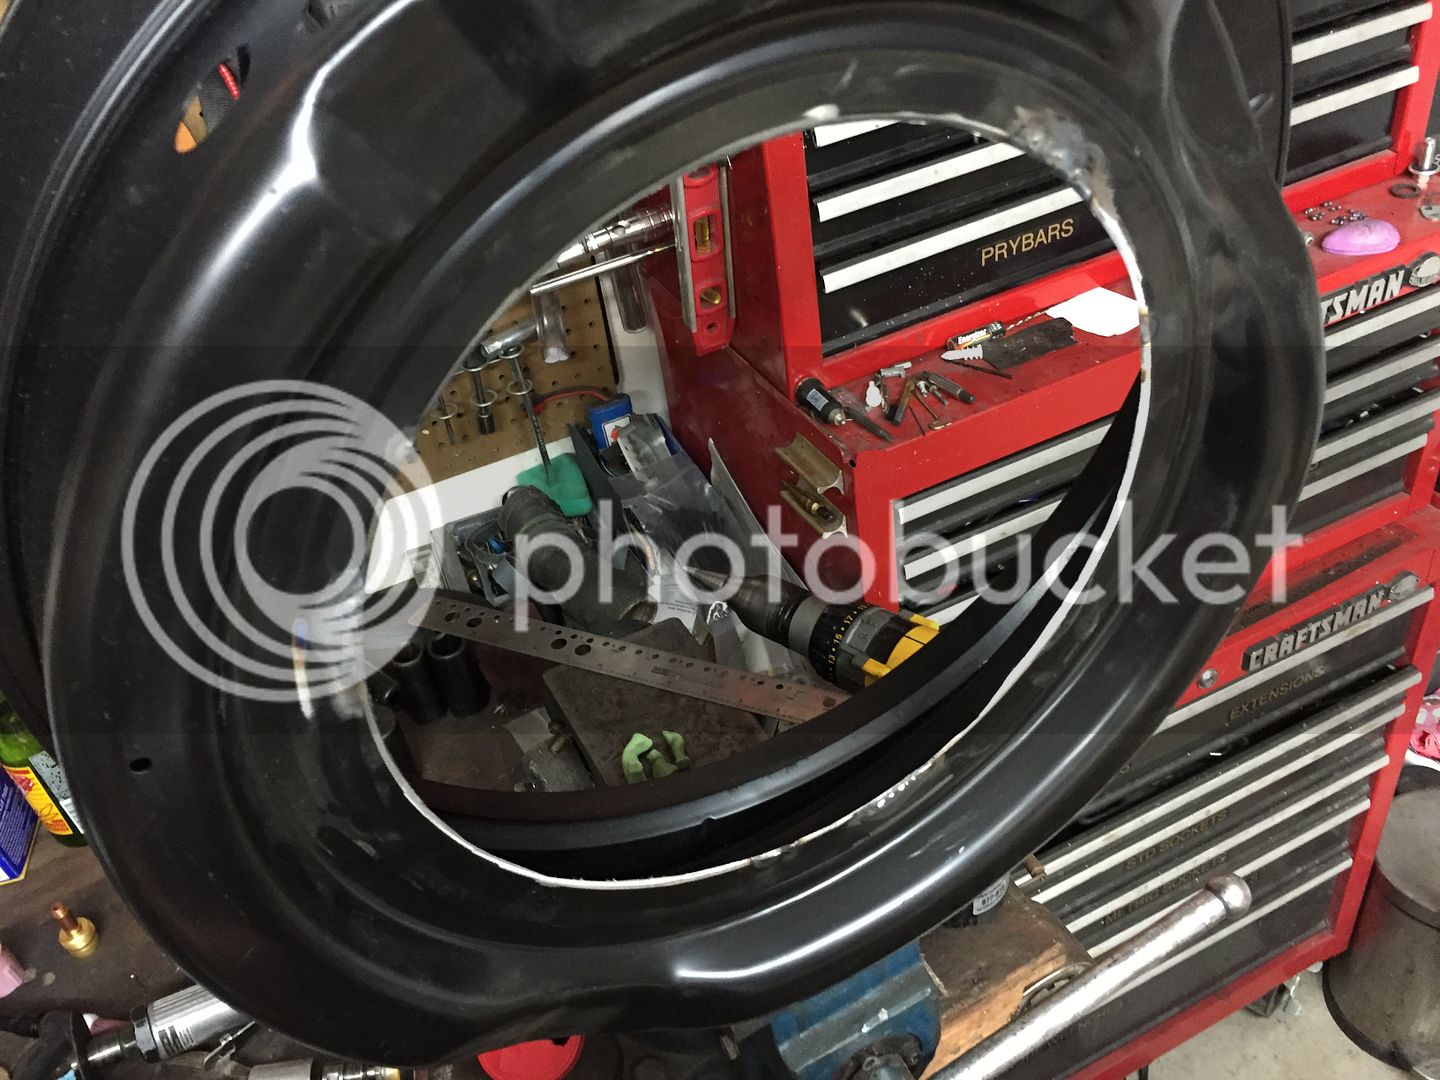
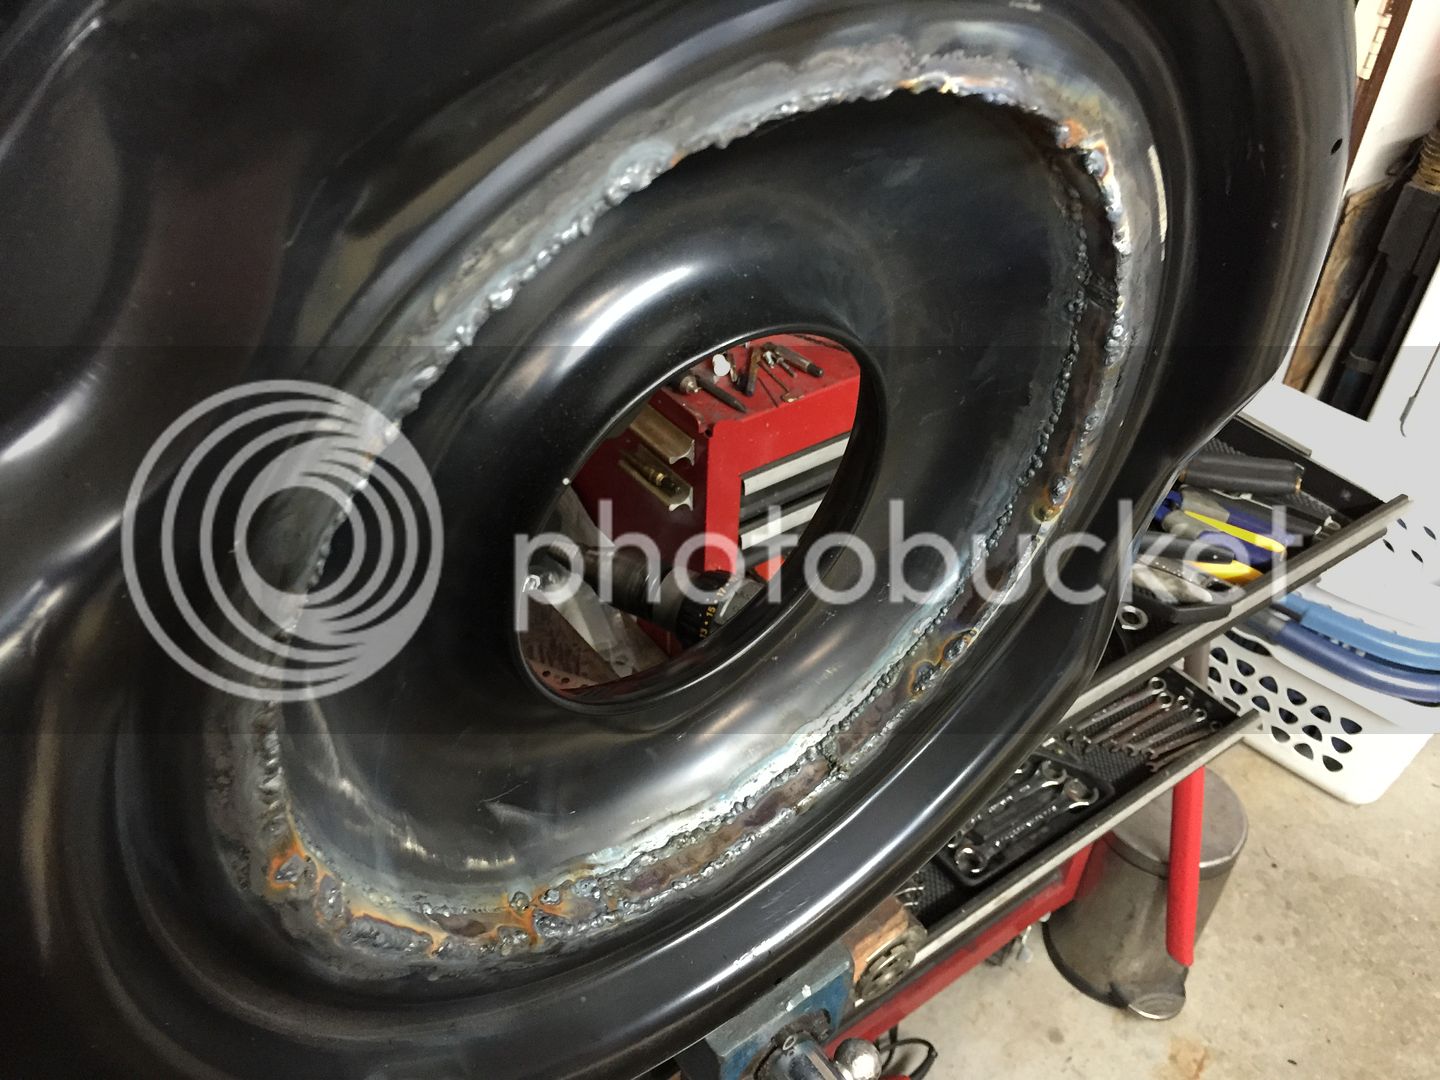
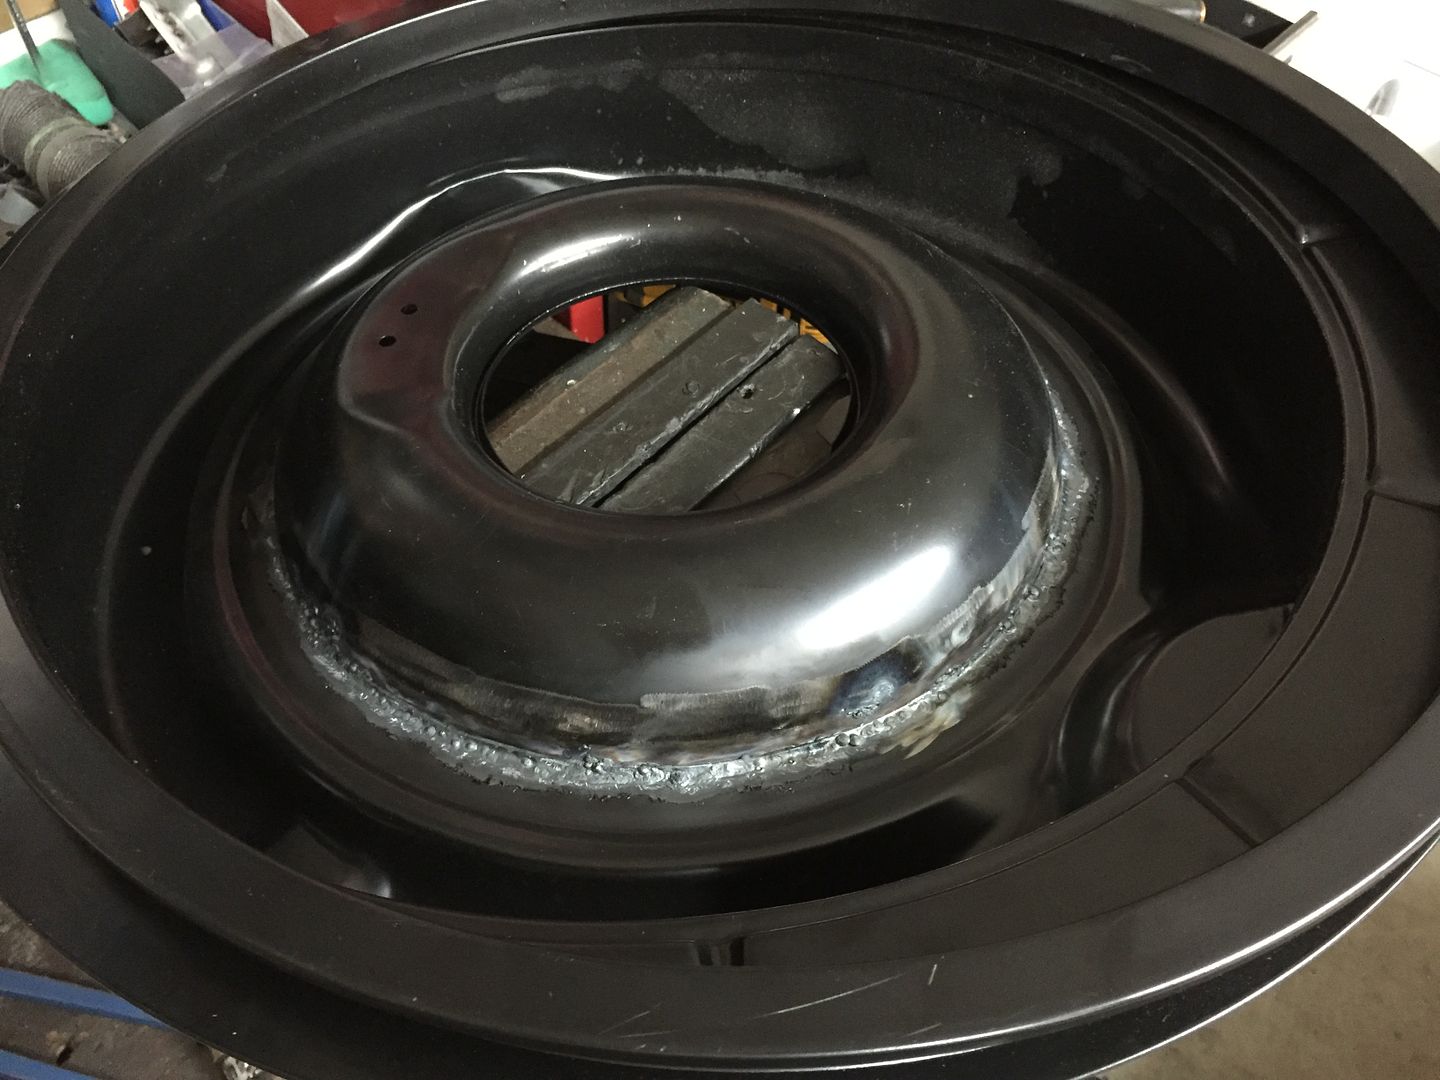
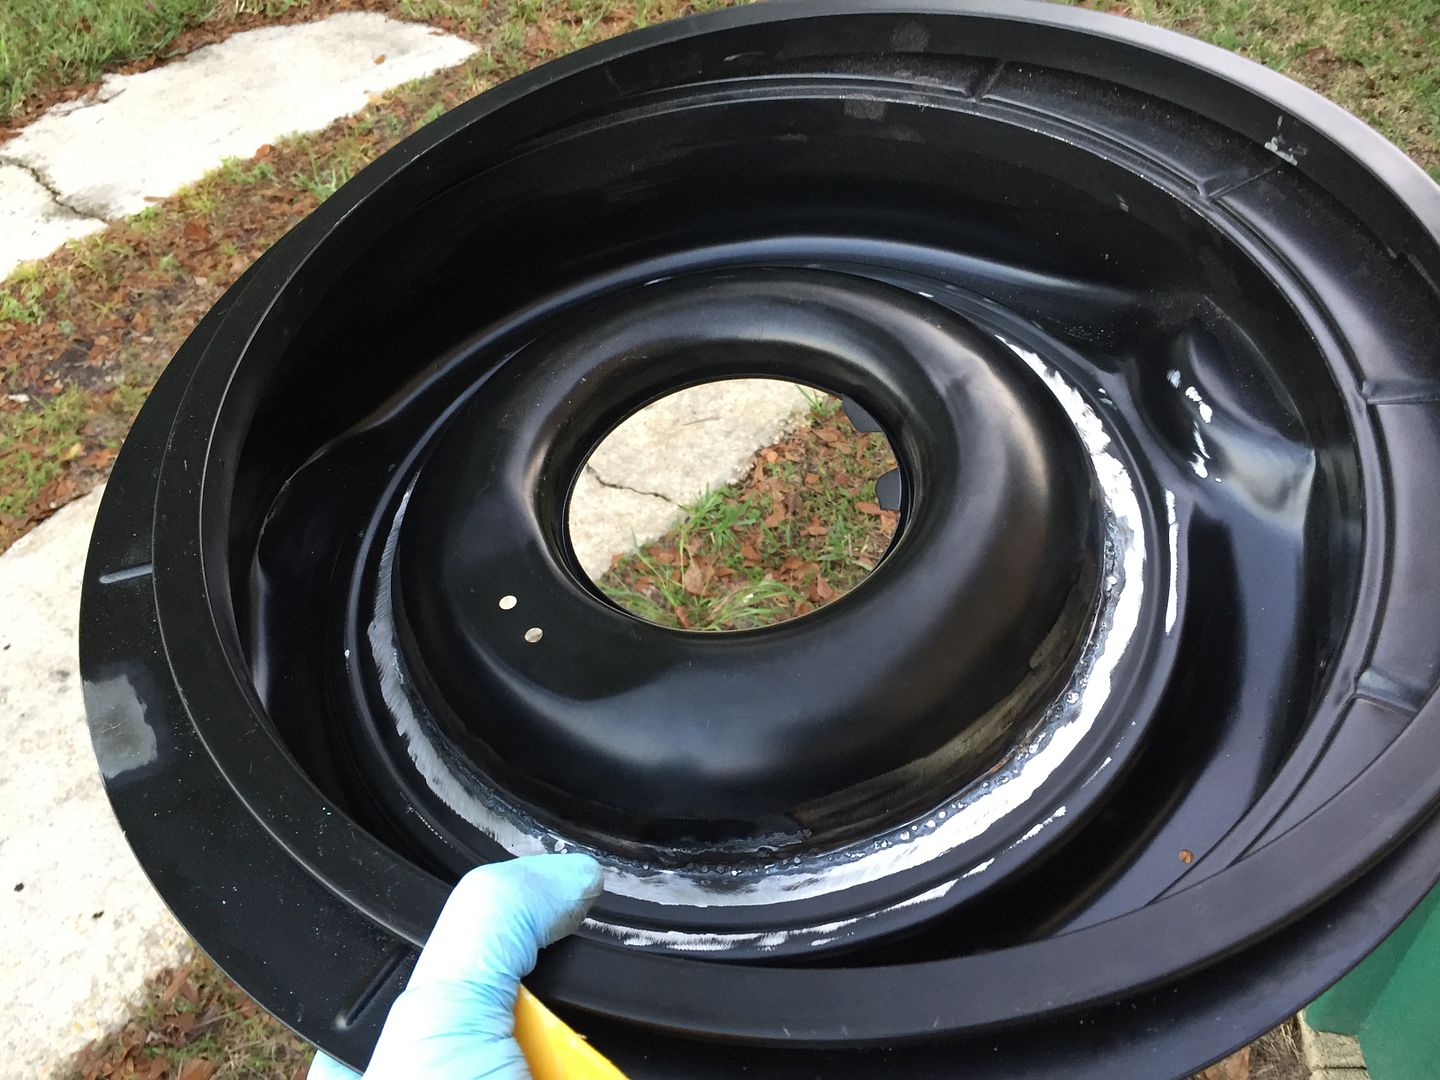
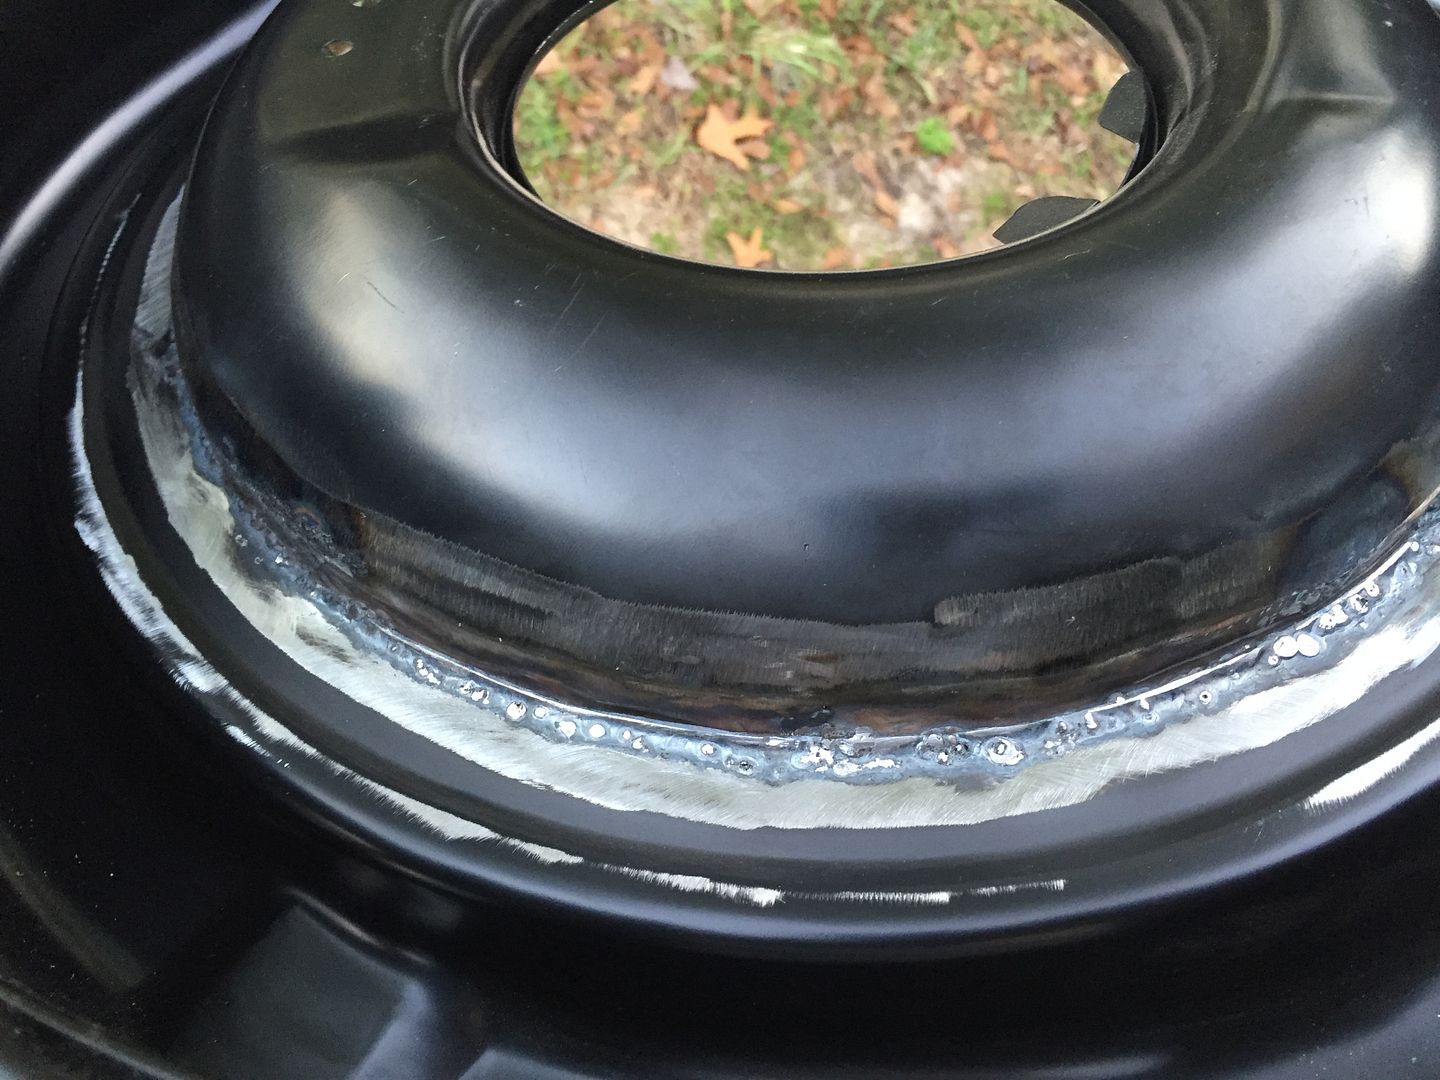
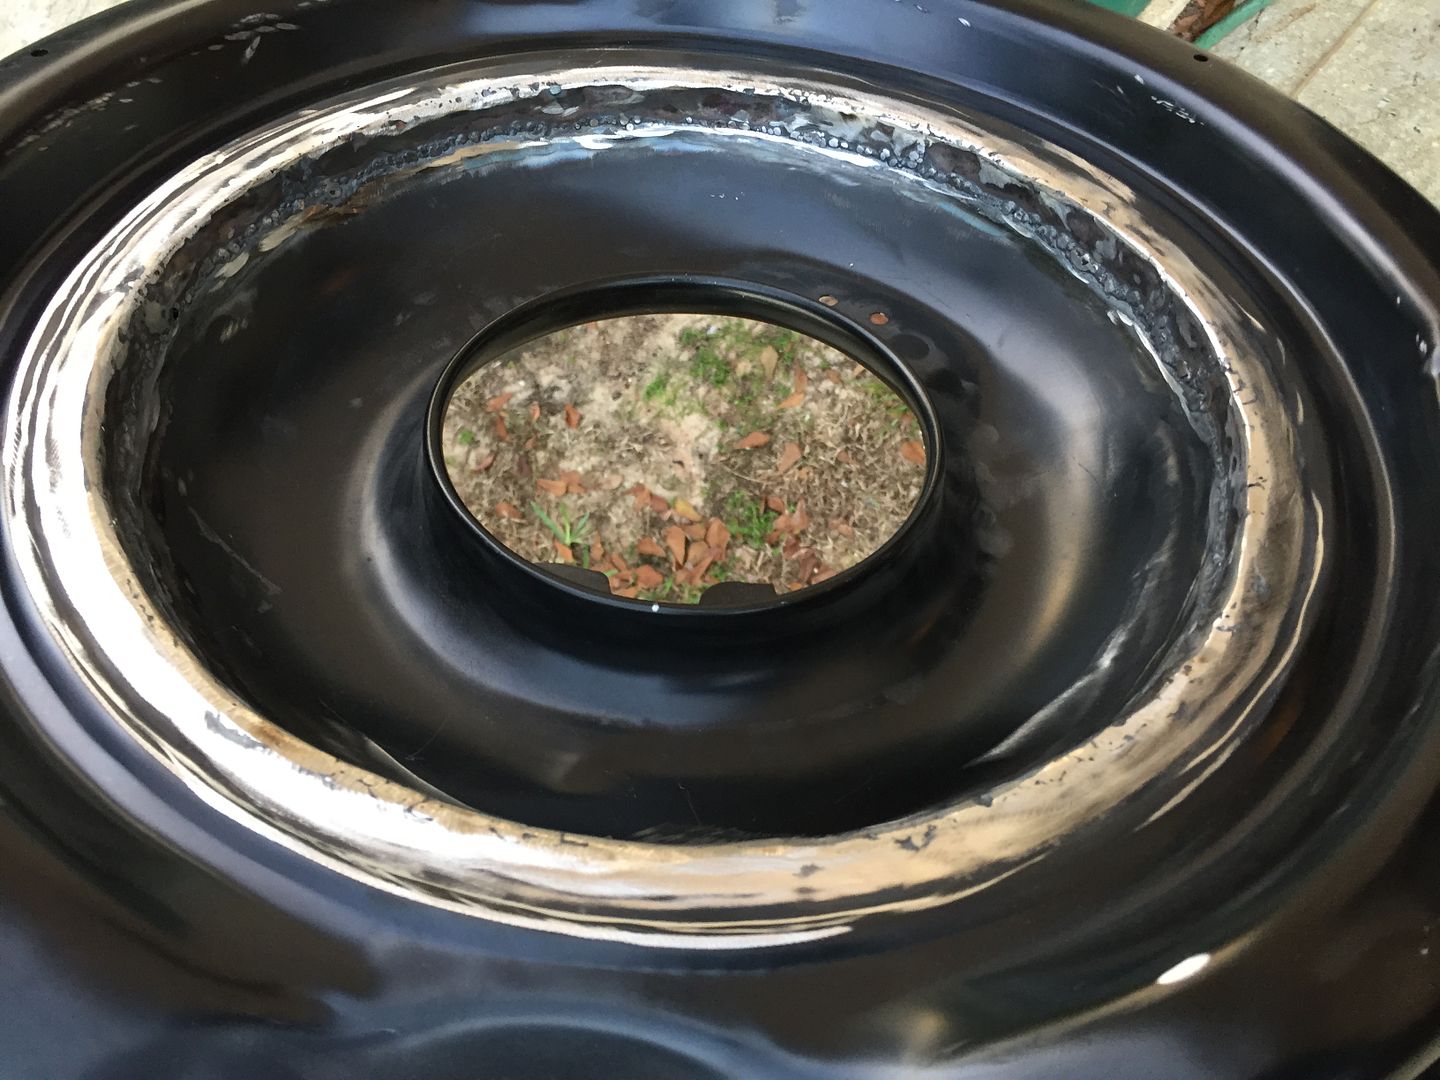
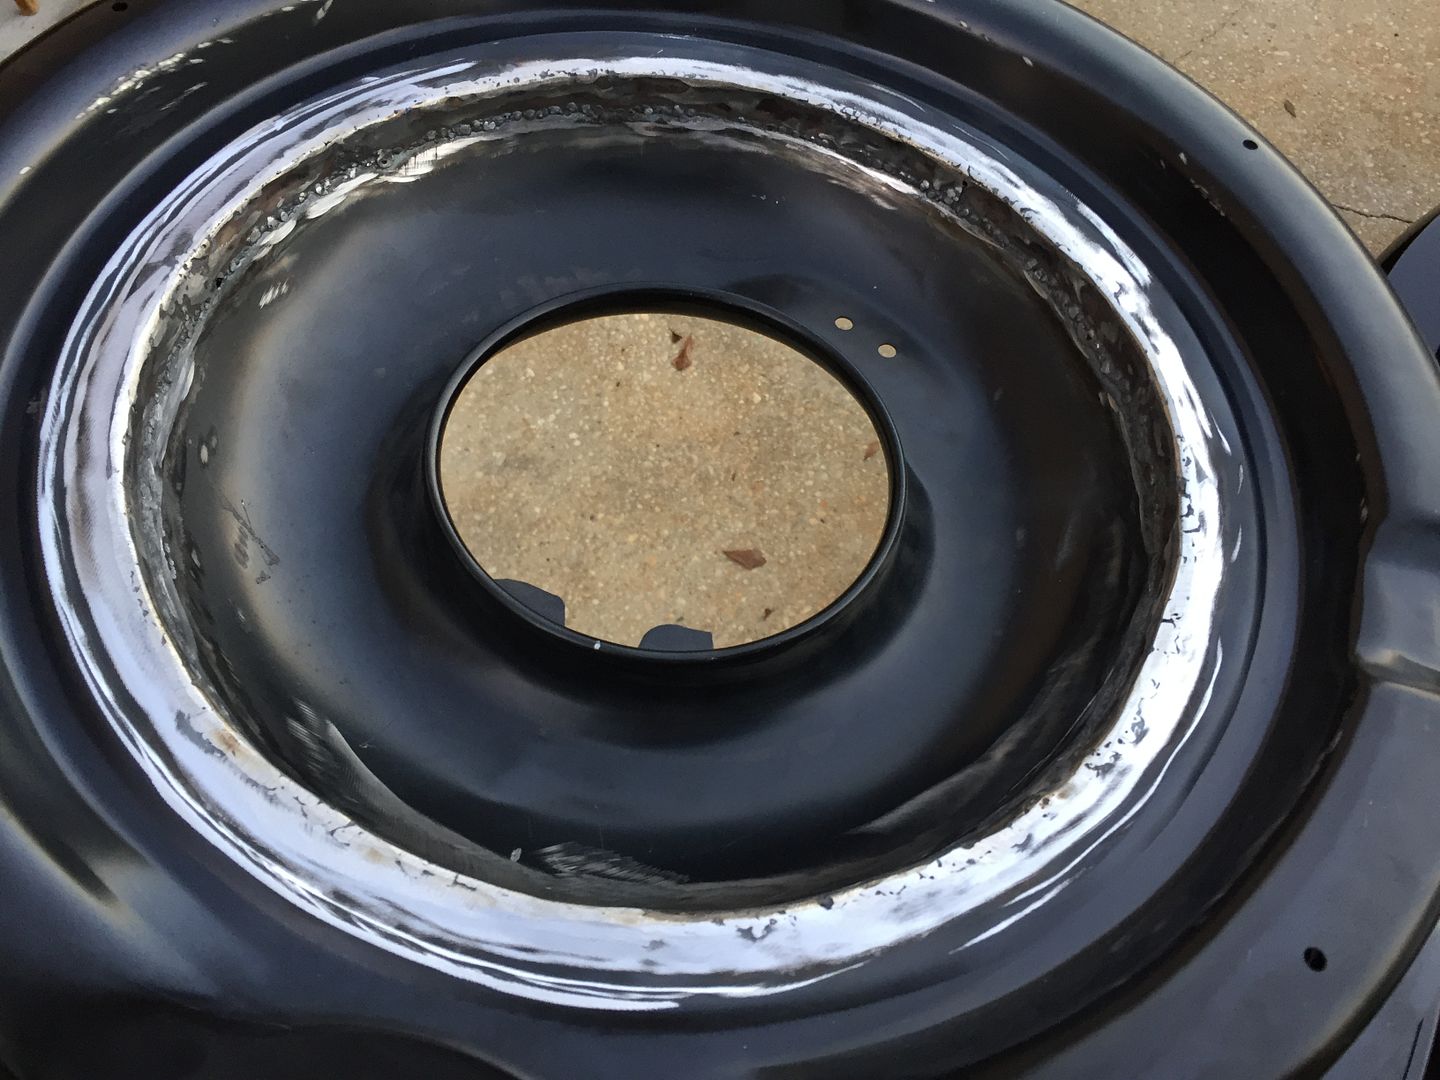
Waiting for parts to show up. I managed to get a good original flywheel to use for this project. The one I have now is quite thin from being surfaced so many times in the past I really did not want to reuse it. I had this one ground and I needed to totally replace the ring gear as it was worn quite heavily in certain spots and I didn't even really feel good about flipping it over.
I've installed flywheel ring gears like this several times in the past and it's by far the easiest way I've ever found to do it.
[video=youtube]
I've installed flywheel ring gears like this several times in the past and it's by far the easiest way I've ever found to do it.
[video=youtube]
- Joined
- Sep 30, 2010
- Messages
- 6,290
- Reaction score
- 1,240
- Location
- Mustang, OK.
- My Car
- 1972 Mach 1 Q code
2007 GT
1969 Cougar Eliminator B302
CSX 7000 Shelby Cobra FIA
2020 Edge ST
2002 F250 V10
Very slick indeed! How di you get the old one off? Chuck
MeZapU
Well-known member
- Joined
- Feb 12, 2011
- Messages
- 830
- Reaction score
- 11
- Location
- Southery, UK
- My Car
- 12 GT
73 Mach 1
85 GT
66 F-100
I just tap it off with a hammer and punch sort of like if it were a wheel bearing race. Keep going around and around until it comes off. It only takes a few minutes.How di you get the old one off?
Last edited by a moderator:
- Joined
- Sep 30, 2010
- Messages
- 6,290
- Reaction score
- 1,240
- Location
- Mustang, OK.
- My Car
- 1972 Mach 1 Q code
2007 GT
1969 Cougar Eliminator B302
CSX 7000 Shelby Cobra FIA
2020 Edge ST
2002 F250 V10
Good stuff to know. Thanks, Chuck
- Joined
- Feb 1, 2013
- Messages
- 3,760
- Reaction score
- 43
- Location
- Richland, WA
- My Car
- 1973 Mustang Mach 1 Q code C6 tranny
Looking really nice!!! Almost there, congrats.
MeZapU
Well-known member
- Joined
- Feb 12, 2011
- Messages
- 830
- Reaction score
- 11
- Location
- Southery, UK
- My Car
- 12 GT
73 Mach 1
85 GT
66 F-100
I guess I let these updates drop off of my radar over the past few months. I will need to take some more pictures in the week and get this post finished. But for now...
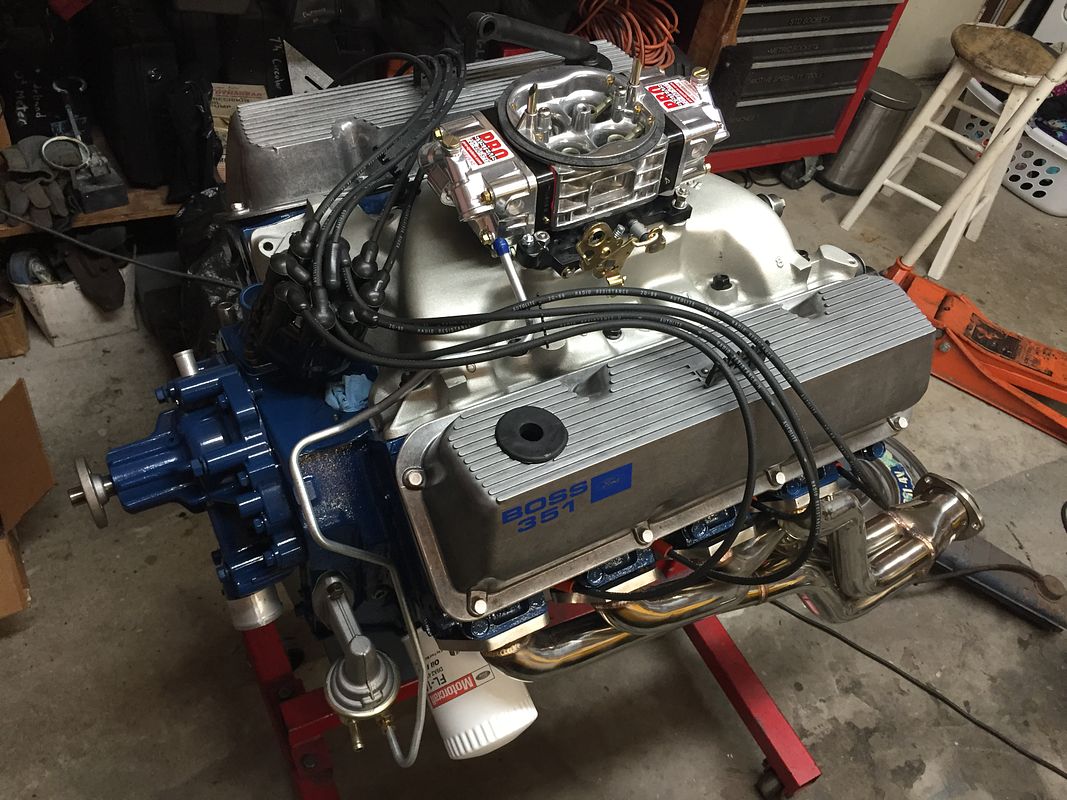
This was just one of the final motor mockup hero shots that I took before stabbing it into the engine bay.
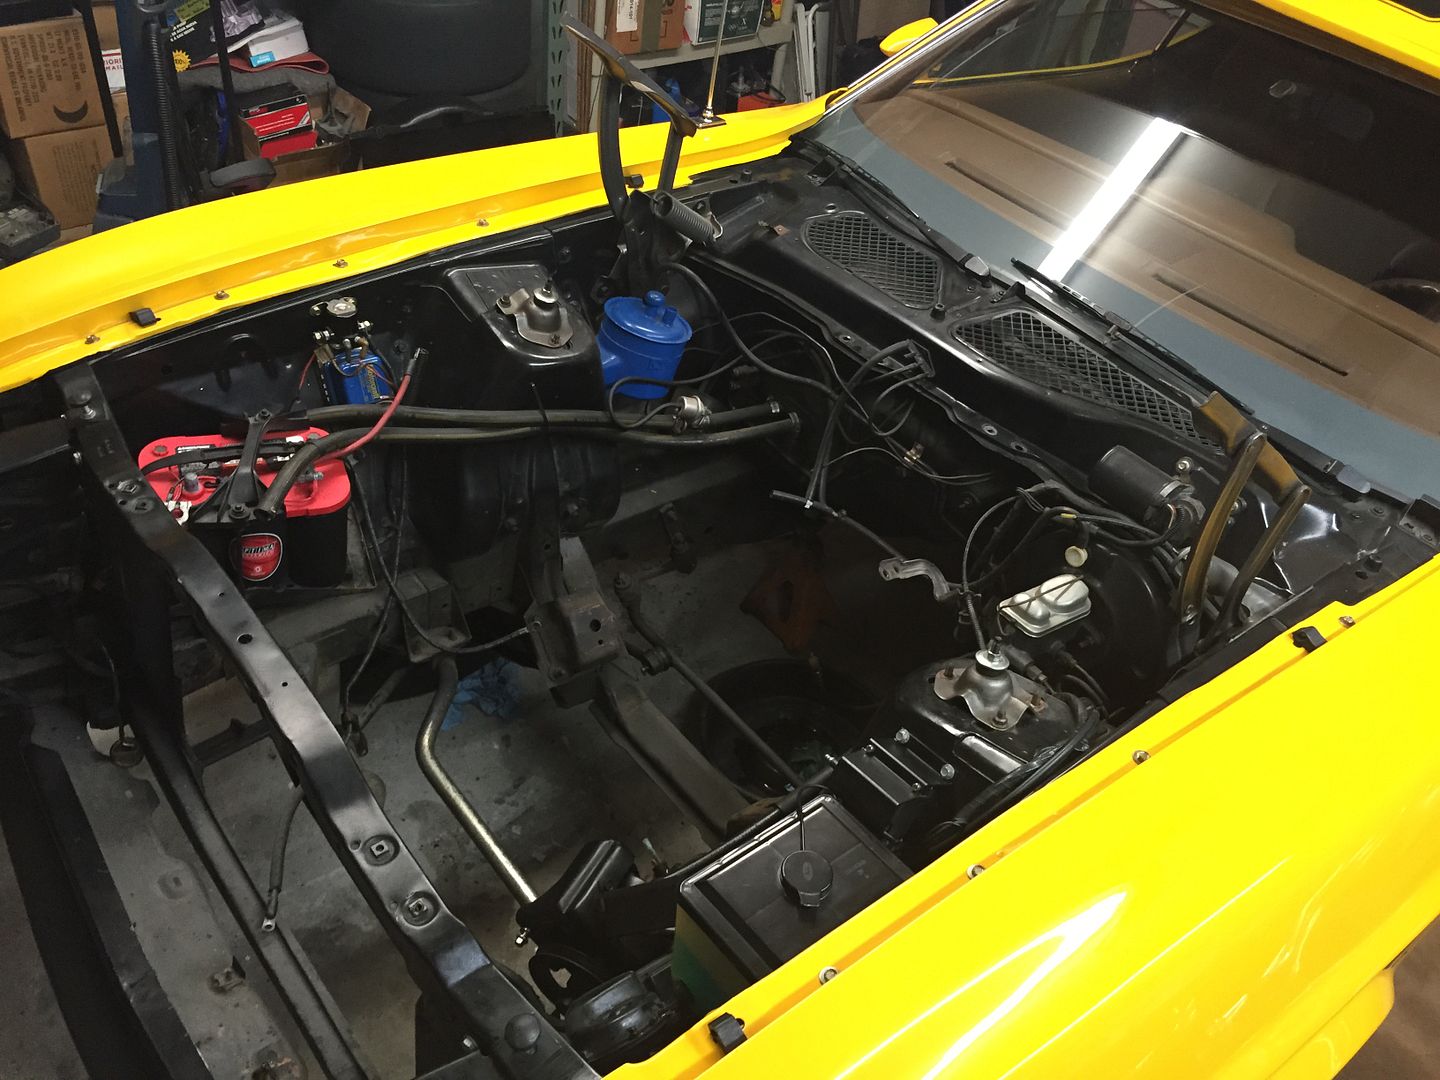
Old motor ready to come out.
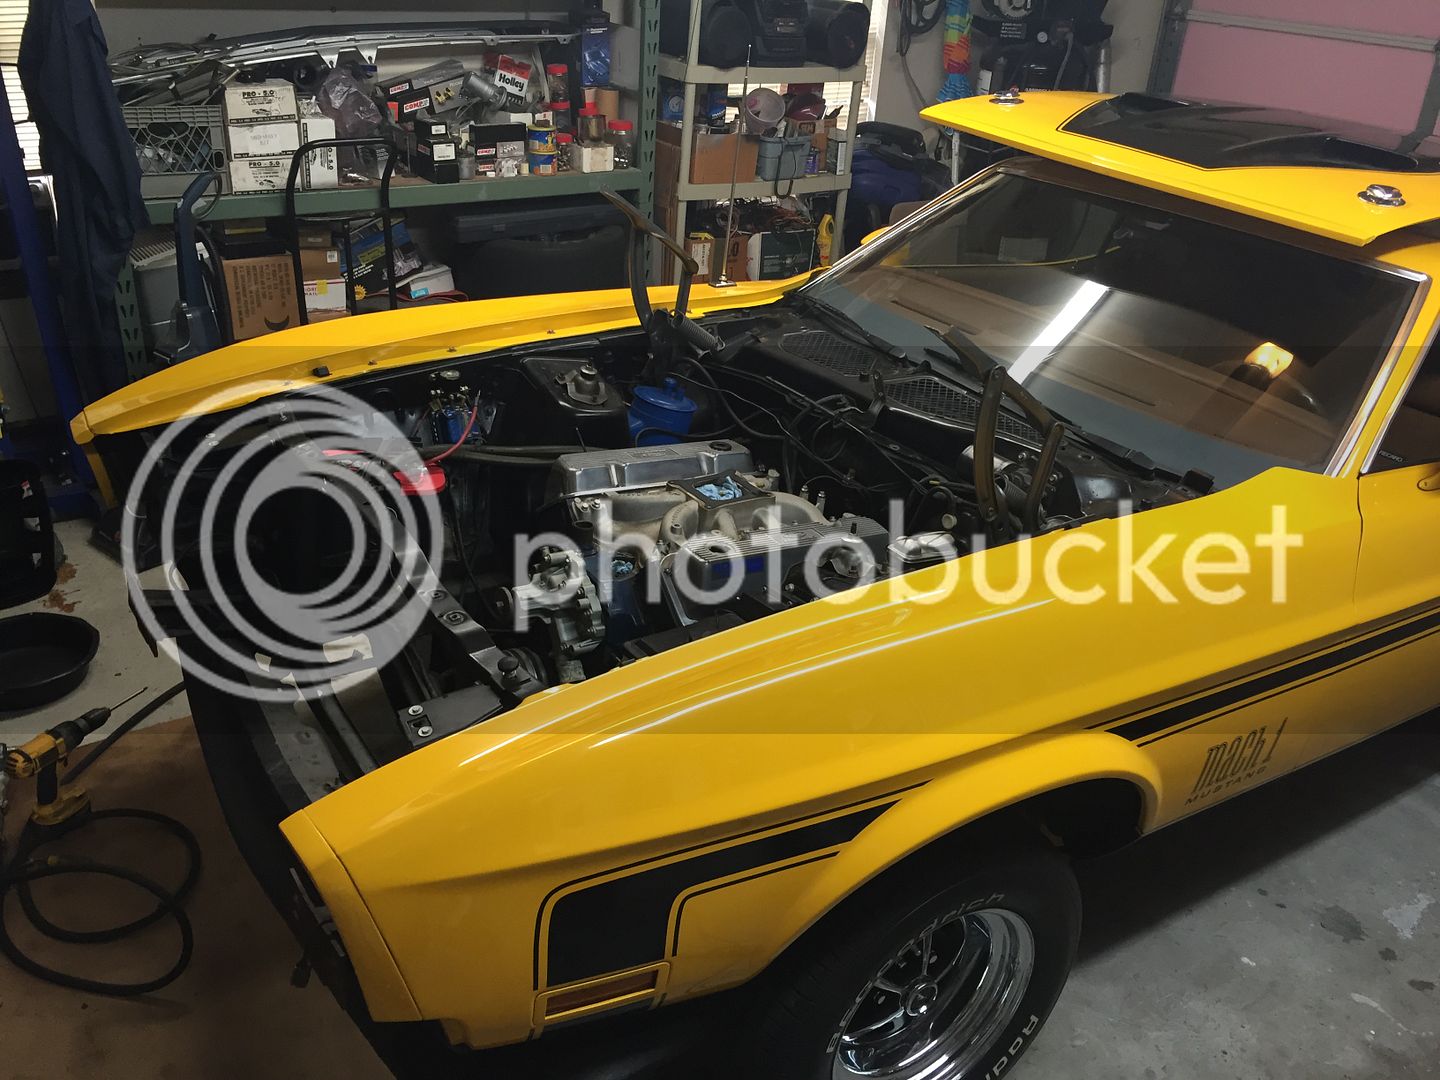
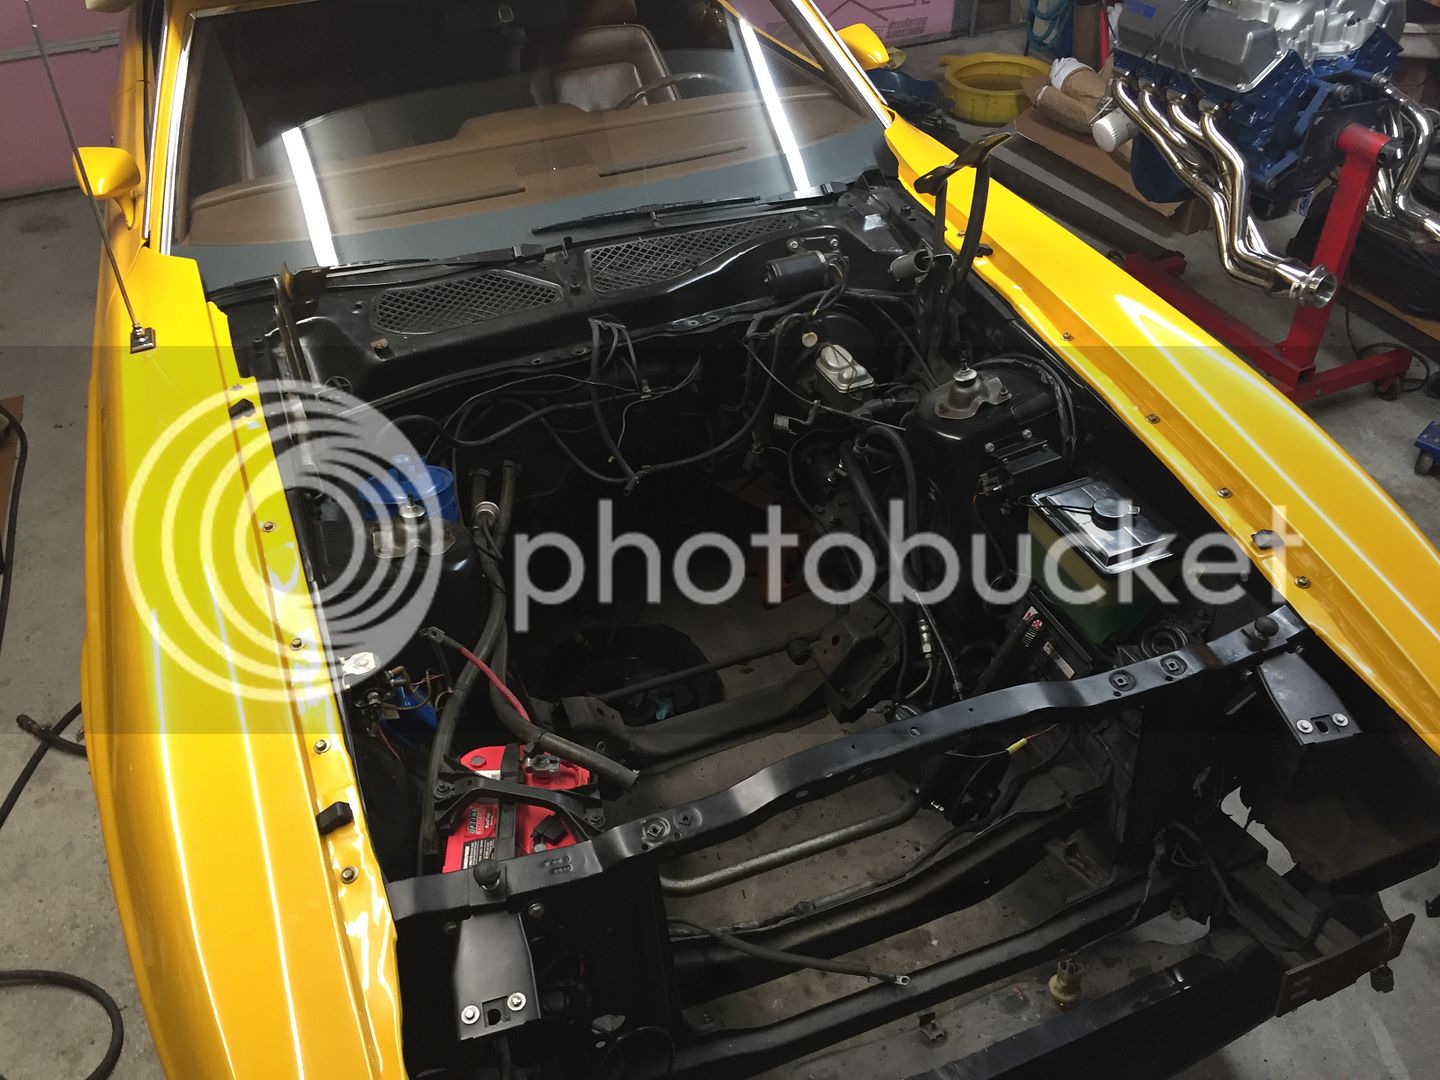
Not a whole lot of room to work with, but better than some.
Engine and trans out.
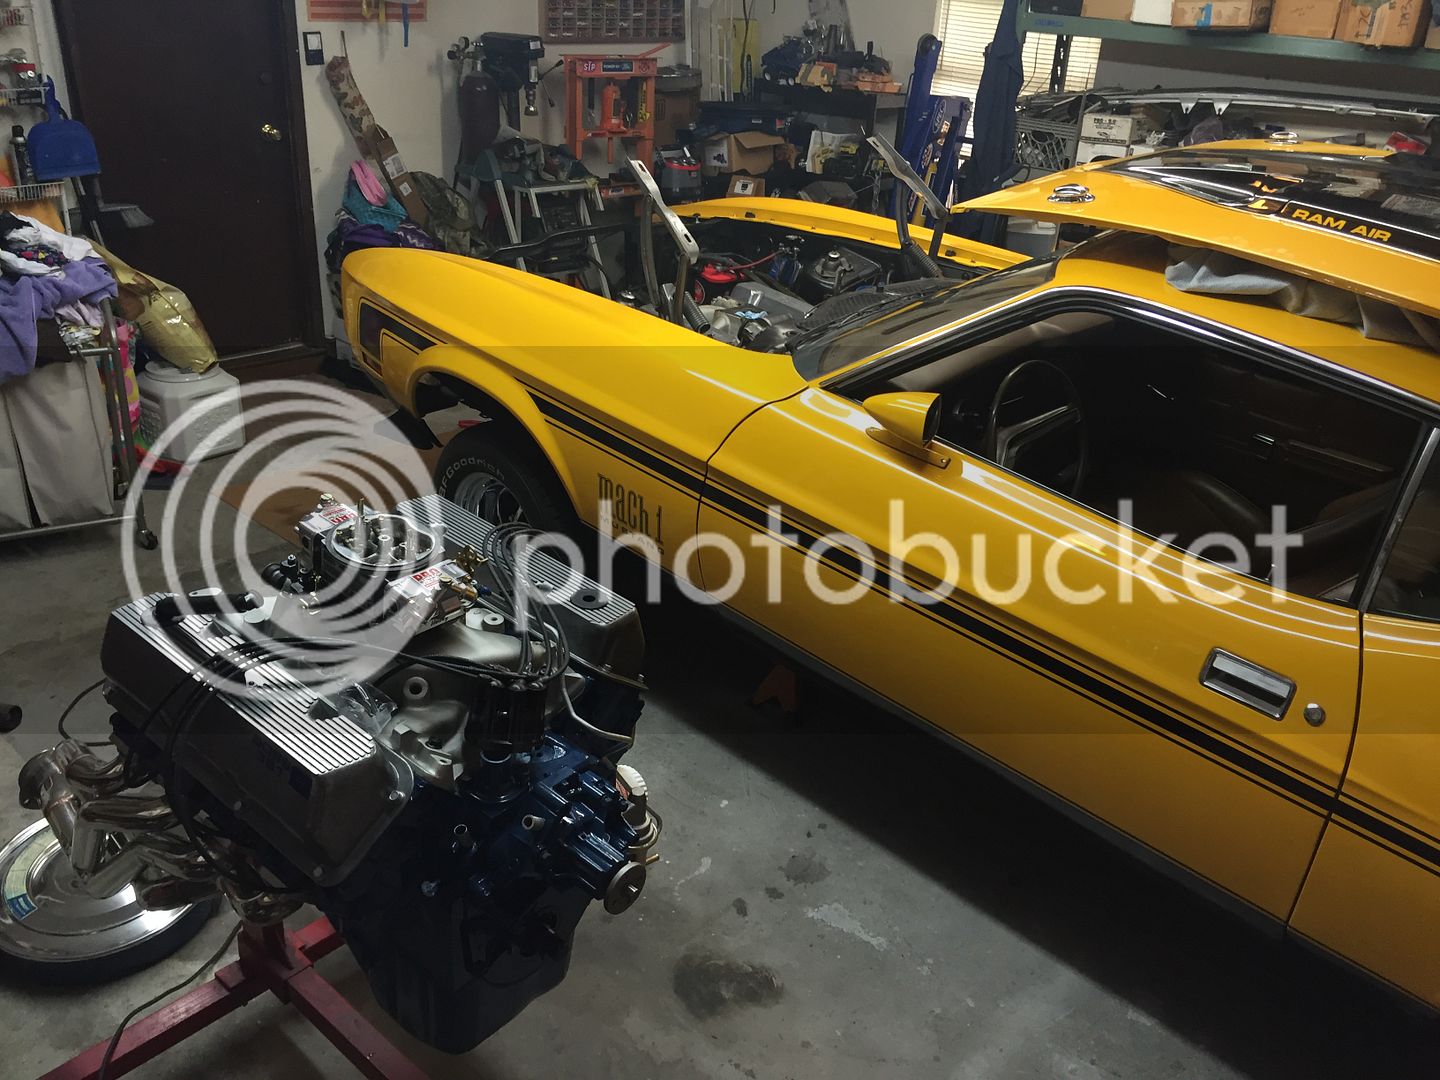
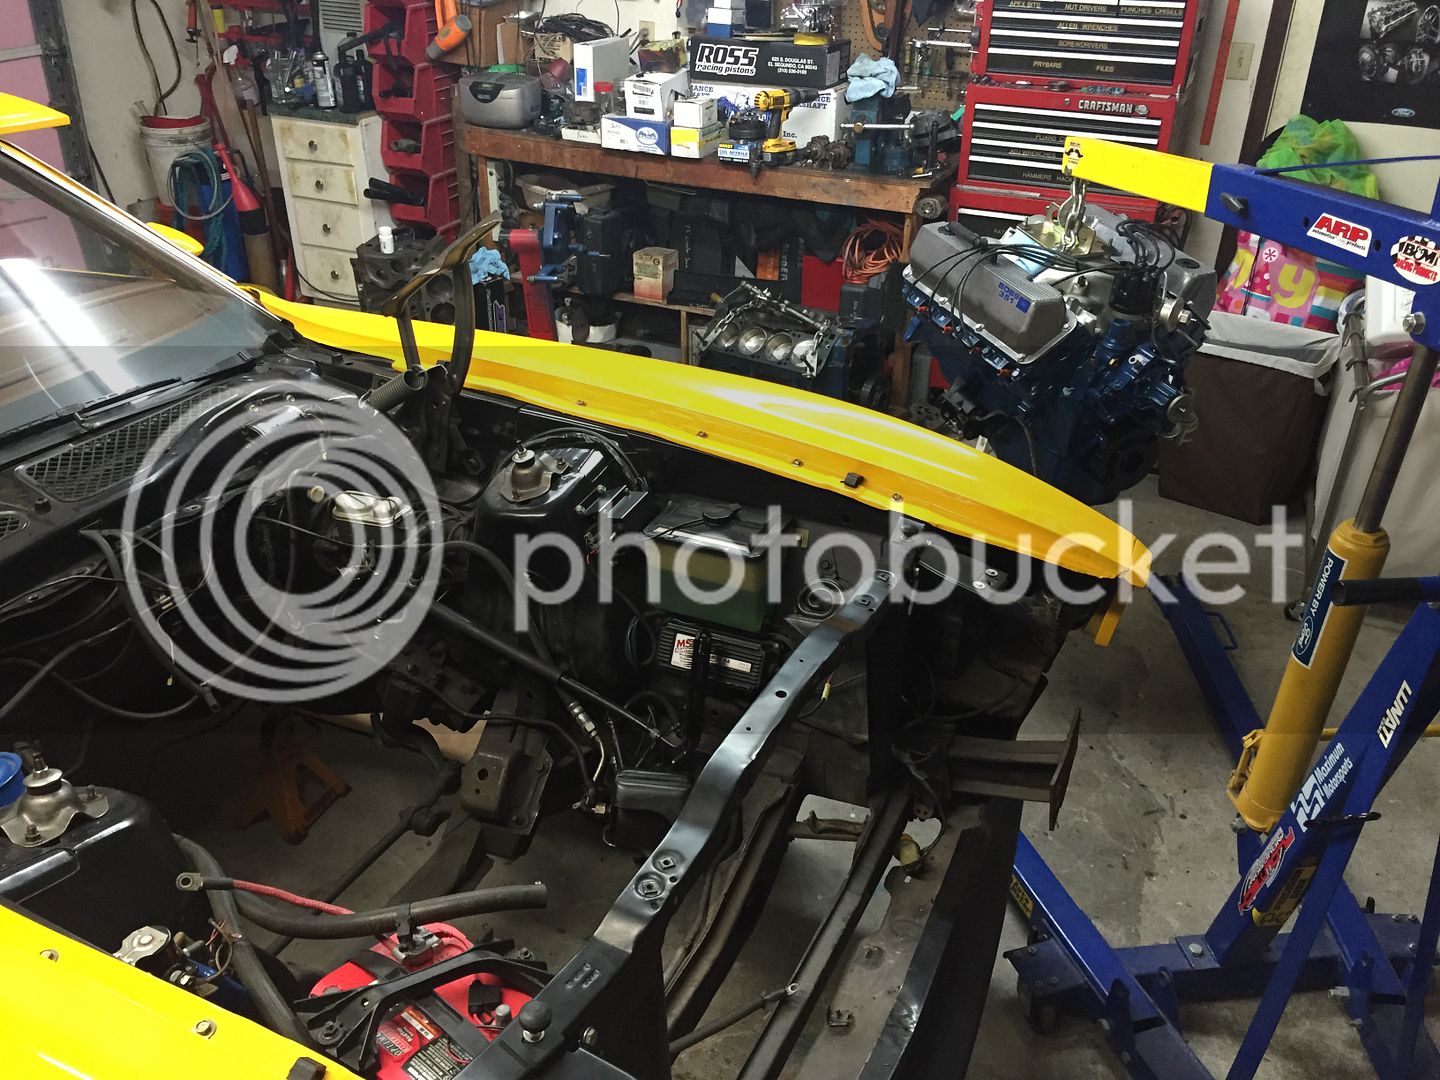
Old vs new. Not a whole lot of difference, but it's whats inside that counts.


After a few weeks of cleaning the engine compartment, and doing other things in life, I was finally ready to drop in the new engine. I think I was waiting on the new clutch and was getting the flywheel ground. I rebuilt the toploader too. Wasn't really anything wrong with it but it was leaking from everywhere.
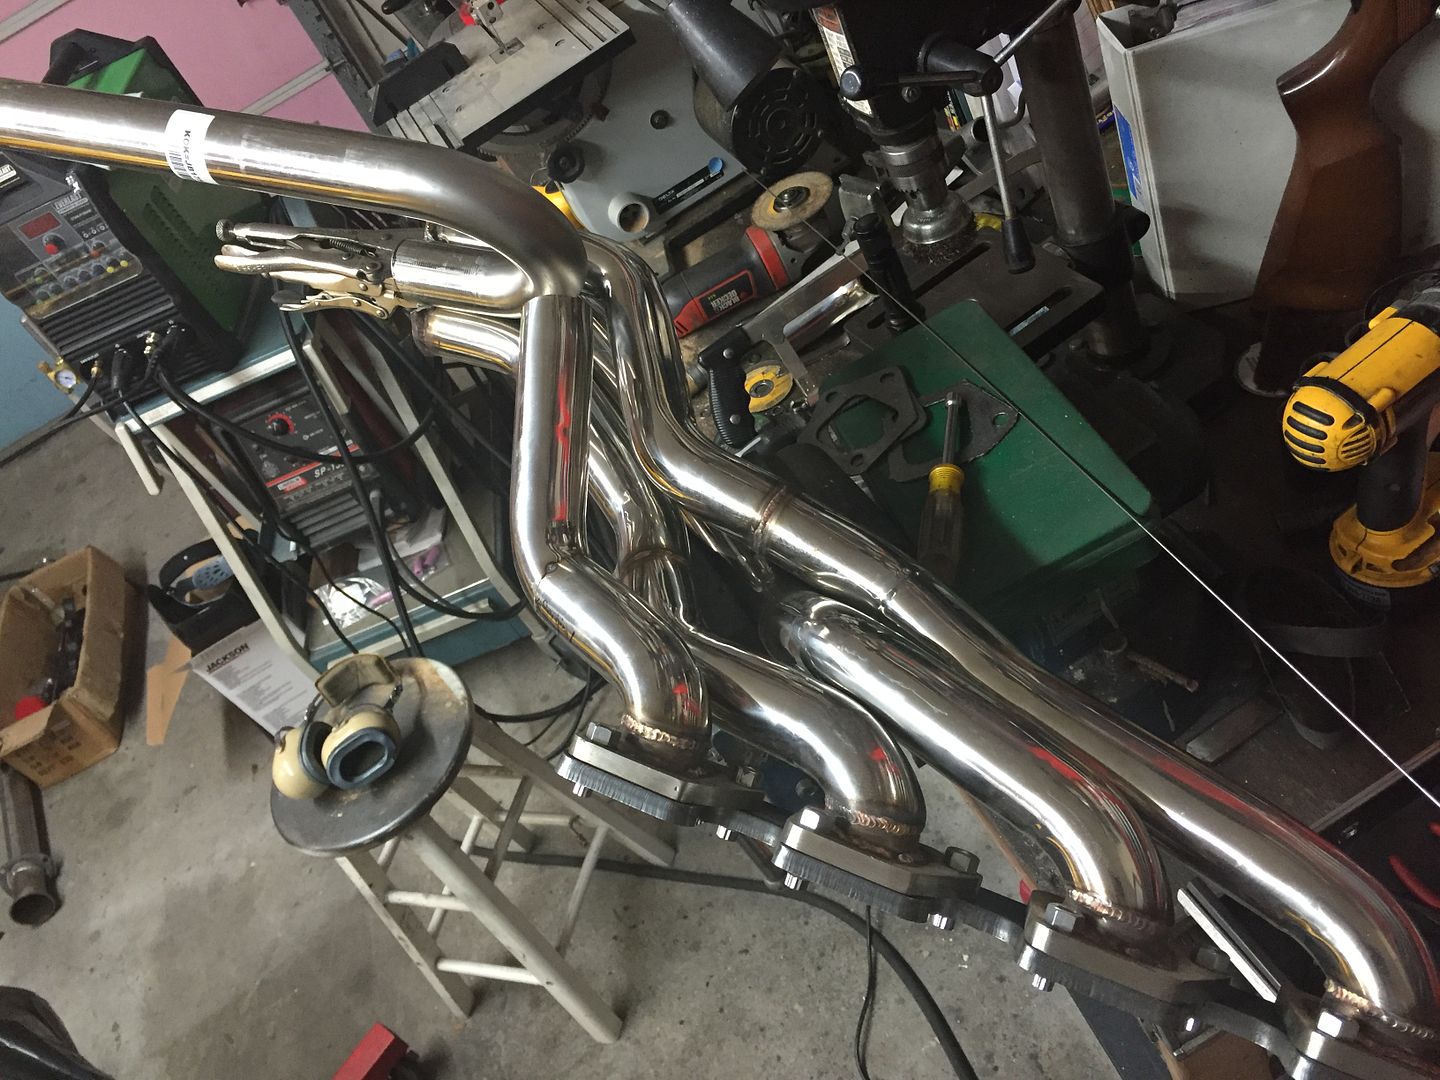
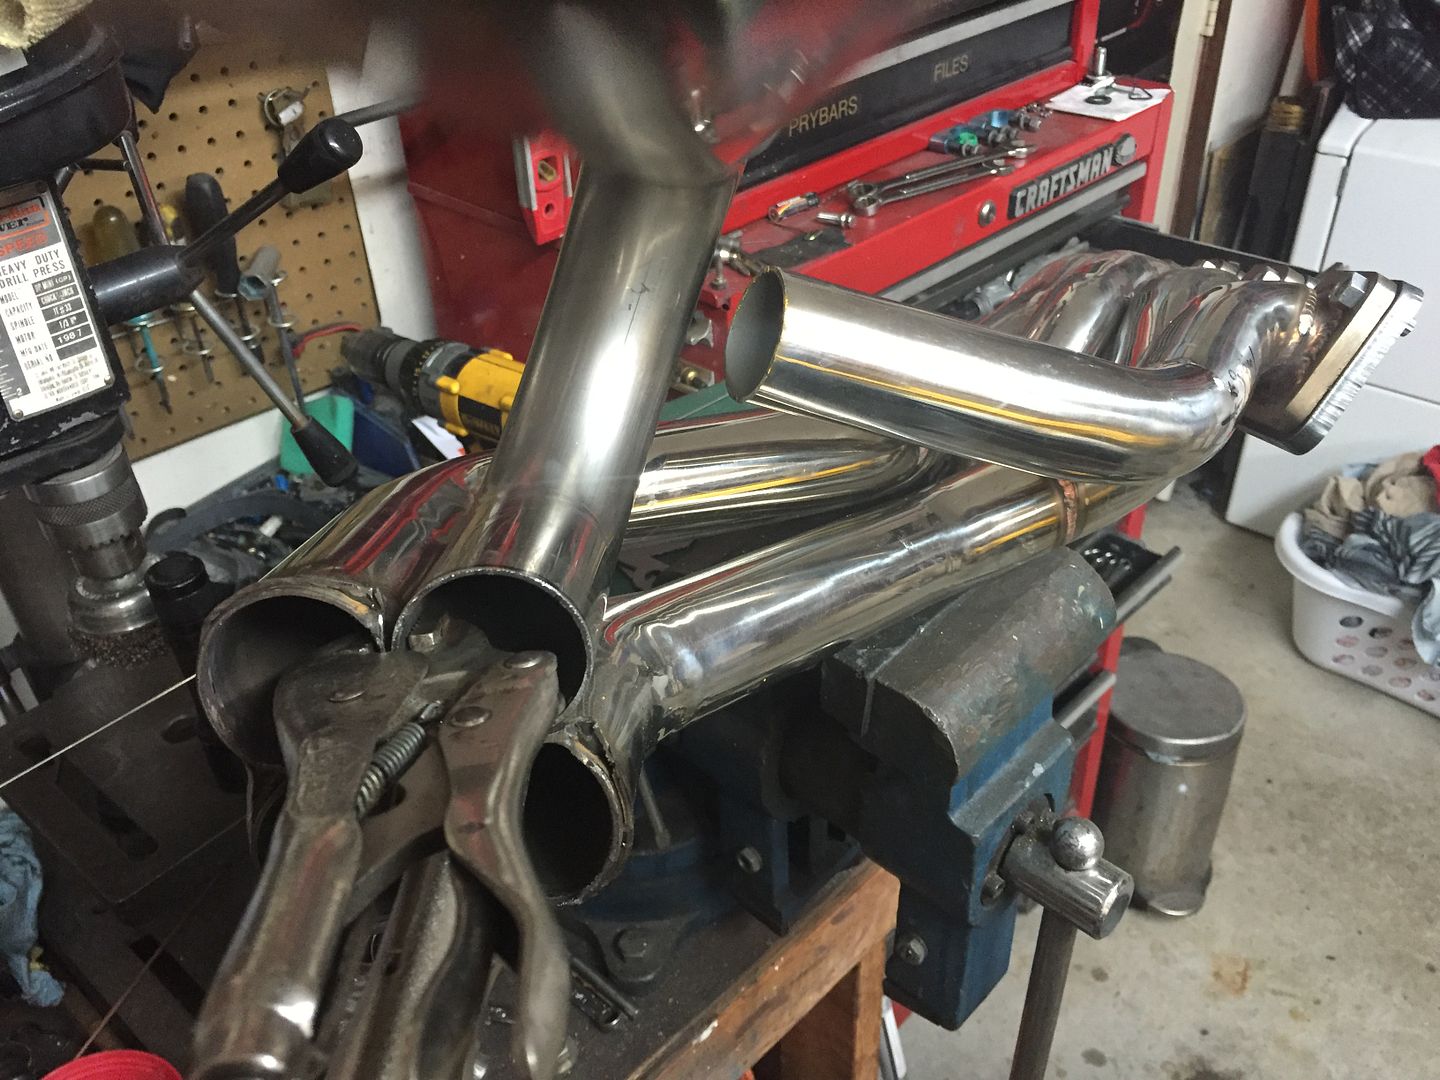
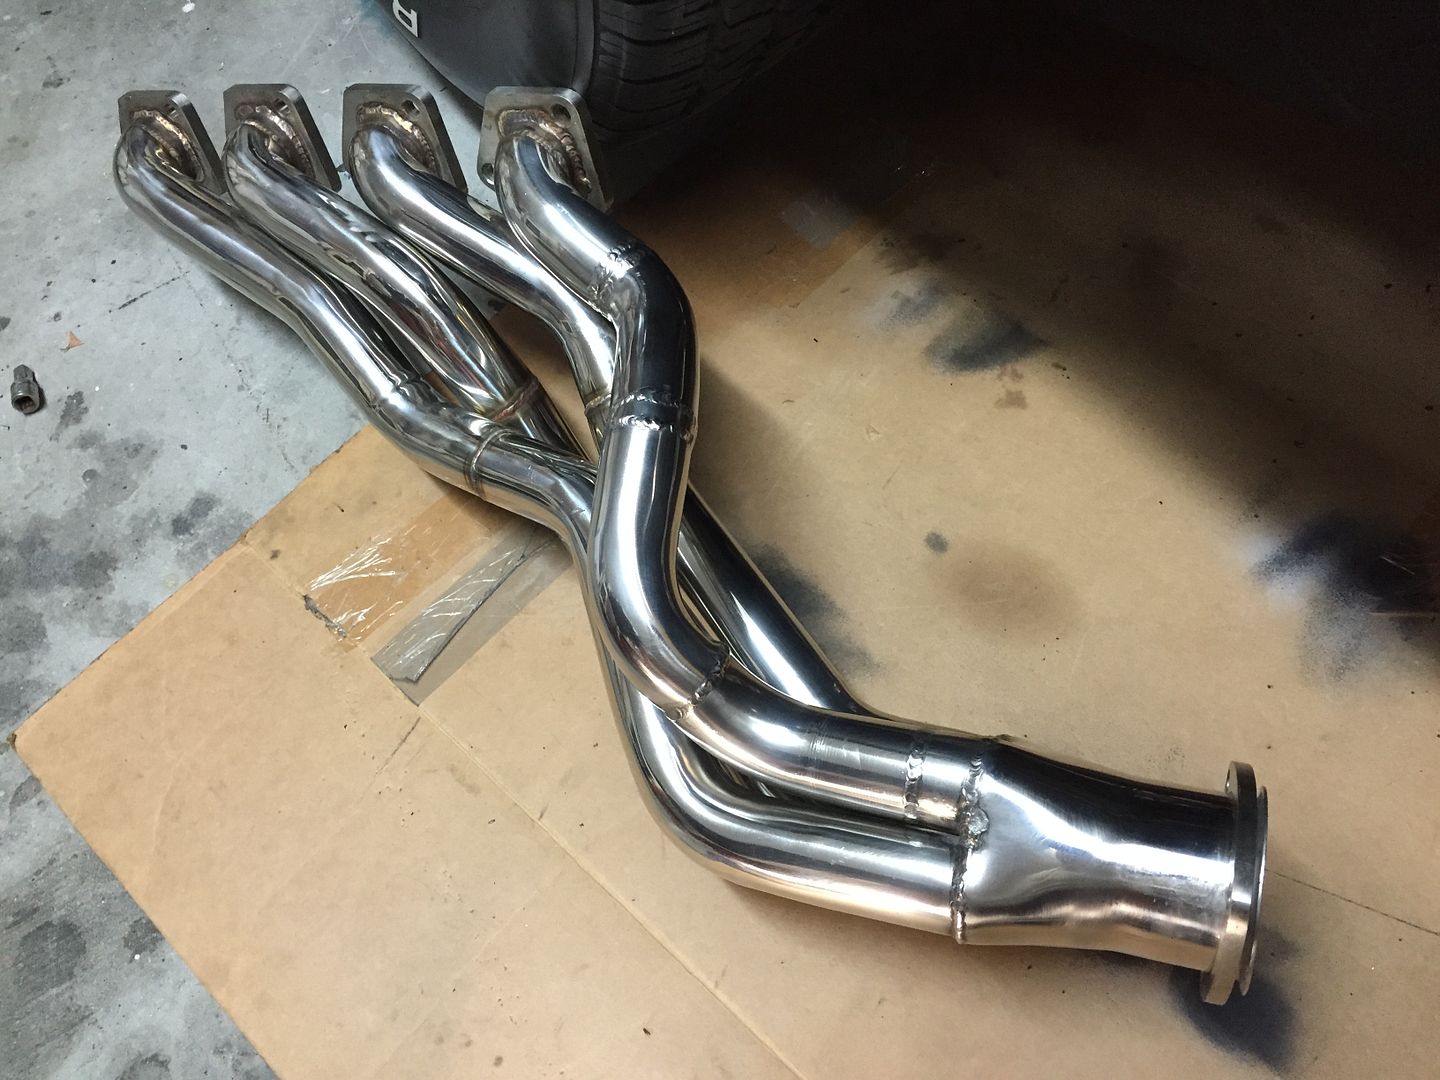
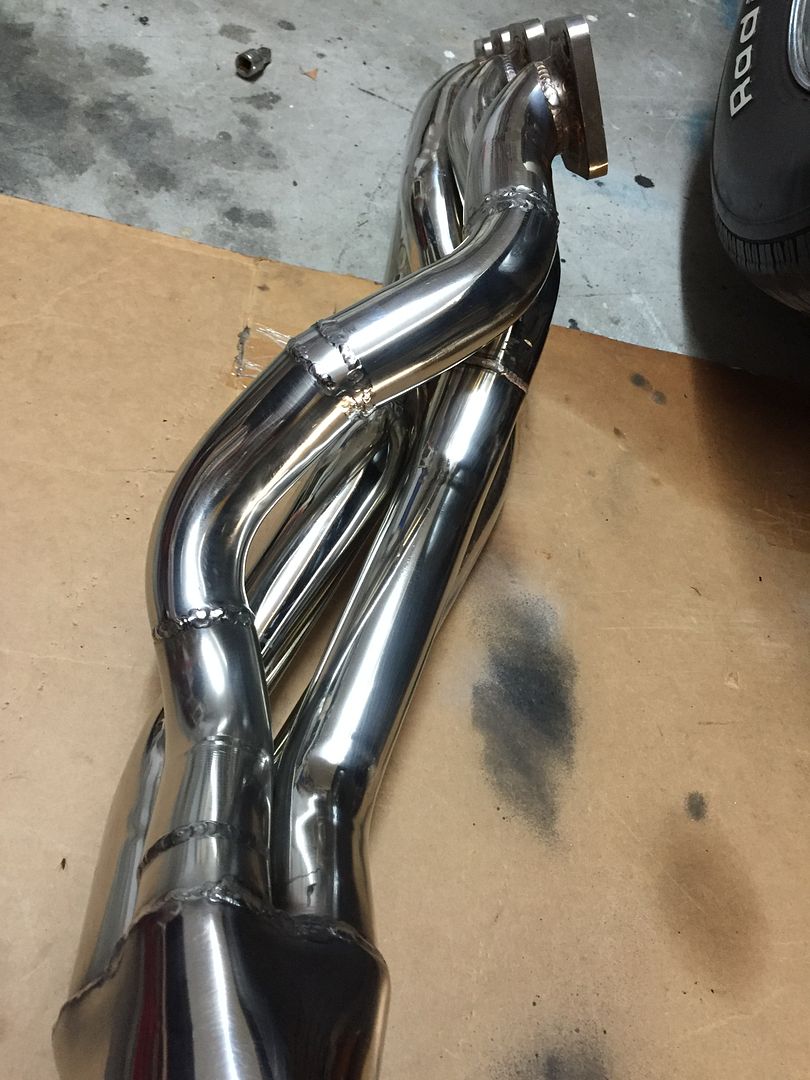
Some people may remember my posts where I had to modify my drivers side header to clear the z-bar. I bought myself a TIG welder and having my first go at it being with stainless steel was pretty ballsy. Here are the pictures again.


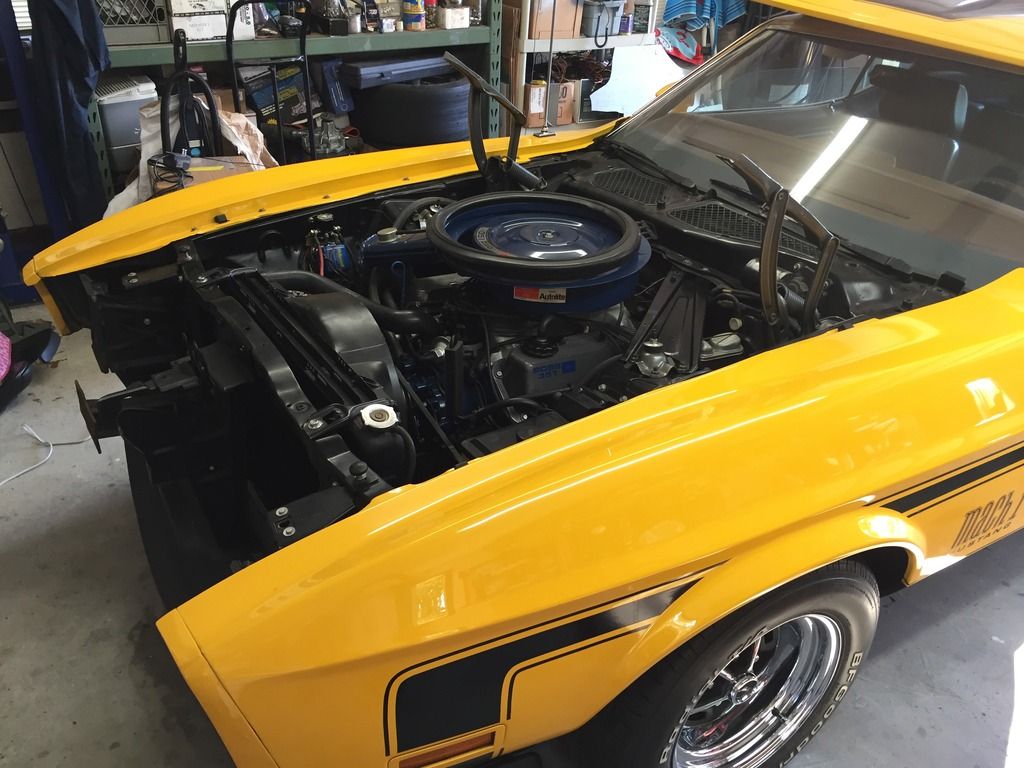
Here it is going to the exhaust shop. The open headers were deafening. Way louder than the last engine was. No way was I going to drive it like that on the street. There was no coasting to be quiet past a police car. I also didn't have the hood installed because it wouldn't close with the Ram-Air air cleaner and the Blue Thunder intake being too tall. Looked good being towed by my F-100.
[video=youtube]
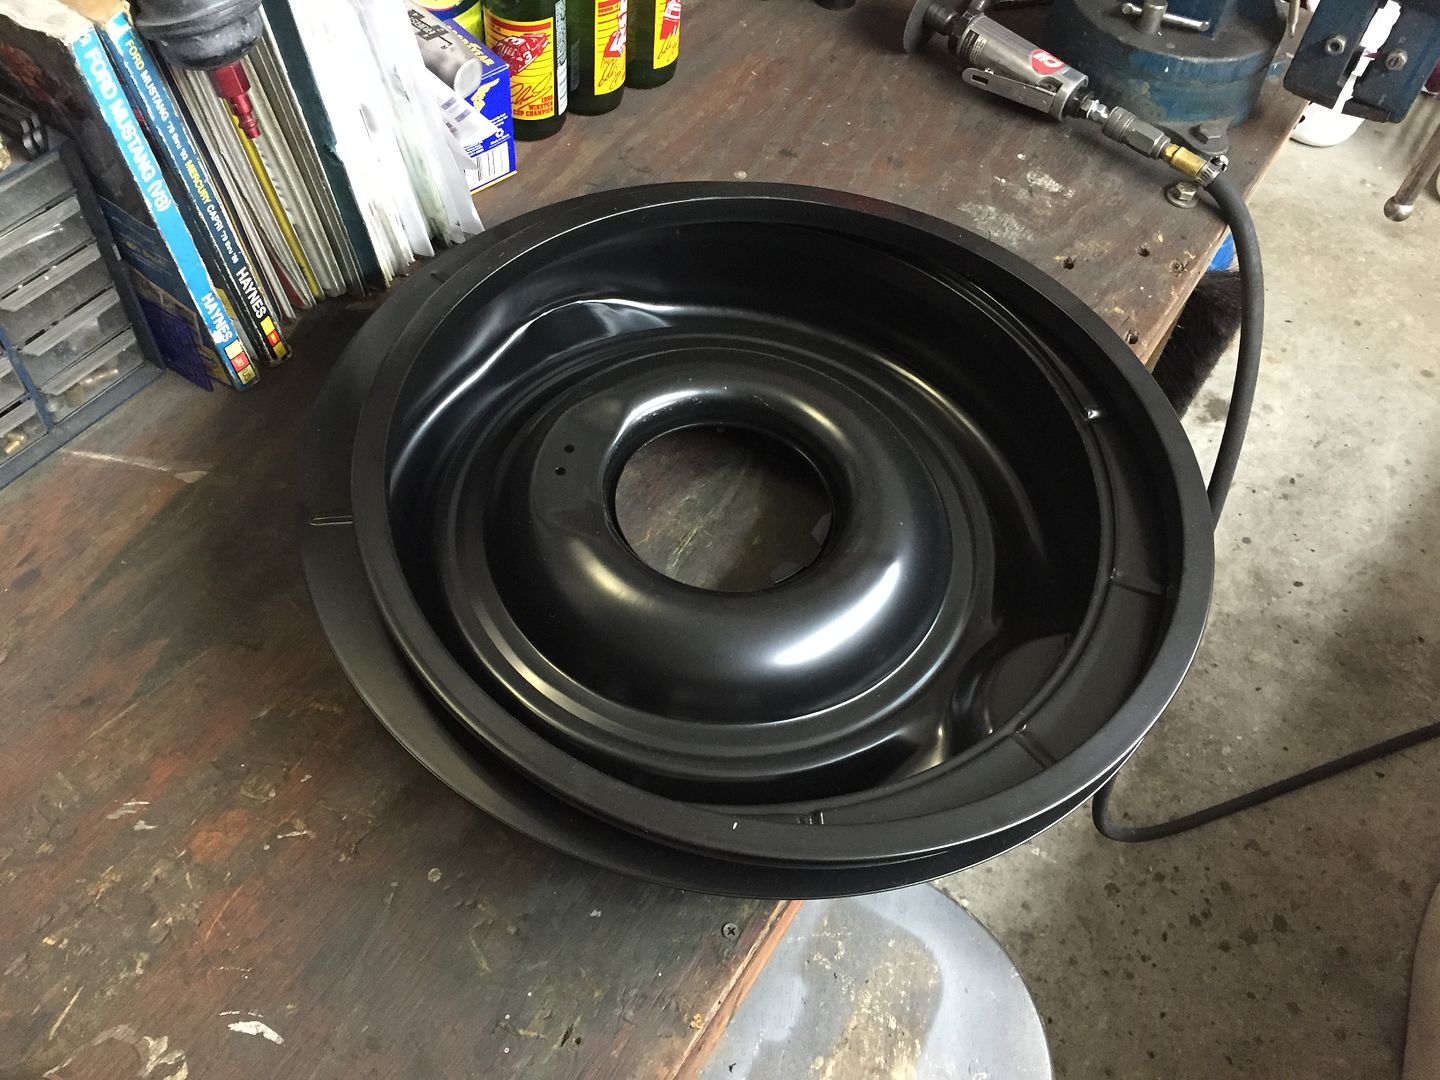
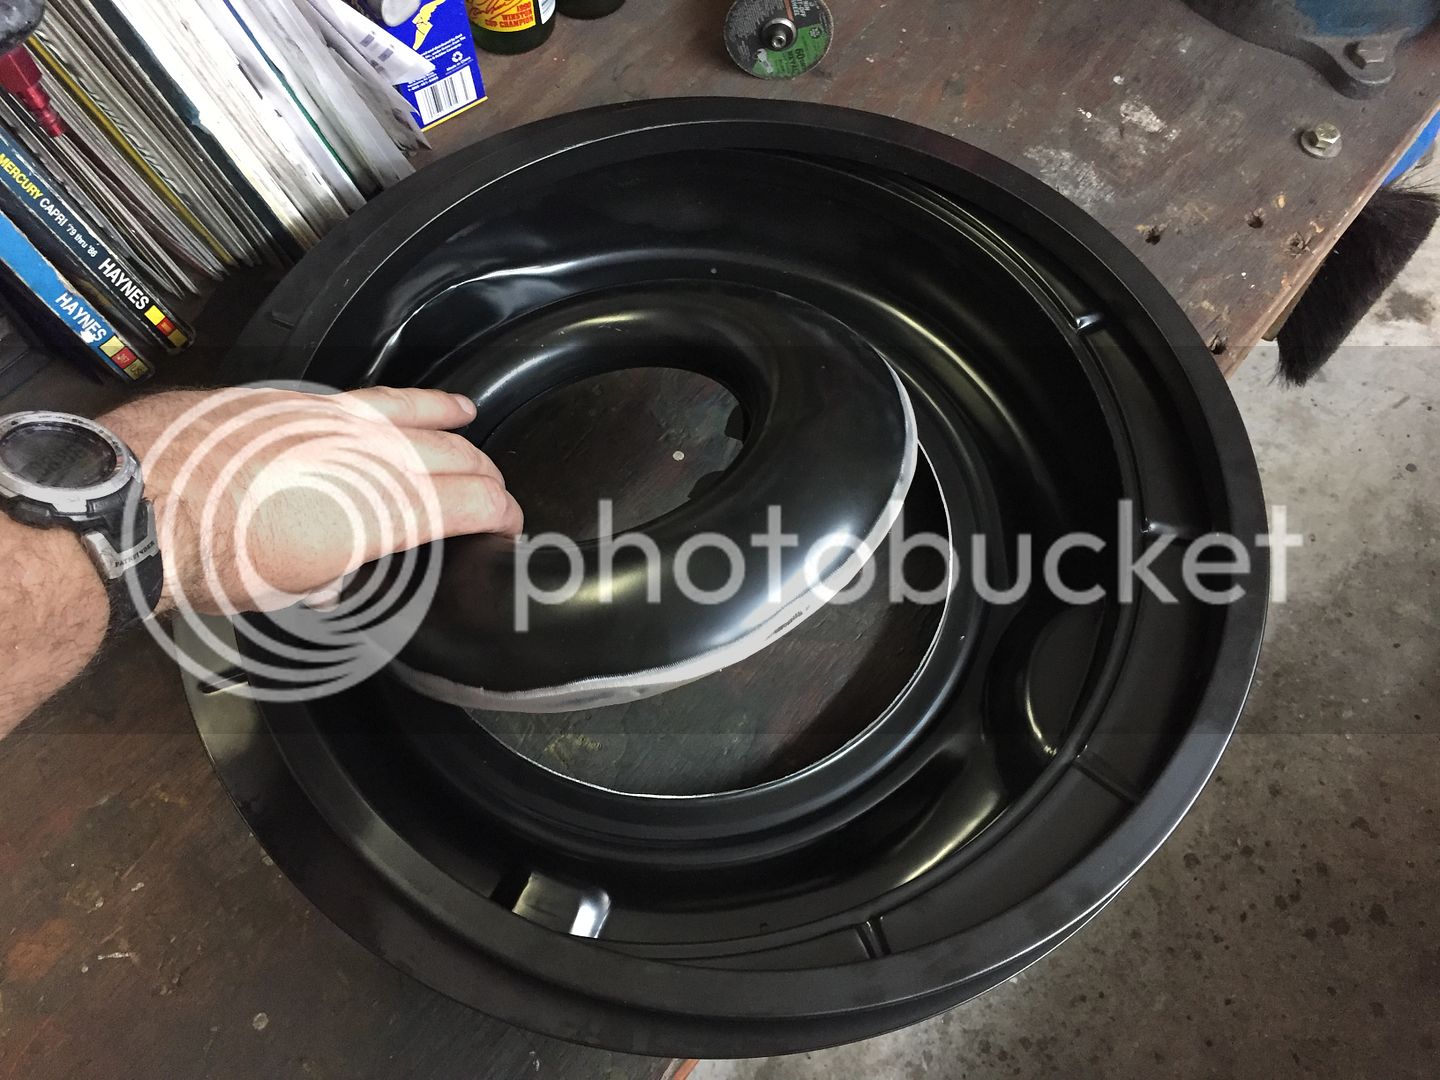
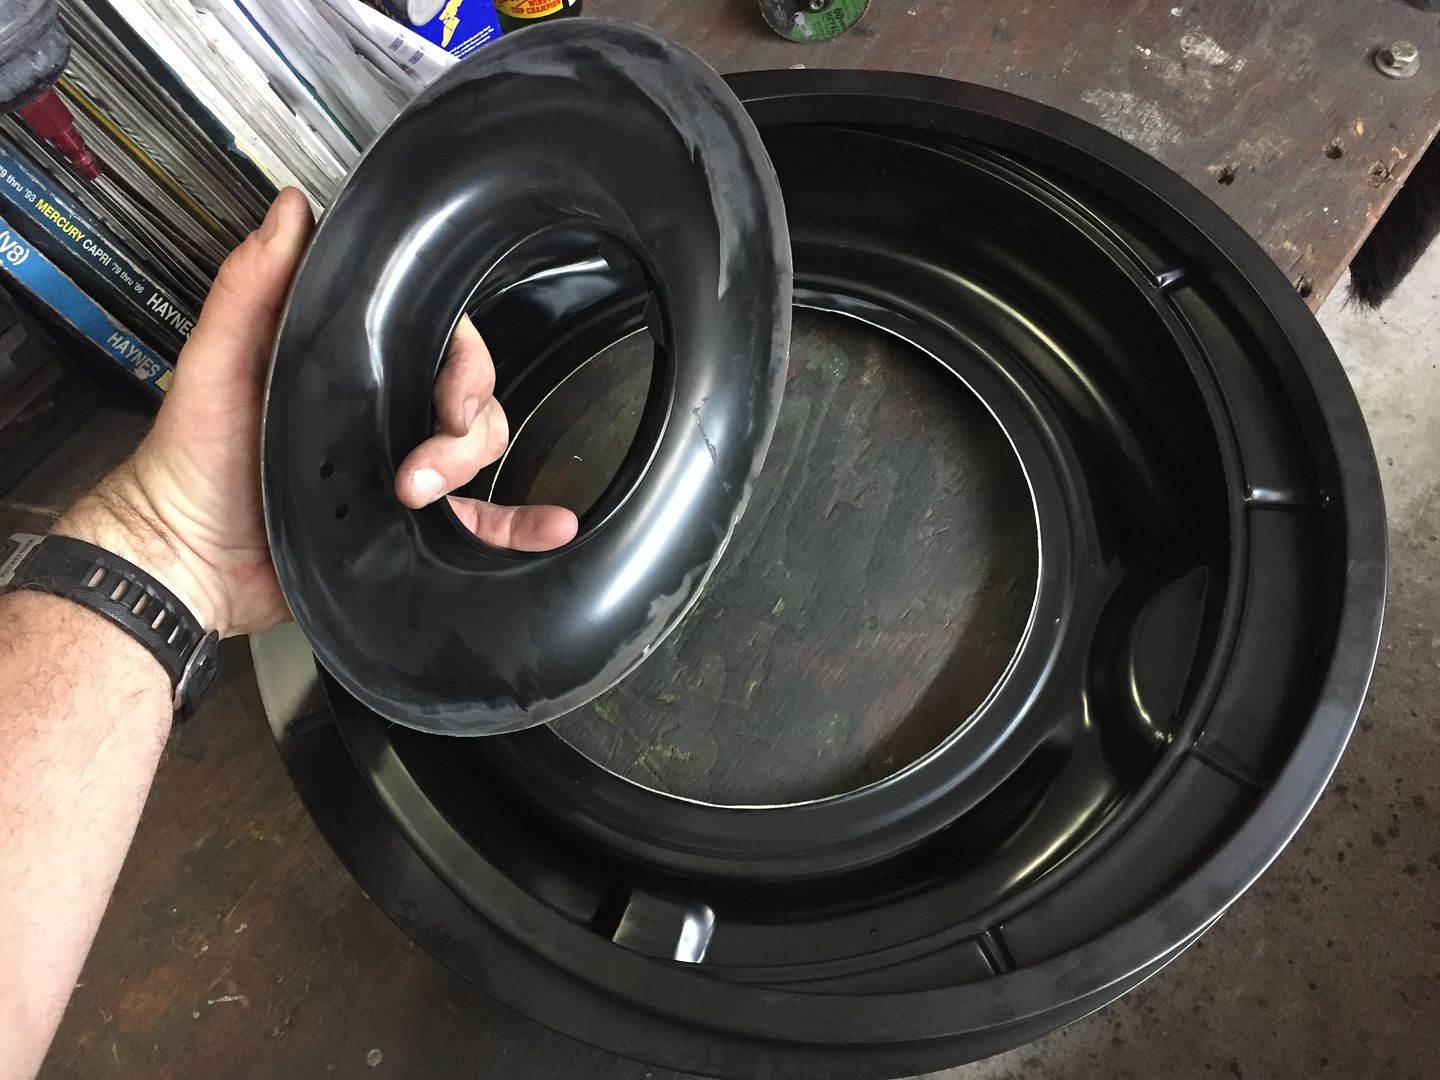
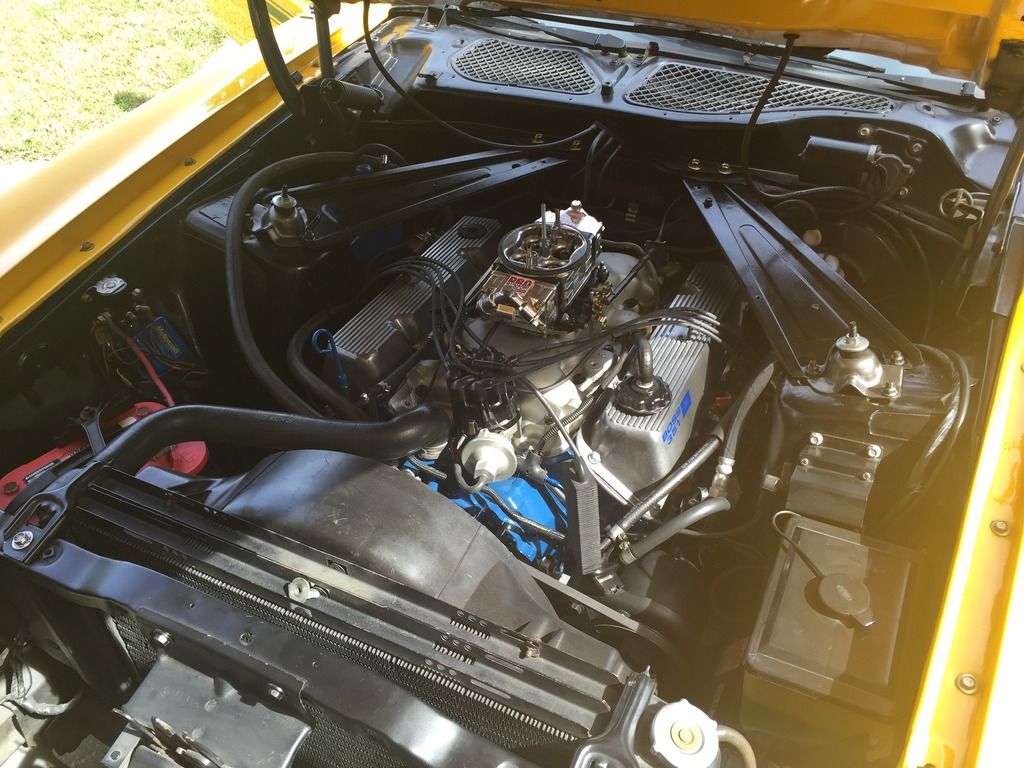
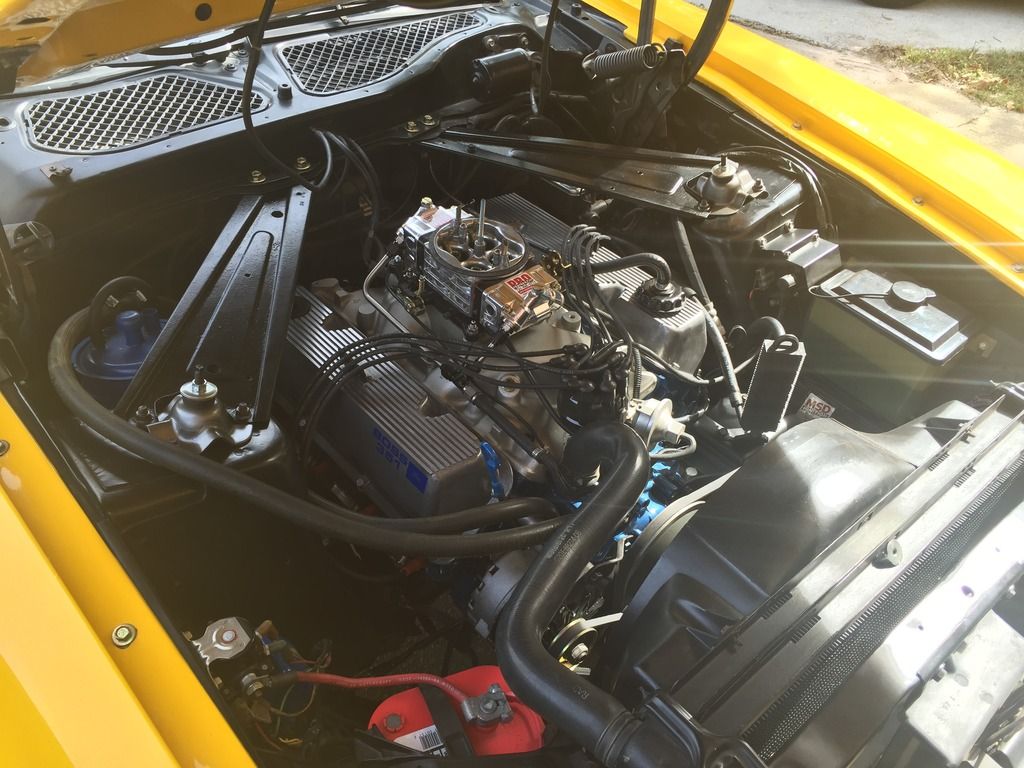
Here is what I had to do to get the hood to fit and work with the Ram-Air air cleaner. I purchased a repo Dynacorn air cleaner and modified it as I certainly did not want to hack up an original.
Complete thread.
These are about the last pictures that I have at this time. I will take some more and complete this post as soon as I can.
Just found some more.
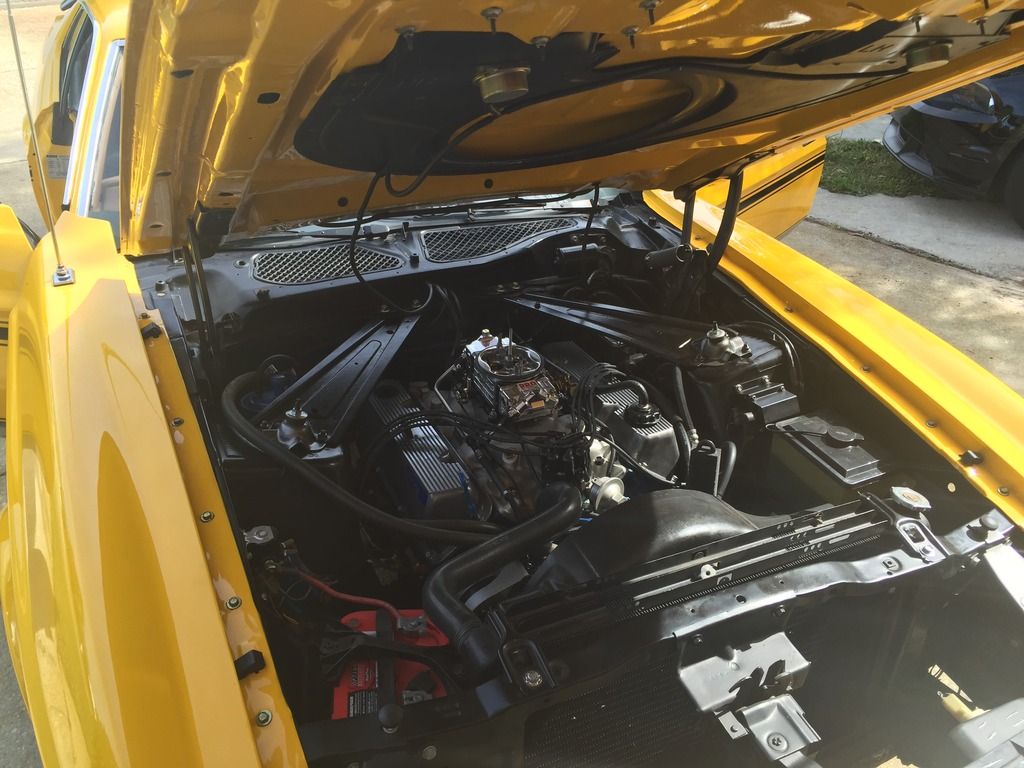
Here are two before I knew I needed to do something with the air cleaner. Note how high it was above the fender line.
This was after the exhaust shop and right when I realized thet the heater core was leaking. Yey. This was another reason for the delay. I procrastinated about a month before I started getting into swapping it out.
This was just one of the final motor mockup hero shots that I took before stabbing it into the engine bay.
Old motor ready to come out.
Not a whole lot of room to work with, but better than some.
Engine and trans out.
Old vs new. Not a whole lot of difference, but it's whats inside that counts.
After a few weeks of cleaning the engine compartment, and doing other things in life, I was finally ready to drop in the new engine. I think I was waiting on the new clutch and was getting the flywheel ground. I rebuilt the toploader too. Wasn't really anything wrong with it but it was leaking from everywhere.
Some people may remember my posts where I had to modify my drivers side header to clear the z-bar. I bought myself a TIG welder and having my first go at it being with stainless steel was pretty ballsy. Here are the pictures again.
Here it is going to the exhaust shop. The open headers were deafening. Way louder than the last engine was. No way was I going to drive it like that on the street. There was no coasting to be quiet past a police car. I also didn't have the hood installed because it wouldn't close with the Ram-Air air cleaner and the Blue Thunder intake being too tall. Looked good being towed by my F-100.
[video=youtube]
Here is what I had to do to get the hood to fit and work with the Ram-Air air cleaner. I purchased a repo Dynacorn air cleaner and modified it as I certainly did not want to hack up an original.
Complete thread.
These are about the last pictures that I have at this time. I will take some more and complete this post as soon as I can.
Just found some more.
Here are two before I knew I needed to do something with the air cleaner. Note how high it was above the fender line.
This was after the exhaust shop and right when I realized thet the heater core was leaking. Yey. This was another reason for the delay. I procrastinated about a month before I started getting into swapping it out.
Last edited by a moderator:
- Joined
- Sep 7, 2011
- Messages
- 2,028
- Reaction score
- 33
- Location
- Wake Forest, NC
- My Car
- 1971 Sports Roof Fastback (early model)
1973 Coupe -Under rebuild/restore
Mike,
Nice work on the header pipes. They look might expensive being stainless steel.
mustang7173
Nice work on the header pipes. They look might expensive being stainless steel.
mustang7173
- Joined
- Nov 3, 2012
- Messages
- 1,054
- Reaction score
- 54
- Location
- France
- My Car
- 73 Ford Mustang Mach 1 351 CJ all matching numbers, under restoration.
73 Ford Mustang Sprint from Mexico.
Very good job, clean and efficient.
What mufflers do you use?
What mufflers do you use?
MeZapU
Well-known member
- Joined
- Feb 12, 2011
- Messages
- 830
- Reaction score
- 11
- Location
- Southery, UK
- My Car
- 12 GT
73 Mach 1
85 GT
66 F-100
Finally got some info back from the guy that I bought the shortblock from. The only information he had was the engine came out of a car that he purchased in 2004 and came out of Queensland near the Gold Coast, but not sure the town.Looking good. Just out of interest you wouldn't happened to know the name of the shop in Aus.
They are Borla Pro XS mufflersVery good job, clean and efficient.
What mufflers do you use?
One inconsistency in this build was the fact that I decided to reuse the rotating assembly instead of buying new bits. I had a good long talk with my machinist who was a long time 351c enthusiast. At the power level that I am at and the application, these parts should be fine for where I want to be. Back in the day they would rev these stock engines to 7k rpm's on a regular basis. With these prepped con-rods and the good balancing it has there was no doubt in his mind it would be fine for what I had planned.
Last edited by a moderator:
Lookin and soundin good...!!! ::congratz::Finally got some info back from the guy that I bought the shortblock from. The only information he had was the engine came out of a car that he purchased in 2004 and came out of Queensland near the Gold Coast, but not sure the town.Looking good. Just out of interest you wouldn't happened to know the name of the shop in Aus.
They are Borla Pro XS mufflersVery good job, clean and efficient.
What mufflers do you use?
One inconsistency in this build was the fact that I decided to reuse the rotating assembly instead of buying new bits. I had a good long talk with my machinist who was a long time 351c enthusiast. At the power level that I am at and the application, these parts should be fine for where I want to be. Back in the day they would rev these stock engines to 7k rpm's on a regular basis. With these prepped con-rods and the good balancing it has there was no doubt in his mind it would be fine for what I had planned.
Similar threads
- Replies
- 32
- Views
- 1K