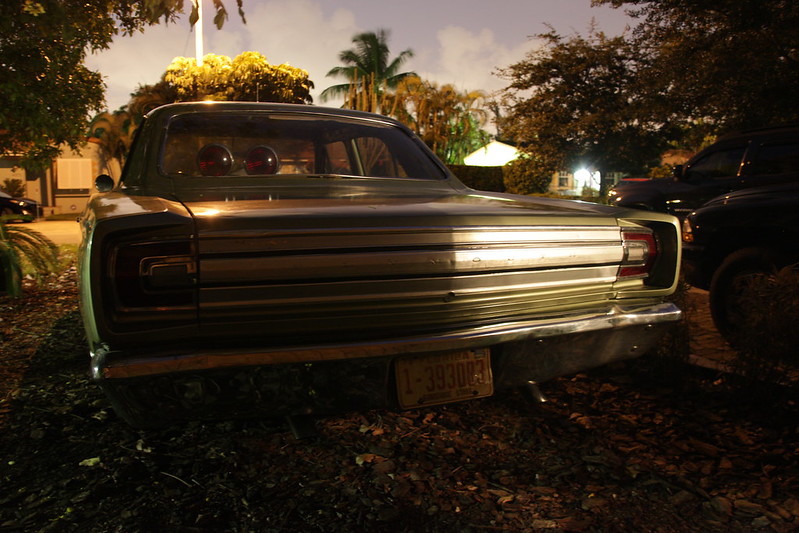
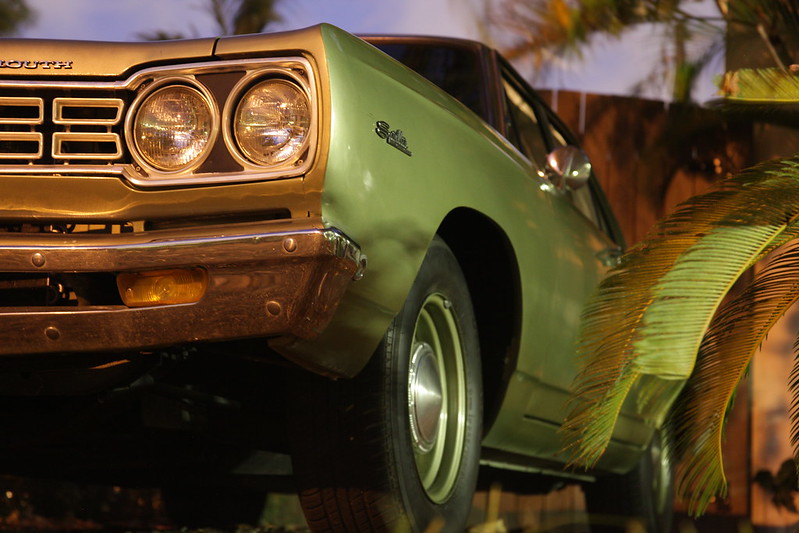
When a 1968 Plymouth Satellite 4-door enters your life...

7173Mustangs.com

Help Support 7173Mustangs.com:

This site may earn a commission from merchant affiliate links, including eBay, Amazon, and others.
Found a second good turndown tailpipe at AutoZone today. Cut it, fit it, and finished the job. It actually looks remotely uniform given that the bent-up bumper throws the eye off:

23mwh9u.jpg


2wdn8f6.jpg


Beauty shot time!

19445784282_f2de45862d_c.jpg


19452038565_26af0c1259_c.jpg


-Kurt

 
Well, a bit of an update:

#1: Neighbor guy fizzled out; ghosted my text messages. Good riddance to him, because...

#2: I found this at a junkyard with a roller-cam 1989 LA 360 (throttle body injected version of the old 318/360 w/o Magnum heads), and it'll cost me about $350 out the door. Any advice for checking the internals before I pull it? I'm going to pull the intake to ensure that it's not a sludgebucket inside, but I'm not sure if I can convince the fellow at the counter to let me sneak a battery in to do a compression test.

EDIT: Forgot - this forum doesn't auto-resize pictures.

34nha2o.jpg


2j47v2f.jpg


20jntj7.jpg


If I go with this, the project gets turned into a carbed affair. Opinions from few Mopar crew here?

-Kurt

 
Last edited by a moderator:
Crank it over with a socket and ratchet on the balancer bolt. You'll know if the compression is decent or not. Then, pull plugs and see what tale they tell.
Went there today. Went slow in the morning:

11:00am:

n62stf.jpg


12:00am:

21dobgj.jpg


12:30am:

14id6dt.jpg


Got to drag my Optima into the yard and test each cylinder. 130-140psi cranking pressure, and the rockers look minty inside the valve covers. Nice healthy sound when cranking too, not that it really accounts for anything.

2eocwu8.jpg


In the course of all of this, I got rained on twice. First time I hoofed it back to the office, second I made camp in the van. Preferred the van!

I got everything off except the torque converter and left engine mount - then the yard closed an hour early. They are open tomorrow though, so it's coming out first thing in the morning.

The van has no instrument cluster, but a faded "grandparents" vanity plate in front has me feeling very good about the find.

Also got a carb off a 1980's slant six from the $hit Van (so named as it stunk from a portable toilet inside it that had NOT been emptied) and a rim off the same van. Good finds.

-Kurt

 
Last edited by a moderator:
Hey Kurt,

This is turning into a real adventure. Try not to injure yourself whilst on the job.Best of luck with it all.::thumb::

Greg.:)
No injuries today, just some scrapes and a $400 hit to the wallet - but I am now the proud owner of a 1989 LA 360...one that's been pissing oil out its front seal for ages, from the looks of it. Flexplate got really smashed up in the process, but I have to replace it with a B&M unit anyway.

15grxxf.jpg


And yes, I loaded it in the pouring rain, and I unloaded it in the pouring rain, not to mention the three times I've been rained out of (or on) in the yard.

Got tons of video of the removal too, but I'm going to save it for the next episode of That '70s Car - if I could only get around to finishing the first one.

Incidentally - I'm not sure if this was the van's mode of failure or just damage from the forklifts that the yard uses to move cars around, but get a load of the driveshaft:

sxexz8.jpg


-Kurt

 
Last edited by a moderator:
Forklift. Same reason I couldn't get a salvage stock police car exhaust for my grand marquis... they were all bent/smushed.
Reminds me - there is a P71 in the yard. There isn't a single thing on it to identify it as a P71 anymore, with exception to the blackout on the trunk and the front seats. Motor and everything else identifiable is gone.

Have you looked around at some of the taxi refurb shops? Would seem to be a good place to dig up a used P71 exhaust.

-Kurt

 
Chronicled in my new daily driver thread, but I gave up and got a walker kit, then a stainless works kit, and now have a new system that a shop bent up.
I'll have a look at the thread. CV fan here.

Incidentally, this just came in the mail. It looks so darn RIGHT on this car:

2wpo8dh.jpg


30ka689.jpg


-Kurt

 
Cool. That car should haul with a 360 in it. Is it 4 wheel drum brakes? They are scary at the top end of a fast run. At least it has 80's mopar cop wheels on it so you can get a decent sized set of tires under it.

 
Cool. That car should haul with a 360 in it. Is it 4 wheel drum brakes? They are scary at the top end of a fast run. At least it has 80's mopar cop wheels on it so you can get a decent sized set of tires under it.
We'll see - I'll be happy if it doesn't blow up the 904 transmission for 6 months. Given the condition of the engine, god knows how the 904 has held up? At least it seems to shift.

It runs 4-wheel drums right now, soon to be disc/drum the moment I can find an M-body languishing away in the junkyard with its spindles intact (Better yet, someone willing to sell the spindles off one junked at a car shop or something, because LKQ prices stink worse than a junkyard van with a port-a-potty in it (FACT: There was one in the other van with the slant six. Probably why nobody bothered to go in there and get the carb). I'm not going to put a power booster on it though; after driving the Valiant (9" drums throughout), I prefer the pedal modulation without the boost. That, and you know exactly what the brakes will feel like if the car ever shuts down while in motion.

I also have to weld a pair of ears (Hotchkis makes these) onto the lower control arms so I can mount a sway bar to the front. Can't do so with the Hobart 140 MIG; doubt if it'd penetrate. I have a Sears arc welder, but it needs a 15 amp/250 volt plug to run, which means I've got to yank out one of my home emergency generators just to weld the darn things in place.

-Kurt

P.S.: Really like the look of the current exhaust on your Grand Marquis. Much more subtle at the rear bumper. Nice work.

 
Last edited by a moderator:
Got the engine off the dolly, on the hoist, and onto the stand this evening:

2u9tjbo.jpg


I also took this opportunity to pull the compressor. I don't care what anyone says - the factory Mopar '88-91 (might apply to earlier '80s LAs too) A/C compressor mount assembly for the Sanden-style unit is one of the worst things I've ever seen engineered. Pulling the compressor pretty much forces you into removing the entire alternator bracket assembly or fighting a pair of 15mm bolts in an area where you can't fit a wrench.

Even if you get the thing out using the latter method (honestly, it's smarter to pull all the front brackets off to take it off, even though it's a much bigger job), you STILL have to pull all the brackets if you want to get the intake manifold off.

In short, if you want the intake off, you might as well take off your fan, alternator, and A/C compressor. Crap!

2dcfz9z.jpg


-Kurt

 
Ok, back to the regularly scheduled "not a Mustang build thread at a Mustang forum."

After one day without power, and two without internet access, I have lots of progress to report:

First off, a closeup of the aforementioned Sanden air compressor brackets I was complaining about:

2exxb84.jpg


These photos do not even show the additional bracket which fits to the back of the Sanden, further securing it directly to the intake. That'd be fine, but the Sanden tabs are threaded, and there isn't enough room to back the bolts out unless you do some not-so-conventional wrenching. Easier to pull the whole bracket set out, but as you can see, doing so also requires dumping the alternator bracket.

There's a word for engineering like this, and it has the word BULL in it. Hence, the Bouchillon BPE4725.

This is what the power steering bracket looks like for the '89 B-van (presumably the same on '88 through 91; might apply to older LA engines too; Magnums have an aluminum bracket), and is notably simpler than the nonsense used to mount the Sanden compressor. It has its own set of problems though: The rear bracket bolts right through the two left hand timing chain cover bolts - which are drilled right through into the cooling passages of the engine. If you have to remove it, you'll probably make a mess, whether you drain the system or not. Not ideal.

jl7bxe.jpg


At any rate, I can't mount the original 1968 P/S bracket if I use the later water pump. The '68 bracket pivots on an extra ear on the water pump (note that the water pump in this photo is also the wrong application for '68 - it's the marine water pump which the aftermarket somehow believes is an HD pump for these engines) which is not present on the later aluminum units. I should note this design is also made to clear the pre-1970 water pumps with a driver's side inlet, and the '89 bracket is an (obvious) impossibility with such a setup.

9h5pn4.jpg


Basic degreasing ended the evening - sans power or lights. Wound up taking everything off with only a forehead LED light to help. Wasn't that bad - on the stand, that is:

1s0as7.jpg


Saturday afternoon - the moment of truth. Off came the valve covers and intake manifold for a clear look into the top end to gauge overall condition.

2ihxuhd.jpg


t02mqf.jpg


15yerls.jpg


It doesn't get any better than this, junkyard engine or otherwise.

Here's where it gets a bit interesting: According to my Mopar master-tech neighbor (who is often wrong - HAH!), this should be a heavy-duty 360, a.k.a. the 360-2 or 360-3 - more or less similar to the E58 depending on marketing. The exhaust valves rotators seem to indicate this is indeed one of the heavy duty motors.

Whichever version it is though, very little information directly from a Chrysler manual seems to be available on it, though the internet's armchair dragracers have wasted no time filling Google chock-full of contradictory bull$hit as to what actually constitutes the 360-2 from the 360-3, much less the actual specs of either. Most of the good information out there about the HD 360s seem to relate to the late-'70s carbureted examples, and not the relatively short-lived roller-cam, throttle-body injected engines from '88-91 (which seem to be almost exclusively of interest only to Ramcharger enthusiasts). I have the VIN from the van, but it doesn't match up with the post-ISO 3779 VIN from the van: 2B6JB31Z0KK375938.

It does have the exhaust valve rotators associated with the heavy-duty 360s though, so that's a plus. There is also talk of lower compression than an average 360 and different valve sizes for minimizing pinging and maximizing low-end torque adjusted for the era's lean mix requirements, but - again - that's based on carb-era engines that were not built from the factory with 308 heads.

We'll soon find out how far the pistons are in the hole, once the heads come off.

aaitev.jpg


Pulled off the rest of the front accessories. By this point, the engine had been sprayed and scrubbed quite a few times by this point. My Performer 318/360 intake arrived as well, and I'm using it here to keep the valley free of any what-nots flying around the workshop:

wgqmm9.jpg


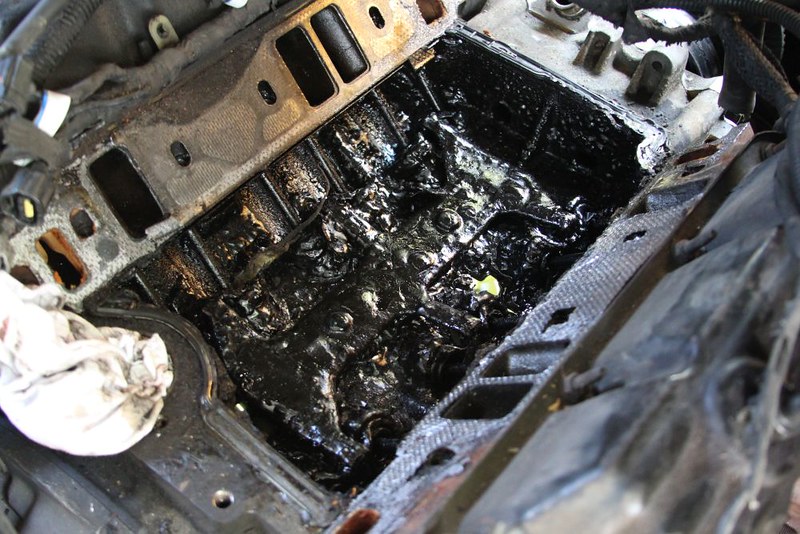
Today's work order called for removal of the oil pan for safe (and simple) removal of the timing chain cover and oil sump, plus, I wanted to swap valve covers so I could begin prepping the '68 valve covers for installation. Now, I'd only popped the left valve cover on this engine before, and it was pretty ugly inside - but this was the first time I'd ever opened up the right side. The sludge in this engine is NASTY:

10qf8fb.jpg


Something tells me that a previous owner of this car believed that oil changes fall under the category of "optional extra." Idiot. Ironically enough, I have more experience with ridiculously abused Mopar small blocks than I have with decent ones, as these two engines were preceded by a '98 Ram Van's 3.9L that was handed down through the family; also the victim of the van's previous owner's attitude to oil changes, long before it ever reached us, though I firmly believe the problem was accelerated by the common intake manifold plenum gasket leak (one of the reasons I was leery of digging up Magnums in the junkyards to begin with). This was at ~125k:

13634409983_e64a11f7d0_c.jpg


Of course, the Satellite isn't quite as bad...but it's bad. Who knows - maybe the lifter valley will prove to be the real horror show:

11wdc1y.jpg


2wd61cy.jpg


At any rate, I'm going to have those valve covers hot tanked. No amount of scrubbing will get the sludge that's behind the baffle. I tried (not shown) and gave up.

25jxfzm.jpg


But back to the 360. This is the original, factory double-roller timing chain (remember - this is a HD 360-2 or 360-3), loose like the t!ts on a goose. The slack surprised me for a moment - seeing as this engine looks to have really low miles on it - but it seems as if this is par for the course on Mopar small blocks. Whatever the case, I ordered another Cloyes factory double-roller to replace it with, along with the Magnum 3.9 tensioner. Here's hoping the Cloyes stock replacement is not a retarded timing set either...because I don't want that. (I also take offense to paying an $100 premium to get the same exact timing chain set with a few extra slots cut in the crankshaft sprocket. If there's one thing I've learned, the not-so-much-different-than-factory performance parts market - especially for Mopar - is a complete and utter ripoff).

288o45g.jpg


This is the truck-style rear sump screen and pickup pipe on the 360 (and presumably the 318 as well). Nothing like the rear sump on the 3.9, I noted. At any rate, I pulled the oil sump, ready for it's Melling center-mounted replacement pickup:

15e8mqa.jpg


My floor is now a world of parts which may or may not make it back onto this engine:

fdt1s7.jpg


Next steps will be to replace the timing chain and tensioner before pulling the heads and inspecting the cylinders - and whether they ride too low in relation to the deck or not.

-Kurt

 
Last edited by a moderator:
Very exciting! I love the looks of old plymouths, doesn't matter what the kind, nice find and good luck with it!

Sent from my iPhone using Tapatalk

 
One of the party pieces arrived today in the form of 1992/93 (w/late-1991 date codes) Magnum 5.2/5.9 exhaust manifolds. These are the semi-elusive 53006618 and 53006619 castings with big honkin' 2-1/8" exhaust ports, said to be almost equivalent to headers in overall flow:

2uo5u38.jpg


ir1eom.jpg


2me9ue1.jpg


ih8ayf.jpg


Note that the Magnum manifolds take notably longer bolts/studs at the ends than the original LA smog logs. Only seller out there is asking $32 for a set of bolts. Ouch:

2dgt8bm.jpg


Quick mockup for amusement:

2me2zj7.jpg


Melling 72-S2 center sump arrived. Did not want to thread on nicely, but had no burrs. Jut a damn slight tighter fit than normal. No stripped threads at the end of the day.

4vl6cx.jpg


The full gasket kit and timing chain should be here by Wednesday. That's when things will really pick up.

-Kurt

 
Last edited by a moderator:
Had an irritating time yesterday when the new upper main seal sliced some of itself on the sharp block. Got another pair of seals today, and the main cap is now back in with a proper Fel-Pro lower seal and some Permatex 51813 (Loctite 518).

I got to work on the front of the engine and came up with this quandary - no drilled bolts, but one oil gallery welch plug with a pinhole for oiling, and a matching hole in the cam thrust plate:

dhblth.jpg


21jx6ph.jpg


Wound up drilling the new tensioner, but I've also been advised to put a drilled bolt on the top right hand side (from driver's perspective) anyway. Not sure if this is really necessary, and there's too much armchair BS on the For A-Bodies Only forum mixed in with people who actually know what they're talking about to know for sure.

Probably just easier to prime the oil pump and see what happens!

6g9zlv.jpg


I thought this was a pretty interesting eye opener. With the factory double roller that I removed, this position between cam and crank was straight up. With the tensioner, it's obvious how much slop/slack has been taken up:

346w212.jpg


And with the chain on was the moment of truth - head removal:

m96hx3.jpg


2ypkk9h.jpg


mljvoy.jpg


Talk about pistons deep in the hole. Those dished pistons also bring back bad memories of Ford's 400/351M smoggers.

Have I spent all that time buttoning up the bottom end for nothing? Heck, I still don't know what compression this combo is running.

Shame the Magnum 5.9 pistons aren't weighed the same as the LA 360's. Would be cheaper than KB-107s or H116's.

In the meantime, I'm going to get the heads cleaned up; possibly hot tanked. No sense in re-doing the nice factory valve set since they're sealing perfectly.

j9a4c4.jpg


-Kurt

 
Well, this afternoon has been a mission.

First, I pulled out the dial indicator this afternoon. Pistons are down in the bore ~0.088", more or less. Assuming that I use Fel-Pro 1008 head gaskets on the existing setup:

Thus:

4.00x3.58 (bore/stroke)

4.18 (head gasket bore)

0.039 (gasket thickness)

72cc (CC volume)

-10cc (dished)

0.088 (deck clearance)

Gives me a CC of 7.77:1. Blech.

I'd be a lot happier around the 9:1 range.

I recalculated for SpeedPro H116CP pistons:

4.00x3.58 (bore/stroke)

4.18 (head gasket bore)

0.039 (gasket thickness)

72cc (CC volume)

-5cc (dished)

0.027 (deck clearance)

9.07:1. Much better.

And then I realized that even if I could get the pistons similar in weight (SpeedPro H116's), I'd still have to get the rotating assembly rebalanced.

:mad:

Then, I remembered something: When I pulled the heads off last night, I was too utterly tired to comprehend this discovery - the stock lifters and pushrods are oil-through units, even though LAs are supposed to oil through the head:

j0cmdd.jpg


206n575.jpg


Apparently, the modifications that lead to the 1992 Magnum engines trickled in on these roller cam blocks. To be sure, I moved the dial indicator to the edge of one lifter and started checking cam specs:

Lift Duration Installed CL

89-91 360 .391/.391 240/240 ???

5.2 Magnum .432/432 251/264 115

5.9 Magnum .410/.417 249/269 117

Intake cam lift on my 360 at is 0.272 at the lifter. Figuring the 1.5 rocker ratio of the standard LA rockers, that works out to 0.408 lift with the setup now.

Exhaust cam lift is 0.258; at 1.5, that'd be 0.387 lift.

Now if we take those specs and apply them to a 1.6 rocker ratio:

0.272 x 1.6 = .435

0.258 x 1.6 = .412

Doesn't quite match up to anything, but I'm starting to get an idea. But first, a look at the lifters. Apparently, each side of this engine must have been built by two different technicians with two different batches of lifters.

All the lifters on the left side of the engine (right side in this picture) has the hourglass-shaped oil hole, while the right side lifters (left in the photo) are of the flat variety:

epkbhw.jpg


And then I found the first really bad thing in this engine to-date:

2qbewxl.jpg


Somehow, I've been blessed by the Goddess of Internal Combustion. The lifter bore isn't scarred at all - that lifter must have had that air pocket in it since it was cast and machined. That line down the camshaft is a reflection of light and is not damage on the cam itself:

2d9twur.jpg


One bad lifter. Could be a LOT worse!

But back to my idea: If doing the pistons - and therefore bottom end - is such a hassle of time, effort, and cost, what happens if I bolt on a pair of Magnum heads onto this engine and leave the bottom end alone?

My calculations came up with 8.3:1 compression using this combination - and the best part: With a pair of good Maggie heads, all I need are a set of proper-length pushrods to bolt them on - unlike older flat-tappet LAs, this engine has the correct cam and lifter lubrication to make the Magnum swap a case of a head and pushrod swap (and different head bolts) - nothing more.

Plus, I discovered that despite the perfect compression, each exhaust valve won't hold mineral spirits:

2cp72qe.jpg


With Magnum heads at $200 a pop, rebuilt and shipped off of eBay, I'd be a fool not to go this route.

-Kurt


Latest posts

Back
Top