


- Joined
- Aug 14, 2014
- Messages
- 4,638
- Reaction score
- 1,669
- Location
- Madison, WI
- My Car
- 1971 Mach 1 w/408C stroker
So I have finally completed this project. I started with this idea a few years ago and did a lot of research. There was nothing off the shelf out there for fold down seat cars.
The starting point is a set of seatbelts from Wesco: https://www.wescoperformance.com/convertilble-seat-belt-metal.html. The key here is the length of the belt. This kit came with a 120" belt, but it happened to be too long. After I bought it I had to find a shop that can shorten it. I ended up having them removing 16". Therefore, the right length would be 104". Less will work but no more. If I were to do it again, I would buy the shorter belt and a slightly longer bucket seat end. The kit from Wesco comes with a 8" bucket seat end. I would get a custom one with 8.5" or 9". I got the main seat belt shortened by Seat Belt Planet (www.seatbeltplanet.com). They may be able to custom size it from the start. Once you are past sourcing the seat belt kit with the right length you will need 6" extension brackets for each side. I bought them from Wesco as well, but there are other sources (https://www.wescoperformance.com/6insebeexbr.html). I also got Wesco's hardware kit with bolts, washers and brackets.
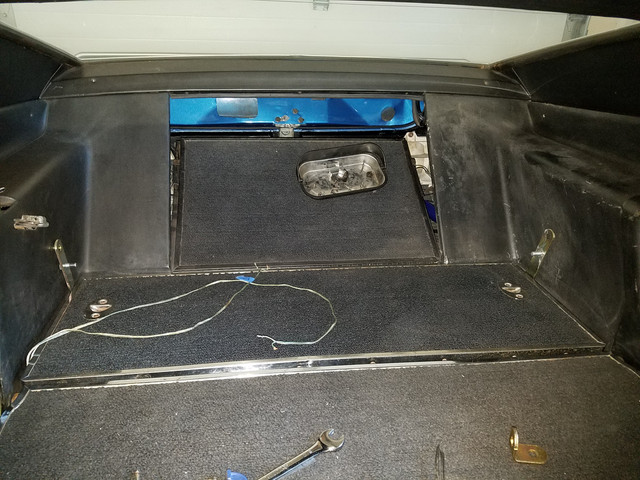
Then comes the install. First is to install the anchor points behind the rear seats for the belt retractors. That's where those 6" extensions brackets come handy. The brackets have to fit between the interior and the floor panels. There is very little space there so this step takes a lot of double checking on measurements. I located the bracket as far back as I could, which is about one inch from the trunk panel. I installed the extension bracket with the ear towards the inner fender. The next step is to center punch the location of the hole. At this point double check again because on the underside you have to be between the rear frame and the inner fender. Careful on the driver's side because the gas line runs very close to there. I first drilled a small pilot hole to check the location. Then I drilled the hole slightly bigger than needed at 1/2". I ended up needing to Dremel the inside half of the hole to move the bracket inwards for a perfect location. On the underside there is only a small space between the frame and inner fender so I cut the supplied washer to fit in this channel. On the underside this area is very stiff due to it being next to the frame.
Locating the extension bracket with the ear towards the inner fender:
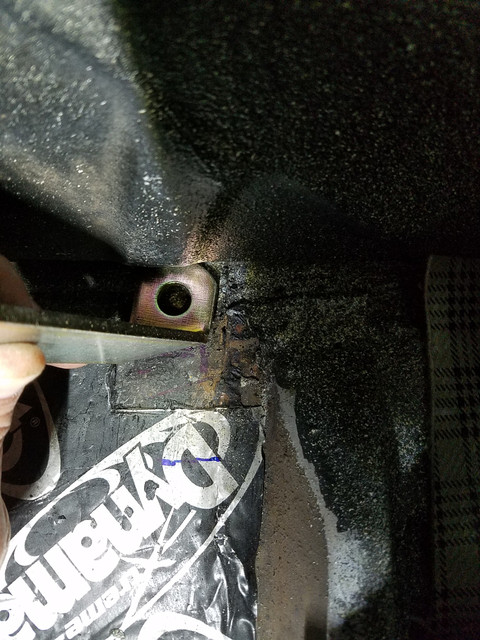
After pilot hole. Yeah... it is real close to where I want it. Unfortunately the location is right above the sway bar which makes it more challenging to get to the bolt.

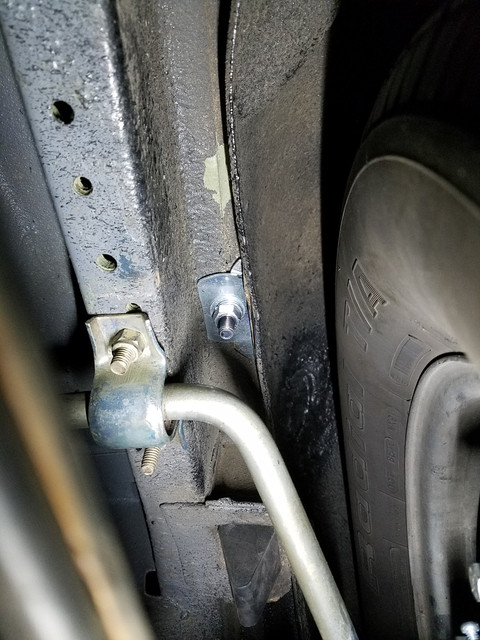
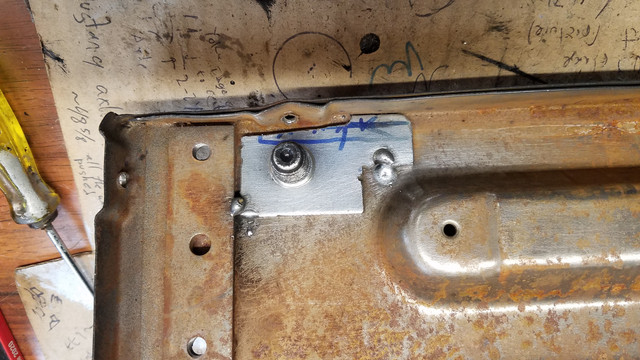
Washer installed on the underside with shims on the fender side because the sheetmetal is thicker on the frame side.
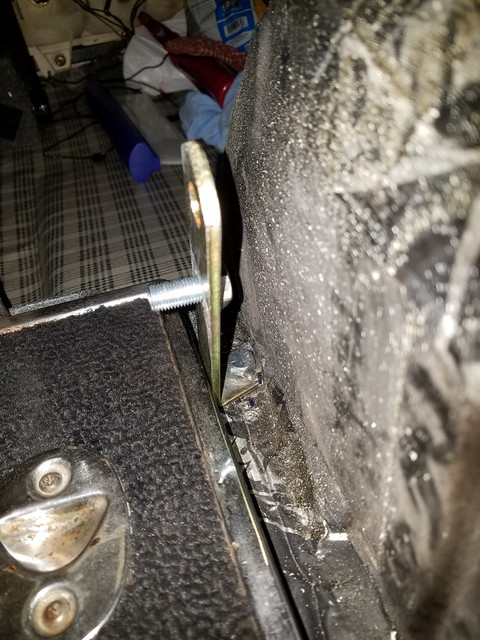
The bracket located right against the edge of floor panel:
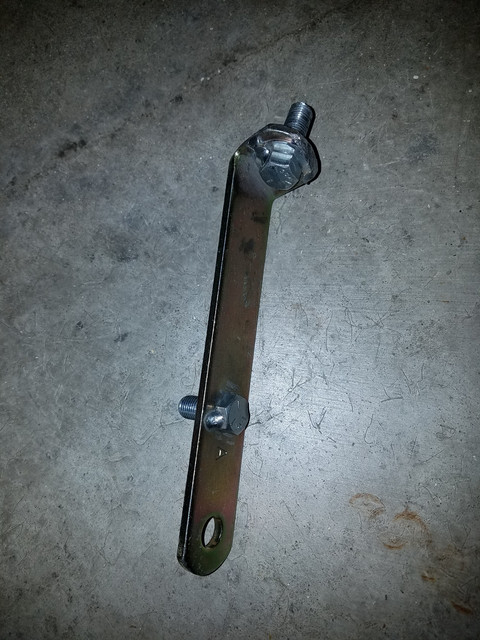
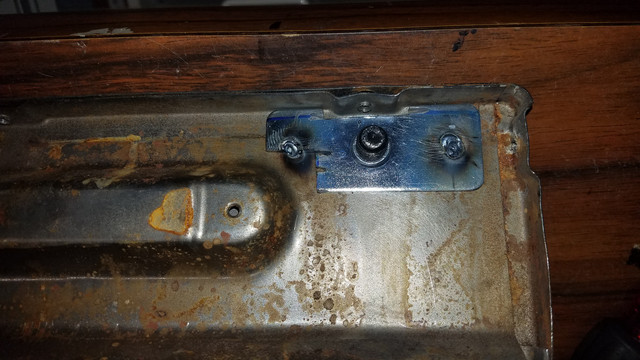
The above picture shows the bracket after the bolt was welded. I drilled a hole for the retractor about 2" lower so in reality it becomes a 4" extension. I did not cut the bracket since it will be all hidden behind the retractor. I welded the retractor bolt due to the tight space left between the bracket and the inner plastic panel to avoid having to fit a wrench in there. I also welded the through floor bolt to the ear because you have to tighten the underside bolt after the plastic panel is installed, which does not allow room to use a wrench.
Here is the bracket fitted between the edge of the floor panel and the plastic side panel. I cut the flange of the plastic side panel in order to fit the bracket so close to it. The driver's side is a bit more challenging because the gas line runs through that area. I cut the through floor bolt a bit shorter so it doesn't come in contact with the line.
The next step is the belt guide. This guide has to attach to the rear of the seat back. I bought the kit from Wesco that includes the mounting plate for the guide (https://www.wescoperformance.com/3poremokit.html). For this step I removed the rear seat back and disassembled all the plated trim, removed the carpet and separated the two pieces that make the back (unfortunately I forgot to take pictures of this step). This step is straightforward, it just needs a lot of screws removed. I cut and modified the brackets to fit in a location about 2" from the edge of the seat back. As always double check all the dimensions before drilling and modifying. I drilled the hole for the guide bolt and tack welded the guides to the inside of the seat backs. I made a mistake here and I thought that this area was carpeted so I was not that careful with tacking so you can see a bit of a readout. This could easily avoided with a faster tack.
View of the guide's mounting plate inside the rear seat's back:
The passenger side is more tricky because the bracket that locks the seat back is also in that location.
Back view of the belt guide after complete installation:
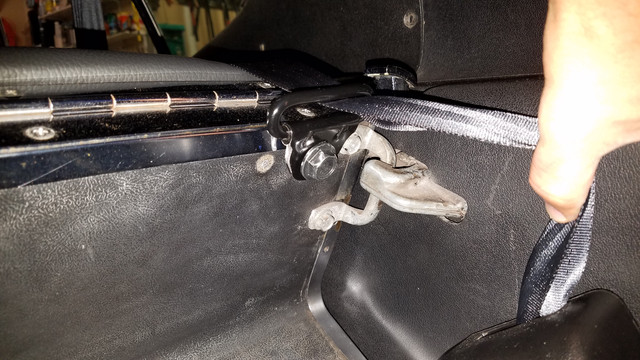
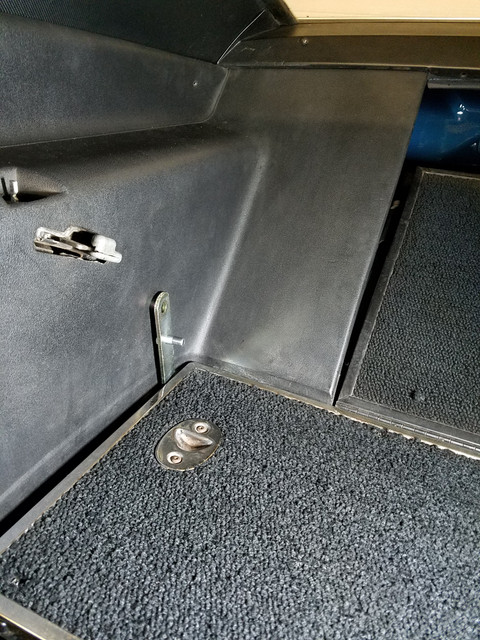
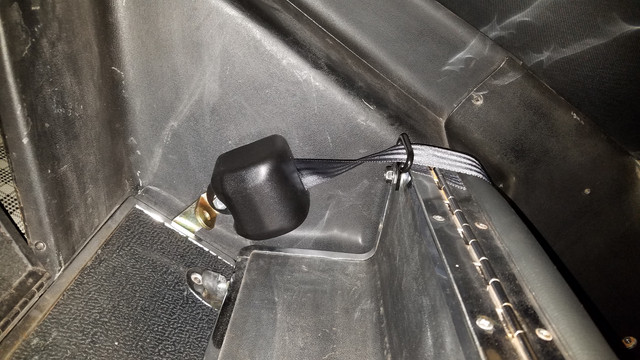
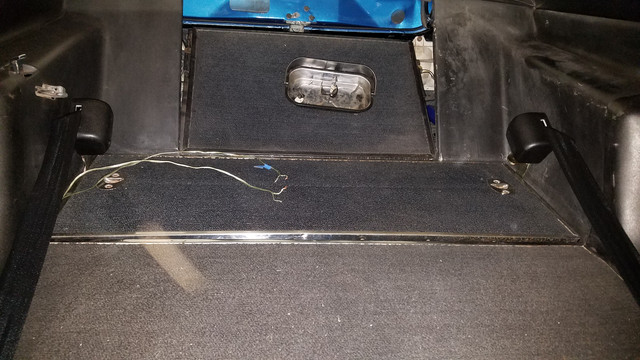
The last step is to attach the retractor to the extension bracket. I sandwiched one of the L brackets so they can be used as anchor points for hooks or a baby seat:
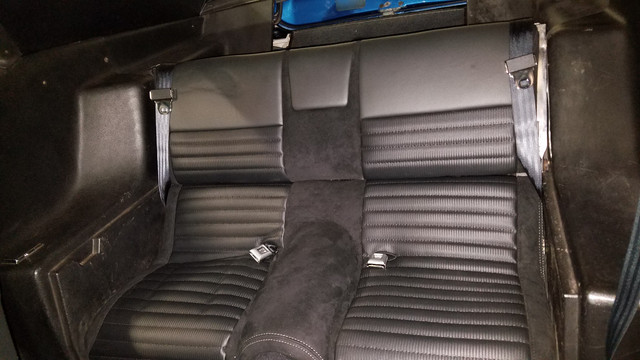
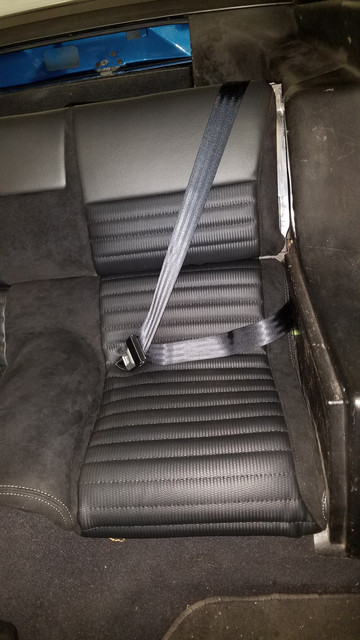
Here is the final product with the seats upright and folded down.

I am very satisfied with the culmination of an idea that started a few years ago. After some research, sourcing, spending extra money to shorten the belts, some patient, here it is.
The starting point is a set of seatbelts from Wesco: https://www.wescoperformance.com/convertilble-seat-belt-metal.html. The key here is the length of the belt. This kit came with a 120" belt, but it happened to be too long. After I bought it I had to find a shop that can shorten it. I ended up having them removing 16". Therefore, the right length would be 104". Less will work but no more. If I were to do it again, I would buy the shorter belt and a slightly longer bucket seat end. The kit from Wesco comes with a 8" bucket seat end. I would get a custom one with 8.5" or 9". I got the main seat belt shortened by Seat Belt Planet (www.seatbeltplanet.com). They may be able to custom size it from the start. Once you are past sourcing the seat belt kit with the right length you will need 6" extension brackets for each side. I bought them from Wesco as well, but there are other sources (https://www.wescoperformance.com/6insebeexbr.html). I also got Wesco's hardware kit with bolts, washers and brackets.
Then comes the install. First is to install the anchor points behind the rear seats for the belt retractors. That's where those 6" extensions brackets come handy. The brackets have to fit between the interior and the floor panels. There is very little space there so this step takes a lot of double checking on measurements. I located the bracket as far back as I could, which is about one inch from the trunk panel. I installed the extension bracket with the ear towards the inner fender. The next step is to center punch the location of the hole. At this point double check again because on the underside you have to be between the rear frame and the inner fender. Careful on the driver's side because the gas line runs very close to there. I first drilled a small pilot hole to check the location. Then I drilled the hole slightly bigger than needed at 1/2". I ended up needing to Dremel the inside half of the hole to move the bracket inwards for a perfect location. On the underside there is only a small space between the frame and inner fender so I cut the supplied washer to fit in this channel. On the underside this area is very stiff due to it being next to the frame.
Locating the extension bracket with the ear towards the inner fender:
After pilot hole. Yeah... it is real close to where I want it. Unfortunately the location is right above the sway bar which makes it more challenging to get to the bolt.
Washer installed on the underside with shims on the fender side because the sheetmetal is thicker on the frame side.
The bracket located right against the edge of floor panel:
The above picture shows the bracket after the bolt was welded. I drilled a hole for the retractor about 2" lower so in reality it becomes a 4" extension. I did not cut the bracket since it will be all hidden behind the retractor. I welded the retractor bolt due to the tight space left between the bracket and the inner plastic panel to avoid having to fit a wrench in there. I also welded the through floor bolt to the ear because you have to tighten the underside bolt after the plastic panel is installed, which does not allow room to use a wrench.
Here is the bracket fitted between the edge of the floor panel and the plastic side panel. I cut the flange of the plastic side panel in order to fit the bracket so close to it. The driver's side is a bit more challenging because the gas line runs through that area. I cut the through floor bolt a bit shorter so it doesn't come in contact with the line.
The next step is the belt guide. This guide has to attach to the rear of the seat back. I bought the kit from Wesco that includes the mounting plate for the guide (https://www.wescoperformance.com/3poremokit.html). For this step I removed the rear seat back and disassembled all the plated trim, removed the carpet and separated the two pieces that make the back (unfortunately I forgot to take pictures of this step). This step is straightforward, it just needs a lot of screws removed. I cut and modified the brackets to fit in a location about 2" from the edge of the seat back. As always double check all the dimensions before drilling and modifying. I drilled the hole for the guide bolt and tack welded the guides to the inside of the seat backs. I made a mistake here and I thought that this area was carpeted so I was not that careful with tacking so you can see a bit of a readout. This could easily avoided with a faster tack.
View of the guide's mounting plate inside the rear seat's back:
The passenger side is more tricky because the bracket that locks the seat back is also in that location.
Back view of the belt guide after complete installation:
The last step is to attach the retractor to the extension bracket. I sandwiched one of the L brackets so they can be used as anchor points for hooks or a baby seat:
Here is the final product with the seats upright and folded down.
I am very satisfied with the culmination of an idea that started a few years ago. After some research, sourcing, spending extra money to shorten the belts, some patient, here it is.
Last edited by a moderator:


.jpg")
.jpg")


