cudak888: 1971 M-code "Soylent Green" - 2024: We're back!

7173Mustangs.com

Help Support 7173Mustangs.com:

This site may earn a commission from merchant affiliate links, including eBay, Amazon, and others.
Hey Kurt,

Looks GREAT !! Guess I steered you in the right direction !
Thanks Q! I have a rule: "If Q says it, you do it."

Will pick up one of those contour gauges. Hope Home Depot has one; not many Loews around here.

-Kurt

 
Thanks, gentlemen.

That said, I've concluded that the far end of the panel - the one spot that still has very noticeable damage - won't necessarily take to the hammer and dolly that well, seeing as there isn't much to stiffen it.

I'm planning on welding in the patch below it first, then go back to smoothing it out. I figure it'll help stiffen the metal from the bottom.

-Kurt

 
Welded in the left lower quarter end to stiffen up the end for hammer/dolly work.

The patch came from the a cheap Spectra partial quarter repop, which didn't want to fit well:

001.JPG

002.JPG

Went overboard on welds - and the pitted metal in spots didn't help - but the bad stuff mostly burnt off (didn't mind stacking welds around here; nobody will see it, nor will it look bad if someone does look at the end product), and the panel sits well:

004.JPG

Unfortunately, I wound up making the cut at the back far too short; the panel worked its way forward through the fitting. So be it; easy fix.

Since I was at it, I finished the missing trunk corner patch. Needs a bit more dressing to look right:

006.JPG

007.JPG

Not a good photo, but the results of the efforts. Rear valance fits great:

010.JPG

-Kurt
 
Last edited:
The car:

71_mustang_1.jpg


Continued from:

http://www.7173mustangs.com/thread-all-original-metuchen-m-code-71-mach-1

and

http://www.7173mustangs.com/thread-carb-swap-options-with-4300a-equipped-m-code-71-351c

The problem:

71_mustang_43.jpg


Where we are now:

14no4tk.jpg


The story:

Read on. There are 26 pages. The saga begins.

-Kurt
To see the 26 pages, where do I go? as well when you say shrinking dis time, do you mean time of braking, a test I will be taking, hopefully, as soon as I get the car back, with my Summit computer to check on braking speed as well 0-60 and 1/4 mile times.

 
With the Valiant all squared away and the long week off, I figured now was a good a time as any to get down to business again. Left quarter remained full of holes and a few other issues, so off to work it was:

005.JPG

The results aren't spectacular - I kept discovering more dirty metal to blow through.

I have more than a few heat affected zones to take care of. First glance doesn't look too bad:

008.JPG

Best part of the day was taking care of this little hole. Been looking at it for ages and am thrilled to see it gone. Again, some hammer/dolly work is necessary before it'll be perfect:

009.JPG

011.JPG

-Kurt
 

Attachments

  • 007.JPG
    007.JPG
    6.2 MB · Views: 0
Last edited:
Surprise, I actually did some work on the green beast this morning. Thanks to the '69 Valiant's upper control arm bushings, I had little time to mention any of it until now.

Granted, it's not much - the trunk dropoff is now welded down its length:

003.JPG

Not much when you look at it, but it took the better half of the morning. Can I tell you how much I hate welding pinholes? It's as if every pinhole has some sort of phantom paint contamination somewhere on it - even though it doesn't - that results in the wire blowing through every time I get down to "that last little fix." Those little fixes resulted in two hours worth of extra work trying to fix up the fixes.

Next time I do a trunk floor, I'm not butt welding the trunk floor to the dropoffs, no matter how nice it seams. Lap it, weld it, seam up the edge with panel glue, and forget it. I'm going to stich-weld my weekends away if I do that with Rustbucket Yellow Mustang Which Shall Not Be Named After Ms. Roosevelt (look out for great news in 36 days from now).

Still have to join that bit at the bottom of the quarter, tidy up a few welds on the other side of the trunk floor, and possibly cut and patch the left quarter again, in the area where my last run-in with pinhole fixing turning into a quarter-sized lump of weld (visible in picture #2)

-Kurt
 
Last edited:
It seems as if the server crash and restoration from a few days ago took out some of the photo updates, so I'll get that re-done soon.

At any rate, hello all - glad to be back from the dead.

After 10 years, I'm getting back to Soylent again, and I'm picking up at a problem I came to grips with somewhere along the line when I put the project to the side: I finally recognized that the right side framerail on Soylent had a wrinkle in it. I seem to remember somewhere earlier in this thread jumping up and down in denial of this to Q - well, time to eat my own words.

framerail_1.318.1.jpg

While I don't have the proper fancy frame measuring tools, I have taken measurements from the forward leaf spring hole and have confirmed - three times over - that the right framerail is 3mm shorter than the left.

I tried a hydraulic ram and judicious slicing of the damaged bits, but the bend is not coming out that way. I've already sliced it all the way through and plan to re-patch the trunk floor on that side. In the meantime, @ib4stangs has SUPER generously offered a replacement rail cut off a parts car that I can either slice a piece from or (hopefully) use in its entirely from the bump stop to the rear crossmember (I'm leaning towards the latter; I'd rather make one whole stitch in the rail than two).

I'll have more photos to post soon; some of which will be pulled from the stills of this video I'm working on. The picture above is one of those stills.

That70sCar-Ep2.png

Fingers crossed for some success in the near future.

-Kurt
 
Thank you, gentlemen!

Anyway, thought I'd give a quick update: To make things easier, I put the car up on jackstands and pulled the rear end out. I figured this would be a good opportunity to replace the leaky pinion seal in the process, along with the rest of the rear end seals.

2_2.63.1.jpg

5_2.107.1.jpg

6_1.243.1.jpg

It also turned out nobody had been there for years, as there's an inch and a half of tar in the bottom of the housing.

But on the topic of the much-more-interesting bodywork:

I leveled the car - so I could work on a reasonably flat plane - carefully shimming out a number of jackstands under it, using a laser level front and back (I'm checking points at the rear framerail, but it's fairly obvious here that it's lower on the right side than the left here):

7_1.281.1.jpg

More importantly - at least for the rear, for now, is the comparison between framerail lengths. This is how I checked it - a measuring tape pulled to the edge of the front leaf mount eyelet, with a magnet on it to keep it in place.

The fact that I'm not taking a center-to-center measurement is of less concern to me than the overall difference between the measurements left-to-right; just so long as the two points are the same on each side of the car.

8_2.151.1.jpg

I chose to measure up to the edge of the shackle housing.

9_2.153.1.jpg

This photo doesn't really show the measurement correctly due to perspective, but...

...these two do. There's a 3mm difference on the left side of the car:

IMG_7232.jpeg

IMG_7237.jpeg

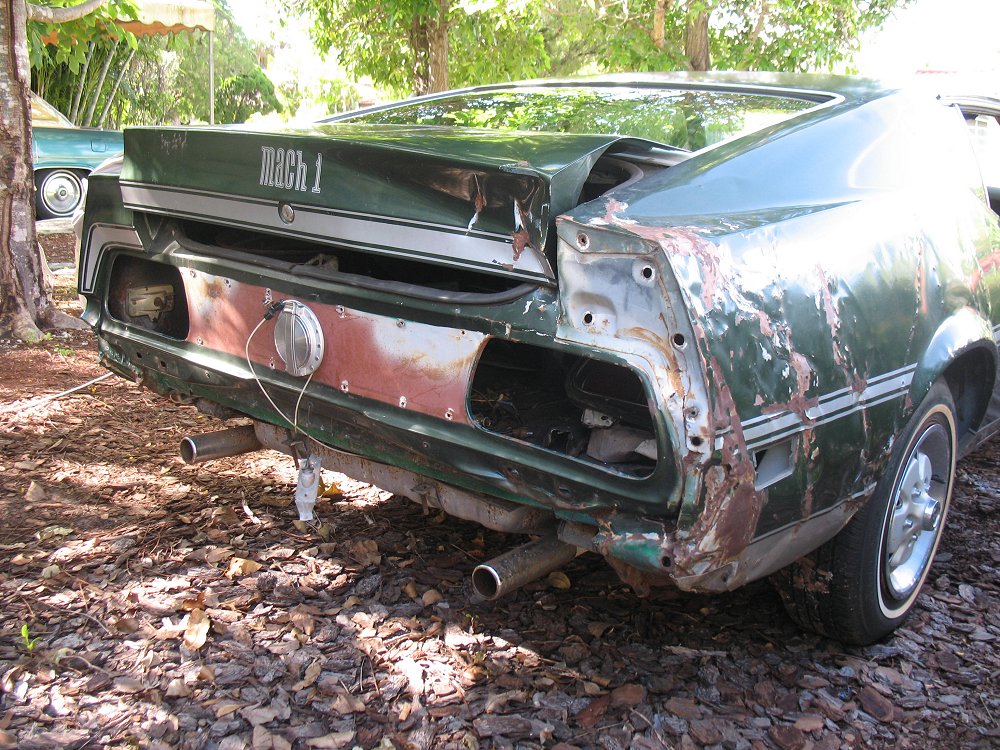
Now, I know some might say that the tolerances on these cars were sloppy enough that it's a very real possibility that it was this bad from the factory, but we know the car was hit pretty hard on this corner, and the wrinkle is there. Moreover, the difference made itself very known at the rear crossmember. The taillight panel would have sit sucked in at the bottom right if I didn't address this.

So started the embarrassing and tedious process of undoing all the plug welds I put into the trunk floor 10 years ago. In hindsight, now that I've tried Spraymax iso-free 2K primer in a can, I'm glad that I never did button this up. Cleaning up all the failed 1K primer junk would have been miserable with the taillight panel installed. There's a test spray of 2K in the center.

11.jpg

Yell at me now if you want. This is what I played with to try to straighten it, figuring I'd re-box the framerail later. It didn't work and ultimately tore enough that I came to the realization that I would need to slice in another framerail piece (or the whole thing; depends on what @ib4stangs can cut out for me).

12.jpg

I can hear everyone yelling "why didn't you use heat?!?" - and I couldn't answer you. I don't know why I didn't think of it. Perhaps I've done so much cold-setting on bicycle frames that confirmation bias fixated the idea of cold setting. That, and I've seen one video on YouTube of a Mustang framerail cold-set as well.

Whatever the case, the framerail is now in two pieces, and that's where the project stands - but it did allow me to re-jig the rail against the taillight panel exactly where it should be, and that also sorted out the taillight panel fit. So, if there's any silver lining, measurements and general seat-of-the-pants fitment suggest I'm going down the right path.

Soon as I have some metal from @ib4stangs, I'll fire up the welder, sleeve the rail, and I should have some progress to report.

Oh, and for those of you looking at all the surface rust on that trunk floor, keep this in mind: Friends don't let friends use 1K primer :p

-Kurt
 
Hey Buddy Guess what ? I also took a breather for 10 years and Started back up on mine this past December Although it wasn't a true break since I built another one during that time . I had started with a rust free running driving car in excellent condition. It's been turn key plug and play for the last 8 years just get in and go ! You can see most of the build here https://7173mustangs.com/threads/green-72-fastback-former-429-460.15881/
On my Q-code before I took a break I did finish up 90 percent of the body work got her in the 2nd to last round of blocking primer Here's a recent vid I posted a few weeks ago of all the work done this past winter-I'm just about ready to drop the motor drivetrain back in get her running again after 34 years ! You do know there is a spec sheet for the frame measurements you need and now they also make a rear frame rail section ? I believe the frame spec sheet is on the site here.
 
Last edited:
Hey Buddy Guess what ? I also took a breather for 10 years and Started back up on mine this past December Although it wasn't a true break since I built another one during that time . I had started with a rust free running driving car in excellent condition. It's been turn key plug and play for the last 8 years just get in and go ! You can see most of the build here https://7173mustangs.com/threads/green-72-fastback-former-429-460.15881/
On my Q-code before I took a break I did finish up 90 percent of the body work got her in the 2nd to last round of blocking primer Here's a recent vid I posted a few weeks ago of all the work done this past winter-I'm just about ready to drop the motor drivetrain back in get her running again after 34 years ! You do know there is a spec sheet for the frame measurements you need and now they also make a rear frame rail section ? I believe the frame spec sheet is on the site here.


Hey Q! I checked to see if you'd posted after I disappeared around here; glad to see you're around and kicking. I remember the green 429; how's it been treating you?

I remember you shared that spec sheet long ago with me - what I didn't realize until now is that the rear framerail measurements are eylet-to-eyelet. That definitely helps. I just ordered one of those el-cheapo frame tools off Amazon to verify; if nothing else, I can use it to double-check the variance I've already measured, plus determine the framerail height variance from left to right (something I'm now more worried about than the length).

-Kurt
That Green 429 is now a very nicely built 351C backed by a 4r70w with Baumen controller there's videos on my channel -It's been trouble free get in and go with many miles on it now. Not sure what you ordered from amazon but I'm assuming something like this ? https://www.amazon.com/BJTDLLX-Meas...rds=tram+bar&mfadid=adm&qid=1721392792&sr=8-7 Although I don't think this is long enough, I've made quite a few tram bars and its a simple matter to do so. Just get a telescoping rod set and install 2 nails as pointers in each end. I've used window cleaning rod sets ( home depot ) also arrow shafts to make a few of mine.
 
Just to refresh your memory here's pics how I had my car setup to measure. The long steel bar with threaded rods (pointers) is the datum line speced out in the chart-you set it by using 2 known good points (x-6 and x6 1/2 on the chart ) This should help you (you can see how far out the rear rail measurement is that work was done by a supposed top notch restoration shop ) Also those rods and such all came from home depot in the electrical section-they use them to hang / setup conduit
 

Attachments

  • 100_1306.JPG
    100_1306.JPG
    653.7 KB · Views: 0
  • 100_1307.JPG
    100_1307.JPG
    563.2 KB · Views: 0
  • 100_1308.JPG
    100_1308.JPG
    593.4 KB · Views: 0
  • 100_1309.JPG
    100_1309.JPG
    831.7 KB · Views: 0
Last edited:
That Green 429 is now a very nicely built 351C backed by a 4r70w with Baumen controller there's videos on my channel -It's been trouble free get in and go with many miles on it now. Not sure what you ordered from amazon but I'm assuming something like this ? https://www.amazon.com/BJTDLLX-Meas...rds=tram+bar&mfadid=adm&qid=1721392792&sr=8-7 Although I don't think this is long enough, I've made quite a few tram bars and its a simple matter to do so. Just get a telescoping rod set and install 2 nails as pointers in each end. I've used window cleaning rod sets ( home depot ) also arrow shafts to make a few of mine.

I remember a 4R70W; can't recall the 351C. Smart move lightening up the front end with the midblock - still more than enough power.

Not everyone might want to admit it, but any of our first-gens - the so-called "big" 71-73's too - are lightweight little tin can farts in comparison to the battering rams built today, and they'll get up and go pretty nicely without a C or J-code weighing the front end down - as many have said before. It's not as if putting it down is particularly easy on anything that fits stock wheel arches to begin with, especially since a lot of the rear weight is sprung weight and not mounted to the body.

Just to refresh your memory here's pics how I had my car setup to measure. The long steel bar with threaded rods (pointers) is the datum line speced out in the chart-you set it by using 2 known good points (x-6 and x6 1/2 on the chart ) This should help you (you can see how far out the rear rail measurement is that work was done by a supposed top notch restoration shop ) Also those rods and such all came from home depot in the electrical section-they use them to hang / setup conduit

I did get basically the same chassis tool POS that you linked to. Hasn't arrived yet. Stretches out to 7.38', so I might be able to use it. My concern is that I have all of weekends to work on this thing, and not often that much of the weekend, so I'll put up with a store-bought piece of Chinesium if it gets the job done (presumably correctly).

If it doesn't, well, it looks as if I'm going to visit Home Depot.

It helps if I don't have to spend too much time jigging it up either, as the spot where the car is gets blasted with Florida sun from the morning straight up to 2pm.

-Kurt
 
Back
Top