FiTech EFI Install

7173Mustangs.com

Help Support 7173Mustangs.com:

This site may earn a commission from merchant affiliate links, including eBay, Amazon, and others.
All,

Started working on the Tanks Inc. PA-4 fuel pump install in my new Tanks Inc. fuel tank. Several items of interest while installing. I got the tools mentioned by AutoEdit’s video, the 3 and 4 inch hole saws. We used the 3 inch one first to cut a 3 inch alignment plate to install into the evaporate opening. We noticed a bit of movement of the plate, when trying to lock it down. We had to align the hole, we locked it down with the ring. Cut the 4 inch hole. Next, we laid the mounting ring to trace the mounting holes. I noticed that the cut out opening was not as big as the I.D. of the mounting ring. OK, well, then. So, I drilled the holes to the size per the instructions. Slipped the ring inside and inserted the screws. Here is where I again noticed the cut out hole was little smaller that the I.D. of the mounting bracket. Well, the lip over hang to the mounting ring was further in than what I saw on the video.

Our fix to this little issue was to use a spot weld cutter in 4 corners of the ring circumference area. Since the tanks metal thickness is thin, it did not take much cutting to open up a weld hole. We tacked 4 holes, ground it smooth. When it was time to insert the fuel pump bracket, we had a bit of clearance problems. We rectified that issue with rounding out the edges of the main bracket to the sump tray. Slid right in.

After all is said and done, I went back to the instructions and found that it says “ Tack weld the ring on the inside of the 4 ½ inch opening. “ Wait a minute, According to AutoEdit’s video, he used a 4 inch hole saw.

My suggestion on this project, would be to look at a 4 1/8 hole saw. I believe the 4 ½ may not provide much material around the mounting holes. On the evaporate hole plate, I would look at the 3 1/8 hole saw. I would recommend to measure sure to make sure, though.

Next, the hardware that comes with the kit is all zinc plated. IMO, zinc plated hardware does not stand up to the weather very well. I am looking into #10 stainless steel hardware for all mounting points.

dn2etk.jpg


Keep you posted.

Mustang7173
Will the Fitech fit under the RAM-Air cleaner and RAM-Air plenum??

BDK

 
It should, assuming the manifold isn't too tall. The FiTech throttle body is the same height (3.25") as Holley carburetors. Because it is shaped differently than carburetors the air cleaner base may need to be modified, though. You can get an idea of how it might, or might not, fit by looking at the dimensions. You'll need to download the pdf to see the elevation (side) view.

http://fitechefi.com/tech-posts/fitech-throttle-body-dimensions/

 
Last edited by a moderator:
Fitech First Start Coming Tomorrow!

Well guys it looks like tomorrow should give me a chance to attempt the first start of the Go Street 400 Fitech system I'm converting to from the Holley Projection 670cfm system I installed back in 1994.....I had decided to convert to the newer self learning system, albeit after much consideration since the days of fighting with the Holley system that seemingly always had me chasing the right fuel curve for across the board performance at times...at some point I dialed it in pretty close and the overall performance was good.instant starts every time and reliable for 23 years..yet the Holley system ( 670cfm 2Di unit) wasn't designed to support more than 275 horsepower, per Holley, but I just felt that there was a great deal of performance left on the so called " table" with that unit and so the decision was made to give Fitech EFI a try....cost vs the competitors, ease of installation and the ability to support horsepower closer to my output and its self learning feature made the decision a bit easier I imagine. But as an older tuner, and one who loves what the 351 Cleveland can do, it still wasn't an easy decision simply because I have wondered this week as I near completion of the install....."if I was happy with what I had, I hope the transition to something better is exactly that"....my daughter recently asked " poppa if it's running the way you want, why then do you always mess with it?", I knew she was right to a degree and maybe trying to find optimum tuning windows has caused me to do exactly that.....not knowing when to be satisfied...I'll share what happens with the start up with you guys when I give it a try.....

 
For anyone considering the EFI move, please please be sure that you have a solid electrical ground scheme in your cars......at a minimum engine to the block, block to the chassis, chassis to the firewall is what I had to do when the old Holley failed to start once ending up sitting in my garage for 5 months going from running darn good to nothing but cranking and dumping lots of fuel!.......UNTIL.....one morning I sat reading a Ford MotorSports Magazine when I ran across an article entitled " Get Grounded For EFI".....I read it simply because I had run out of ideas trying to solve my mysterious problem and sure enough when I ventured out to the garage to determine whether or not my grounding scheme under the hood was satisfactory, I found out that while I'd upgraded "stuff" to an old school car, I hadn't given grounding any consideration.....I configured my negative grounding network as the article stated an BINGO!!! engine started and ran perfectly....I imagine that the basic setup of battery to the block had run its course so please be sure to verify that your setup is grounded for success!

 
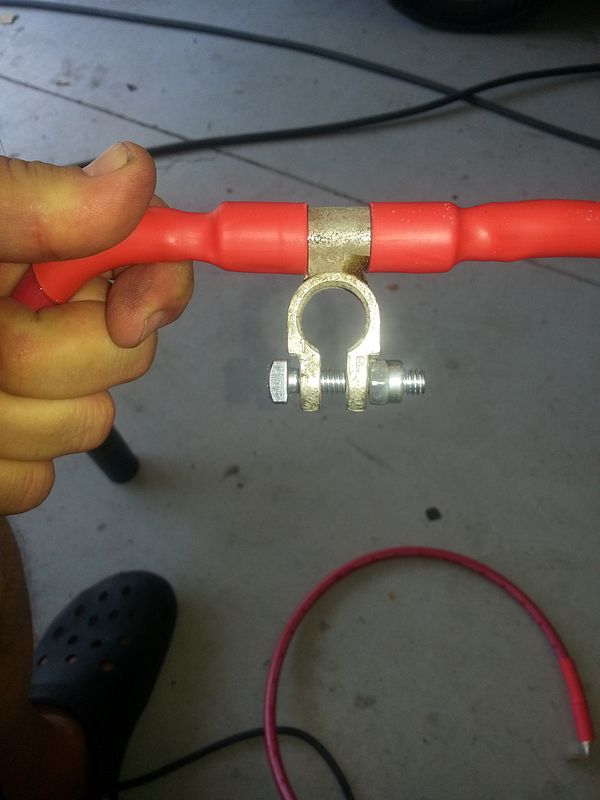
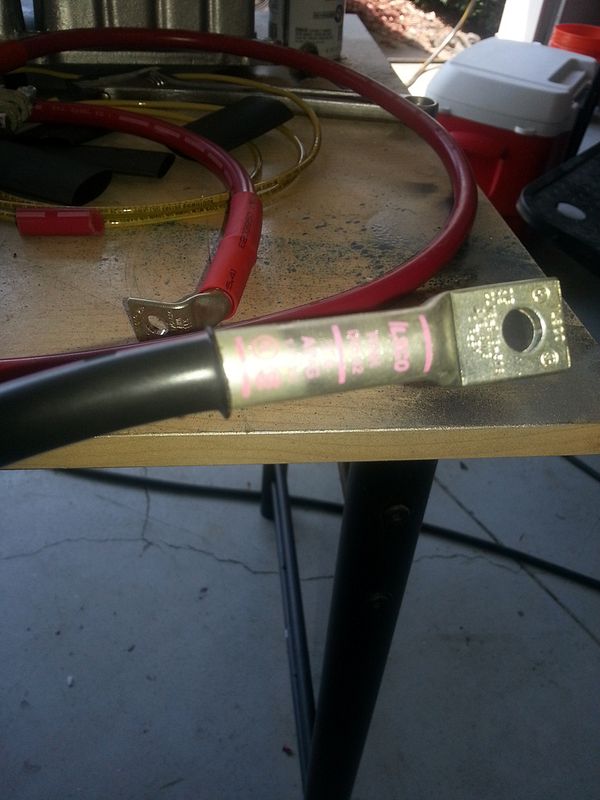
I would also suggest upgrading your battery cables. This is for everyone really, especially anyone running a high compression engine. Get yourself a really good AGM battery, 750cc amps. Then get solder on battery terminals and use #1 or #2 AWG Battery cable. Some people use Welding cable, I do not like it. The Jacket of welding cable is very flimsy. It is designed to be easily rolled up and flipped around long runs of cable so the welders can move around easily. This is fine for welding, but in a car, you want a heavy jacket to protect it. Thats why I find a wholesale electrical supply house, and get their best grade of Automotive battery cable. The jacket on that type is very stuff, very abrasion proof, and is over twice the thickness of welding cable. The #1 or #2 Cable will handle alot more amps that the stock cables, but more importantly, the grounding potential of the negative power cable is multiple times better than the stock cables.

Plus if you run a Big Stereo or any power hog like that, the extra large cable comes in handy for sending power to amps. I like the solder on connections because they are more protected than regular wire. The Hydrogen that is expelled by conventional batteries will corrode the cable thru the smallest of cracks in the jacket or exposed wire. That is why I also use the heavy duty heat shrink with glue inside so that all the connections are sealed gas tight so they will not corrode.

The Flag Style terminal here is good if your sending power to a distribution box for power amps.


On the ends that connect to the starter solenoid or directly to the starter motor, you use the straight solder on terminals like this.


Also one very worthwhile upgrade to the older mustangs (if your not trying to keep it bone stock) is to upgrade the starter/alternator/starter relay system to a later 3G style. The PMGR Starter, and a mid 90's style starter relay, and a mind 90's style 3G alternator will produce well over twice the current of the stock 1G alternator setup. With a high compression engine, the larger cables and PMGR starter will provide more starting power to the engine.

I really like the FI Tech EFI system. For a budget system, it seems to work really good. I have at least 3 friends that run the system and it was a big overall improvement in performance, especially in places that require seasonal carb adjustments. These systems arent as good as some of the ones that are over twice as expensive, but they are a great value solution that works much better than a carb. The weakness of the FI Tech unit is all in the fuel pump system. Its funky. The first guy I know that got one had nothing but trouble with it. The other 2 guys both had issues getting FI Tech to send them the fuel pump unit, but it eventually showed up. They said the issues seem to be worked out, but it was still a bit tricky to install, but is doable.

 
Last edited by a moderator:
Fired on the first crank!

Well today I finally gave the Fitech its first try and sure enough it fired on the very first crank.....just need to get a better understanding of the tuning procedure of the handheld, tune the IAC idle steps and a couple of other variables and take her for a ride....but atleast the hard part is over....easy install and the system seems to be much more powerful than my old Projection Unit...well keep you guys posted as I get further into this transition...

 
All,

Got the LS1 fuel/pressure regulated filter mounted and plumbed. Also ran the power/ground through existing electric fuel pump mounting via rubber grommet. I purchased the grommet and 2, 9/16 hole plugs, Lowe's Home Improvement,  to finish out the dressing. Next week, I will be working on the plumbing of the Oxygen sensor.


mustang7173

 
Last edited by a moderator:
All,

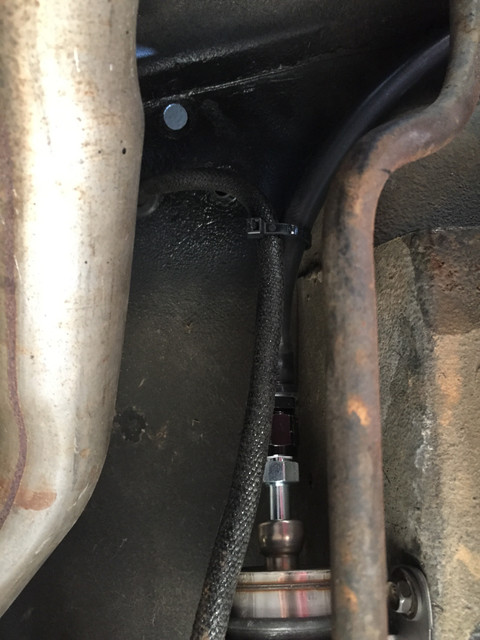
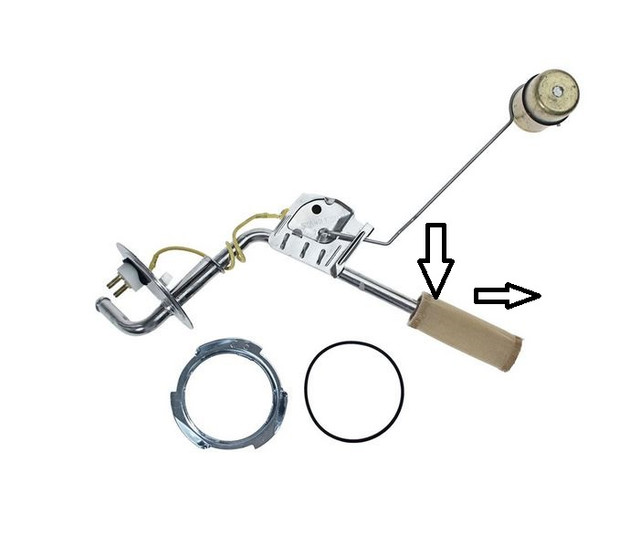
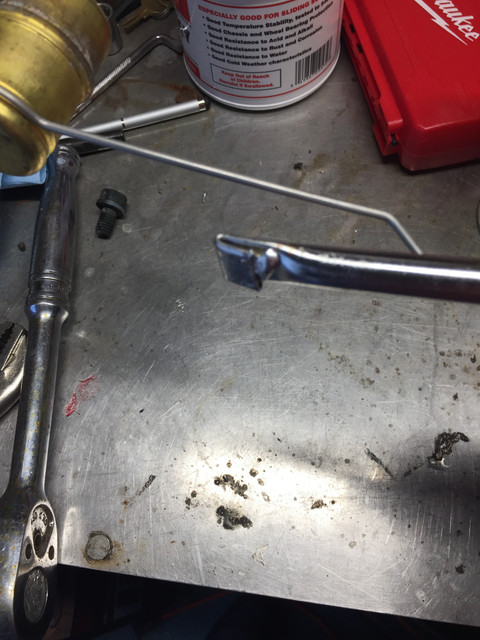
The next to last thing to d underneath, is to plug up the fuel tank sending unit. While watch AutoEdit's video, I noticed he had a bolt in the tube that held the sock filter. Unfortunately, he not go into specifics on how he processed that area. I purchased a Stainless Steel 5/16 hex bolt with a shoulder.

Any suggestions on what to use to seal the bolt in? It needs to be fuel resistance.


photo upload

mustang7173

 
Last edited by a moderator:
Permatex #1 should seal it. However, if it were me, I would pinch and solder the sock end, cut the outlet end between the elbow and flange, pinch and solder it. Using silver solder will allow soldering it at a low enough temperature that it won't burn off the zinc coating and never have to worry about it.

 
I've been thinking (maybe over-thinking), have any of you thought about installing an inertia switch in the fuel pump circuit? One of the nice things about fuel injection is that the engine doesn't flood out during hard braking and acceleration or during abrupt manuevers like a carburetor can cause. The downside is that it also will run upside down or on its side. The FiTech has a feature that will shut off the voltage to the fuel pump if the RPMs get too low, but in the case of a crash and the engine keeps running the electric fuel pump will keep running. This is why all Ford factory FI systems include an inertia switch. Other manufacturers use other safety features like a low oil pressure switch.

Don

 
When I built my 69 vert restomod (EFI 302ci) I installed a Ford inertia switch in the trunk next to the filler tube. It's wired in-line with the fuel pump motor.

Obviously with 71-73 factory fuel pump that is operated by the crankshaft, it would not do much for fuel delivery, but you could wire it to cut out the ignition circuit.

 
Good Day to All,

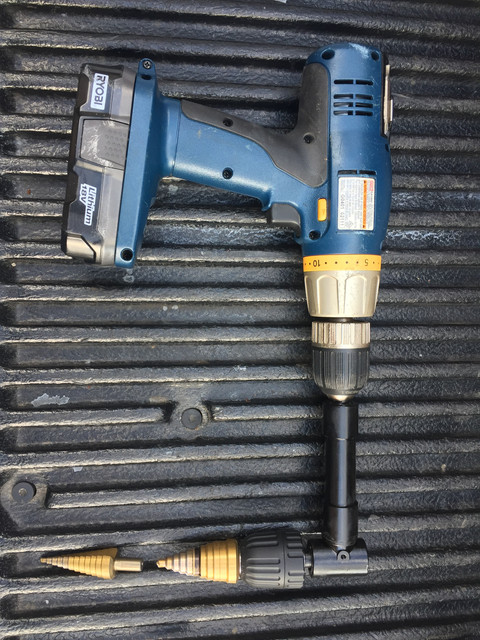
Here is the latest- I went to Northern Tool and picked up a right angle drill head. They also have the 2 step drill bits. The instructions call for a 7/8 inch hole. I went with the next to the 7/8 inch hole, slightly smaller hole. Works just fine.

I have the Lokar carburetor adapter plate for the AOD TV Cable. I had to drill a small hole to clear the butterfly stud. After I drilled, I clear coated to prevent rust.


my photos upload

I wil post more updates later on.

mustang7173

 
All,

I installed a Ford inertia switch in the trunk also when I installed the electric fuel for my carburetor. I am almost finish wiring up the FiTech EFI 400. I am using the Painless 1/2 ClassicBraid Wire wrap

http://www.painlessperformance.com/webcat/70958


1/4 Tube

http://www.macsautoparts.com/store/wiring-loom-1-4-id-cloth.html


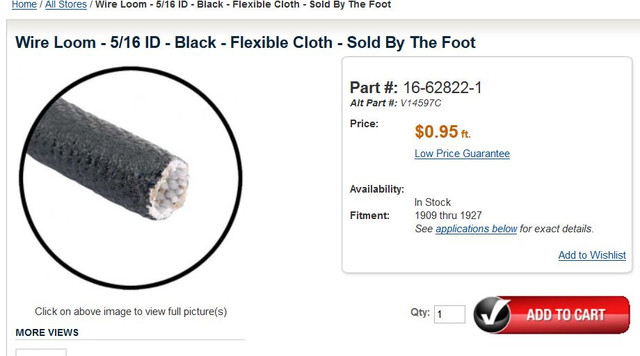
5/16 Tube

http://www.macsautoparts.com/store/wire-loom-5-16-id-black-flexible-cloth-sold-by-the-foot.html


Here is some of the wire covering I used to dress out the harnesses!

mustang7173

 
All,

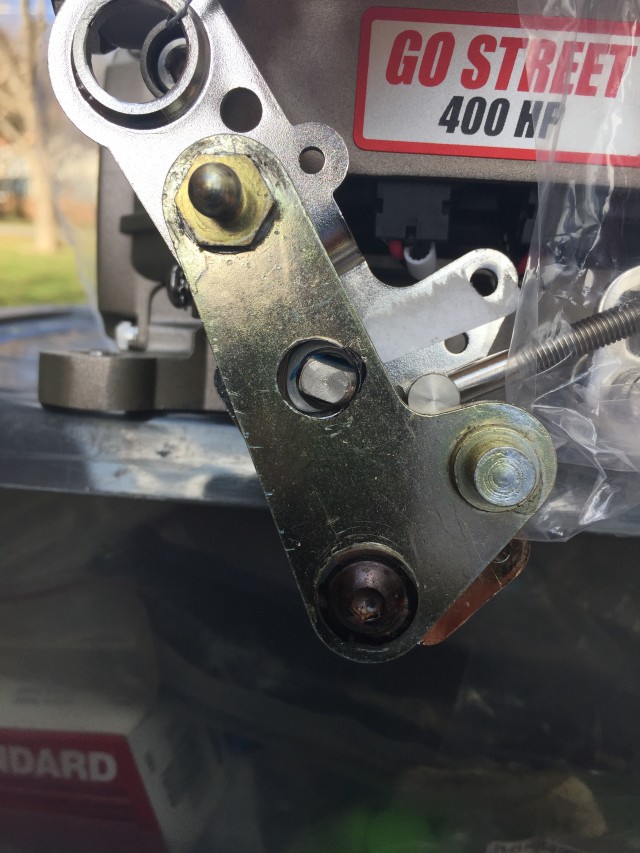
An Update. I have removed this bracket that was originally for the Holley Carb. The pivot point did not pull the Lokar TV cable in the proper geometry. Once I removed the bracket, added the studs directly to the FiTech, the Lokar geometer was back in alignment.


image storage server

Thanks

mustang7173

 
All,

Another update here! A friend of mine who has 2 of the FiTech 600 Hp's EFI's found this on the FaceBook FiTech Technical Support group.

Fitech just posted this to the fitech facebook group. I still have not figured out how this affects us, but you need to read it....

Here is the be all end all on fuel pressure. Please read fully before Commenting.

IGNORE all previous instruction besides what is below. Our new instructions will have the below in them.

Go Street, Mean Street = 43 PSI

(if you are using an FCC simply change your EFI regulator over to the FCC and vise versa, for all external regulators set them to 43PSI) Go EFI 4 600, 600 PA, 1200PA, Dual Quad 625HP, Dual quad 1200PA = 58PSI If you have a FCC, Inline pump kit, aftermarket inline kit, aftermarket in tank pump kit, aftermarket return style regulator, aftermarket filter regulator (corvette filter regulator), or any other combination of the ones above, then you can use them with our system so long as they are set to the respective pressures for that unit.

Vacuum line routing:

The regulator vacuum line MUST be connected to MANIFOLD vacuum (rear passenger side 3/16 vacuum port), this is true for ALL regulators we offer. Be that on single Throttle Body, Dual Quad (both regulators if using both return ports, single regulator if your only using one TB for return), or FCC. You can "T" into this line if you need manifold vacuum for other accessories. For boosted applications you must route the regulator to a boost reference. For blow thru applications it would go to the same rear passenger 3/16 vacuum port on the TB, for draw thru applications (roots style supercharged, draw through turbo) we must route the vacuum reference to below the supercharger or in the intake in some fashion to get both vacuum and boost reference from this location for proper pressure compensation.The regulators need vacuum to help lower the fuel pressure at idle or increase fuel pressure under boost which helps fuel trim needs of the system to properly control fuel and AFR Fuel pump restrictions:

340LPH or lower LPH can be used directly with our system with our regulators. If you are using a larger pump (anything larger than 340LPH such as an Aeromotive A1000 for example) than you must use and external regulator system with its own return (making sure to block our return with the supplied plug) and set the regulator to to respective pressure for that unit.

Over pressure:

If you are using a fuel system with a Mean street, or the Go Street and cannot regulate down to 43PSI, the system will compensate but it may make your trim and learn percentage pull out fuel and this could affect your overall fueling and could be slightly rich at idle. It wont damage anything but it wont be optimal for fuel consumption.

To swap regulators follow these instructions:

Release fuel pressure by cracking the feed line loose that goes to the throttle body, it will leak fuel and release pressure. Retighten line once this is done. Next remove two Allen screws securing regulator hold down to the passenger-side (non-linkage side), remove hold down and pull regulator out, you may need to rotate the regulator back and forth as you pull to get it out easier. Repeat this process on the FCC regulator. With both regulators out grease both the large upper o-rings and the small lower o-rings with lithium based grease. With that done slowly slide each regulator into its respective port, they will slide in smoothly with little effort DO NOT force them in as this will damage the o-rings. then install hold down and Allen screws and snug them down. you have now switched regulators.

If you need any further info you can look at our tech forum/tech article section of fitechefi.com

One part that grabbed our attention is this: Go Street, Mean Street = 43 PSI

So, I called FiTech Support and stated that I had the LS1 fuel regulator/fuel that was set to 58 PSI. The LS1 has a built return and this is how I have my return line setup. Could this my problem with the idle going from 800 RPM's to 1200 RPM's every other minute? Support stated that the 58 PSI could be causing this issue. Now, since FiTech has stated the reduced the fuel PSI, I will need to re-configure my return line to take advantage of the built pressure regulator.

I did some research on the FiTech EFi systems, and almost all pictures that saw, they had the return fuel plumed.

This weekend will be the return fuel line re-configuration fun.

mustang7173

 
All,

Another update here! A friend of mine who has 2 of the FiTech 600 Hp's EFI's found this on the FaceBook FiTech Technical Support group.

Fitech just posted this to the fitech facebook group.  I still have not figured out how this affects us, but you need to read it....

Here is the be all end all on fuel pressure. Please read fully before Commenting.

IGNORE all previous instruction besides what is below. Our new instructions will have the below in them.

Go Street, Mean Street = 43 PSI

(if you are using an FCC simply change your EFI regulator over to the FCC and vise versa, for all external regulators set them to 43PSI) Go EFI 4 600, 600 PA, 1200PA, Dual Quad 625HP, Dual quad 1200PA = 58PSI If you have a FCC, Inline pump kit, aftermarket inline kit, aftermarket in tank pump kit, aftermarket return style regulator, aftermarket filter regulator (corvette filter regulator), or any other combination of the ones above, then you can use them with our system so long as they are set to the respective pressures for that unit.

Vacuum line routing:

The regulator vacuum line MUST be connected to MANIFOLD vacuum (rear passenger side 3/16 vacuum port), this is true for ALL regulators we offer. Be that on single Throttle Body, Dual Quad (both regulators if using both return ports, single regulator if your only using one TB for return), or FCC. You can "T" into this line if you need manifold vacuum for other accessories. For boosted applications you must route the regulator to a boost reference. For blow thru applications it would go to the same rear passenger 3/16 vacuum port on the TB, for draw thru applications (roots style supercharged, draw through turbo) we must route the vacuum reference to below the supercharger or in the intake in some fashion to get both vacuum and boost reference from this location for proper pressure compensation.The regulators need vacuum to help lower the fuel pressure at idle or increase fuel pressure under boost which helps fuel trim needs of the system to properly control fuel and AFR Fuel pump restrictions:

340LPH or lower LPH can be used directly with our system with our regulators. If you are using a larger pump (anything larger than 340LPH such as an Aeromotive A1000 for example) than you must use and external regulator system with its own return (making sure to block our return with the supplied plug) and set the regulator to to respective pressure for that unit.

Over pressure:

If you are using a fuel system with a Mean street, or the Go Street and cannot regulate down to 43PSI, the system will compensate but it may make your trim and learn percentage pull out fuel and this could affect your overall fueling and could be slightly rich at idle. It won't damage anything but it won't be optimal for fuel consumption.

To swap regulators follow these instructions:

Release fuel pressure by cracking the feed line loose that goes to the throttle body, it will leak fuel and release pressure. Retighten line once this is done. Next remove two Allen screws securing regulator hold down to the passenger-side (non-linkage side), remove hold down and pull regulator out, you may need to rotate the regulator back and forth as you pull to get it out easier. Repeat this process on the FCC regulator. With both regulators out grease both the large upper o-rings and the small lower o-rings with lithium based grease. With that done slowly slide each regulator into its respective port, they will slide in smoothly with little effort DO NOT force them in as this will damage the o-rings. then install hold down and Allen screws and snug them down. you have now switched regulators.

If you need any further info you can look at our tech forum/tech article section of fitechefi.com

One part that grabbed our attention is this:  Go Street, Mean Street = 43 PSI

So, I called FiTech Support and stated that I had the LS1 fuel regulator/fuel that was set to 58 PSI. The LS1 has a built return and this is how I have my return line setup. Could this my problem with the idle going from 800 RPM's to 1200 RPM's every other minute? Support stated that the 58 PSI could be causing this issue.  Now, since FiTech has stated the reduced the fuel PSI, I will need to re-configure my return line to take advantage of the built pressure regulator.  

I did some research on the FiTech EFi systems, and almost all pictures that saw, they had the return fuel plumed.

This weekend will be the return fuel line re-configuration fun.

mustang7173
Interesting. Thank you for posting. I am trying to understand how this would affect an external pump system that has no regulator and relies on FitTech's throttle body regulator.

 
Back
Top