The tri-power manifold required a swap to 4v heads and exhaust. I was running a 2v Edelbrock performer and some hooker super comp headers. The swap over was a few years back, I don't have any pictures. I had spent so much money on the manifold, the carbs, the heads and such that I 'jumped' at an ebay auction for some used 4v Cleveland Hooker super comp headers. I ran with that for years.
Never buy used headers off of Ebay. The picture looked good but they had been smacked a few times and the fresh coat of paint was good enough to hide in pictures but not in real life. Still, I didn't have the funds to 'do it right' so I slapped them on.
Then a week or so ago I managed to have a stupid moment pulling into a gas station. As I turned left across traffic the bay I had in mind became occupied. I adjusted my course at the last moment but didn't see the curb sticking out. SMACK. I ran over the peninsula and hit the headers HARD. This is no surprise, the 4v super comp headers didn't have much ground clearance. Heck, any speed bump or higher speed dip and it seemed like I would smack them.
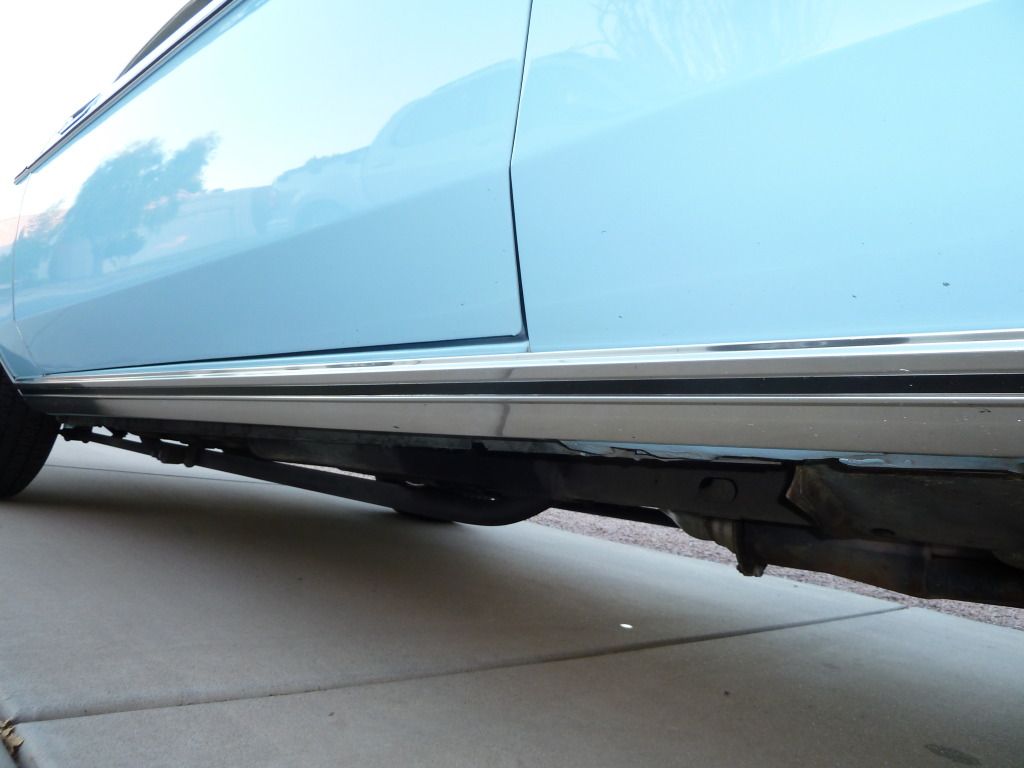
The good news is between the headers and the subframe connections I managed to avoid any body damage at all.
Now for some pics:
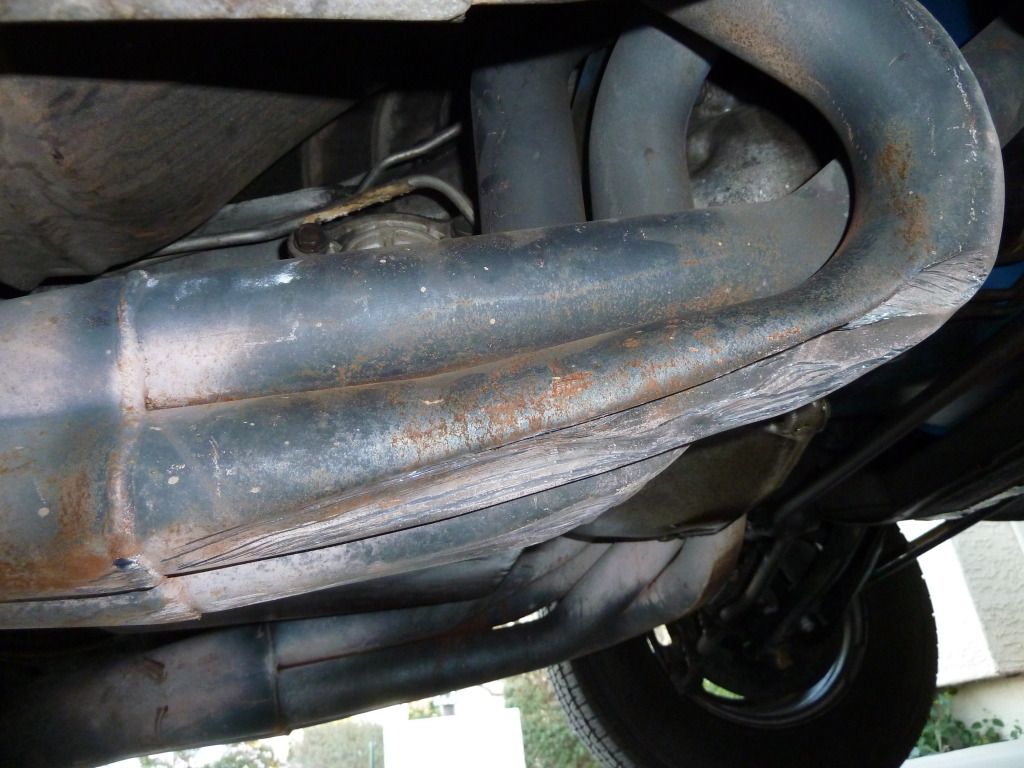
First the ugly. Here is what a header pipe is NOT supposed to look like:
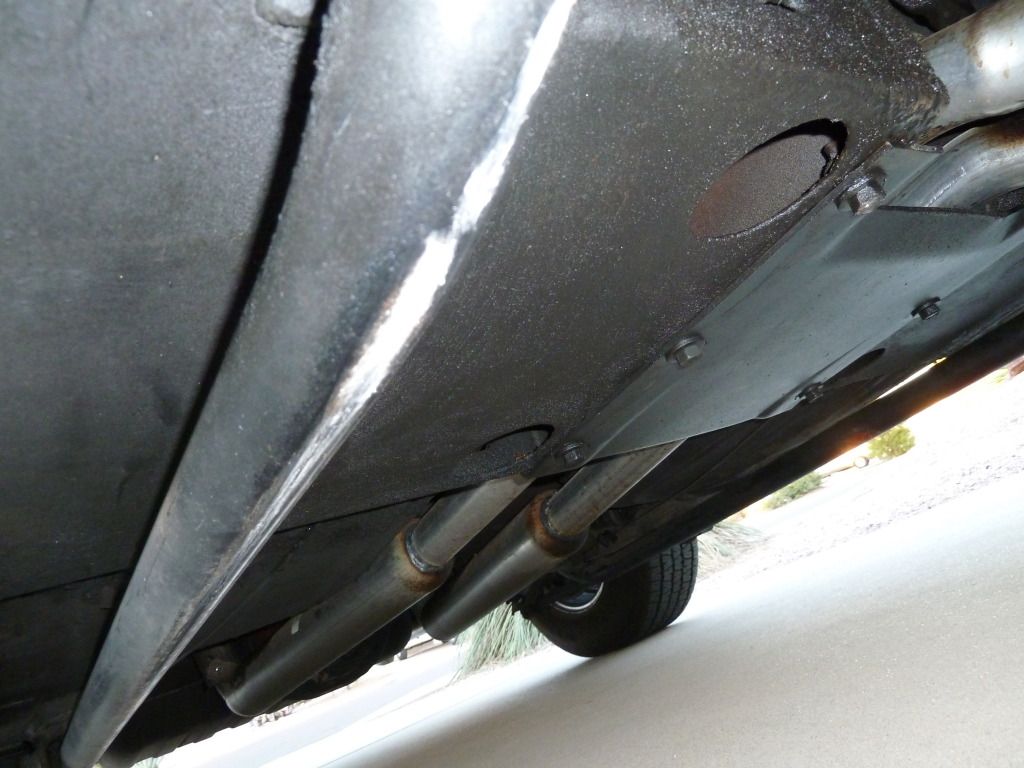
Here is a shot of the slider bars.. um, I mean sub frame connector. I have a jeep I four wheel with some slider bars, they work great! I never expected the subframe connectors to double up as sliders but, goodness, it saved the floor pans and rockers and such:
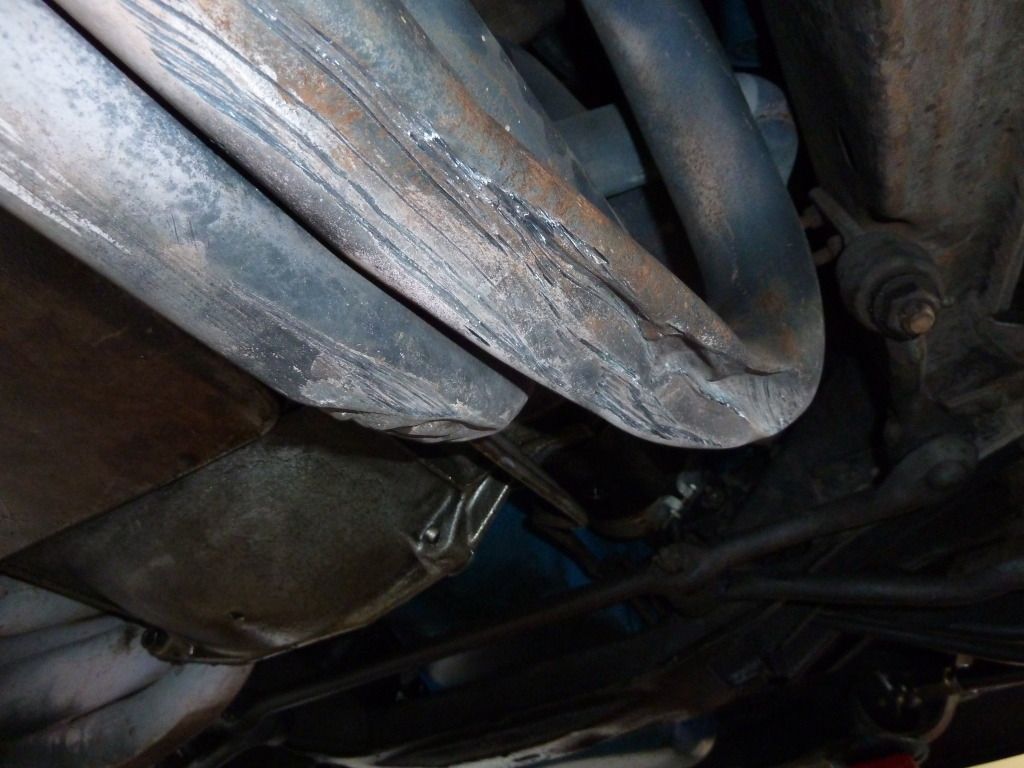
Another pic of the header. Horrifying I know...
No damage! Sweet! I had spend a small fortune on some NOS rocker moldings years before they were available aftermarket. Add to that some rocker/fender damage I would have been out a 'not so cool' grand or two.
'The worlds best header to the rescue!'
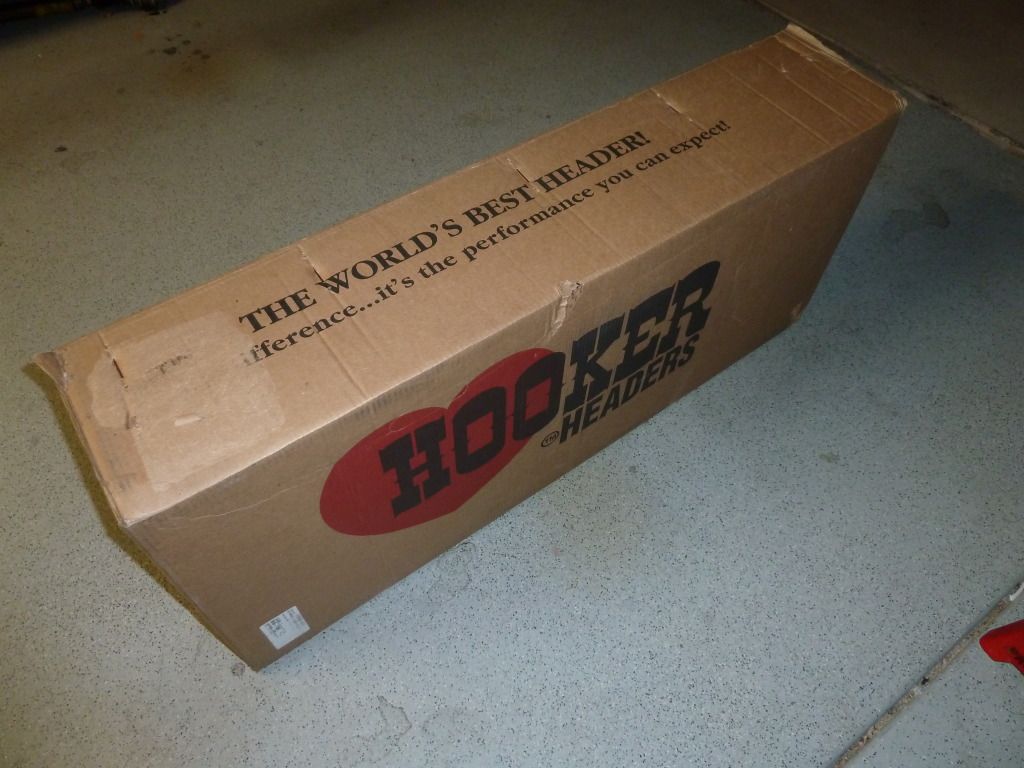
They were packed great. Really nice job. I have pics but no need to post them.
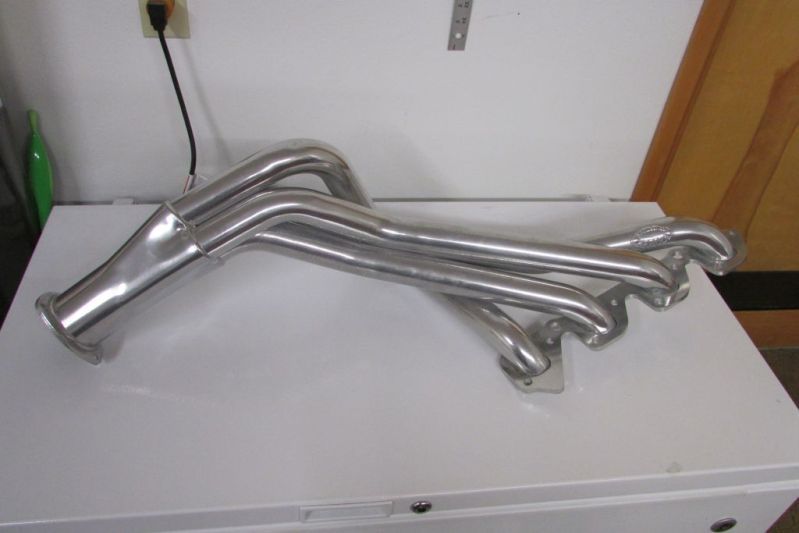
Let's just jump in and look at the difference between the 4v super comp and the 4v comp
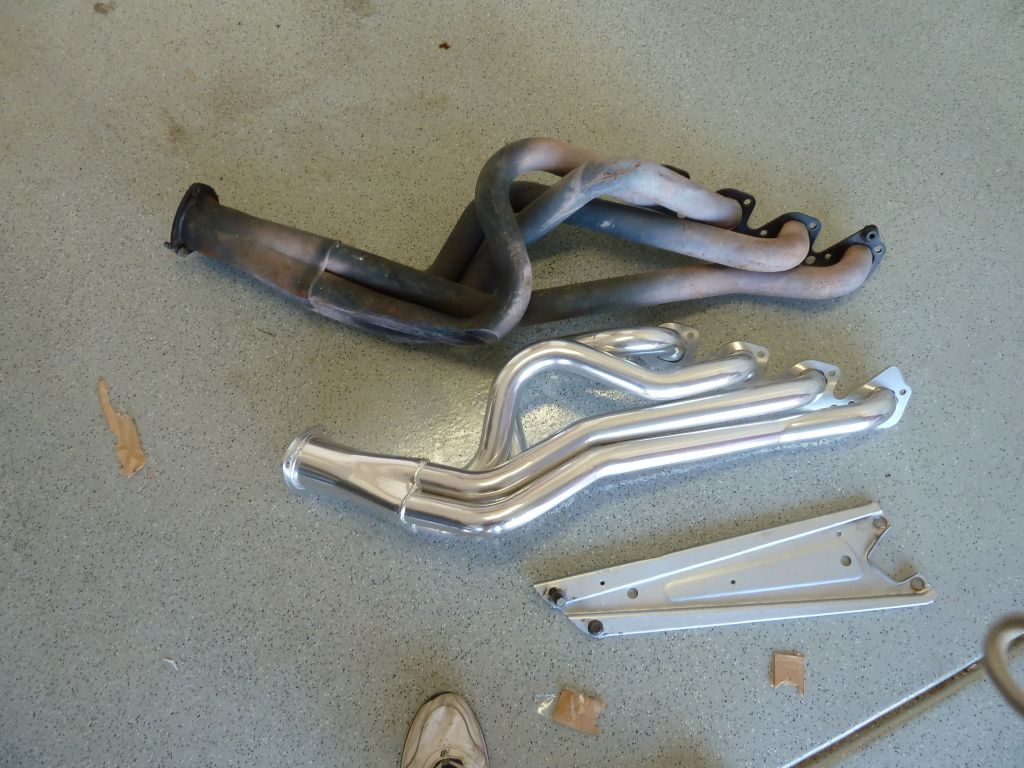
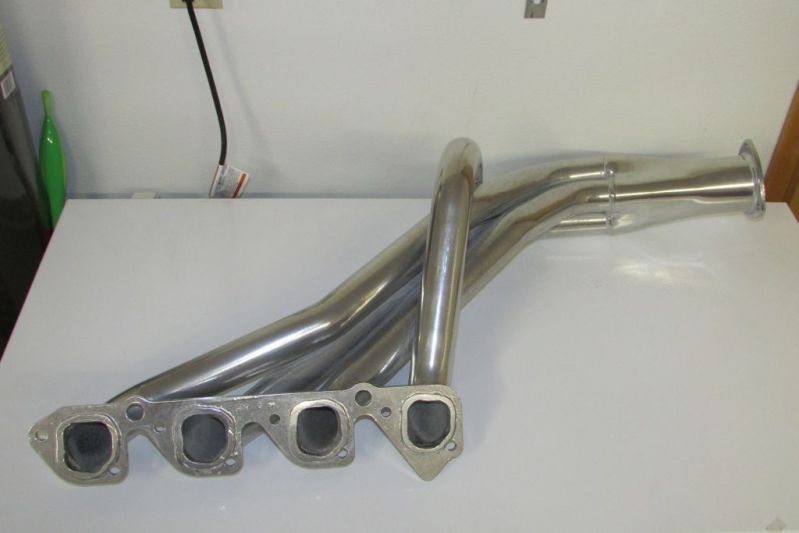
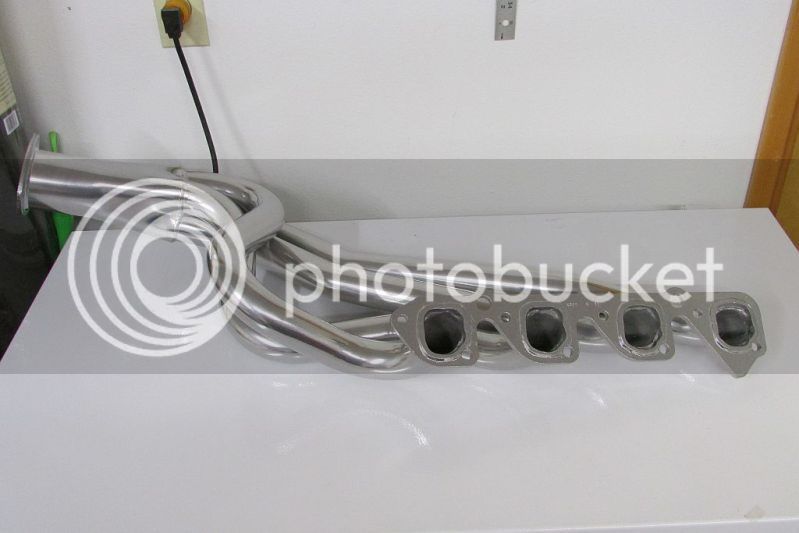
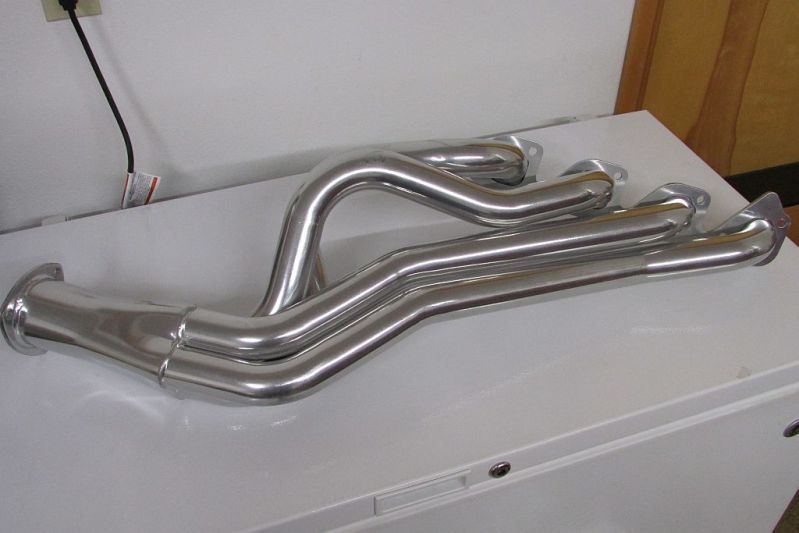
The comp are shorter and not 'tuned'. That means each pipe is not 'exactly' the same length. You will notice they don't take the same path to the collector either.
The tubes are different sizes. 2 inches on the super com, 1 3/4 on the comps.
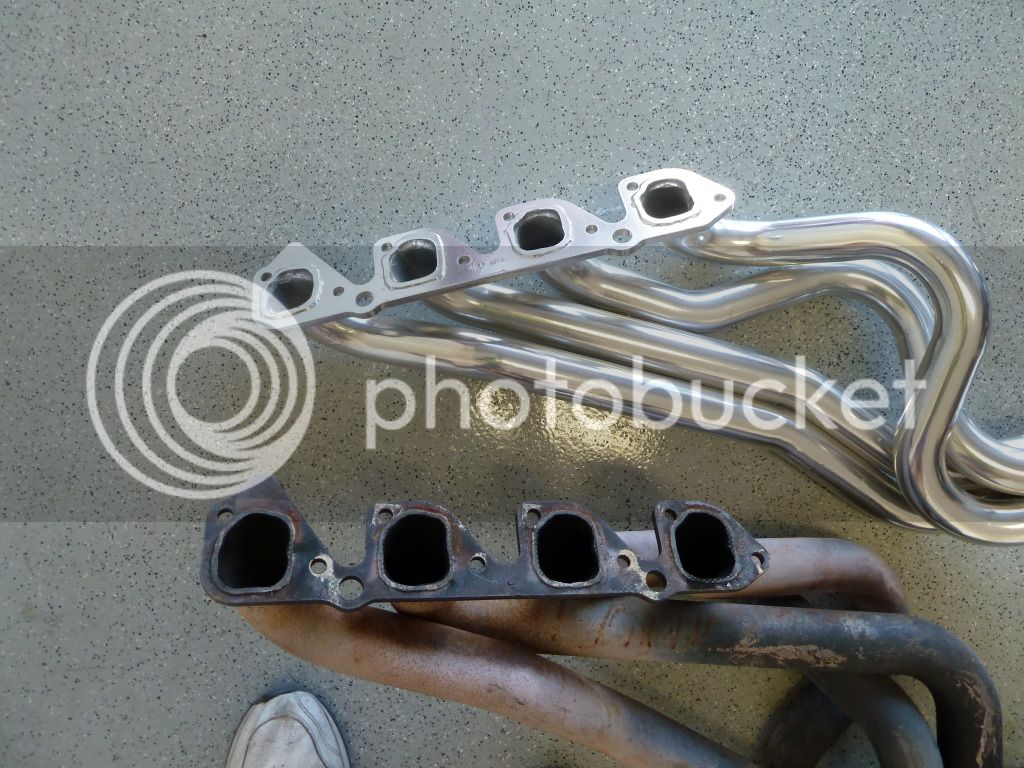
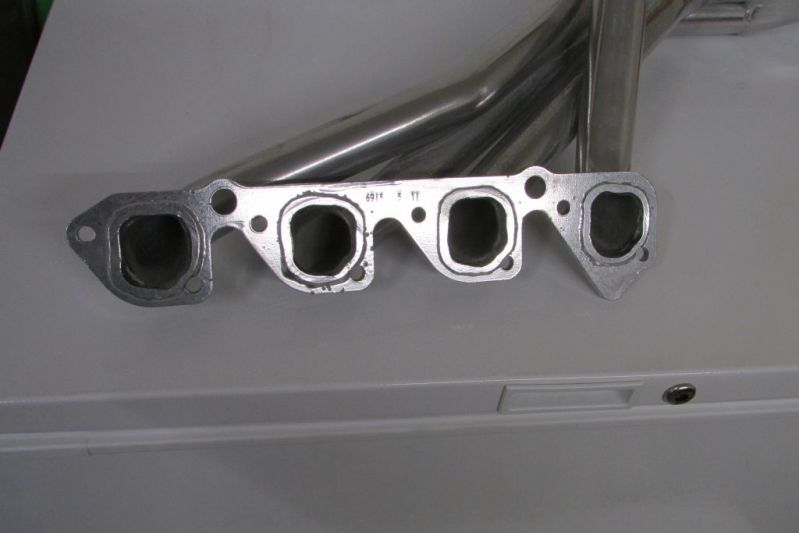
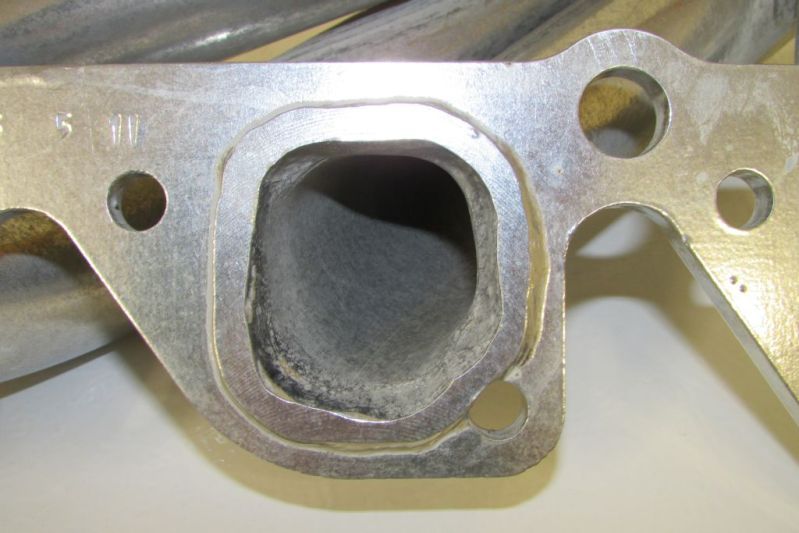
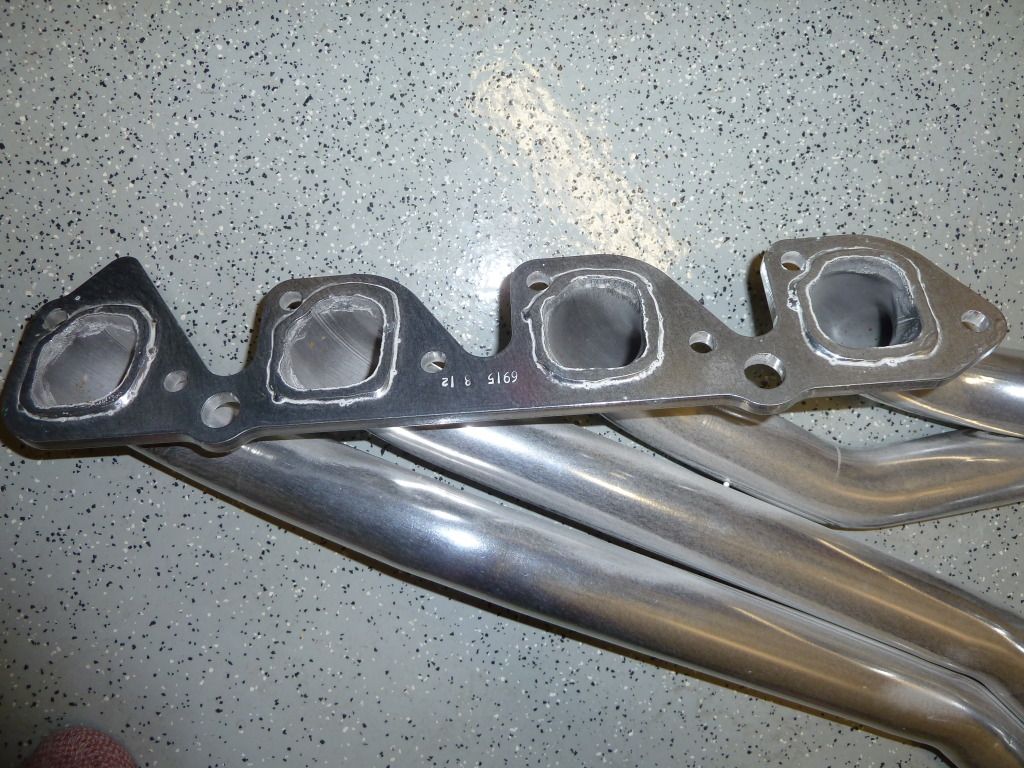
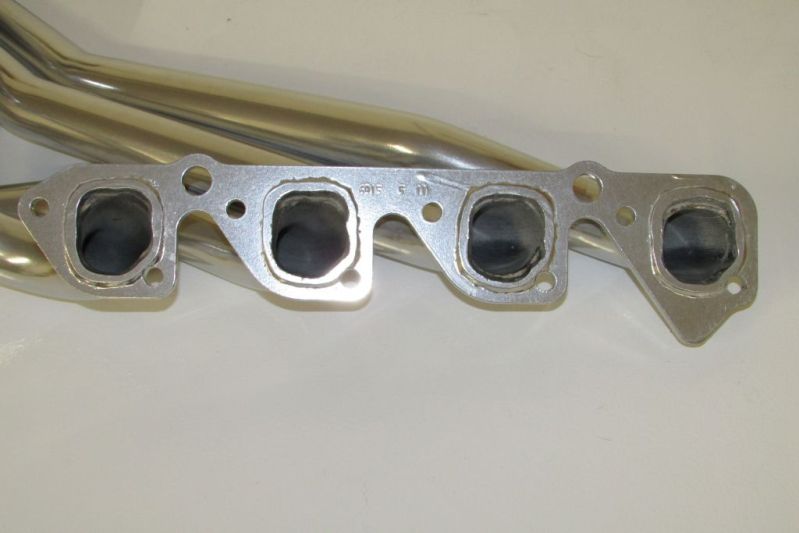
The super comps really push the outside limits of the port. I had issues getting them to seal and ended up using genuine hooker gaskets. With the smaller pipe size this may not be an issue with the regular comps.
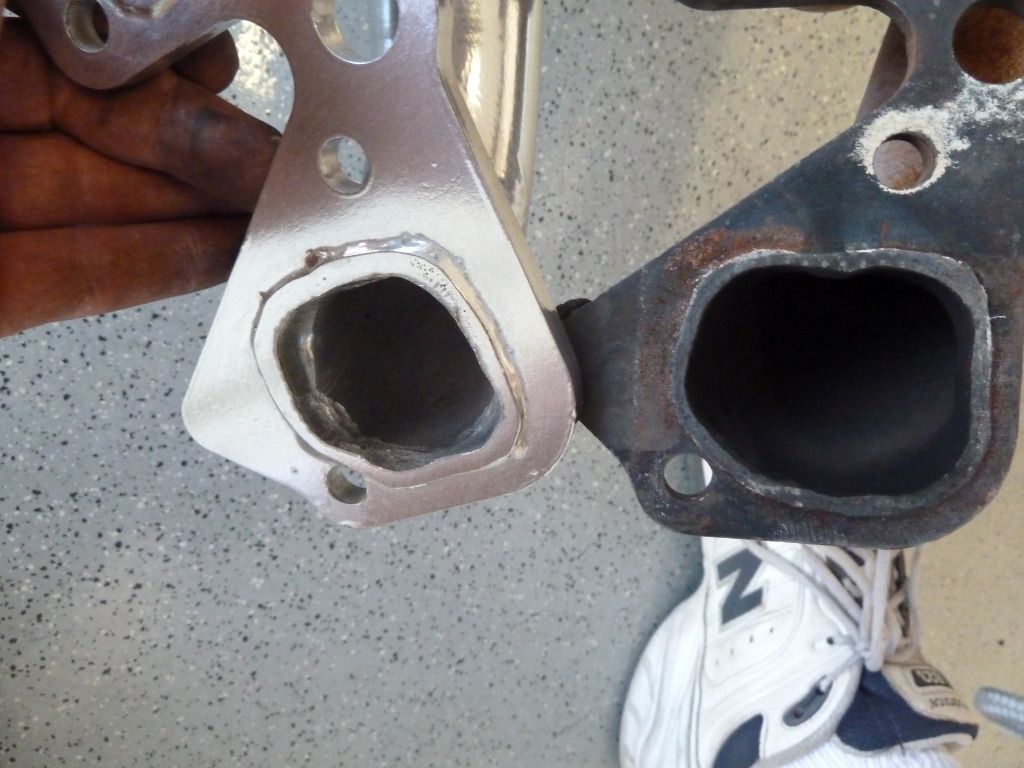
This shot makes it a lot more obvious. You can see the difference between the bolt hole and the primary tube.
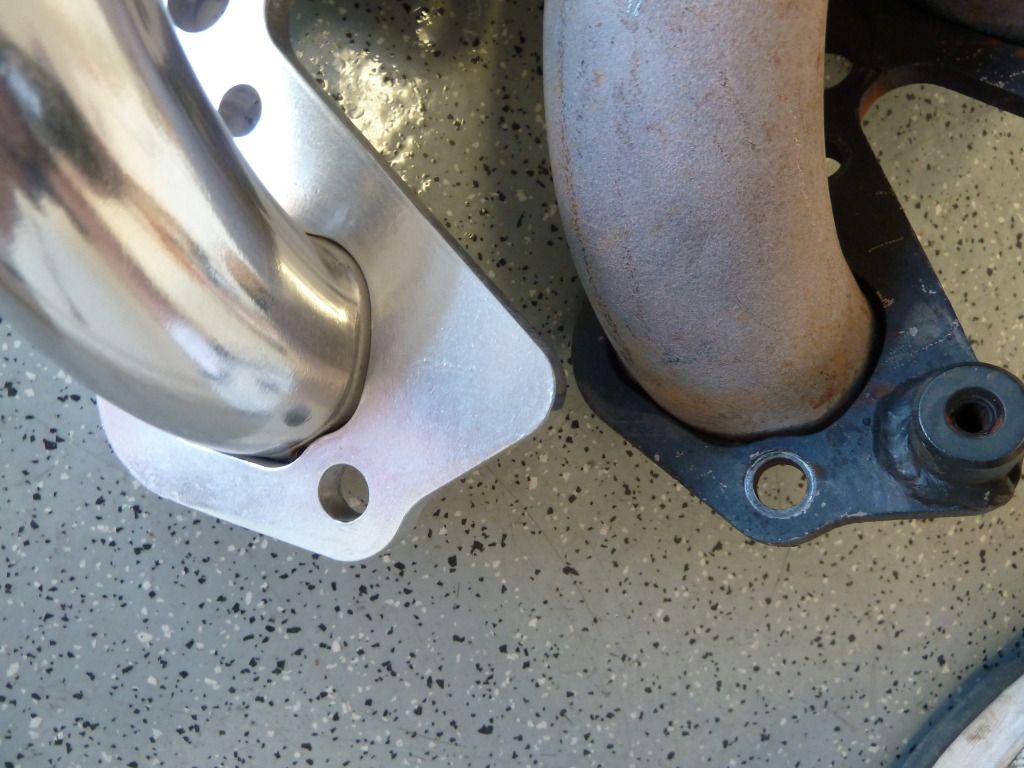
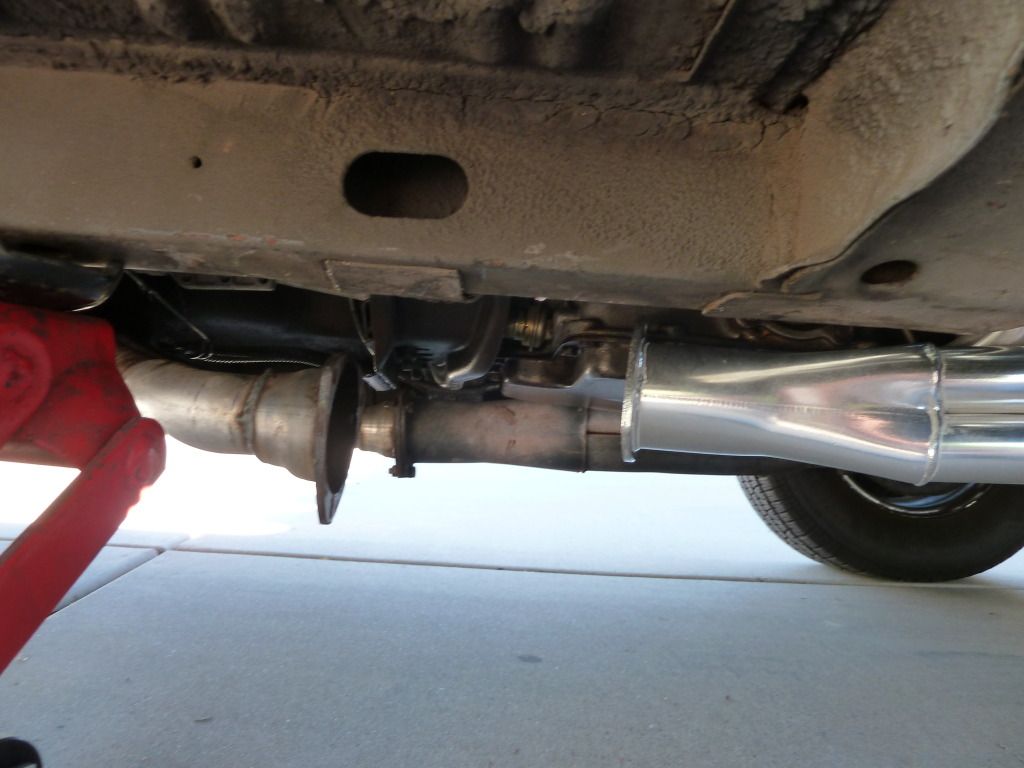
Installed you can see the difference in length. The exhaust pipe is hanging down a little but you can see the comps sit a little higher and are quite a bit shorter than the super comps.
Here is a picture from the drivers side. The lowest part of the header cleared the ground by just 4 inches.
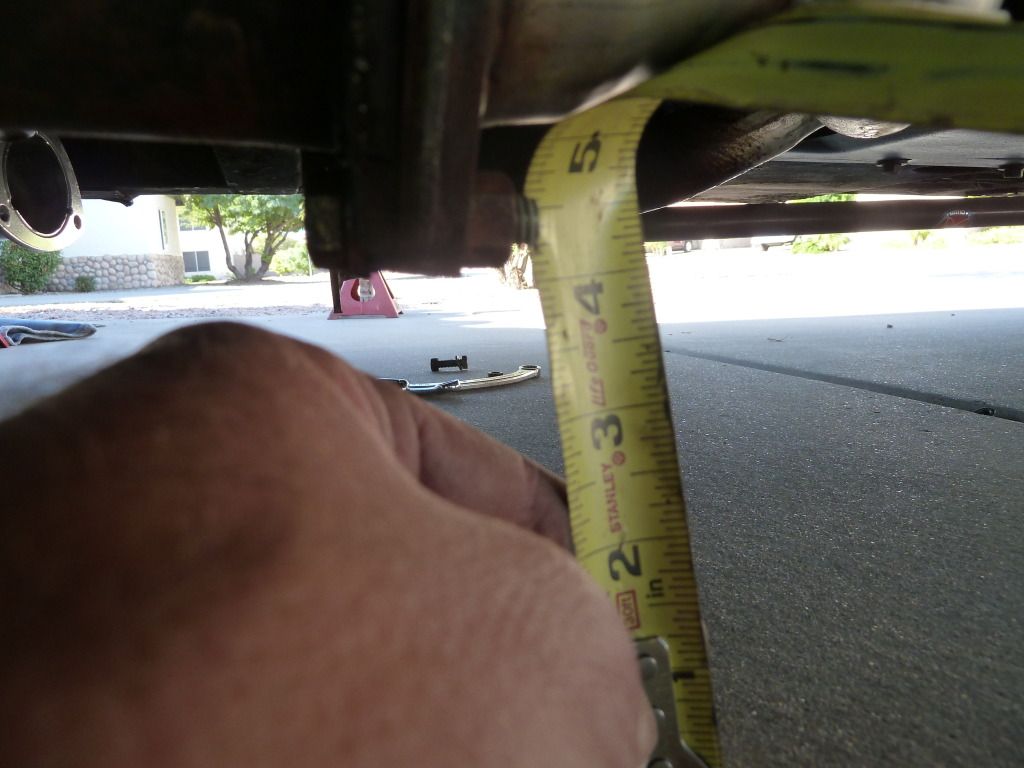
I have to take another pic with the new headers. Individual results will vary depending on tire/springs.
The tubes themselves sit about 5" above the groun with the super comps. No wonder I smacked them!
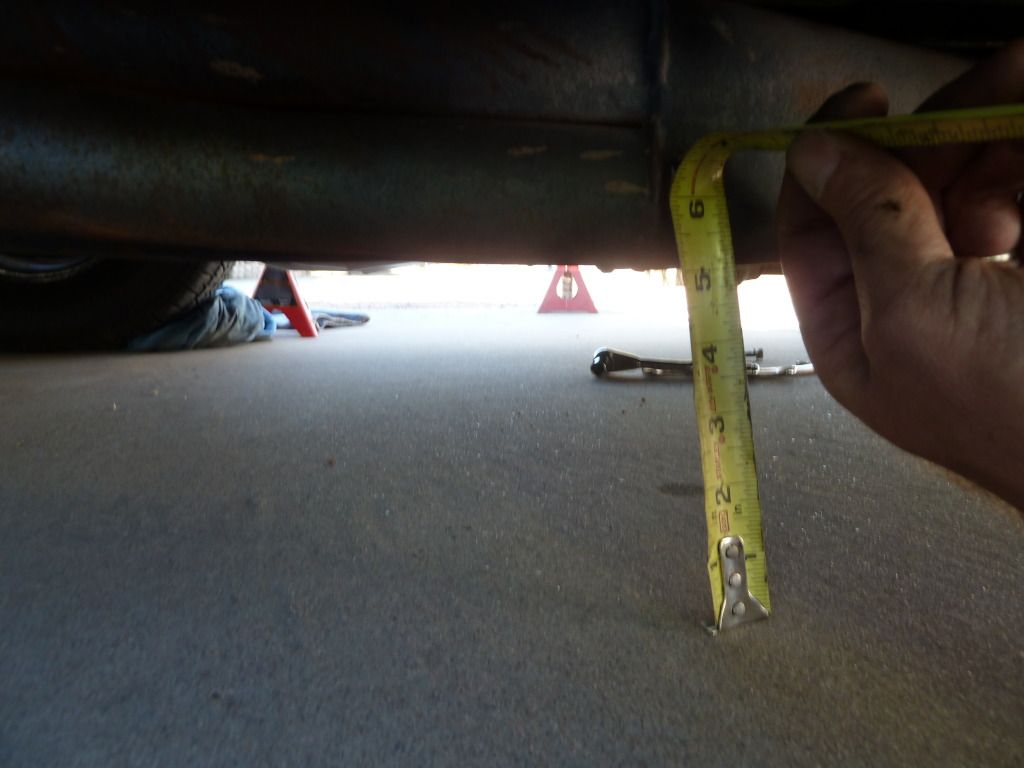
You need a lot more ground clearance for the installation/removal of the super comps than you do for the comps. passenger side is easy but the driver side is a little tricky with the steering stuff in the way. This gives you an idea of how far I jacked it up to get the super comps out. The comps slipped right in no issues.
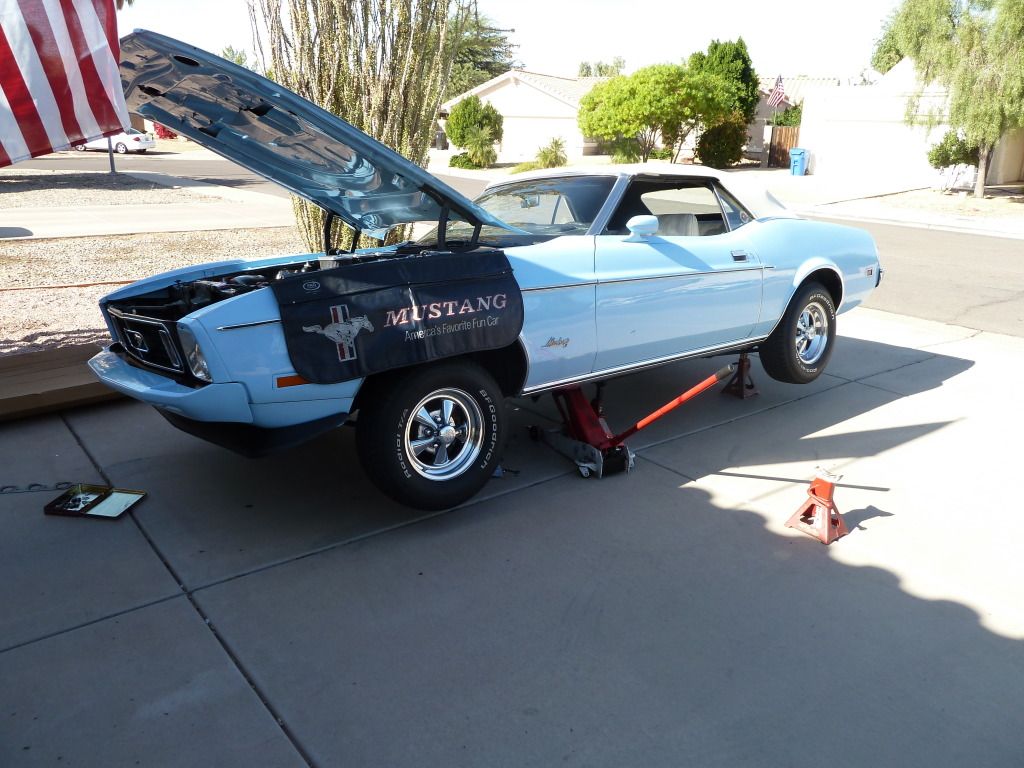
Yep, that's a pair of blue jeans I used to protect the new headers. Worked pretty good.
It seemed like it was leaning more that the picture shows.
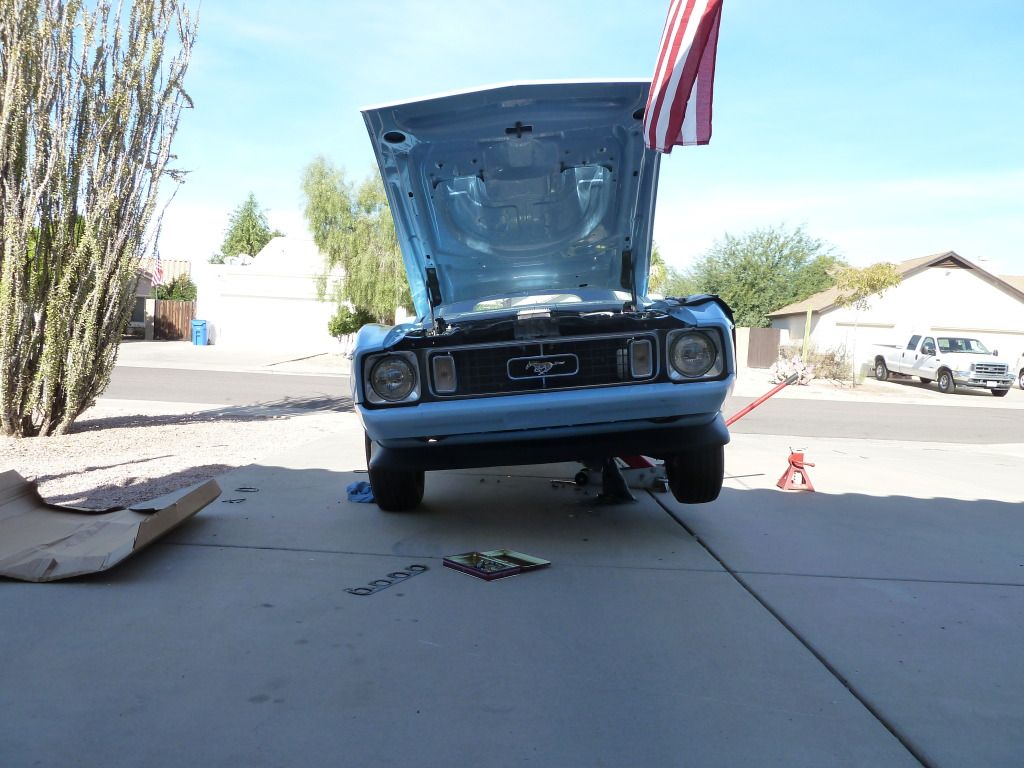
I did learn the trick to jack up the rear axle and get that side off the ground. This puts less strain on the frame jack point. I did it in 'stages'. Rear/body/rear/body/rear/body/rear/body. Same thing letting it down. Took more time but I think it was better overall for my 40 year old car.
Here is the new header installed. Pretty!
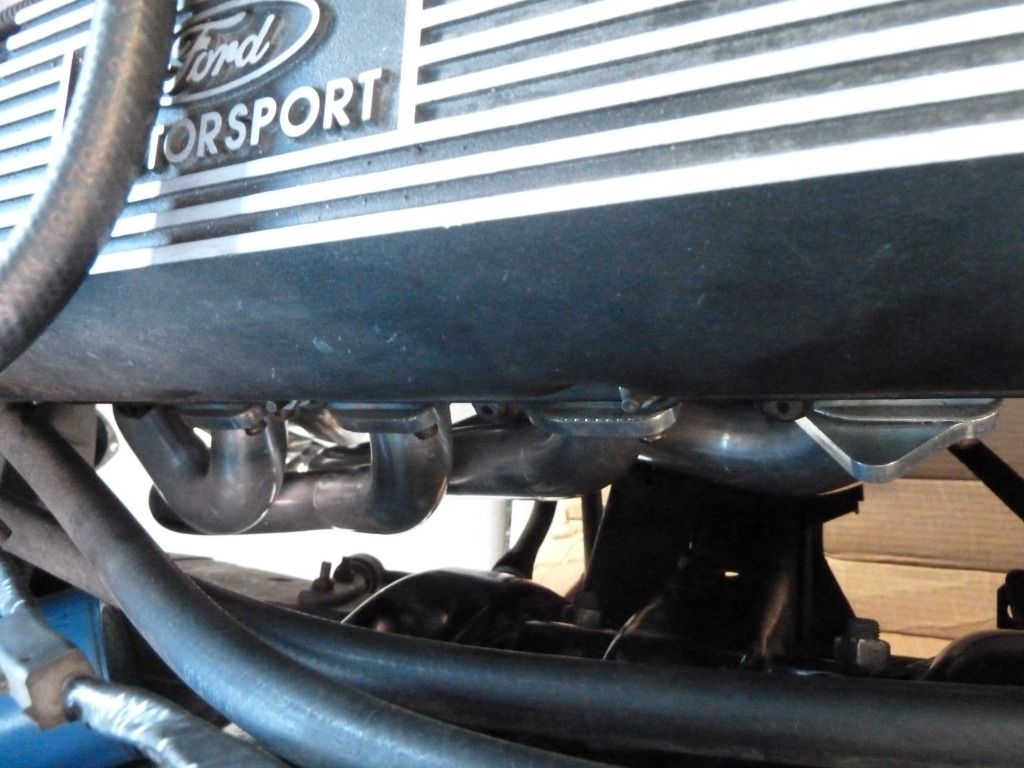
This will be what I think is my 4th header set. My first were a used set that didn't have a common flange, the second were some super comps for 2v that I had modified to clear the c6 (I don't think this was necessary now but it did allow for removing the tranny without disconnecting the headers). The 3rd set were the ebay super comps for 4v. They were a little rough to start with but I was trying to save money. I now finally have a beautiful set of ceramic coated headers. I will do some more measurements on ground clearance tomorrow.
Both the super comp and the comp headers cleared the c6 tranny. The passenger side of the comp headers is close but it makes it. I think removal of the tranny is not an issue with the super comps. It might be necessary to remove at least one side of the headers to get the c6 out. Anyone have experience with this?
I did a write up on the stage 8 header bolts. Well worth the effort:
http://www.7173mustangs.com/thread-stage-8-header-bolts
I know this was long. Thanks for reading it. I hope it helps out at least one other member considering/installing hookers.
Keyword search: 6915 6211
Never buy used headers off of Ebay. The picture looked good but they had been smacked a few times and the fresh coat of paint was good enough to hide in pictures but not in real life. Still, I didn't have the funds to 'do it right' so I slapped them on.
Then a week or so ago I managed to have a stupid moment pulling into a gas station. As I turned left across traffic the bay I had in mind became occupied. I adjusted my course at the last moment but didn't see the curb sticking out. SMACK. I ran over the peninsula and hit the headers HARD. This is no surprise, the 4v super comp headers didn't have much ground clearance. Heck, any speed bump or higher speed dip and it seemed like I would smack them.
The good news is between the headers and the subframe connections I managed to avoid any body damage at all.
Now for some pics:
First the ugly. Here is what a header pipe is NOT supposed to look like:

Here is a shot of the slider bars.. um, I mean sub frame connector. I have a jeep I four wheel with some slider bars, they work great! I never expected the subframe connectors to double up as sliders but, goodness, it saved the floor pans and rockers and such:

Another pic of the header. Horrifying I know...

No damage! Sweet! I had spend a small fortune on some NOS rocker moldings years before they were available aftermarket. Add to that some rocker/fender damage I would have been out a 'not so cool' grand or two.

'The worlds best header to the rescue!'

They were packed great. Really nice job. I have pics but no need to post them.
Let's just jump in and look at the difference between the 4v super comp and the 4v comp

The comp are shorter and not 'tuned'. That means each pipe is not 'exactly' the same length. You will notice they don't take the same path to the collector either.
The tubes are different sizes. 2 inches on the super com, 1 3/4 on the comps.

The super comps really push the outside limits of the port. I had issues getting them to seal and ended up using genuine hooker gaskets. With the smaller pipe size this may not be an issue with the regular comps.

This shot makes it a lot more obvious. You can see the difference between the bolt hole and the primary tube.

Installed you can see the difference in length. The exhaust pipe is hanging down a little but you can see the comps sit a little higher and are quite a bit shorter than the super comps.

Here is a picture from the drivers side. The lowest part of the header cleared the ground by just 4 inches.

I have to take another pic with the new headers. Individual results will vary depending on tire/springs.
The tubes themselves sit about 5" above the groun with the super comps. No wonder I smacked them!

You need a lot more ground clearance for the installation/removal of the super comps than you do for the comps. passenger side is easy but the driver side is a little tricky with the steering stuff in the way. This gives you an idea of how far I jacked it up to get the super comps out. The comps slipped right in no issues.

Yep, that's a pair of blue jeans I used to protect the new headers. Worked pretty good.
It seemed like it was leaning more that the picture shows.

I did learn the trick to jack up the rear axle and get that side off the ground. This puts less strain on the frame jack point. I did it in 'stages'. Rear/body/rear/body/rear/body/rear/body. Same thing letting it down. Took more time but I think it was better overall for my 40 year old car.
Here is the new header installed. Pretty!

This will be what I think is my 4th header set. My first were a used set that didn't have a common flange, the second were some super comps for 2v that I had modified to clear the c6 (I don't think this was necessary now but it did allow for removing the tranny without disconnecting the headers). The 3rd set were the ebay super comps for 4v. They were a little rough to start with but I was trying to save money. I now finally have a beautiful set of ceramic coated headers. I will do some more measurements on ground clearance tomorrow.
Both the super comp and the comp headers cleared the c6 tranny. The passenger side of the comp headers is close but it makes it. I think removal of the tranny is not an issue with the super comps. It might be necessary to remove at least one side of the headers to get the c6 out. Anyone have experience with this?
I did a write up on the stage 8 header bolts. Well worth the effort:
http://www.7173mustangs.com/thread-stage-8-header-bolts
I know this was long. Thanks for reading it. I hope it helps out at least one other member considering/installing hookers.
Keyword search: 6915 6211
Last edited by a moderator:


