Ford obviously knew these cars leaked like seives otherwise why put so many drain holes throughout the car if it wasnt to deal with water infiltration
Last edited by a moderator:


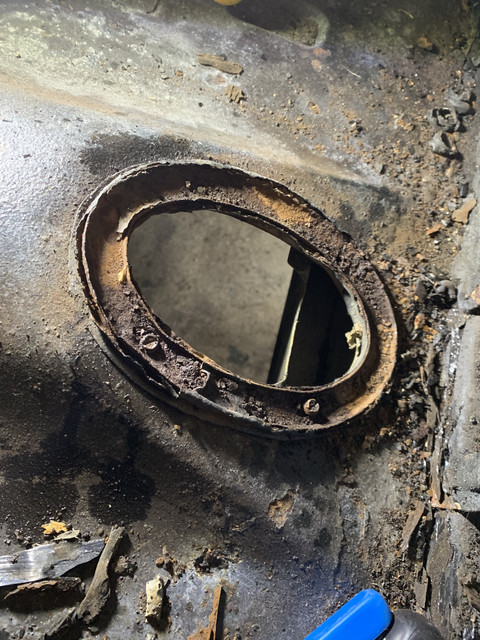
that reminds me of a question that's been bugging me. what do the drain holes on the floor pan do ? they are plugged up with a cover, or screwed in with a metal plate as in the rear of the front seat, is the idea to release the covers when you discover a leak, do they magically open when there is water ingress ? puzzled.....Ford obviously knew these cars leaked like seives otherwise why put so many drain holes throughout the car if it wasnt to deal with water infiltration
Tony, thanks for all the tips, will definitely reach out with questions, good to know someone has been on the road and paved a way forward like you, i don't believe seller lied and think the 2 years in which the car was in probate and parked up is where the bulk of the rust occurred. Plus the fact I've had the car for 9 years and never once lifted the carpet puts the onus on me to have addressed the issues earlier. Some parts of the car are in amazing shape so it is a little inconsistent. I dont think i will need any external panels to be cut and welded although i haven't taken out the windshields/screens to inspect, mind you nothing will surprise me now.I am reading your thread and it is a very similar situation that happened to me. When I bought my car the PO didn't know (or didn't disclose) any rust issues. I believe him. He was an old man and the rust was covered by a very bad restoration body work done 10 years previously. The floors were repaired with fiber glass and that's why they sounded "solid". The rest is history. I have repaired the floors, trunk, cowl and battery apron. I didn't know how to weld before I started all this and tackled the floor by myself. I did one side at a time to help keep the car in shape. Here is my long floor thread for reference: https://www.7173mustangs.com/thread-muscletang-needs-new-floor-pans-advice
In regards to the cowl you can inspect a lot through the vent openings and from the interior with a flexible camera (endoscope. I got a cheap one that I connect to my phone (similar to this, https://www.amazon.com/BlueFire-Android-Endoscope-Phones-Function/dp/B013HZCYXK). Well worth it! Here is my method of cowl repair. By no means it is a rotisserie repair, but I avoided removing the "one million" spot welds. If no one really looks inside the cowl, they will never know how it was done. Here is a link to that thread: https://www.7173mustangs.com/thread-my-method-for-cowl-repair
As you are learning things are going to take 2 to 4 times longer than planned. When I started the floors I thought it was going to be one winter, but it ended up taking me 1 1/2 years. Then came the trunk, the cowl and the battery apron. The more you inspect the more rust you find!! I have replaced pretty much every moving part little by little over the last four years. The last batch is the rear end which I am working on as I speak. This is my build thread for reference: https://www.7173mustangs.com/thread-muscletang-mod-project-thread-1971-m-mach-1
Feel free to ask me any questions. I think you are in the same boat I was in four years ago..... and a few(+++) thousand dollars ago.


Interesting, thanks, I've learnt something new today !The drain holes are part of the manufacturing process. When the body is bucked and completely assembled in bare steel the bodies were dipped in a primer tank to cover the bare metal. As the body rose from the tank this allowed for drainage of the primer from the body back into the tank
Tony, thanks for all the tips, will definitely reach out with questions, good to know someone has been on the road and paved a way forward like you, i don't believe seller lied and think the 2 years in which the car was in probate and parked up is where the bulk of the rust occurred. Plus the fact I've had the car for 9 years and never once lifted the carpet puts the onus on me to have addressed the issues earlier. Some parts of the car are in amazing shape so it is a little inconsistent. I dont think i will need any external panels to be cut and welded although i haven't taken out the windshields/screens to inspect, mind you nothing will surprise me now.I am reading your thread and it is a very similar situation that happened to me. When I bought my car the PO didn't know (or didn't disclose) any rust issues. I believe him. He was an old man and the rust was covered by a very bad restoration body work done 10 years previously. The floors were repaired with fiber glass and that's why they sounded "solid". The rest is history. I have repaired the floors, trunk, cowl and battery apron. I didn't know how to weld before I started all this and tackled the floor by myself. I did one side at a time to help keep the car in shape. Here is my long floor thread for reference: https://www.7173mustangs.com/thread-muscletang-needs-new-floor-pans-advice
In regards to the cowl you can inspect a lot through the vent openings and from the interior with a flexible camera (endoscope. I got a cheap one that I connect to my phone (similar to this, https://www.amazon.com/BlueFire-Android-Endoscope-Phones-Function/dp/B013HZCYXK). Well worth it! Here is my method of cowl repair. By no means it is a rotisserie repair, but I avoided removing the "one million" spot welds. If no one really looks inside the cowl, they will never know how it was done. Here is a link to that thread: https://www.7173mustangs.com/thread-my-method-for-cowl-repair
As you are learning things are going to take 2 to 4 times longer than planned. When I started the floors I thought it was going to be one winter, but it ended up taking me 1 1/2 years. Then came the trunk, the cowl and the battery apron. The more you inspect the more rust you find!! I have replaced pretty much every moving part little by little over the last four years. The last batch is the rear end which I am working on as I speak. This is my build thread for reference: https://www.7173mustangs.com/thread-muscletang-mod-project-thread-1971-m-mach-1
Feel free to ask me any questions. I think you are in the same boat I was in four years ago..... and a few(+++) thousand dollars ago.
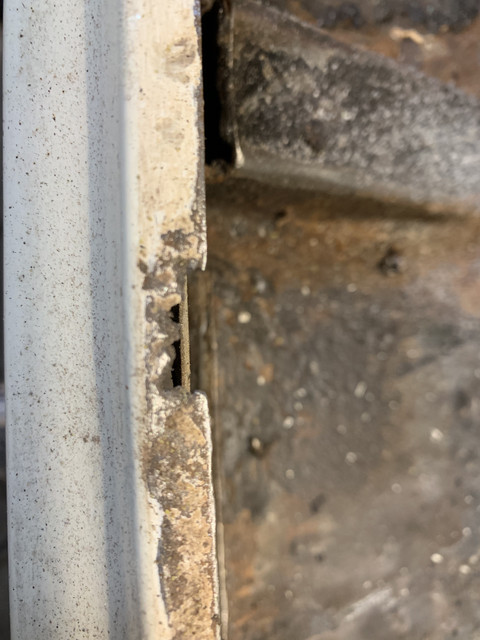
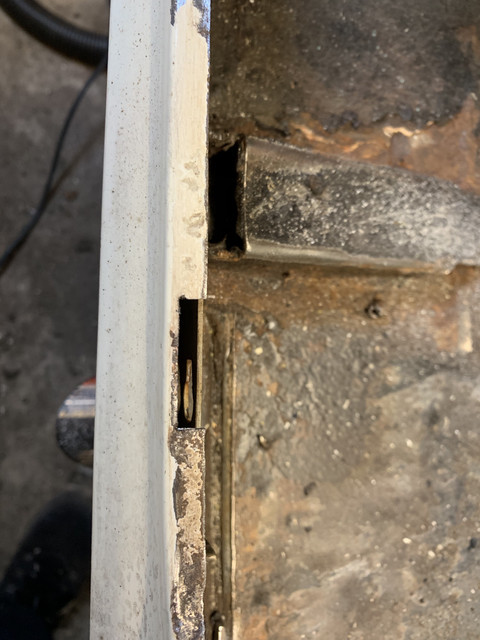
Re cowls, i did exactly that, inspected through the openings and it did look like surface rust which is why i was concerned by the floor pan rust, i like the endoscope idea and will look to buy it.
I will check out your build thread.....
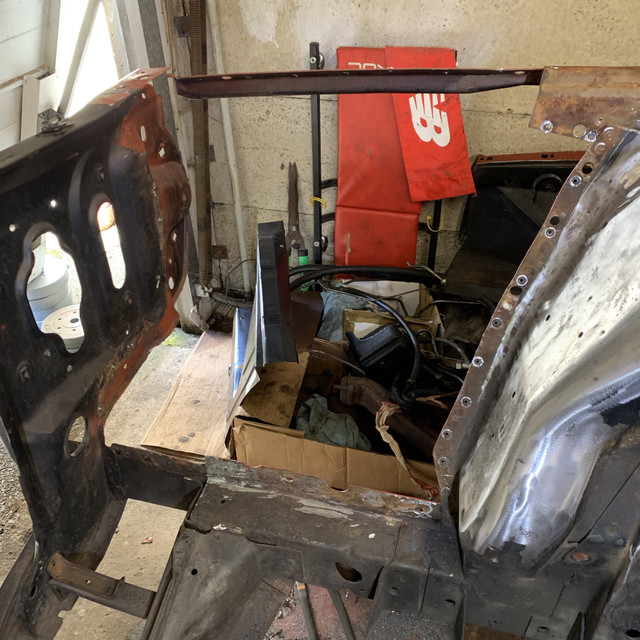
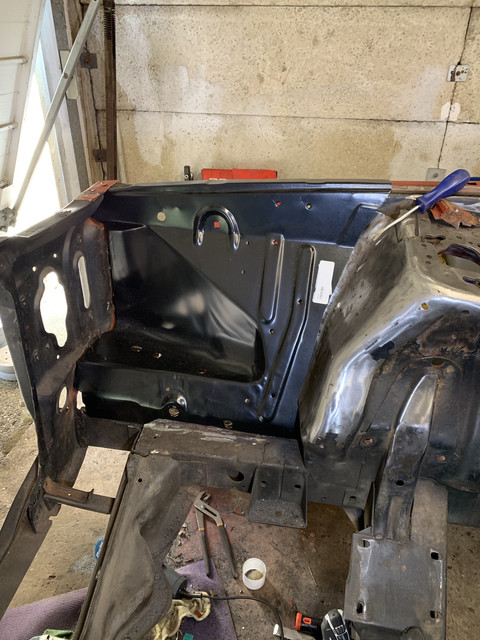

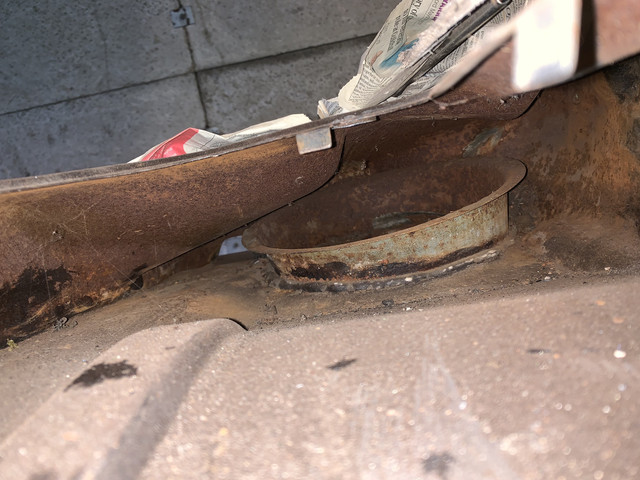
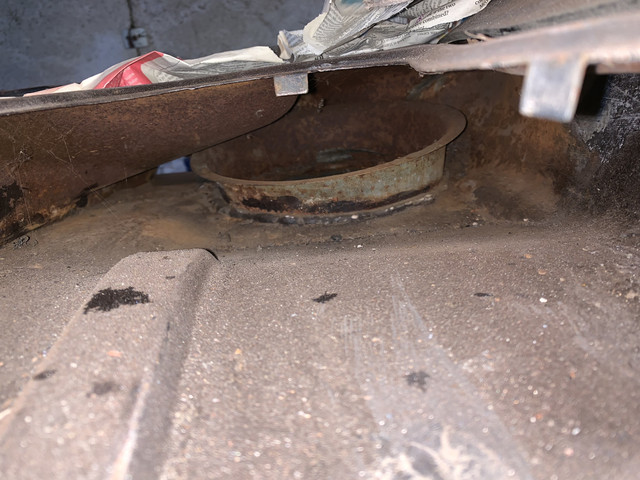
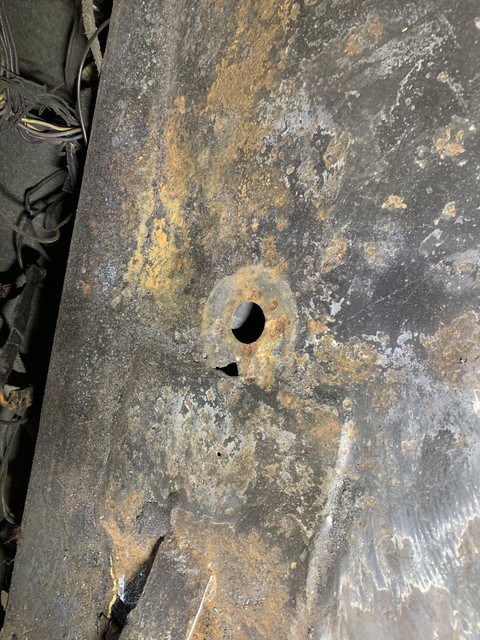
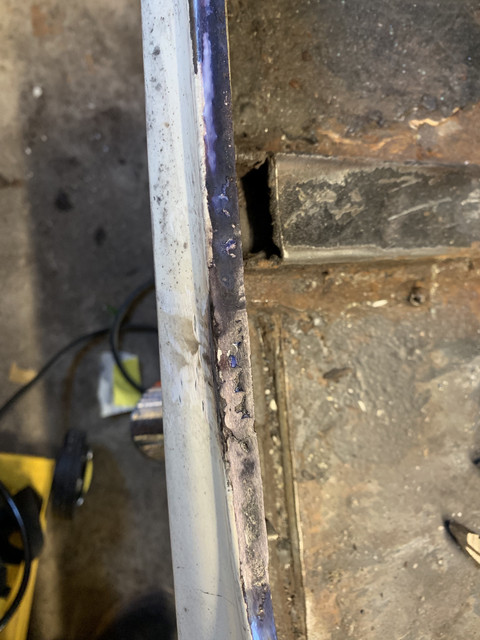
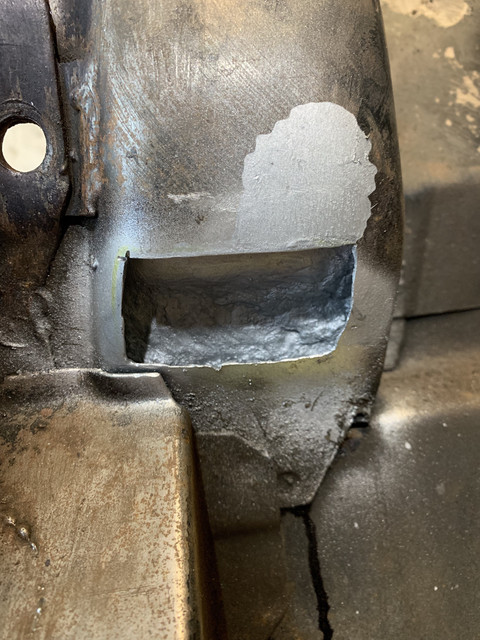
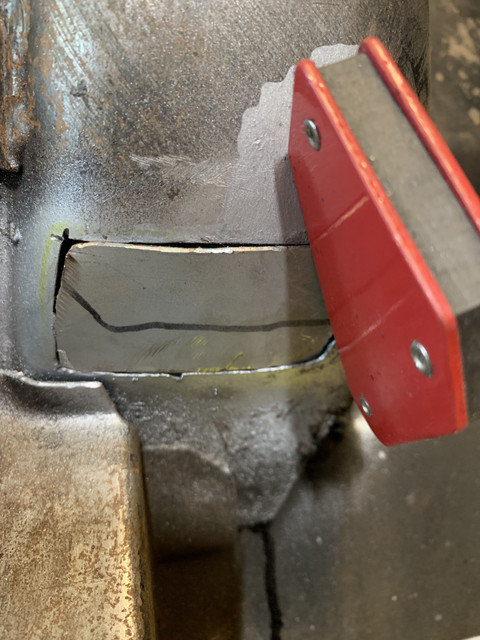
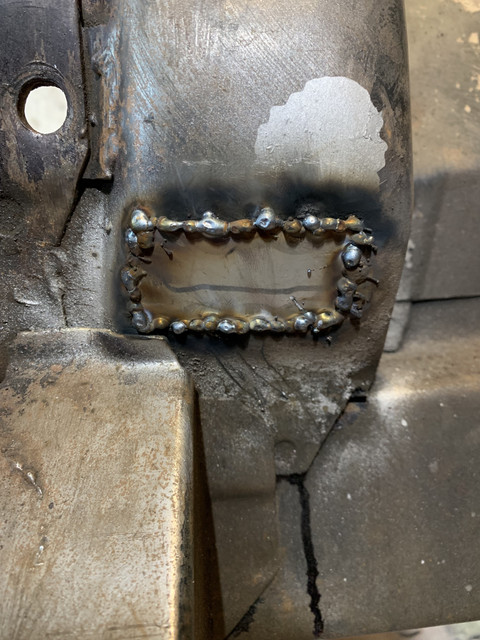
Your picture shows the cowl's hat. The cowl takes the fresh outside air through the vents and then through the hat into the cabin. The hat is there to allow water to drain around it and not into the cabin.initial view of passenger side cowl below : in a previous post i asked whether it was feasible to cut the section above to get access to the cowl and then repair as necessary. difficult to tell if its rusted through. dumb question but what's the purpose of the cowl. its not something i hear mentioned in relation to European cars bit always part of the Mustang discourse....