Your moving in the right direction. When you posted the title "Summer deadline" which summer did you mean?
You are using an out of date browser. It may not display this or other websites correctly.
You should upgrade or use an alternative browser.
You should upgrade or use an alternative browser.
Summer deadline - 72 Mach 1 Build thread
- Thread starter baz70
- Start date


Help Support 7173Mustangs.com:
This site may earn a commission from merchant affiliate
links, including eBay, Amazon, and others.
baz70
Well-known member
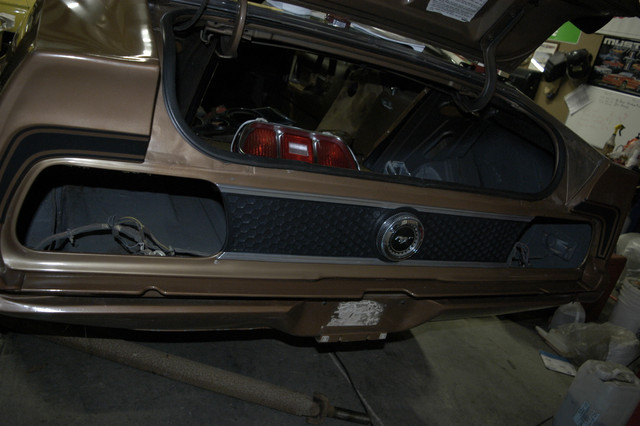
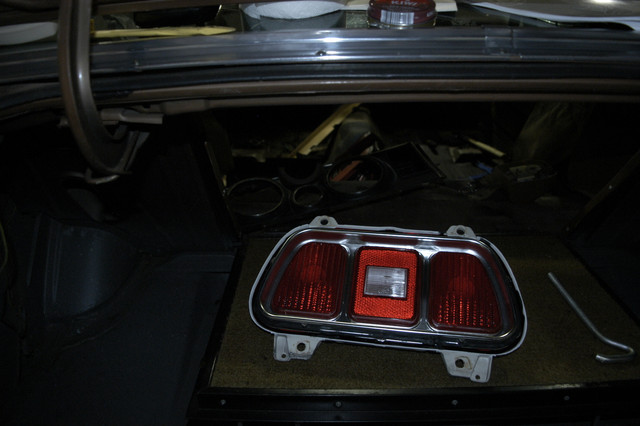
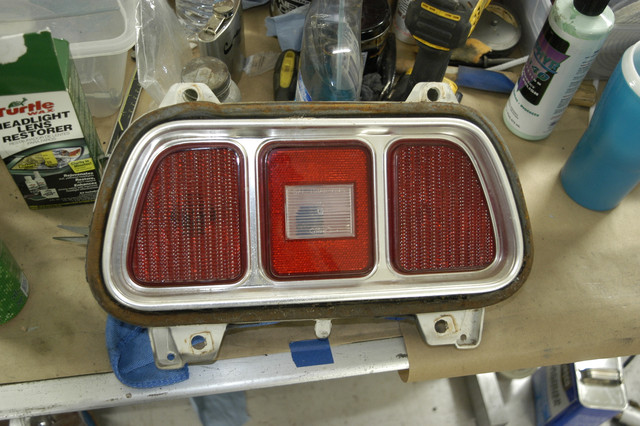
hi David, thanks for the insight, other than 4 small sections i think the trunk floor is solid. I've stood on itI just removed my tail lights and cleaned the trunk of my 73 Mach 1. When the guys at the factory sprayed paint in the trunk they got very little if any where the tail lights went. The flange with the studs that hold the tail lights in was in the way of spraying the paint. I used a brush and put POR Paint Over Rust around where it seals.
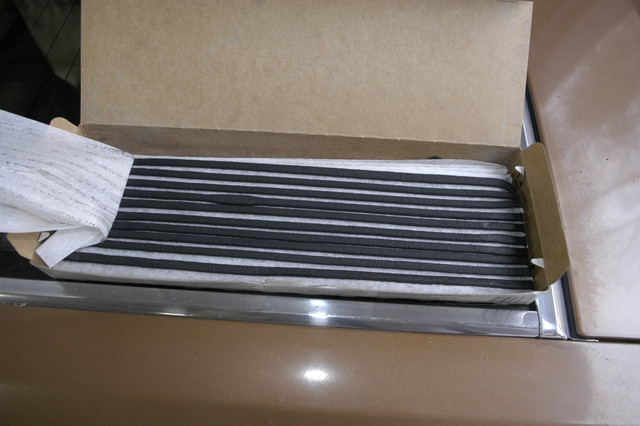
Daniel Carpenter makes a much better seal that the Ford original. I have a couple sets of NOS Ford gaskets but ordered the DC from National Parts Depot. It is molded from better material and more dense.
Like someone else stated I use the 3-M strip caulk on the roof rails and also around the tail lights. I do not wash my Mustangs with a hose or pressure washer and try to stay out of rain. Every time you do wash you feed the rust inside the quarters, cowl, tail lights and all the places with no primer or paint.
The trunk floor is one of the most important parts of your car structure. I think you should think about replacing it. I have seen the leaf springs actually come through the floor at the rear mounts due to rust damage. I believe you will find that replacing the whole front floor pan will be much faster and easier than putting the patches in. They never match in form and very difficult to get a good butt weld. Most people overlap and end up with lots of sealer to close them them.
I have seen my friend put floor pan in from firewall to tail lights in two days. They were not patches.
Any project on a Mustang tends to snowball out of control because you keep finding more issues. You being far from the supply of parts makes it tough and expensive also.

") I am going with my gut on this and repairing, replacing is for another day. Butt welds can be made invisible with the right amount of time and effort. I want to keep as much of the car as original as i can, that's just the way i am i guess
I am going with my gut on this and repairing, replacing is for another day. Butt welds can be made invisible with the right amount of time and effort. I want to keep as much of the car as original as i can, that's just the way i am i guess re floor pans, I've already ordered 2 pans left and right and will "enjoy" the process of putting them in (Waiting for CJPP to get the parts in stock that they said they had in stock before they ship everything to me) will butt weld them in and use cleco fasteners to hold them in before cutting out section by section to get a perfect alignment. That's a few weeks away, first need to get all rust eliminated and declare victory before attacking floor pans and cowls.
baz70
Well-known member
Aussie summer innit, that'll give me a few more months to get it all sortedYour moving in the right direction. When you posted the title "Summer deadline" which summer did you mean?
baz70
Well-known member
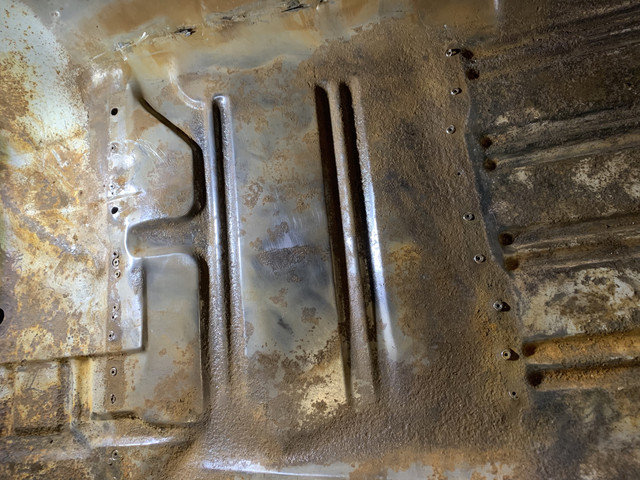
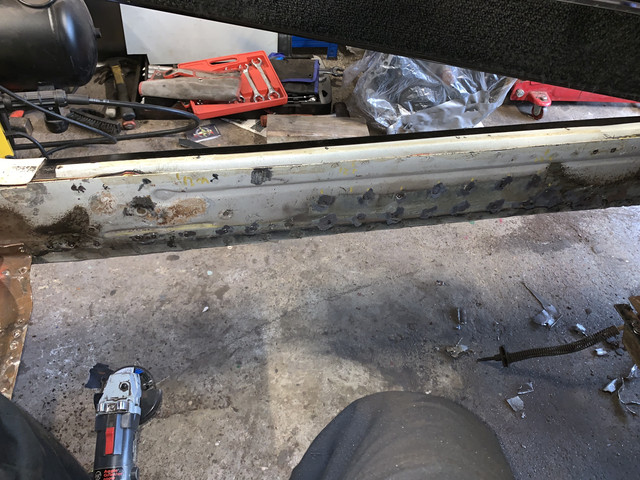
so this weekend i continued diassembling and repairing rust.
Ground down welds on shock tower patch, looking good with filler will not be noticeable.

Removed rear windscreen/shield so i could get to the rusty surrounding areas, thankfully only looks like surface rust. (thanks for Remington on Youtube for the video that shows you how to make it look easy, what happened to his resto, anyone know?)
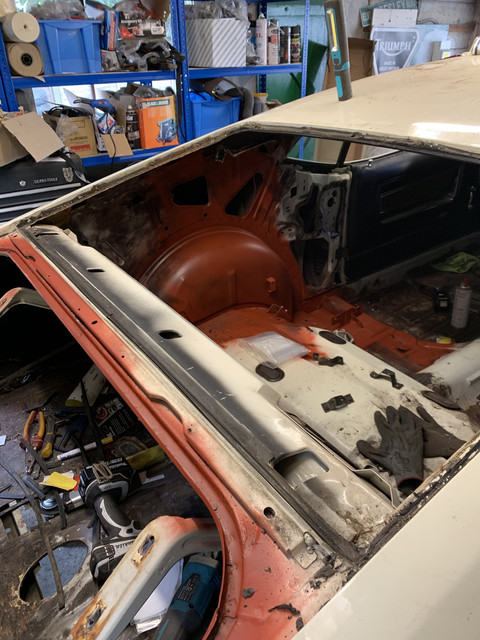
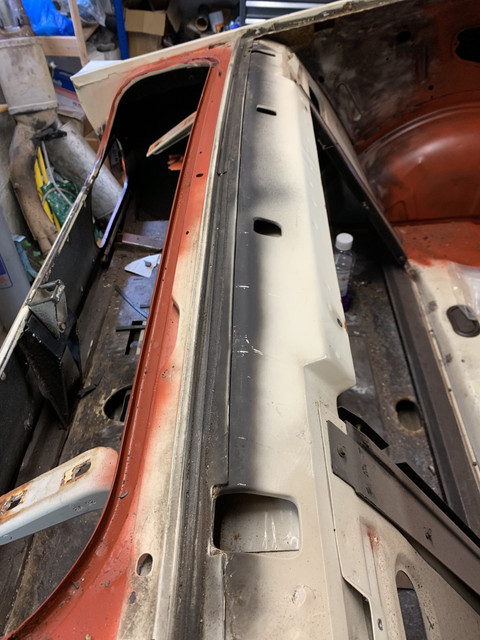
Removed rear suspension parts, shocks etc. anyone know how to remove the handbrake cable ? do it from the rear drums end ? couldn't see how to easily disconnect it..... then Diff comes off and can put away for later refurb.
next steps, continue to clear out the rust in rear sections, trunk and underbody, whilst waiting for floorpans which i plan to do over the long Easter weekend.
Ground down welds on shock tower patch, looking good with filler will not be noticeable.
Removed rear windscreen/shield so i could get to the rusty surrounding areas, thankfully only looks like surface rust. (thanks for Remington on Youtube for the video that shows you how to make it look easy, what happened to his resto, anyone know?)
Removed rear suspension parts, shocks etc. anyone know how to remove the handbrake cable ? do it from the rear drums end ? couldn't see how to easily disconnect it..... then Diff comes off and can put away for later refurb.
next steps, continue to clear out the rust in rear sections, trunk and underbody, whilst waiting for floorpans which i plan to do over the long Easter weekend.
Last edited by a moderator:
baz70
Well-known member
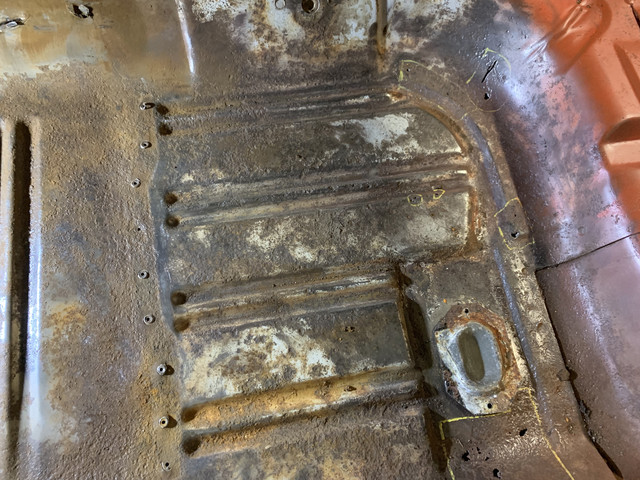
I made use of the longer daylight hours this evening to do some work. i plan to do an extra couple of hours every evening till the rust is gone. then starts the real restoration.
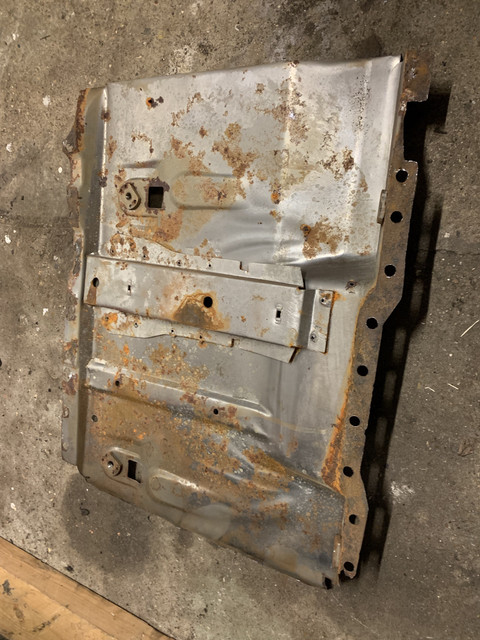
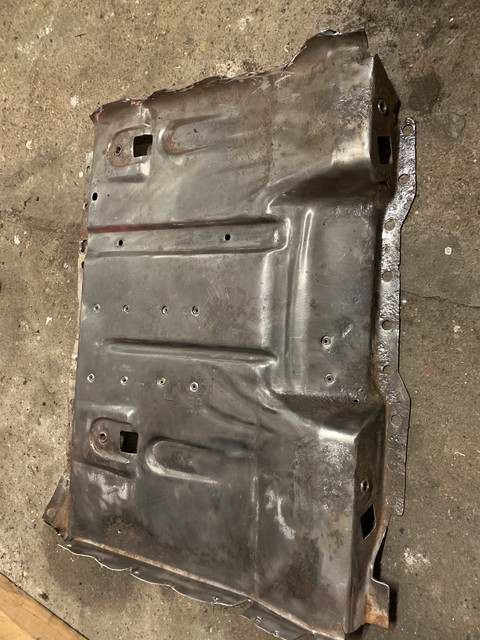
Removed driver side seat platform, this is salvageable, needs a couple of welds, one to a pinhole and another to a structural tear in one corner. I unnecessarily drilled out spot welds on top but these were not connecting platform to floor, will clean and fill in welds later.
So my floor pans are still on back order, CJPP say they will go out this week.
So, what do you folks think, (I'm still asking hehe) should i patch weld or replace complete floor pans on each side ? It's difficult to gauge the thickness of floor where the floor is pitted and no holes are present..... any techniques ?
Meantime I've applied some rust treatment and will check out tomorrow night on what the effect has been.
- Joined
- Nov 15, 2016
- Messages
- 652
- Reaction score
- 15
- Location
- Australia
- My Car
- 1972 Mustang Coupe 302 Auto RHD
One technique is to plunge a screwdriver into it, a bit old school and if you lose your screwdriver you definitely need to replace it!


$39.99
Lucky Ride Ford Hoodie Legend Lives Mustang Pony (Pocket) Full Zip Sweatshirt, Red, Medium
Giftware Shop Usa


$24.95
Ford Mustang Pony Racing Stripe 5.0 Muscle Shelby Long Sleeve T-Shirt Front Back Print-Black-Large
Giftware Shop Usa

$59.98
JH DESIGN GROUP Men's Mustang Logo Hoodie Full Zip Up Black Hooded Sweatshirt (X-Large, Black)
Affordable Family Clothing


$13.75
$16.39
Ford Mustang: Trivia & Fun Facts Every Fan Should Know About The Great American Icon!
Amazon.com

$99.99
Polished Rocker Panel Sill Plate Molding Kit with Clips Compatible with 1964-1966 Ford Mustang - Authentic Restoration for Classic Car Enthusiasts
Classic 2 Current Fabrication

$9.00
2016 Hot Wheels Vintage American Muscle 1970 FORD MUSTANG MACH 1 die-cast 4/10
Cards and Bobbles

$37.69
$55.00
The Complete Book of Ford Mustang: Every Model Since 1964-1/2 (Complete Book Series)
Amazon.com


$18.99
$19.89
Checkered Flag Men's Ford Mustang Cap Tri-Bar Pony Logo Adjustable Black Hat
BS STORE LLC


$64.98
JH DESIGN GROUP Men's Ford Mustang Collage Black Zip Up Hoodie Sweatshirt (Large, CLG2-black)
Affordable Family Clothing


$29.70
Ford Mustang, Mach 1, GT, Shelby, & Boss V-8 (64-73) Haynes Repair Manual
Haynes Repair Manuals
+1 and don't be gentle! It will give you a good idea on where the soft metal is. ::thumb::One technique is to plunge a screwdriver into it, a bit old school and if you lose your screwdriver you definitely need to replace it!
Run a wire wheel across the floor. That will remove your rust and should show up any holes that are there. If you have access to ramp or jacks i would advise looking at the floor from under the car. Its far easier to see any holes as your in a darker space under the car and if there are holes you will see daylight coming from a brighter space
baz70
Well-known member
thanks all, as a viewer of Car SOS over here the screwdriver test was my first port of call. I think I'm a little calmer, the flex in the floor was due to the removed seat platform not giving the floor its usual rigidity, i would say its down around 10% in strength due to rust but with the right patches and seat platform it can be strengthened again.Run a wire wheel across the floor. That will remove your rust and should show up any holes that are there. If you have access to ramp or jacks i would advise looking at the floor from under the car. Its far easier to see any holes as your in a darker space under the car and if there are holes you will see daylight coming from a brighter space
Last edited by a moderator:
baz70
Well-known member
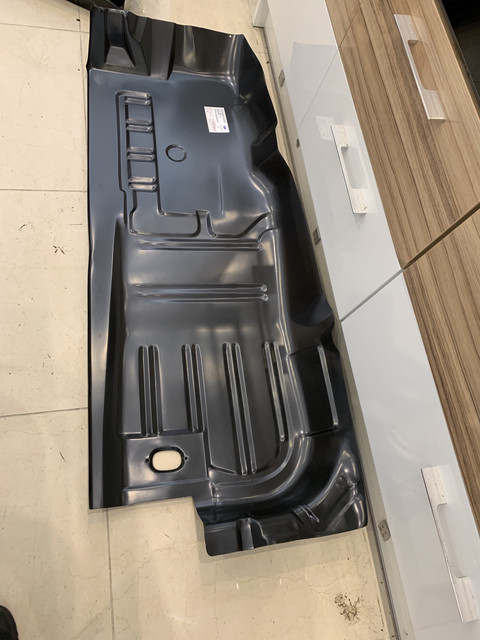
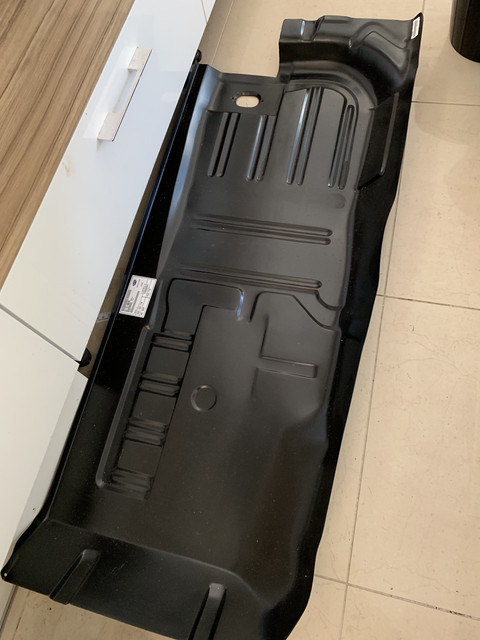
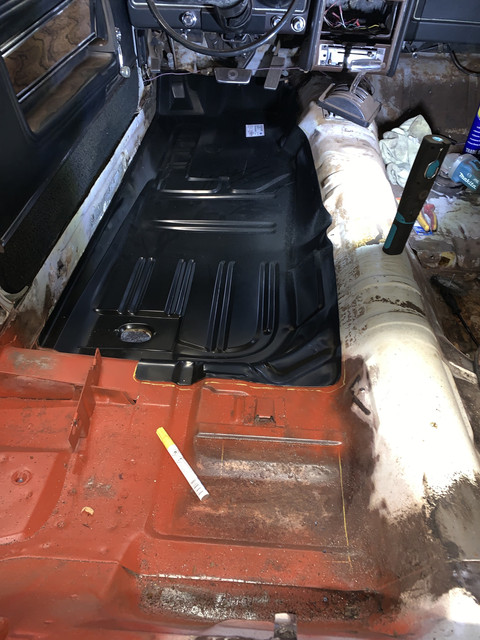
Well the the floorpans have arrived and look to be in good nick, thanks CJPP (only took a few weeks!). I am goooooing to..... (drum roll) replace the floorpans. I don't really want to, it's lot of work....but now that i have them it will provide a more certain rust free floor than patching up existing floor. I'm preserving seat platforms and trunk floor as a compromise to keep some original sheet metal. I hope the torque boxes (what are they for anyway?) are clean....
Cant beat fresh metal They will look great when fitted Be good to see them installed. Keep us updated
They will look great when fitted Be good to see them installed. Keep us updatedbaz70
Well-known member
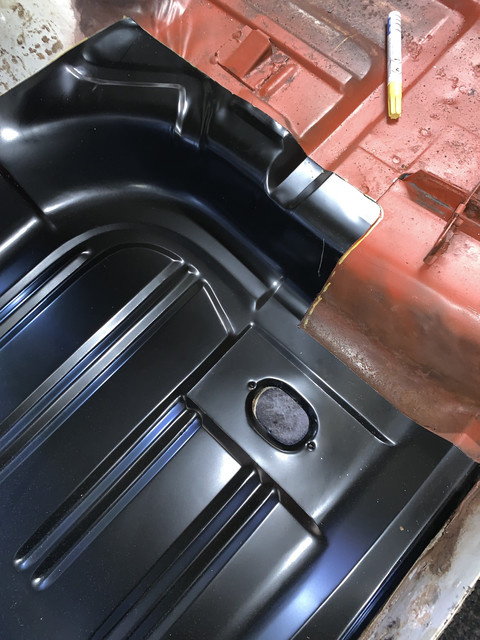
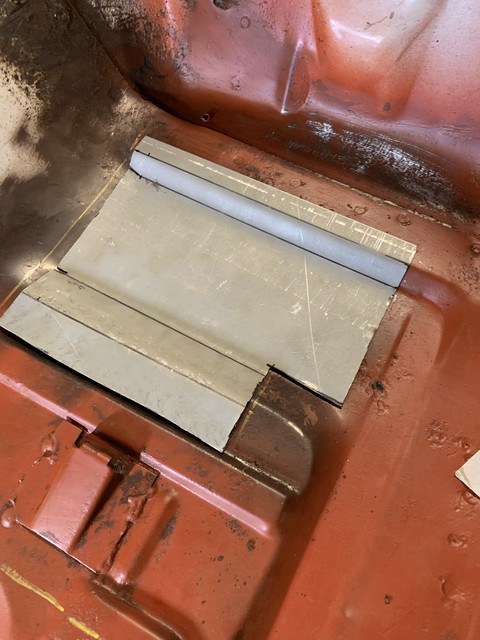
trial fitting it to make some markers, will clean surround metal on original floorpan and mark up some measurements. Cutting comes much later, might get some clico pins to help. Looks like a good fit, some overhanging will need to be trimmed back.

- Joined
- Aug 14, 2014
- Messages
- 4,589
- Reaction score
- 1,630
- Location
- Madison, WI
- My Car
- 1971 Mach 1 w/408C stroker
This brings me back memories. It took me a lot of long work but it was all worth it. I learned a lot and don't regret any of it. Some people here says it is easy. I say it is hard but doable if this is your first sheetmetal work. Keep the good work and take a look at my floor thread that has a diary of all i went through. I hope it serves as a guide and saves you time. Good luck!
Sent from my SAMSUNG-SM-G930A using Tapatalk
Sent from my SAMSUNG-SM-G930A using Tapatalk
baz70
Well-known member
Will do thanks, i plan to have both in by end of easter weekend so will be checking over lots of threads to learn from them. the most scariest bit is going to be cutting out old floor and making sure new one aligns - welding is easy.This brings me back memories. It took me a lot of long work but it was all worth it. I learned a lot and don't regret any of it. Some people here says it is easy. I say it is hard but doable if this is your first sheetmetal work. Keep the good work and take a look at my floor thread that has a diary of all i went through. I hope it serves as a guide and saves you time. Good luck!
Sent from my SAMSUNG-SM-G930A using Tapatalk
This time next week will be 20 degrees so better working conditions for you. You wouldnt have purchased the floor pans if you didnt have the confidence. I am sure you will do a excellent job with due diligence. Spring finally coming so it should step up the work rate for most of us all. Hope you hit your target for your summer deadline. There will be plenty of winters to work on improving what you dont get around to doing this springWill do thanks, i plan to have both in by end of easter weekend so will be checking over lots of threads to learn from them. the most scariest bit is going to be cutting out old floor and making sure new one aligns - welding is easy.This brings me back memories. It took me a lot of long work but it was all worth it. I learned a lot and don't regret any of it. Some people here says it is easy. I say it is hard but doable if this is your first sheetmetal work. Keep the good work and take a look at my floor thread that has a diary of all i went through. I hope it serves as a guide and saves you time. Good luck!
Sent from my SAMSUNG-SM-G930A using Tapatalk
baz70
Well-known member
thanks Steve, I hope so, I've been checking the weather frequently so looking forward to some warmer days....I really want to get the car to paint this summer. talking of which, if you know a good place you would recommend let me know. Maybe a little premature, let me get this finished first !This time next week will be 20 degrees so better working conditions for you. You wouldnt have purchased the floor pans if you didnt have the confidence. I am sure you will do a excellent job with due diligence. Spring finally coming so it should step up the work rate for most of us all. Hope you hit your target for your summer deadline. There will be plenty of winters to work on improving what you dont get around to doing this springWill do thanks, i plan to have both in by end of easter weekend so will be checking over lots of threads to learn from them. the most scariest bit is going to be cutting out old floor and making sure new one aligns - welding is easy.This brings me back memories. It took me a lot of long work but it was all worth it. I learned a lot and don't regret any of it. Some people here says it is easy. I say it is hard but doable if this is your first sheetmetal work. Keep the good work and take a look at my floor thread that has a diary of all i went through. I hope it serves as a guide and saves you time. Good luck!
Sent from my SAMSUNG-SM-G930A using Tapatalk
I had 4 differant companies quote me £10k for bare metal respray. Then i chanced across a sprayer in his 60's that asked all the right questions about lines and finishes. He has quoted me £3,5000, I asked around and he is supposed to be one of the best locally. Always good to plan ahead in the UK as specialist are few and far between when it comes to classic American cars. I will keep you updated on how my spray job goesthanks Steve, I hope so, I've been checking the weather frequently so looking forward to some warmer days....I really want to get the car to paint this summer. talking of which, if you know a good place you would recommend let me know. Maybe a little premature, let me get this finished first !This time next week will be 20 degrees so better working conditions for you. You wouldnt have purchased the floor pans if you didnt have the confidence. I am sure you will do a excellent job with due diligence. Spring finally coming so it should step up the work rate for most of us all. Hope you hit your target for your summer deadline. There will be plenty of winters to work on improving what you dont get around to doing this springWill do thanks, i plan to have both in by end of easter weekend so will be checking over lots of threads to learn from them. the most scariest bit is going to be cutting out old floor and making sure new one aligns - welding is easy.
baz70
Well-known member
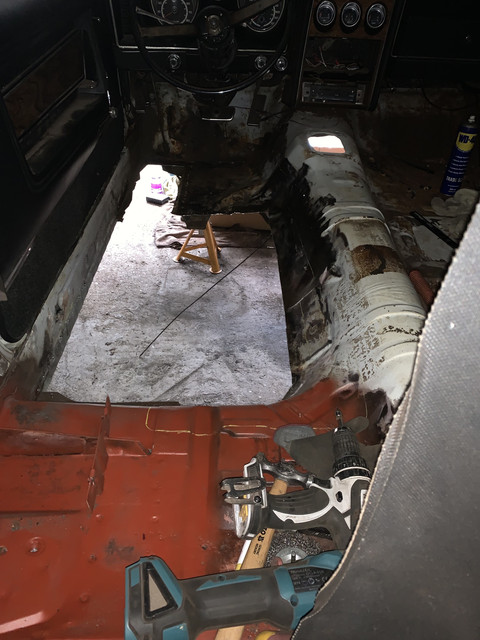
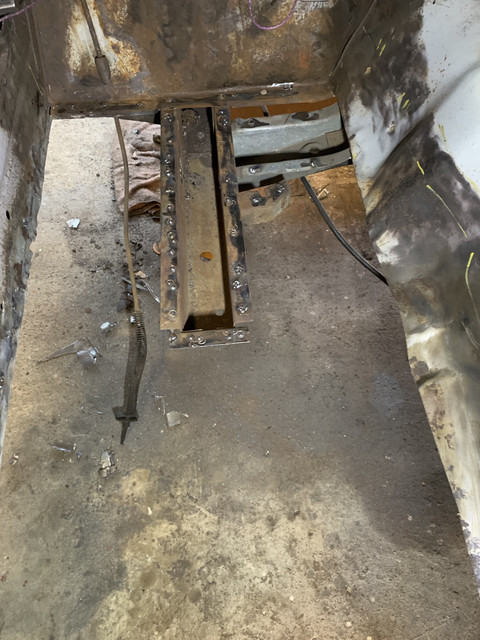
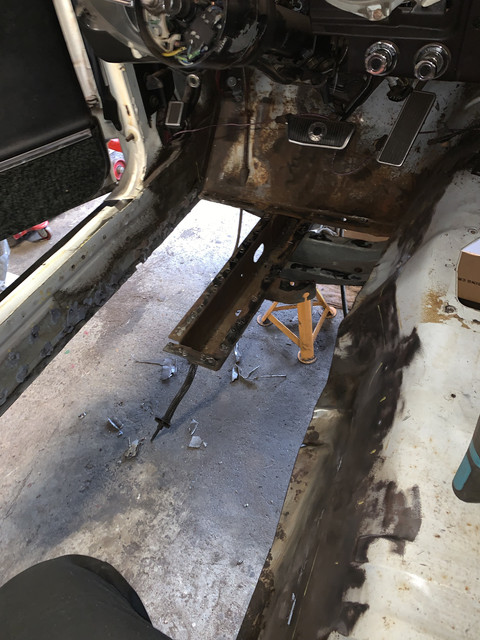
I cut out most of the drivers side floor pan and took measurements to determine floor height and location of key points, given there is supporting frame rail this makes it easier to sit the new pan. Tomorrow I hope to have the spot welds all out. I did try and take off steering wheel to make the welding easier but naively thought i wouldnt need the puller, so another job for me to do. My cut alignment to where i butt weld is going to be a bit up and down as i want to avoid cutting seat belt mounting point etc.... slow but steady progress.
baz70
Well-known member
cool, will follow your progress and hopefully if you go ahead he will do a sterling job.I had 4 differant companies quote me £10k for bare metal respray. Then i chanced across a sprayer in his 60's that asked all the right questions about lines and finishes. He has quoted me £3,5000, I asked around and he is supposed to be one of the best locally. Always good to plan ahead in the UK as specialist are few and far between when it comes to classic American cars. I will keep you updated on how my spray job goesthanks Steve, I hope so, I've been checking the weather frequently so looking forward to some warmer days....I really want to get the car to paint this summer. talking of which, if you know a good place you would recommend let me know. Maybe a little premature, let me get this finished first !This time next week will be 20 degrees so better working conditions for you. You wouldnt have purchased the floor pans if you didnt have the confidence. I am sure you will do a excellent job with due diligence. Spring finally coming so it should step up the work rate for most of us all. Hope you hit your target for your summer deadline. There will be plenty of winters to work on improving what you dont get around to doing this spring
When i get to mine, i will have done all the prep work and stripped back to bare metal and epoxy primer the body and leave as shell with everything removed, and then let painter do all finishing and final prep before painting.
baz70
Well-known member
not as much progress as I'd liked by this stage of the weekend, sister called in a favour to do the kitchen flooring.....
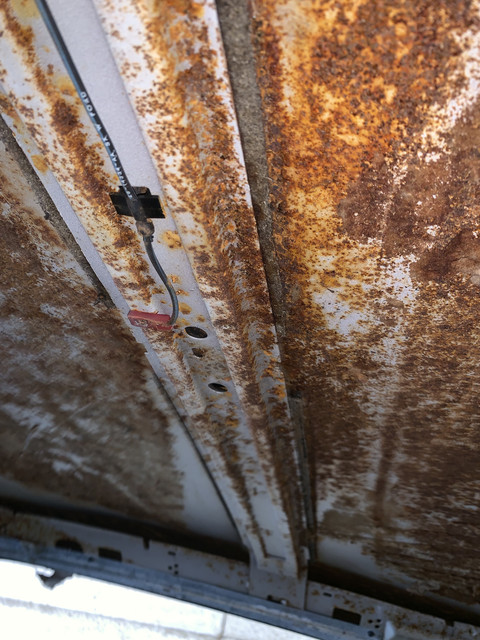
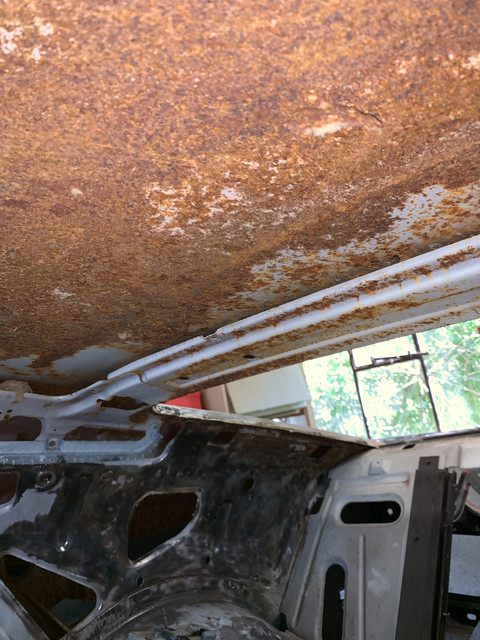
headliner and surrounding fitments came off revealing tons of surface rust (screwdriver didnt poke through) to deal with. This needs to come before i fit the replacement floorpans.

Meantime, as the weather has been great i painted some panels on the fold down seat (no pics)
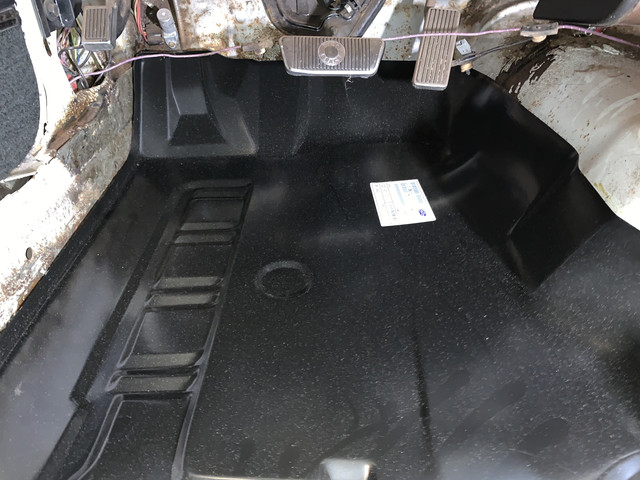
Cleaned surrounding welds on the driver side floor pan by the footwell, sills and frame rails, ready for new panel installation. Next steps, weld through primer, spot weld drill holes and cutting the tunnel section so alignment is perfect.
Managed to end the day with my first panel fabrication using a metal bending tool. Some fettling still to do to get it 100% but I was impressed with initial fit given that was 20 minutes effort.
Still tons to do but I'm moving forward, once i get roof rust-remedied can then work on interior proper. One other thing, i came to the realisation that as 80% of the car is out of the car, I'll remove all the rest till I'm just left with the bodyshell and then refit everything. Will take longer but will avoid me thinking what I missed off and having to disassemble again....
headliner and surrounding fitments came off revealing tons of surface rust (screwdriver didnt poke through) to deal with. This needs to come before i fit the replacement floorpans.
Meantime, as the weather has been great i painted some panels on the fold down seat (no pics)
Cleaned surrounding welds on the driver side floor pan by the footwell, sills and frame rails, ready for new panel installation. Next steps, weld through primer, spot weld drill holes and cutting the tunnel section so alignment is perfect.
Managed to end the day with my first panel fabrication using a metal bending tool. Some fettling still to do to get it 100% but I was impressed with initial fit given that was 20 minutes effort.
Still tons to do but I'm moving forward, once i get roof rust-remedied can then work on interior proper. One other thing, i came to the realisation that as 80% of the car is out of the car, I'll remove all the rest till I'm just left with the bodyshell and then refit everything. Will take longer but will avoid me thinking what I missed off and having to disassemble again....
Similar threads
- Replies
- 32
- Views
- 2K
- Replies
- 22
- Views
- 765
- Replies
- 16
- Views
- 765
- Replies
- 11
- Views
- 617
Latest posts
-

-
 1973 Convertible Project: Coupe Parts Swap Begins
- Latest: Steve McMahan
-

-
 Anyone ever find a drag coefficient for our cars?
- Latest: Hemikiller
-

-