Vibration

7173Mustangs.com

Help Support 7173Mustangs.com:

This site may earn a commission from merchant affiliate links, including eBay, Amazon, and others.
Is that the only rod that's ground? Sometimes engine builders grind those pads to balance the rods making their weight equal. The valve spring will make the engine miss which can seem like a vibration. It looks like at least removing the heads will be required. Since it's out I'd probably pull it down and inspect the parts.

 
I think the question is, how do you much fun do you have removing, installing, removing, installing your engine?

I don't know what you are trying to point out with the rod photo. I can post photo's of my rods and how they were ground for balancing purposes...I guess.

Is the diagnosis on the valve spring that is broke because it was bad, or over worked, or over played?

There are so many things to look at still...cylinder bore size, crank journals, etc.

Difficult not being there...

 
Time for a minor update...

I was close so I pulled the motor to replace the oil pan gasket and clean the motor and motor bay.

I pulled the pan and this is what I saw..

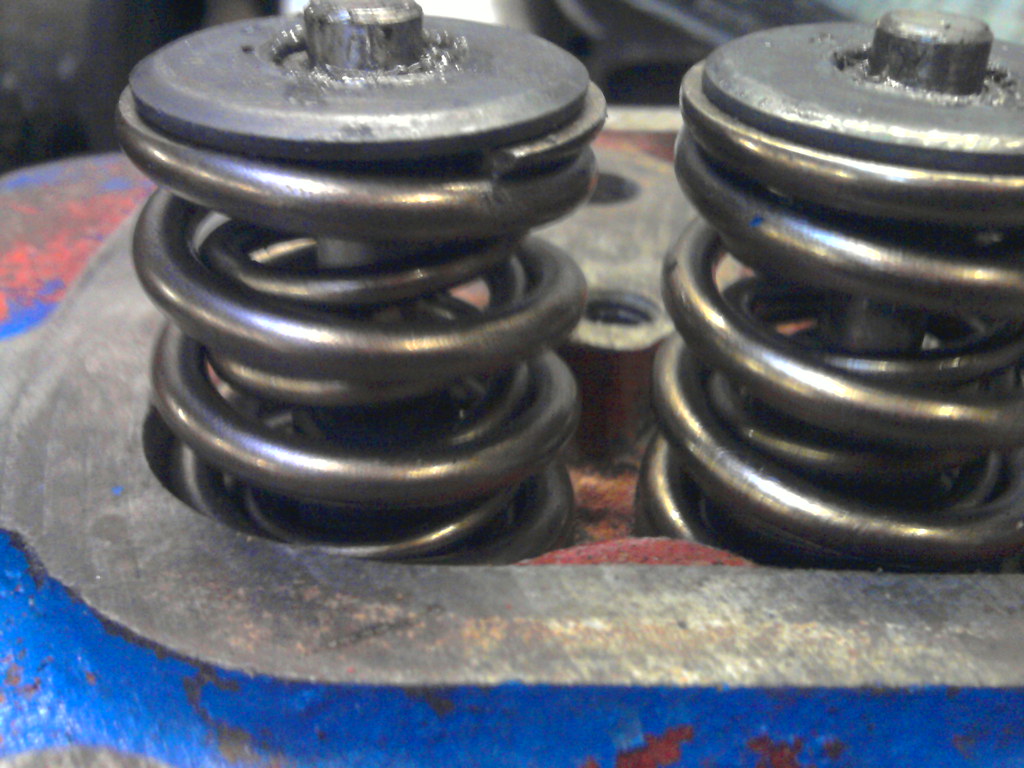
I then rolled the motor over to do the valve gaskets and I found this.

So I wonder which of the three is my vibration?

The flywheel, bad valve spring or the (possibly) out of balance rods.

Seriously thinking about tearing the whole thing down and starting over.

Jeff
Have any idea about what you cam lift is? That's an unusual breakage.

I would definetly check the valve travel. Great catch though!

 
As Mark suggested I would check for coil bind before going further. http://www.lunatipower.com/Tech/Valvetrain/ValveSpringTech.aspx

My opinion is the vibration is caused by the broken valve spring. The rod cap appears to have been ground on for balancing purposes. The 7 center punch marks should mean that rod is in the number 7 bore. The valve spring can be changed without pulling the head using compressed air to pressurize the cylinder, with the piston at TDC, and a valve spring compressor tool. The procedure is in most repair manuals as well as the Ford manual, Volume 2, section 21-21-14. Chuck

 
Wolverine

As much I enjoy working on this car, ( it is far easier than some of the projects I have undertaken) , I prefer to not keep pulling the motor.

The rod picture, I was hoping they ground it for balance but wanted a second opinion,thanks. Also I think I heard some where it is not good practice to put stampings on the main flat on the cap. Can you correct me on this?

After hearing a brief story from the owner I purchased it from , it seems a 16 yo drove the car for about a month prior to its shipment to Florida.

So I would assume the valve spring broke during his exploits around the desert. So to answer your question " broke because it was bad, or over worked, or over played? ", I would say all of the above. :p

I have peeked into the cylinders through the spark plug holes and can see lots of carbon on the pistons and a cross hatch pattern on the walls. But all looks well to my untrained eye.

So how hard is it to break a valve spring?

I know high rpms will do it but, would it take ( to use time as a measurement) 5 minutes of full throttle to do it? Or an hour ? I know it is a open ended question but I am trying to decide if I should do the springs or the whole rebuild. I didn't plan a rebuild in the budget. If I do just the springs I will do them all.

Jeff

 
Wolverine

As much I enjoy working on this car, ( it is far easier than some of the projects I have undertaken) , I prefer to not keep pulling the motor.

The rod picture, I was hoping they ground it for balance but wanted a second opinion,thanks. Also I think I heard some where it is not good practice to put stampings on the main flat on the cap. Can you correct me on this? They should be stamped as done by the factory, number on the side before the rod is final honed. However, I've seen lots of punch marked rods in use with no problem.

After hearing a brief story from the owner I purchased it from , it seems a 16 yo drove the car for about a month prior to its shipment to Florida.

So I would assume the valve spring broke during his exploits around the desert. So to answer your question " broke because it was bad, or over worked, or over played? ", I would say all of the above. :p Just an opinion, the failure was caused by over revving and "floating the valves". Many valve train problems by using a spring that is too weak than one that is too strong.

I have peeked into the cylinders through the spark plug holes and can see lots of carbon on the pistons and a cross hatch pattern on the walls. But all looks well to my untrained eye. A thin layer of carbon is normal and being able to still see the cross hatch clearly is a good sign as long as the roughness average and cross hatch angle is compatible with the ring set used.

So how hard is it to break a valve spring?

I know high rpms will do it but, would it take ( to use time as a measurement) 5 minutes of full throttle to do it? Or an hour ? I know it is a open ended question but I am trying to decide if I should do the springs or the whole rebuild. I didn't plan a rebuild in the budget. If I do just the springs I will do them all. You could do a leak down check to get a read on how well the rings and valves are sealing (requires a leak down tester and an air compressor). And pull a couple of rod caps and a main cap to check bearing condition. If all looks good, re-torque every thing to specifications. It would be good if you could find out the specs for the cam so appropriate springs can be selected. New valve guide seals are cheap and it may be a good idea to change them "while you are there". Make note of the location of any shims you find under the individual springs and check/correct installed spring heights per the manufacturer's specification.

I know it sounds like a lot but, given what you've already done yo can handle it. Chuck

Jeff
 
It's pretty hard to break a spring in that manner. As Chuck said you can change it without pulling the head, but I've got to wonder what caused that. You will definetly want to check your cam and make sure your springs match the lift. Another member had some real issues after breaking a factory valve. Motor is now toast!

 
I spent some time in the garage this afternoon and pulled the cam out. From markings I believe it is an Edelbrock cam and lifters ( numbers on cam 7182 comes up with a cam and lifter kit from both Summit and Jegs), with Comp Cams push rods and roller rockers. Cam is matched with intake, I believe.

Summit is suggesting a single , Edelbrock, valve spring. I have a dual valve spring.

I am not sure which one to get now.

Jeff
You have single springs with a damper (the flat spiral piece inside the spring). A double spring looks like this.


Regarding your ability to see the cross hatch on the cylinder walls, I think that is a good question...

If you can see cross hatches on the cylinder walls, is that a "good" sign?

I don't know. When I bought my block, standard bore, I could see the cross hatches but they had to be cut .030 over anyway. Chuck probably has some more insight

Maybe you close the valves and load the cylinders with air and see how much pressure they will hold.

 
If the lifters and/or cam lobes show signs of failure you need to tear it down. If the lifters and cam lobes look OK the next thing I would check are the push rods and valve train geometry including coil bind. If the push rods aren't bent and are the correct length and the springs aren't into coil bind I would replace all the valve springs with new, quality, correct for the application valve springs and run it.

 
Last edited by a moderator:
The story continues..

I picked up a leak down tester today and found 100% leakage on all cylinders. It sounds like it is leaking around the rings. I did find one valve leaking( one that has a bad spring). I pulled the rod caps on the pistons with bad springs and the bearings look ok to me.

motor 006.jpg

motor 004.jpg

I have looked at the cam and lifters and they look fine. But the cam bearings..

motor 007.jpg

And look a bad retainer..

motor 014.jpg

I found the pistons are .040 over but I did measure the bore with my caliper and it came to 4.025". I also measured the stroke and it was 3.52". Now take that with a grain of salt, I am not equipped to do this accurately.

motor 021.jpg

So this is what I know so far.

pistons are .040 over but unknown make, unknown crank and rods, cam and lifters are Edelbrock, push rods and rockers are Comp Cams, unknown valves and springs. Edelbrock intake and carb.

There is more but I'm tired and ready for bed.

Dam this is getting expensive.

Jeff

 
Regarding your ability to see the cross hatch on the cylinder walls, I think that is a good question...

If you can see cross hatches on the cylinder walls, is that a "good" sign?

I don't know. When I bought my block, standard bore, I could see the cross hatches but they had to be cut .030 over anyway. Chuck probably has some more insight

Maybe you close the valves and load the cylinders with air and see how much pressure they will hold.
Please read the caveat I posted reference the cross hatch. Just because your machinist, the internet, or I told you XYZ doesn't make it true. TRUST BUT VERIFY. Chcuk

 
Regarding your ability to measure the cylinder bore, when I picked up my block, it measured 4.000 with my calipers, so I knew it was standard.

When my machinists bored them .030(let's be honest, that is 1/32 off the diameter, or 1/64 off the wall..not very much), I measured them again and got 4.030, so you may be correct.

There are a host of other factors here, like what are your pistons made of, what material are the rings made of etc. You might be able to keep your pistons(I think about $50 a pop, tax and shipping), hone out your bores to .040 and just replace the rings. If you don't need a valve job, then you can just replace springs.

Do you know what you are doing or do you just sound like you know what you are doing(so do I...lol...depending on who you talk to)? You made more progress than I would have, but then again I am recording/measuring/documenting every nut and bolt for the reassembly.

All I am saying is, if I got my motor down to where you are, I am not putting it back together and loading it back in my car until I know every single part that is good.

Ask for parts here. Guys have crap filling their garages and are often willing to give them up for shipping. That is because the only way to make our wives happy is for them to see some outgoing car parts instead of the boxes and boxes of incoming.

Wish I could give you hand.

 
The story continues..

I picked up a leak down tester today and found 100% leakage on all cylinders. It sounds like it is leaking around the rings. I did find one valve leaking( one that has a bad spring). I pulled the rod caps on the pistons with bad springs and the bearings look ok to me.

I have looked at the cam and lifters and they look fine. But the cam bearings..

And look a bad retainer..

I found the pistons are .040 over but I did measure the bore with my caliper and it came to 4.025". I also measured the stroke and it was 3.52". Now take that with a grain of salt, I am not equipped to do this accurately.

So this is what I know so far.

pistons are .040 over but unknown make, unknown crank and rods, cam and lifters are Edelbrock, push rods and rockers are Comp Cams, unknown valves and springs. Edelbrock intake and carb.

There is more but I'm tired and ready for bed.

Dam this is getting expensive.

Jeff
Jeff, No engine leaks 100% on all 8 if it is in one piece. The leak down test has to be done with the cylinder under test at TDC on the Compression stroke. The valve picture is scary. The bearing picture shows some condensation/corrosion (i.e. sat for a while + alcohol) nothing catastrophic. Fix the heads, put it back together, leak test it again, dry and wet, (wet is with some oil introduced through the spark plug hole) and see what you have. This may not be as bad as it looks. Even if it is, you are are not risking much money to find out. Just an opinion. Chuck

 
Thanks for the help so far.

I have removed the flywheel and here is a picture of the back...

I am thinking this is a 50oz flywheel that some one has drilled to get close to a 28oz flywheel.

Could this be( along with a wrong harmonc balancer ) what is giving me my vibration?

I don't have a problem buying new parts just don't want waste my money either.

Also, I have the casting numbers D4AE-6015-AA

And it is a Windsor, thermostat housing coming out of the front then up.
I dont think those holes would be enough to convert a 50 oz to 28 oz. Half the counterweight would have to be removed.

It looks as if your engine was balanced,

I would not replace flywheel and balancer unless proven to be wrong or damaged.

I would say the broken valve spring would cause your vibrations,

 
Good evening gents. My apologies for the lapse in posting.

But between the holiday and ordering parts, not much has happened.

Here is an update....

After much thought and your advice I went with Edlebrock valve springs with steel retainers and locks. I also pick up some poly locks for the simple fact I didn't trust the lock nuts staying in place. Over kill , yes but peace of mind trumps that.

Poly locks not yet here.

motor 9 050.jpg

While I was waiting for parts I sprayed the engine bay and most of the parts to go back on the motor.

motor 9 052.jpg

View attachment 12422

Ready to go back in ...

motor 9 060.jpg

It is all back together and back in the car. Along with the OLD flywheel, clutch and tranny. A bit of rewiring and she purrs like a kitten with a noticeable vibration at 3200 rpm.

I summized that the motor has been balanced so I should keep the original parts and it will run fine.

Well I was wrong. Same vibration only at a different RPM.

So tomorrow I will be taking the trans out ( besides I put the throw out bearing in wrong so I have to fix that :p) and replacing the flywheel.

Oops. :D

If that doesn't work I will change the harmonic balancer.

I was hoping the valve springs would have solved my problem but I see that it is not the case.

I bet this is going to go like most of my other projects, Spend my way out of it.

But hey I am learning alot. :D

Thanks for all the input I really appreciate all the help and wisdom I have gained so far.

I will post soon with the results of the flywheel swap.

Jeff

motor 9 051.jpg

 
Last edited by a moderator:
While you are pulling the trans back out, I'd take off the pressure plate and clutch disc, then put the bellhousing back on temporarily and start the motor up, that would eliminate those pieces and the trans. If the engine still vibrates, you know it's the balance of the motor, not the other driveline parts.

 
Last edited by a moderator:

Latest posts

Back
Top