replacement panels

7173Mustangs.com

Help Support 7173Mustangs.com:

This site may earn a commission from merchant affiliate links, including eBay, Amazon, and others.

kornpuffer

Member
Joined
Feb 27, 2013
Messages
17
Reaction score
1
Location
Mass
My Car
1972 mustang fastback
351 cleveland
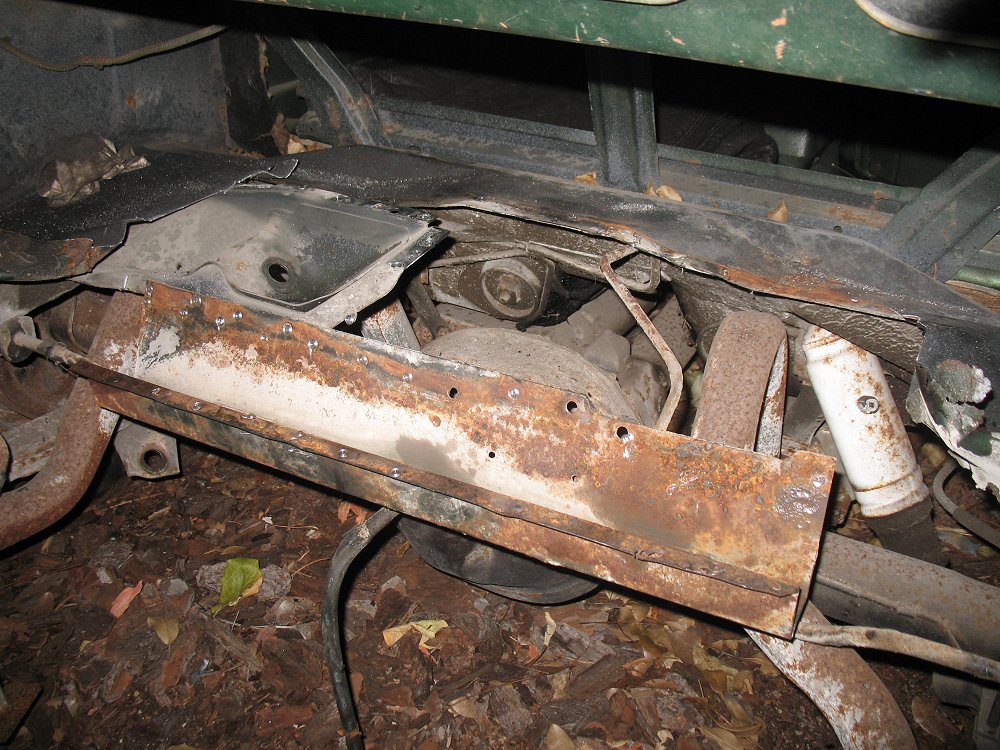
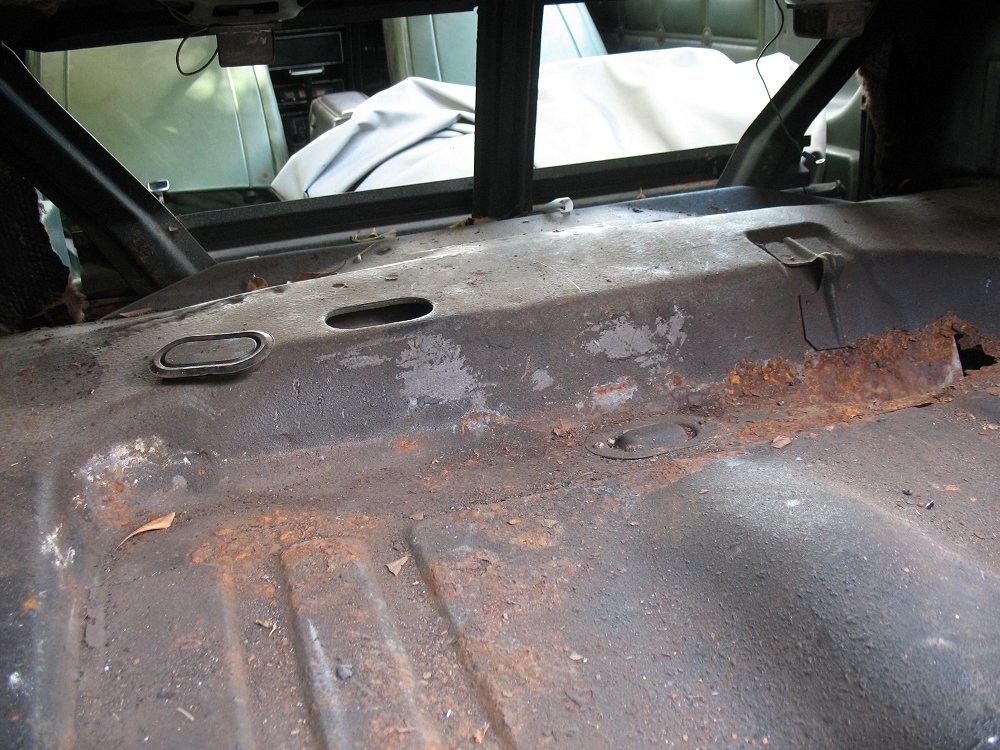
restoring my 72 fastback. replacing trunk pan, frame rails, wheel wells, lower quarter panels, tail light panel, and eventualy the floors


starting the build

89.jpg

90.jpg

91.jpg

92.jpg

93.jpg

7.jpg

8.jpg

9.jpg

IMG_0534.JPG

IMG_0535.JPG

IMG_0536.JPG

IMG_0537.JPG

IMG_0544.JPG

IMG_0613.JPG

IMG_0603.JPG

97.jpg

98.jpg

99.jpg

101.jpg

102.jpg

103.jpg

106.jpg

107.jpg

118.jpg

117.jpg

109.jpg

121.jpg

285.jpg

287.jpg

 
Last edited by a moderator:
Wow looks like fun

Glad I am past that stage

Have a look at Scott's floor replace thread as his method butt welds the panel rather than lapping

Keep the photos coming

 
More work to the stang! trunk pan, wheelwells, and quarters fully tacked into place. Installed and fabricated gas tank cross member.

Decided to put traction bars on!

160.jpg

161.jpg

162.jpg

163.jpg

166.jpg

167.jpg

168.jpg

170.jpg

159.jpg

 
WOW looks good, loos all to familiar..LOL

where in Mass are you located, I'm in Rhode Island.
Haha going good so far Many hours and too much money! I'm from western Mass 20 min outside of springfield


Such nice progress! What will be precipitating the need for slapper bars? Are you building a monster?
Thanks! Not a monster but not a cruiser either, I wanna go fast! Rebuilding rear end also. Replaceing pinion seat, bearings, 2 axles, fluid and sandblasting. When I get the rear end back I'm going to have back of car competed. Suspension, brakes, and welding work done! Next is trans and engine, swapping 2brl intake and carb to a 4brl

 
Last edited by a moderator:
The stang is getting close! Starting to look like a car again

185.jpg

186.jpg

187.jpg

188.jpg

189.jpg

193.jpg

194.jpg

195.jpg

196.jpg

197.jpg

198.jpg

200.jpg

201.jpg

202.jpg

 
Nicely done - but don't forget to open the stamped depression at the left of the trunk floor - it's the access hole to install the upper shock nut for the staggered LH shock. You can't mount the shock absorber without the hole present.

-Kurt

 
Last edited by a moderator:
Nicely done - but don't forget to open the stamped depression at the left of the trunk floor - it's the access hole to install the upper shock nut for the staggered LH shock. You can't mount the shock absorber without the hole present.

-Kurt
Is this where the shock comes thru the floor and is bolted to the plate? If so, i had to reinforce those plates for the shocks.

 
Is this where the shock comes thru the floor and is bolted to the plate? If so, i had to reinforce those plates for the shocks.
Yes, and no. Your car is equipped with staggered shocks, so only the RH shock comes through nearer the floorboard area, as it sits in front of the axle.

The LH shock sits behind the axle and bolts to that box above it; the one that you had to weld to the trunk floor. It's visible hanging off the left framerail here:

71_mustang_83.jpg


The factory access hole for service. Also note the spare tire J-hook mount:

71_mustang_67.jpg


-Kurt

 
Last edited by a moderator:
Is this where the shock comes thru the floor and is bolted to the plate? If so, i had to reinforce those plates for the shocks.
Yes, and no. Your car is equipped with staggered shocks, so only the RH shock comes through nearer the floorboard area, as it sits in front of the axle.

The LH shock sits behind the axle and bolts to that box above it; the one that you had to weld to the trunk floor. It's visible hanging off the left framerail here:

71_mustang_83.jpg


The factory access hole for service. Also note the spare tire J-hook mount:

71_mustang_67.jpg


-Kurt
When I disassembled my car it did not have the staggered shocks. they were both in front of the axle, and their are two other access holes in front of the one you pointed out. those are still accessible to install the shocks. thanks for everything, if this is not right let me know man. Here are some pics, before and after. rebuilt rear end also, bearings, seals, two new axles, sandblasted and painted, new shackles, eye bolts, and shocks!

141.jpg

142.jpg

143.jpg

184.5.jpg

184.6.jpg

184.7.jpg

 
Back
Top