


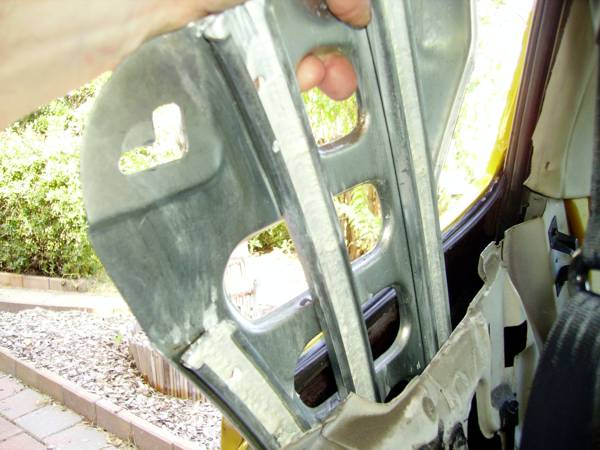
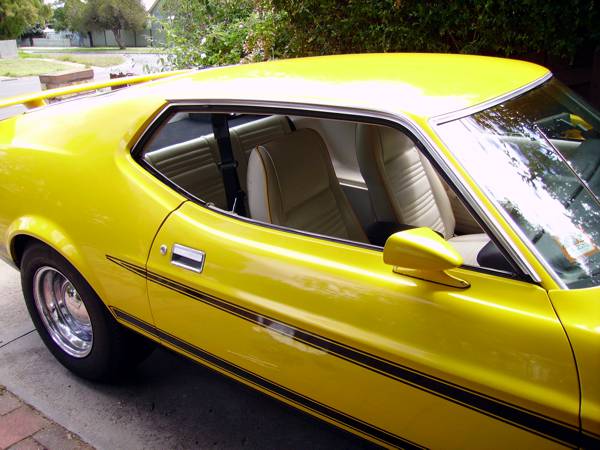
1971 to 1973 fastbacks didn't come out with wind down quarter windows - the only way you could go pillarless was to order the electric window option. However all the holes and mounting points are pressed into the inner rear quarter side wall to allow the winding mechanism from a '71-'73 coupe to be transferred directly into a fastback. Why Ford didn't sell the fastbacks with manual wind down quarters when they were clearly designed to have them fitted is a mystery, but I'm assuming some stingy beancounter worked out he could save $20 per car if they were deleted.
The first step is to buy all the bits needed for the conversion, and eBay is the best place to look. I was lucky enough to find a seller who was selling the complete kit of coupe window parts in one shipment, but the parts can be bought separately, and the following pictures show exactly the parts that are needed (one set only shown - you'll need to buy two of everything of course). The coupe window is not the same shape as the fastback window so cannot be used. For this conversion you will be using your original fastback window.
Shown here are four screws for mounting the winder mechanism, the two upper stops that allow the window to be positioned correctly when wound up, and a coupe rear quarter window crank handle. Not shown is the screw that holds the window crank on. Using a front window crank handle on the rears would probably work ok, but these rear crank handles are shorter and won't stick out into the door entry area where the could get snagged by a person getting in or out. If the bolts can't be sourced on eBay then a local fastener shop would probably have them:
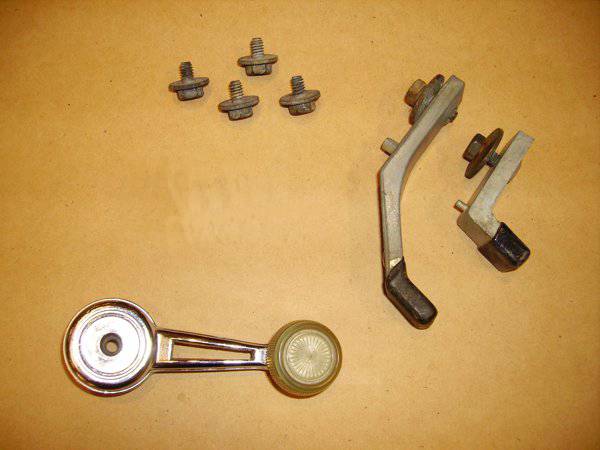
This is a coupe window winder mechanism; mine is second hand, but these can be sourced as new reproduction items:
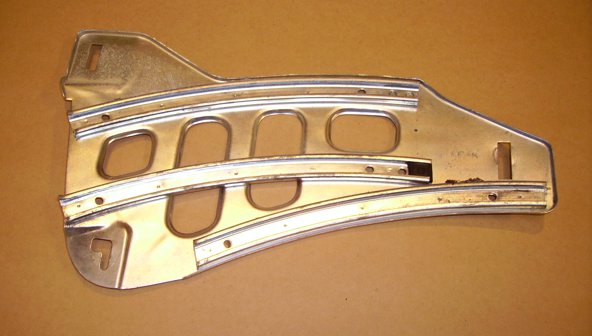
This is the coupe rail sliding plate:
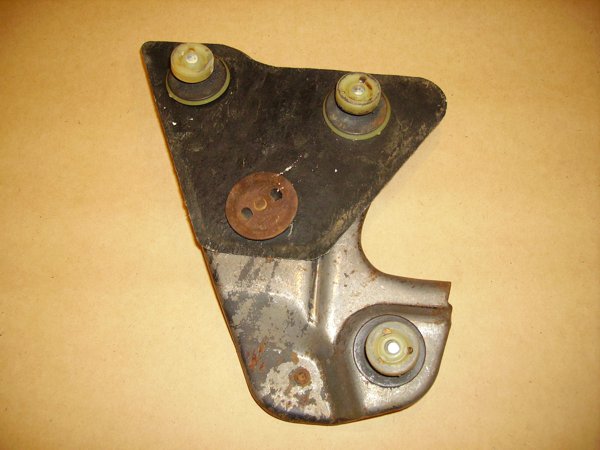
And this is the coupe window clamp plate with rollers attached (the coupe clamp plate is designed to be compatible with the fastback window):
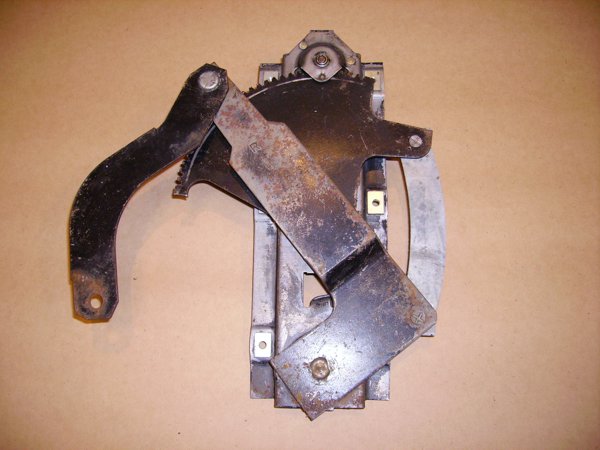
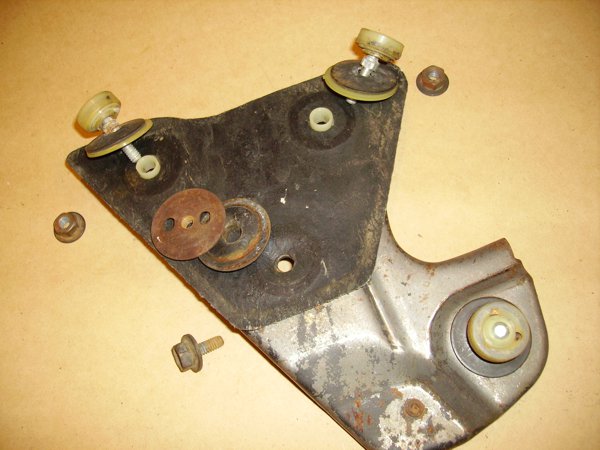
An exploded view of the clamp showing all of the parts, in case they can't be sourced in a single assembly this pic shows every part needed:
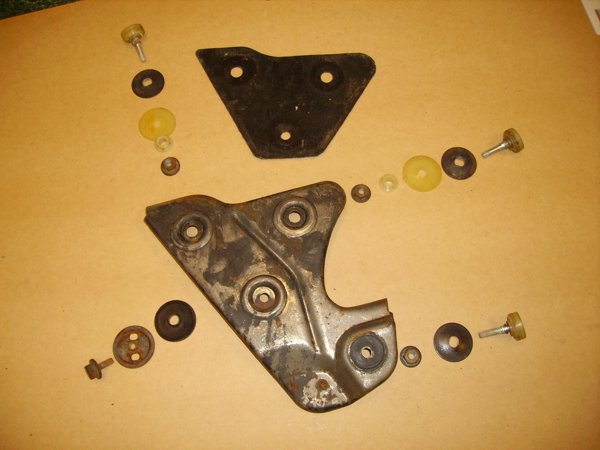
and another view detailing the assembly:
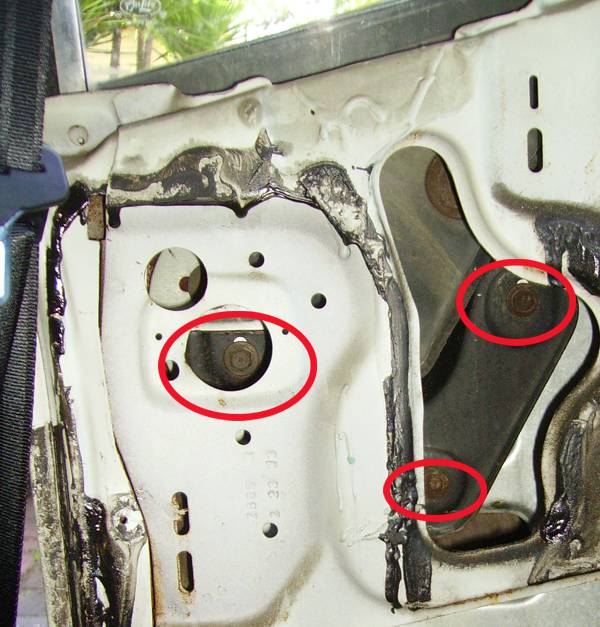
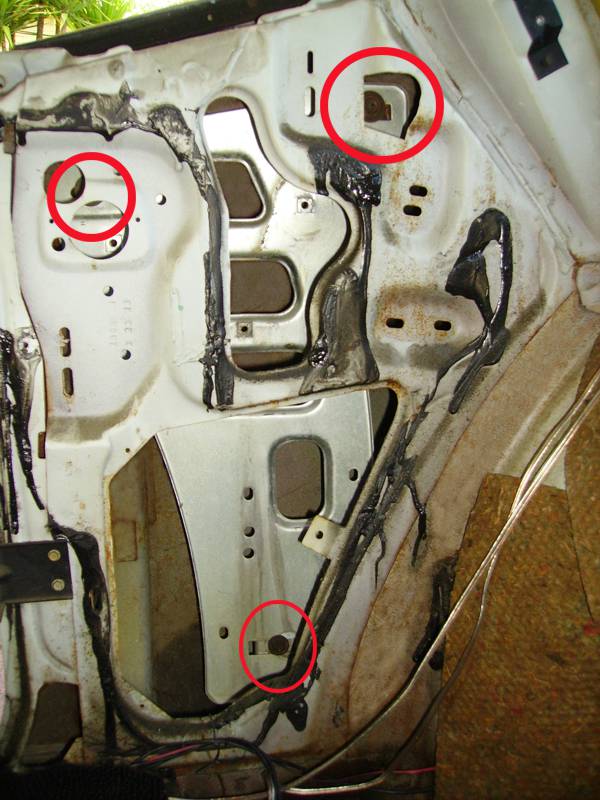
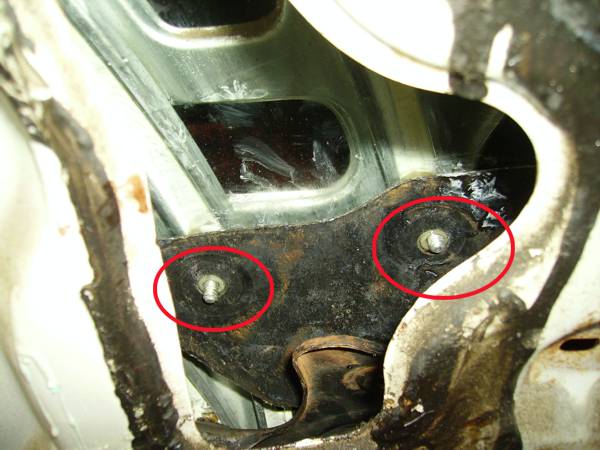
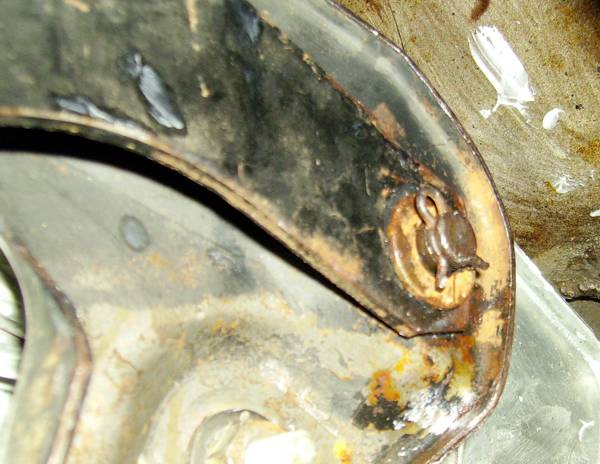
First step is to remove the seat, the side panel, and the rubber quarter post seal from the door jamb. Undo the three window plate bolts (circled):
The window can then be removed. It is likely that after 38 years the rubber window seal will be stuck to the window so a screwdriver might be needed to pry the rubber away from the glass:
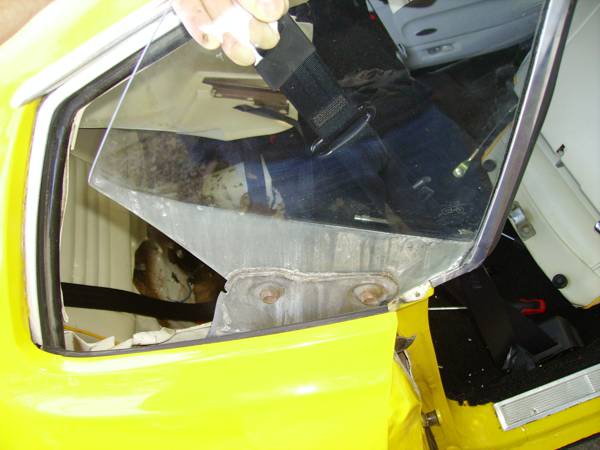
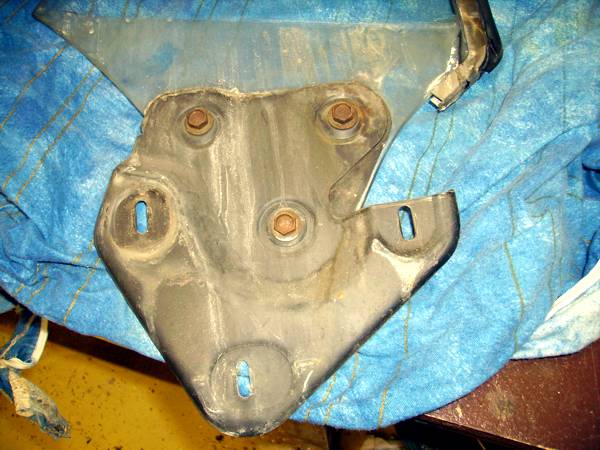
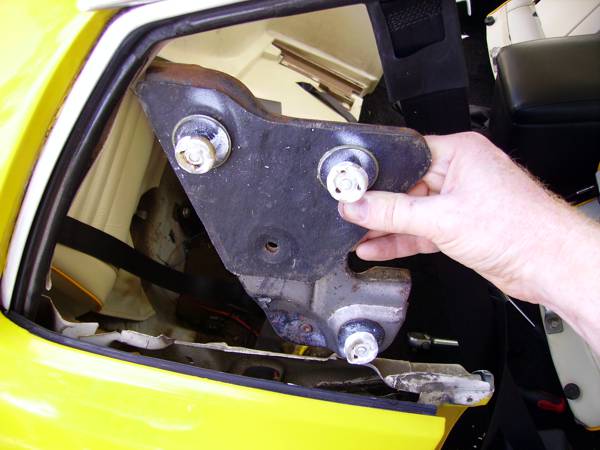
Then remove the three bolts on the large mounting plate and remove it through the window gap:
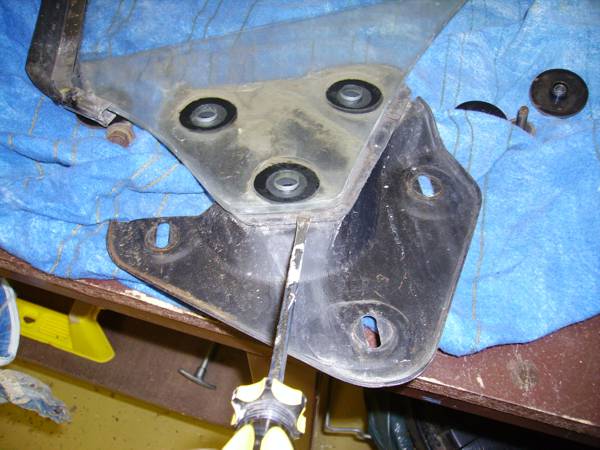
Remove the clamp plate from the window by undoing these three bolts:
Once again 38 years will have glued the rubber clamp pad to the window around the mounting holes, so very gently and slowly prise the window away from the rubber with a screw driver. When the window is free give it a good clean. None of the parts removed from the window will be re-used during the conversion: (EDIT: The rubber clamp pad could be reused if unable to obtain one from a coupe)
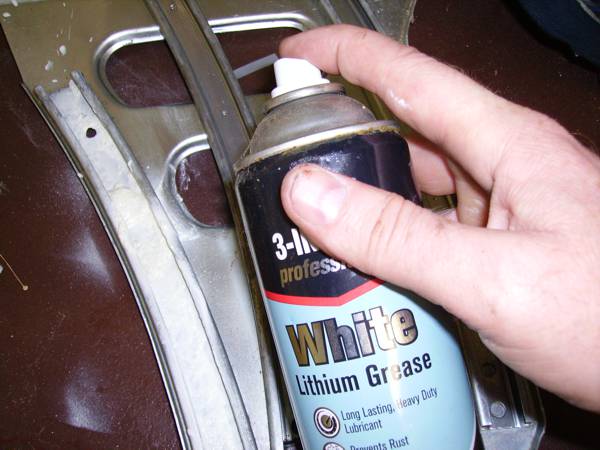
Spray the insides of the rails on the sliding plate liberally with lithium grease:
Insert the sliding plate though the window slot and bolt it into position loosely to the same studs and hole the original mounting plate was attached to:
On the new clamp plate remove the lower window clamp bolt and washer, loosen the top two roller nuts slightly (leave the bottom roller bolt tight), spray the rollers with some grease and then slide the rollers on the plate into the rails on the slide plate:
When the clamp plate has been slid down about 3/4 of the way, undo the top two roller nuts and pull the top of the clamp plate away from the roller screws (letting the clamp plate pivot on the bottom roller to which it is still attached). This is when you attach the window to the clamp and it can get a little tricky. Drop the window in from the top and position the roller bolts into the top two mounting holes in the window. Place the two small nylon spacer bushes into the clamp plate, then place the rubber clamp pad into position on the clamp plate using the two nylon spacer bushes to hang it on:
Move the metal clamp plate (and rubber pad) into position over the roller screws by pushing the nylons spacer bushes through the holes in the window and put the nuts on the screws. Important: before doing the nuts up tight, be aware that the large metal washers on the rollers (now hidden from sight behind the clamp plate) have flats in their holes that correspond to the flats on the base of the roller screws. Put you fingers around the back of the clamp plate and turn the washers until you are sure the roller screw has located properly inside the washer hole - tightening the screw if it's not located properly in the washer may break the window! If everything looks alright then tighten the nuts firmly, but not tight enough to damage the glass (this particular little assembly job does get pretty fiddly and hard to line everything up easily, but don't be suckered into thinking you can attach the window to the clamp plate and insert the whole lot into the car in one go - I spent about an hour on the first window I did trying to do it this way before I concluded it just couldn't be done....):
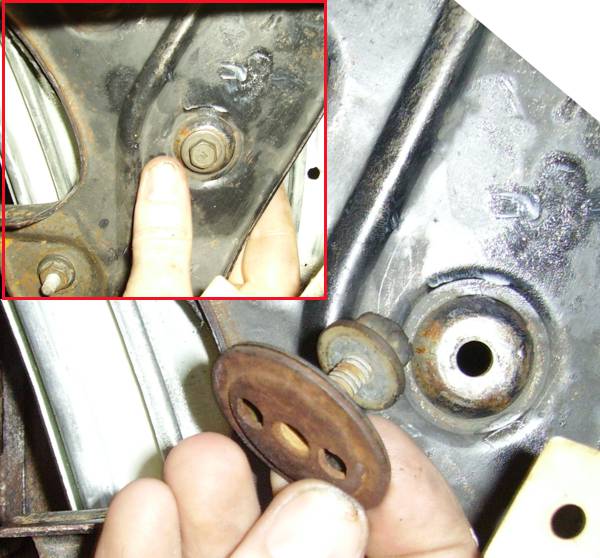
Next is the last window bolt, flat washer and plastic spacer is put in from behind and the nut tightened from the front:
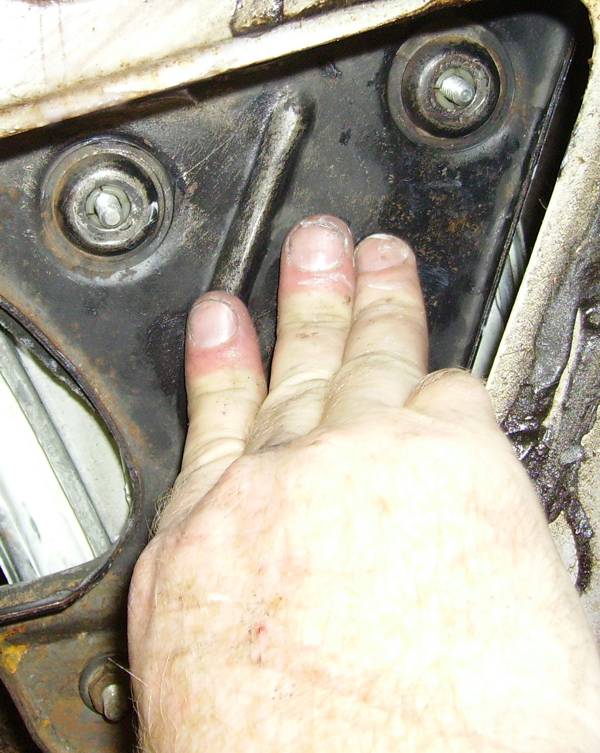
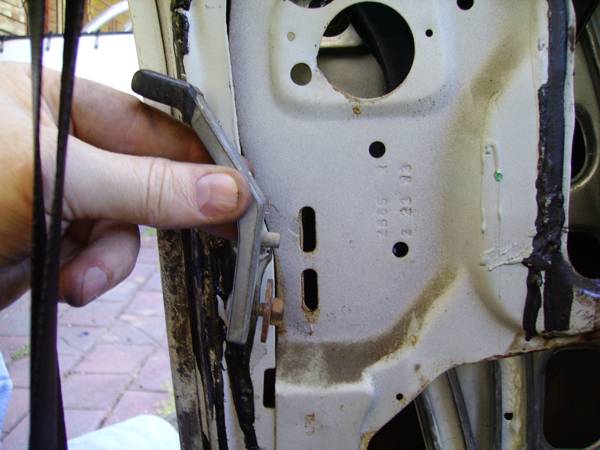
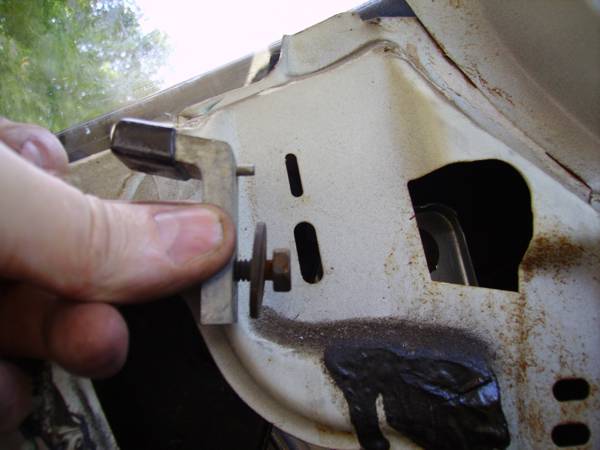
The two upper window stops are then inserted inside the wall with the bolts done up loosely. The following pictures show where they go, with the slots allowing for window stop adjustment:
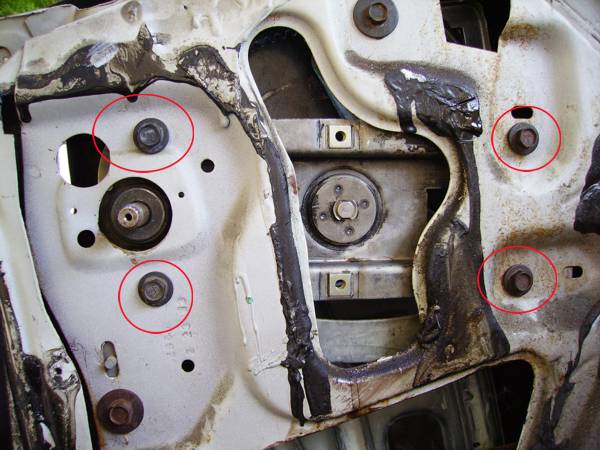
Now bolt in the winder mechanism; note that only four bolts are used, with the other two mounting holes in the mechanism not needed:
Connect the winder mechanism arm to the pin on the window plate clamp using a circlip over the pin:
Temporarily put the crank handle onto the winder spline, wind the window up to full extension. Move the window into the correct position by moving the sliding rail plate slots around on its studs and then tighten the sliding plate nuts and bolt. Then adjust and tighten the upper stops as required (Positioning the window in the right spot can take a few tries).
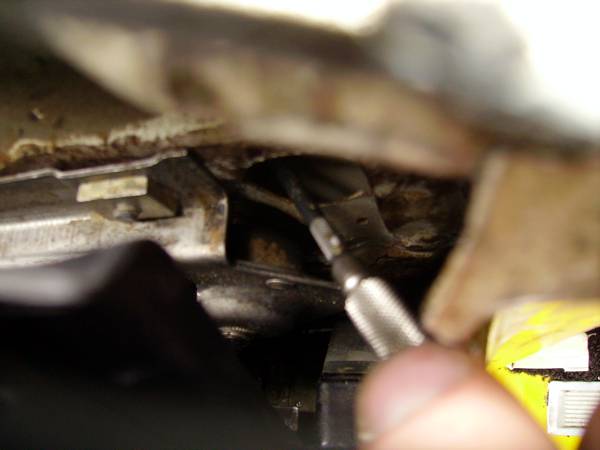
Now to drill the hole in the interior panel so the crank spline can stick through. Place the panel into its correct position, then looking in through the top you will be able to see where the spline is touching the inside of the plastic panel. Use a scriber or something long and sharp to scratch the panel around the top of the spline so there will be a visible mark on the panel when you take it back off:
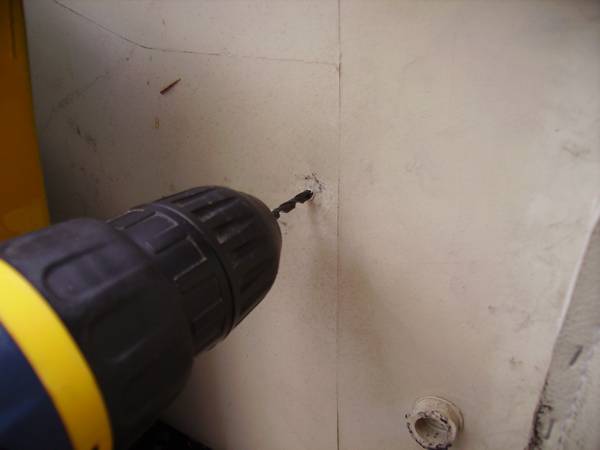
Just to be sure you've marked the right spot, drill a small pilot hole first, then put the panel back on and see if you got it in the right place:
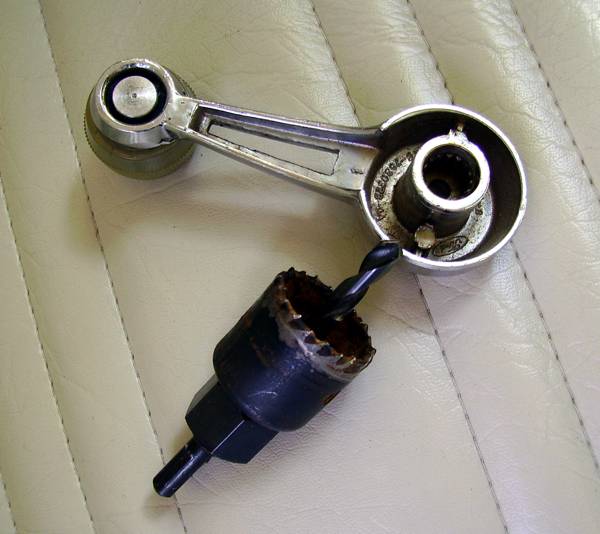
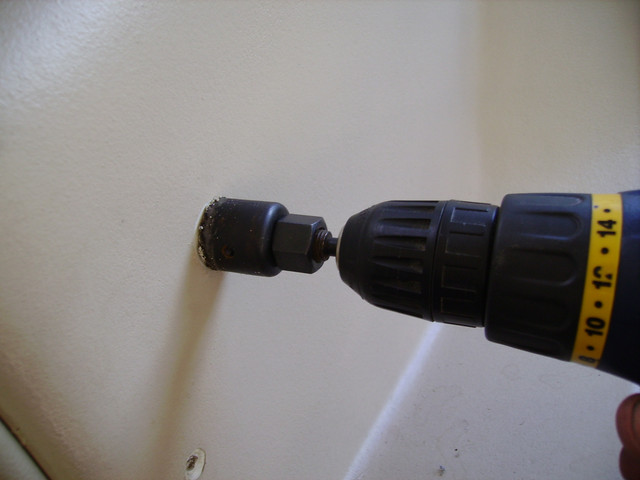
Choose a hole saw big enough for the centre of the crank handle to slide through with a bit of margin for error, but not too big that the edge of the hole will show if you didn't quite manage to drill in the right spot:
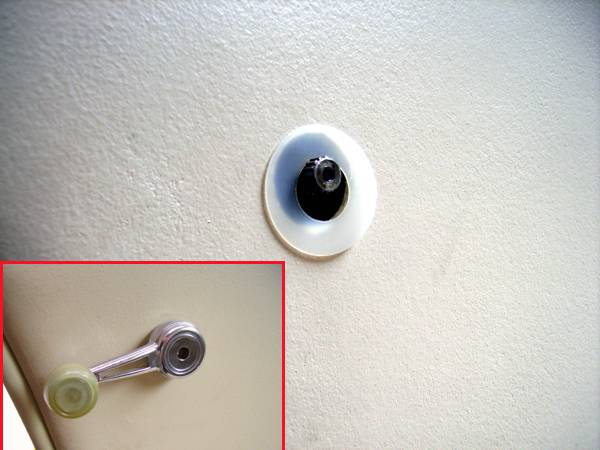
Now put the car back together, place a plastic crank disc over the hole to protect against winding wear, then screw on the crank handle. I had to replace the rubber quarter post seal on the door jamb too (I bought these before I started the job), as mine was as hard as a rock and wouldn't let the window slide through it:
Jobs done!

The first step is to buy all the bits needed for the conversion, and eBay is the best place to look. I was lucky enough to find a seller who was selling the complete kit of coupe window parts in one shipment, but the parts can be bought separately, and the following pictures show exactly the parts that are needed (one set only shown - you'll need to buy two of everything of course). The coupe window is not the same shape as the fastback window so cannot be used. For this conversion you will be using your original fastback window.
Shown here are four screws for mounting the winder mechanism, the two upper stops that allow the window to be positioned correctly when wound up, and a coupe rear quarter window crank handle. Not shown is the screw that holds the window crank on. Using a front window crank handle on the rears would probably work ok, but these rear crank handles are shorter and won't stick out into the door entry area where the could get snagged by a person getting in or out. If the bolts can't be sourced on eBay then a local fastener shop would probably have them:
This is a coupe window winder mechanism; mine is second hand, but these can be sourced as new reproduction items:
This is the coupe rail sliding plate:
And this is the coupe window clamp plate with rollers attached (the coupe clamp plate is designed to be compatible with the fastback window):
An exploded view of the clamp showing all of the parts, in case they can't be sourced in a single assembly this pic shows every part needed:
and another view detailing the assembly:
First step is to remove the seat, the side panel, and the rubber quarter post seal from the door jamb. Undo the three window plate bolts (circled):
The window can then be removed. It is likely that after 38 years the rubber window seal will be stuck to the window so a screwdriver might be needed to pry the rubber away from the glass:
Then remove the three bolts on the large mounting plate and remove it through the window gap:
Remove the clamp plate from the window by undoing these three bolts:
Once again 38 years will have glued the rubber clamp pad to the window around the mounting holes, so very gently and slowly prise the window away from the rubber with a screw driver. When the window is free give it a good clean. None of the parts removed from the window will be re-used during the conversion: (EDIT: The rubber clamp pad could be reused if unable to obtain one from a coupe)
Spray the insides of the rails on the sliding plate liberally with lithium grease:
Insert the sliding plate though the window slot and bolt it into position loosely to the same studs and hole the original mounting plate was attached to:
On the new clamp plate remove the lower window clamp bolt and washer, loosen the top two roller nuts slightly (leave the bottom roller bolt tight), spray the rollers with some grease and then slide the rollers on the plate into the rails on the slide plate:
When the clamp plate has been slid down about 3/4 of the way, undo the top two roller nuts and pull the top of the clamp plate away from the roller screws (letting the clamp plate pivot on the bottom roller to which it is still attached). This is when you attach the window to the clamp and it can get a little tricky. Drop the window in from the top and position the roller bolts into the top two mounting holes in the window. Place the two small nylon spacer bushes into the clamp plate, then place the rubber clamp pad into position on the clamp plate using the two nylon spacer bushes to hang it on:
Move the metal clamp plate (and rubber pad) into position over the roller screws by pushing the nylons spacer bushes through the holes in the window and put the nuts on the screws. Important: before doing the nuts up tight, be aware that the large metal washers on the rollers (now hidden from sight behind the clamp plate) have flats in their holes that correspond to the flats on the base of the roller screws. Put you fingers around the back of the clamp plate and turn the washers until you are sure the roller screw has located properly inside the washer hole - tightening the screw if it's not located properly in the washer may break the window! If everything looks alright then tighten the nuts firmly, but not tight enough to damage the glass (this particular little assembly job does get pretty fiddly and hard to line everything up easily, but don't be suckered into thinking you can attach the window to the clamp plate and insert the whole lot into the car in one go - I spent about an hour on the first window I did trying to do it this way before I concluded it just couldn't be done....):
Next is the last window bolt, flat washer and plastic spacer is put in from behind and the nut tightened from the front:
The two upper window stops are then inserted inside the wall with the bolts done up loosely. The following pictures show where they go, with the slots allowing for window stop adjustment:
Now bolt in the winder mechanism; note that only four bolts are used, with the other two mounting holes in the mechanism not needed:
Connect the winder mechanism arm to the pin on the window plate clamp using a circlip over the pin:
Temporarily put the crank handle onto the winder spline, wind the window up to full extension. Move the window into the correct position by moving the sliding rail plate slots around on its studs and then tighten the sliding plate nuts and bolt. Then adjust and tighten the upper stops as required (Positioning the window in the right spot can take a few tries).
Now to drill the hole in the interior panel so the crank spline can stick through. Place the panel into its correct position, then looking in through the top you will be able to see where the spline is touching the inside of the plastic panel. Use a scriber or something long and sharp to scratch the panel around the top of the spline so there will be a visible mark on the panel when you take it back off:
Just to be sure you've marked the right spot, drill a small pilot hole first, then put the panel back on and see if you got it in the right place:
Choose a hole saw big enough for the centre of the crank handle to slide through with a bit of margin for error, but not too big that the edge of the hole will show if you didn't quite manage to drill in the right spot:
Now put the car back together, place a plastic crank disc over the hole to protect against winding wear, then screw on the crank handle. I had to replace the rubber quarter post seal on the door jamb too (I bought these before I started the job), as mine was as hard as a rock and wouldn't let the window slide through it:
Jobs done!
Last edited by a moderator:


![IMG_1407[1].JPG](https://cdn.imagearchive.com/7173mustangs/data/attachments/57/57814-69522353b7aa94129cbe168b6237fea7.jpg "IMG_1407[1].JPG")