1971 Grande Concourse Restoration

7173Mustangs.com

Help Support 7173Mustangs.com:

This site may earn a commission from merchant affiliate links, including eBay, Amazon, and others.
Not sure what steel you are referring to on the heater hose? Was it the clamps from the heater core or are you saying the firewall?
One of those hose remnants in the picture(on the left) has a inner rubber wrapped with metal wire mesh then a outer rubber covering

20160628_142726.jpg

 
Last edited by a moderator:
The engine compartment was shot in semi-gloss black from the top and down under the firewall into the torque box area as far as the painter felt like stretching. Usually not very far doing a couple hundred cars a day. I would recommend you paint the underside slop gray up to about the middle of the firewall and then paint the engine bay black over that. Please remember these were guys building hundreds of cars a day. They didn't care how long the car lasted their focus was the 60 seconds the car was in front of them. Your attention in this restoration will probably go well above how it left the factory.
I am at war with myself mentally. As you said the workers only had 60 seconds so quality control was non existent. I really want to stay true to original paint BUT then i want a 21st century paint finish with no orange peel on the body. I am more than happy to stay true to the day it rolled off the line with everything but the paint finish.

After attending a classic car show on Sunday and seeing all the engine bays with a modern Satin Black/semi gloss black finished to a high standard i am leaning toward this finish. Especially when the bodies have no orange peel and the shine from the bodies from a 21st century re-spray look fantastic

 
Not sure what steel you are referring to on the heater hose? Was it the clamps from the heater core or are you saying the firewall?
One of those hose remnants in the picture(on the left) has a inner rubber wrapped with metal wire mesh then a outer rubber covering
The hose clamps are aftermarket, more likely the hoses have been replaced. Maybe the po used hydraulic hose stock.

 
Steve, I agree you should do the restoration as you see fit. I truly feel that is the great thing about our site is that we can respect each individuals path on refreshing their car in the manner they choose. For folks talking about going the concourse route or as close to original as they want I try to chime in from time to time and offer up some of the things I have learned talking to many people and doing a lot of research. If you like the gloss/semi gloss engine bays, by all means do it. If you don't like orange peel, color sand and buff it to a mirror. Honestly, my car does not have much orange peel and I may get dinged for that from time to time by MCA. I am OK with that. I like it to look they way I want it to and I respect that of everyone else as well. Enjoy your car and I look forward to you keeping us all posted on how you progress along. Let us know when you have questions, and I am sure you will get all kinds of feedback. Go with the feedback that helps move you along and everyone has their own background and opinions to draw from and hopefully respect that as feedback and nothing else. Looks like you have a lot of parts to get installed now. Better get in the garage.

 
As i get deeper into the engine i am finding more problems. The engine was fitted with new valve guides to the exhaust side at some point in its history. The guides are worn and need replacing to the exhaust side.

The baffling thing though is the differant exhaust valves and springs. Some of the valves have a flat surface and some of them are concaved. Then when the springs get a closer inspection they are differant lengths with extra shims to make the springs work at a more equal rate. Obviously the last mechanic had a differant idea of what taking care of their car compared to others is.

I tried to buy new valve guides, valves and springs but my local supplier has not got what i need in stock. As its Christmas they will not be receiving their next order until 3rd week of January. Was hoping to have the engine rebuilt, re-installed, and the engine bay done by Christmas but it looks like this phase of restoration will not be finished until mid February.

The York compressor has been inspected by a local specialist and its not repairable. They have ordered one from the States which should be here early January. The clutch is salvageable and it will be cleaned to a new standard. The 2 brackets will be stripped to bare metal and re-sprayed. As for everything else for the A/C under the bonnet it will all need replacing as it is missing!!

Next year should see the the engine bay finished, the undercarriage stripped to bare metal and re-sprayed, the body stripped to bare metal and re-sprayed and new parts fitted where needed. The gas tank has a serious dent so will need replacing.

 
Its been a while since i was last here !!!!!!!!!!!!!!!!!

There has been a lot going on with the car but getting nowhere fast!!!!!!!!!!

The engine is back together and sprayed Ford corporate blue. The headers have been bead blasted with glass beads at 20 PSI along with steering box, carb, rear brake drums. Evereything came up like brand new. The headers have been sprayed with a heat resistant Spray that looks same colour as original cast iron. The engine should be back in within 3 weeks and back on the road.

The underside has had a bare metal strip. Next job is to remove bad metal on left boot drop off. Weld new panel in then spray underside.

I will post some pics once these jobs are complete.

Jobs for the coming autumn/winter will be to bare metal the wheel arches and trunk & then respay those areas.

Another job for the coming winter will be doors, deck lid, hood, front wings will be dipped and stripped. I found a company here in the UK that will dip and strip the whole car(wish i found them 12 months ago)  http://www.envirostripgbltd.com/

 
Removed the black backplate and lights yesterday to reveal the original colour of the car. I was blown away by the brightness of the colour and getting excited about how its going to look when sprayed.

The black at either end has got me baffled. You can see where masking tape used to be. Would this have been done in the factory?

I reckon thats the first time since November 1970 that backplate has been off.

The other thing that baffled me was when i took the rear quarter extensions off there was just a grey primer when the undercarriage and inner doors were red oxide. There is a slight wave in the rear panel that houses the light cluster. Maybe its a repair.

Enjoying getting into the bones of this car and seeing how Ford did things.

You can probably see theres a new gas tank and straps added along with some new leaf springs. The bolts are not correct but i do have the concourse chassis bolt kit from AMK arriving soon.

Finally feel like there is some progress taking place. Its hard to believe its been 13 months since purchase of the car. Things take so long to order, get delivered and then fit. Time flys while the work crawls along.

20170628_154816.jpg

20170628_154522.jpg

 
The black you are seeing on the rear panel is factory. As you can see it was sprayed when they did the engine bay, the lower black out if a decor group and then the color was put on over the black. The black was between the tail light and the black panel to improve the look. I have seen some with black around the gas filler also but not all. This pic is my 73 vert that is original factory paint also yellow. I believe they used gray primer on all cars since it is a neutral color and works the best for any top color. Under the cars they might have used red oxide when low on the slop paint. Wish we could find a worker from then to explain why.


temporary image hosting

 
The black was applied on the inside edge of the taillight housing and should also be around the gas filler hole.  This was to avoid the body color appearing in the gaps between the back trim panel and the other parts.  There is a ford diagram of this in their body manual. I do not have that handy, but this is how I did mine.

tail panel.jpg

 
Thank You for clearing that one up. It looks like black around the filler cap was a variable. Bkdunha had it around the filler cap and Carolina mountain mustang never.

It was was the removal of my filler neck that peaked my interest as i could see original lime green through the gasket holes. Thats what made me take the light cluster panel off. I wanted a piece of paintwork that had never had any light exposure so i could take a chip from it to gtake to the paintshop for matching.

BKdunha your car looks fantastic ::thumb:: :thankyouyellow:

 
Its been a tough and dirty day today.

I removed what was left of the interior roof trim. Taken the seats out. Removed carpets and sound deadener.

The idea was to clear out all the parts i stored in the car but that lead to me sweeping out a bucket full of dust and dirt.

After the carpet and sound deadener came out i was shocked at just how much the rustworm had eaten in the rear floor pan. Its a total mess. There is also a 6 inch long by 1/8 inch hole on the driver floor.

So tomorrow the car will go off to the welder to get it sorted out.

:huh: One day the engine will go back in :shootself:

 
I'm sure most of us have had these unwelcome discoveries but I look at it as a learning experience

Would never have taught myself to weld or fabricate panels and now value these skills

I could have chosen to buy a $40-50K vehicle already restored but I would never have valued it as much as a vehicle I restored myself despite the cost

Respect for going the concourse route Steve not something I would do especially for a bog standard coupe but perhaps the next Mustang?

Look forward to some pics of your progress

 
It looks like its good news week this week.

The wheel arches should be resprayed next week.

The engine should be back in by the end of August.

Door panels have arrived after 14 months of ordering them. SMS agreed to throw in some vinyl to re-cover the dashpad FREE of charge.

The condensor has been tested and re-sprayed for the equivalent of $50.

Mike of Motor City Mustangs hoses for A/C arrived. They will go to the glass bead blaster to get dealt with.

A/C Filter drier arrived

A/C Pulley arrived

Hub Caps arrived

Replacement rear valance arrived

Concourse parking brake cable

Grille moldings

Headlight Rings

Rear side markers

So the plan for next month is to have all engine and mechanical done. Rip out the A/C box and heater box and get everything restored and running.

After that there will be a lull while i source parts and get the cash together for the re-spray, headliner fitting, vinyl roof trim renovated, sprayed and fitting, vinyl roof fitting, all new glass and fitting. Realistically i reckon next easter before i am at the stage where the exterior is finished and start on the interior

 
Its been a while since i updated my build thread. I have posted jobs i have completed elsewhere but wanted to keep it all together


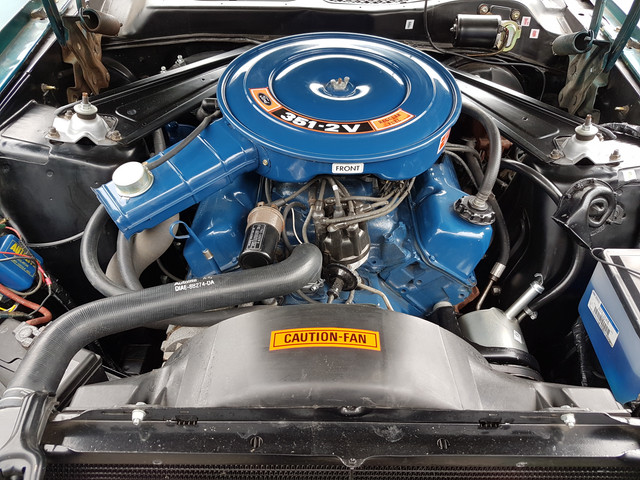
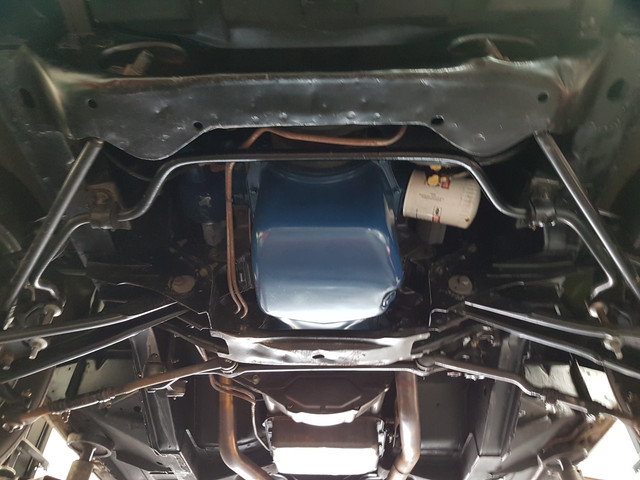
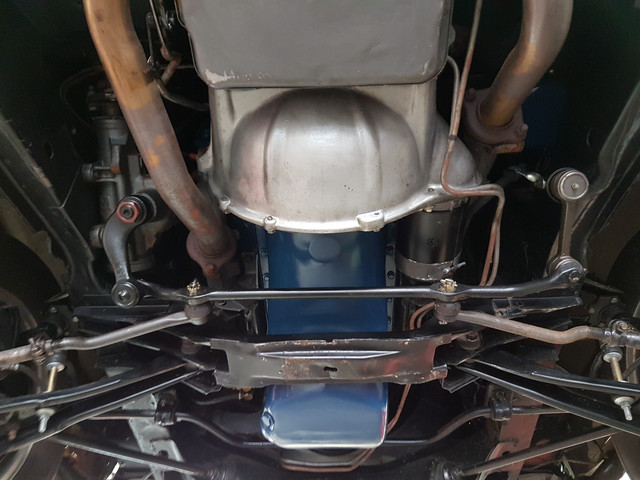
Engine bay is 95% there. Theres just some parts to re-visit


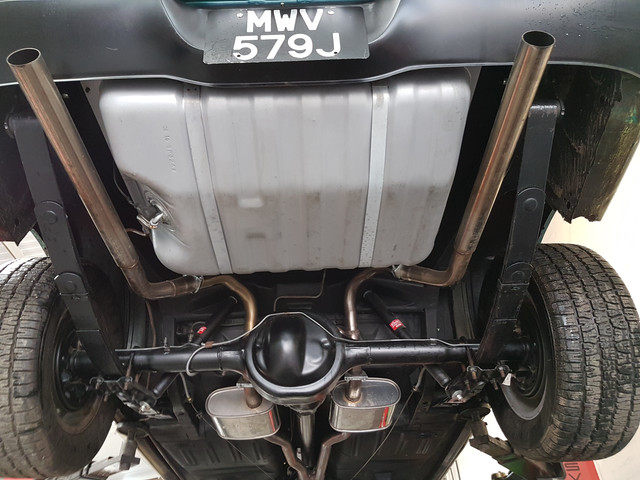
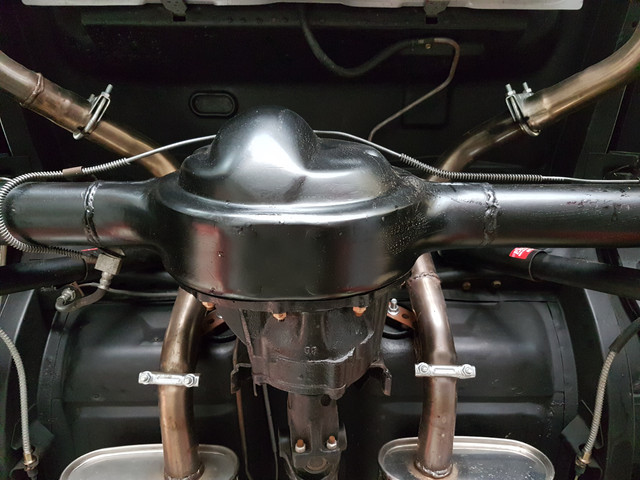
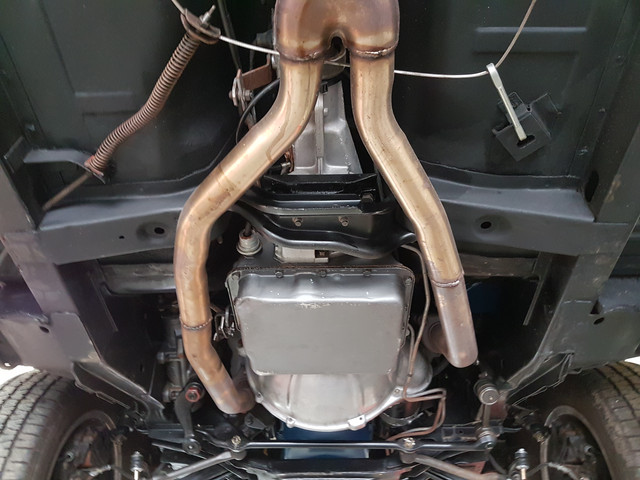
Although originally had a single exhaust i wanted to let the engine breath a little more so i added a twin exhaust. The car sounds far far better now


The brake spring has to tackled


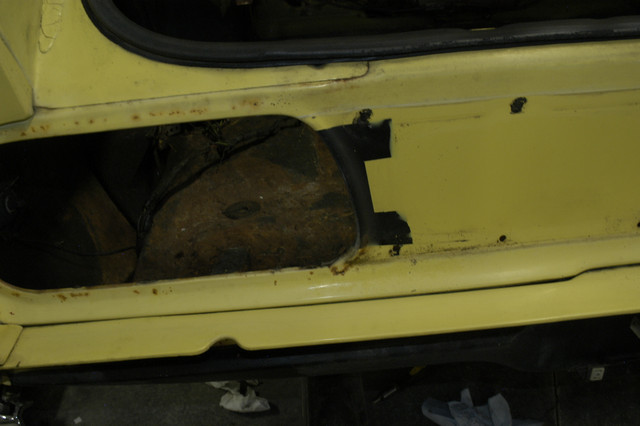
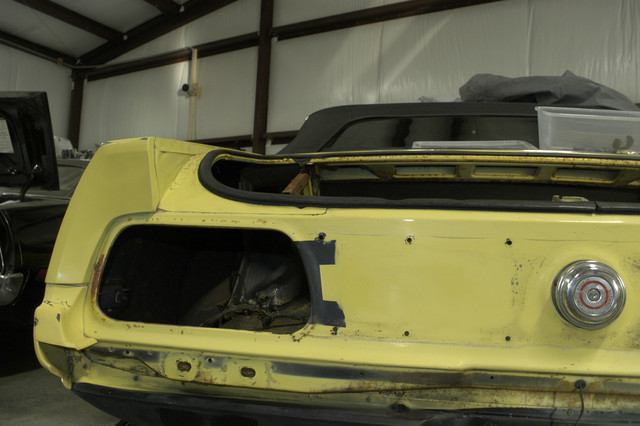
I have to re-visit some of the paintwork because of a brake fluid leak stripped the paint away


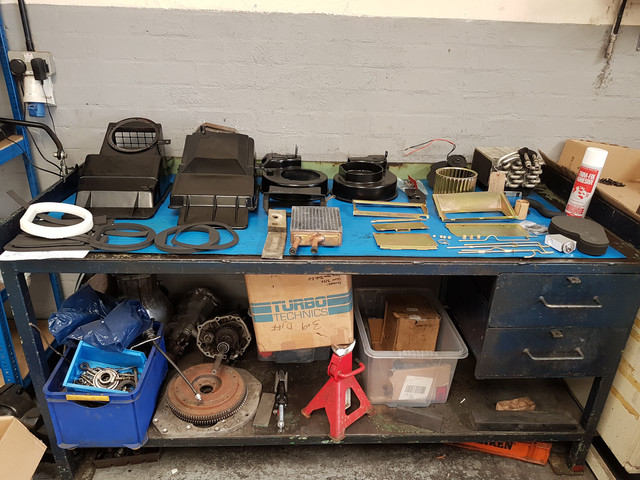
Blower motor was replaced. A/C-Heater box stripped down and had all the metal parts replated. The heater core was leaking like a sieve so that was replaced and tested before it went back together


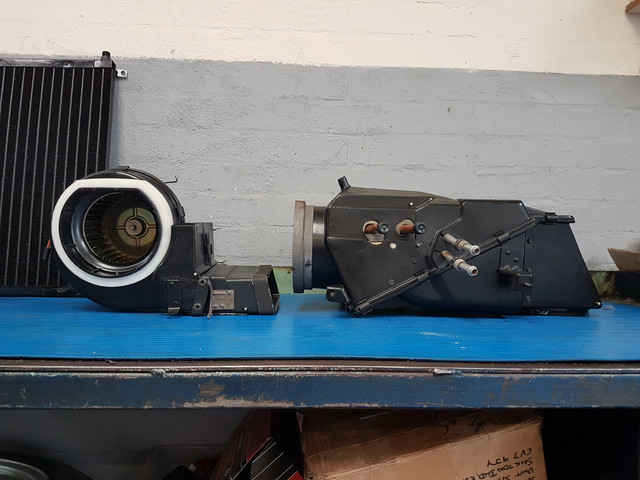
Heater-A/C box back together with all new seals. Evaporator was tested and found no leaks :D  Condensor was tested and had no leaks :D  I have all new vacuum motors from Classic Air. I took members advice and had some motors that had been refurbished instead of generic.

Everything has now arrived to re-install the A/C. I had brackets from Don :D  They are being worked on right now


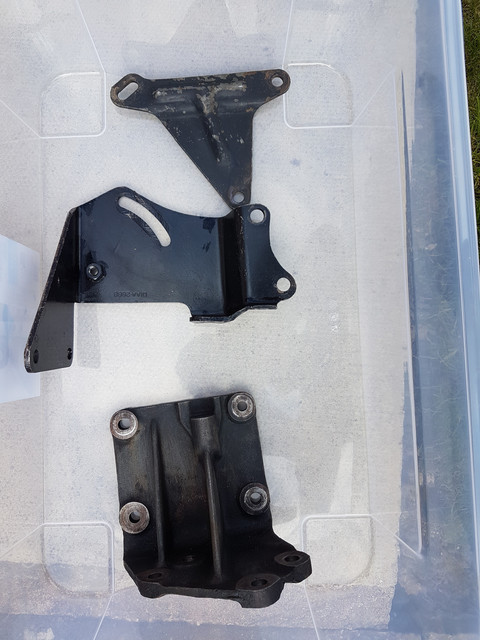
The brackets after a de-grease. The middle bracket looks to be in the best shape for rust


The bracket at the top was the middle bracket in previous picture. What i thought had least rust turned out to have the most rust. So glad i got the paint stripper on them.

I bought some rust remover. The one i bought is a re-usable one. I have the smallest bracket soaking in the rust remover. It will stay soaking till tomorrow morning when i will zinc plate it.

The zinc bath is being primed up today and i will leave a piece of zinc connected to each annode till tomorrow. That should be plenty of time for the bath to be ready to accept, Eve, its first customer

I think that just about sums up whats been happening over the autumn/winter period apart from spending spending spending on yet more parts in preparation for this years push to get the car a lot further down the road

 
Back
Top