72 Roof Reskin

7173Mustangs.com

Help Support 7173Mustangs.com:

This site may earn a commission from merchant affiliate links, including eBay, Amazon, and others.

Tomahawk715

Well-known member
Joined
Jul 4, 2010
Messages
85
Reaction score
1
Location
Black River Michigan
My Car
72 Grande Coupe--302 C4
73 Mach 1 351c/fmx
70 Challenger 340 a66
M38a1 M38 CJ2a Jeeps
49 Jeepster
79 Z28
08 Mustang GT
1961 Plymouth Belvedere
Anyone here ever reskin a roof on a 71-73. My 72 Grande had a vinyl top which I've got no interest in replacing. The front edge of the roof is well pretty much gone--the part that faces in to the windshield. I've got a 71 with a good roof thats my parts car. I see I'd have to drill out a billion spot welds--I see them in the windshield area--in the rear window area and on the drip rail and the sailpanel. Other than the ones on the driprail--are threre any more on the side above the doors?? I can see any but I dont want to miss any. I'm going to attempt removal of the donor before I mess with the actual car I'm working on.

Thoughts?? Pictures anyone has??

 
My roof is bad on the 72...but I decided against reskin. I'm going to use POR-15's floor and roof restoration kit to salvage the existing roof and then vinyl over it. I just need it to be smooth and even!

 
[Yeah if I was going to redo the vinyl it wouldnt be a big issue--I'd weld in a lip piece and vinyl away. May still try and patch in welded section and see how it turns out--but regardless going to grab the roof off the other before it goes to scrapyard (long way down the road)

 
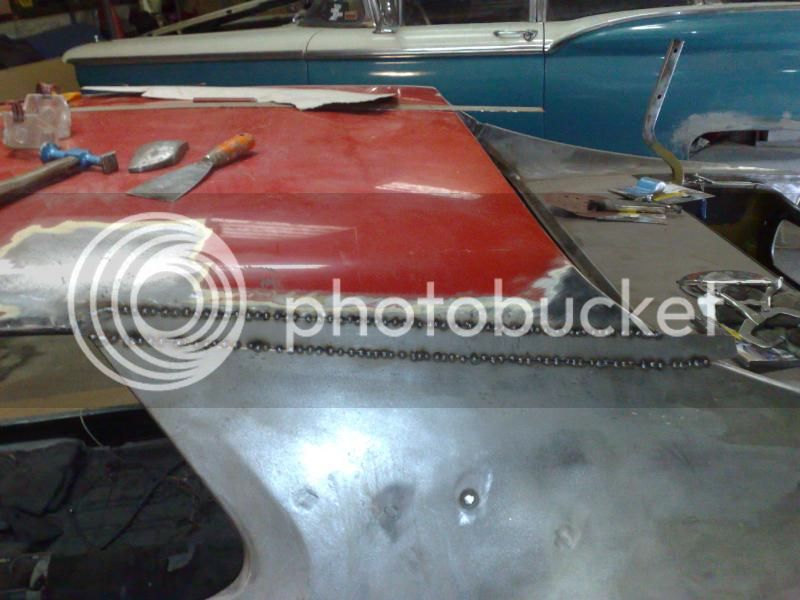
So whoever was welding on the drivers side musta been getting paid per weld---:dodgy:

So I've got both sides free--drip rails/a pillars and the sail panels.

Just have to drill out all the spotwelds over the windshield and over the back window-----ohhh and then start over on the car I'm actually working on lol

And before anyone says it---I've been taking photos the whole time and just need to get them downloaded and then I'll post some--or just do a writeup on the whole process. As one can guess I've learned a thing or two in the process already.
Yes sir! You could do a how to in our Wiki section! That would be great! Keep us posted!

 
The donor roof is off :D

Now to do it all over again

top.JPG

 
Question. Would it have been easier to cut the posts and replace in 1 piece? or does that create other problems. I've never seen it done. But the job you did looks great!

 
I'd like to know as well. Excellent picture... I'm sure that took awhile. I have a better windshield and firewall section from a junker that I'm considering grafting into mine, but was wondering what to do with the roof section.

I'm guessing the roof skin should be one piece to avoid "issues" when getting ready for paint?

 
I would say no---think of it this way--the sides and top are a frame that is structural. Many of the frame pieces are layered over each other--in some places three times. They go together one way and cant be taken apart without the skin being off.

The sheet metal is the skin which goes over that framework. Once you start removing the skins it becomes clear how the car went together--it would appear from the ground up--the panels above overlap the ones below.

With that being said if you cut the a-pillar and the sail panel you would be cutting in the middle of a structural member with no way to get at the back side to weld the sections back together. The a-pillars might be easy to weld back together as they are basically a "pipe" and you could weld all the way around. The sail panels would be a pita--they are two box sections joined together--the outside section would have to be welded thru the sheetmetal or cut a section out to get to the member behind. Not to mention you now have a buttweld seam where there was none before--I'd be hesitant to do it as I think your just creating a stress area where cracks are going to form. These are unibody cars--they flex enough without creating a place for them to do so. Either way is alot of work and I'd not want to see cracks in my paint. Plus it would be ALOT of measuring and cutting to make sure you take it off the same place on both cars--then line it all back up and get it back together-----not me brother lol--the openings accept doors windows etc the way they are now--I dont want to create fitment issues.

As it is right now the roof structure is still strong and put together the way it was engineered. You could stand on the roof bracing right now.

While doing it the way I did is time consuming its simply reversing the way it was put together. And when it goes back together all the areas I had to drill all the spotwelds from will be "hidden". In the windshield and back window area those will be hidden by the glass. The sail panel and the a-pillar weld areas are recessed and will be covered by lead. Much easier to finish in my opinion and make it look good.

So could it be done removing it in one piece--sure

Are there a hundred other things you could screw up and make a mess-yes

Would I do it the same way I did it again--without a doubt.


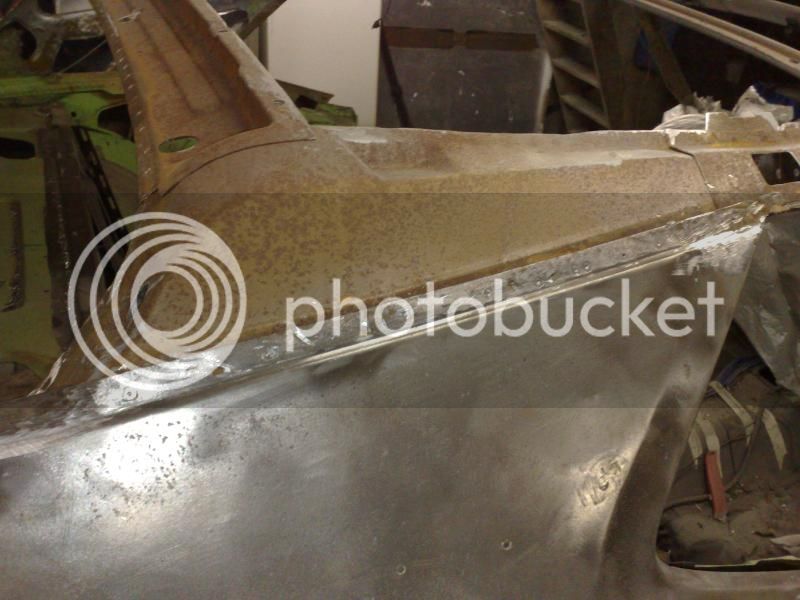
Oh another thing--The parts car roof and frames are in excellent shape--but the skin and bracing still show surface rust. Its pretty obvious all this stuff was not painted but only got the overspray from the primer and paint from the jams body etc. The stripe you can see on the roof in the background is raw steel that was sitting on top of the brace!!!! Taking off the roof gives you access you will never have again and I plan to take advantage of it and hit it all with Eastwood rust converter and encapsulator. In my lifetime I shouldnt ever need to worry about it again.

Oh and I got everything but the spotwelds over the rear window done on the car I'm fixing today :D:D

 
Last edited by a moderator:
IMG_0182.jpgIMG_0252.jpgWas clearing out some old photos and found these--figured I would add them quick as a help to someone doing this in the future. If I ever find time I will sit down with all the photos I took and do a write up. Anyway this gives a better understanding of how it goes on--oh and the last photo is installed on the car. These are only phone photos--others I took with camera
 
http://www.napaonline.com/Catalog/CatalogItemDetail.aspx/Strut-Tower-Spot-Weld-Cutter/_/R-NCP2786007_0380230883

The best Ive found was actually one from napa--the "blades" are double sided--just flips over.

Ive used several different kinds and I like this one the best. The trick is to go slowwwww the slower the bit is turning the better. Just let the blades do their job. If you crank the rpms the blades just skate over the metal and get dull almost immediately.

I also used a snap center punch--the type you push and it clicks. Keeps the napa style on course. I center punched every spot weld. If your unsure you can also give the center punch spot a quick turn with a small drill bit.
Yes those are similar to harbor freight and they work. Napa hopefully buys them from a place with better steel. I had them break the teeth off.

http://www.harborfreight.com/3-8-eighth-inch-double-sided-rotary-spot-weld-cutter-95343.html#.UzFme2CD5Gk

Good work on the roof by the way.

 
The napa ones seemed to be good steel--I broke one tooth the whole time. I had used the bit for a ton of cuts and it was finally getting dull. I was hogging on it pretty good and moving the drill itself around trying to get it to bite. When it broke thru the top layer the drill was at a slight angle and it caught the edge of the steel and snapped. Which is another tip for anyone using these--keep them at a 90 to the work surface and DO NOT move the drill around like you do when your trying to wallow out a hole.

Oh and when you go to weld the sheet metal spot welds back together

http://www.eastwood.com/plugweld-pliers.html

I wouldnt do it without a pair of these. You can put some heat into it without worrying about drop out on the bottom side. Damn I really need to just do a write up on this lol--

 
sorry i missed this.. but it looks familiar...

had to do the same..


i filled in the sailpanel with sheet metal, so no need for filling it up with bondo or lead..

looks good man!

 
Back
Top