- Joined
- Mar 30, 2017
- Messages
- 2,418
- Reaction score
- 930
- Location
- The Netherlands
- My Car
- 73 Grande 351C
71 Mach 1 429CJ
Fantastic weather today. They say it might be the last time this year 
back to chilly temp tomorrow, no time to waste!
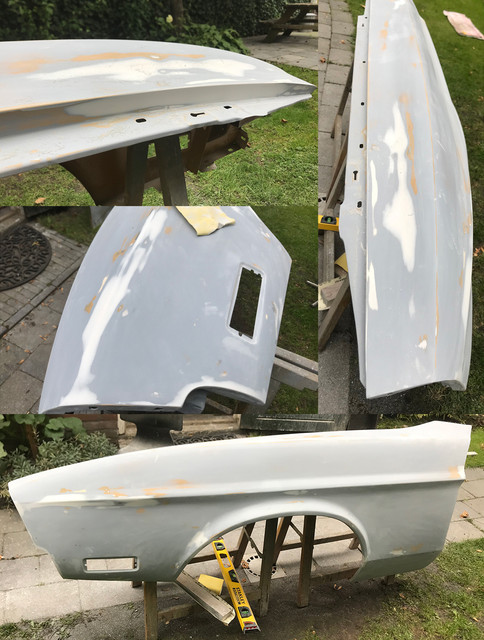
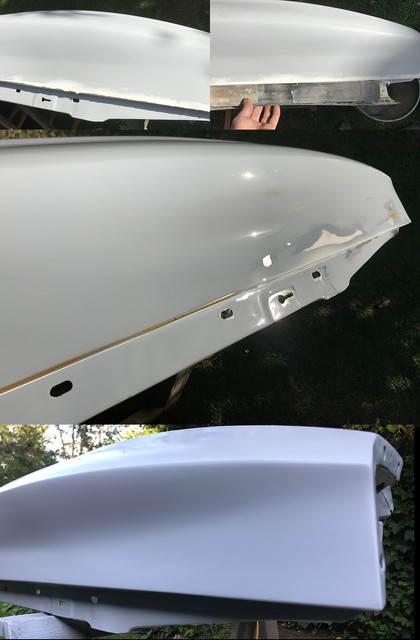
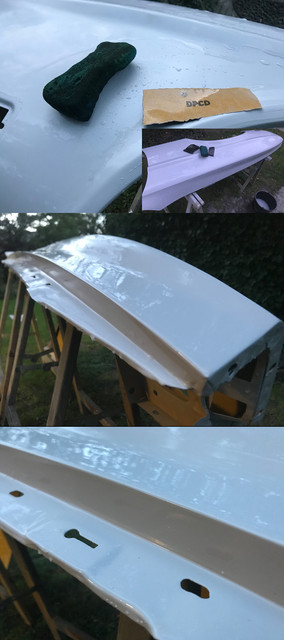
Primed the fender in filler primer. Looks now much better than it was but still need some fine tuning bondo. I've sanded the hood line a tad too much, and the line edge on top isn't consistent on the whole line. Didn't see it while busy as the fender was having another angle. Will need work very slowly for that one. Another issue on the middle line, where there is still a tiny "s" in it (deep rusty dent was there)) that needs small correction. For the rest even, if very hard to see on these sunny picts, I need small tiny touches on 4 or 5 locations, a good fine sanding and I should be there. Fixing the hood line is what matters most...
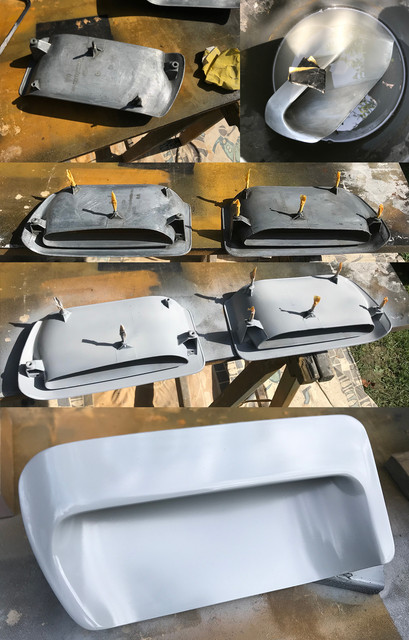
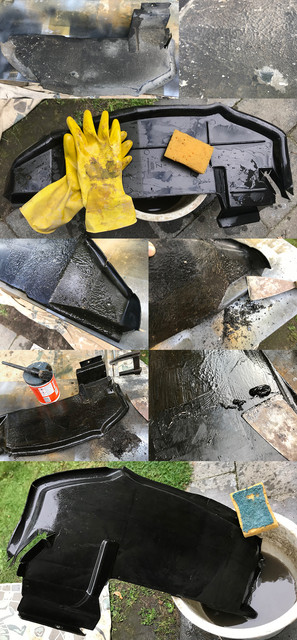
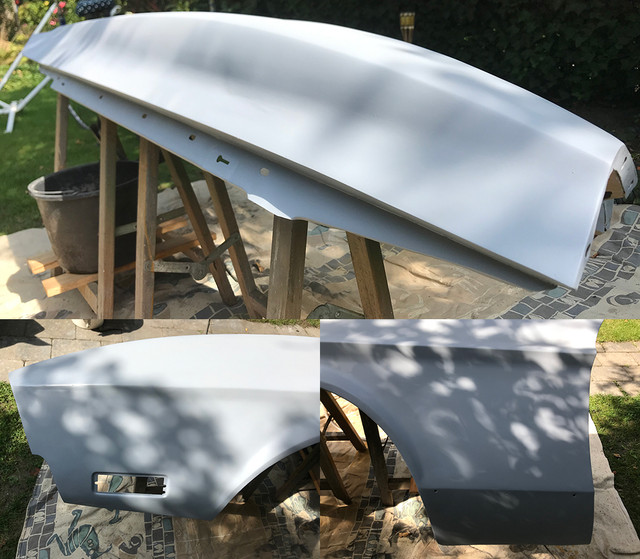
Because I need spray some grey/silver on lower part of both fenders, economically speaking, the more parts to paint at once the better. The scoops, already paint free and semi polished, were waiting for a while, so gave them a good soda bath and 800 fine water sanding, rinsed them and protected the studs, they are in good clean states, simply fear to crack the zamak trying remove them with double nuts. Turns out they were actually handy to hold the part in place.
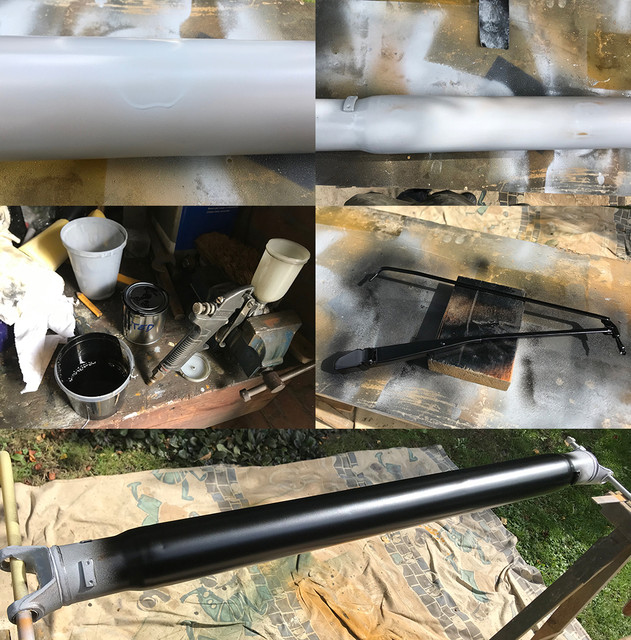
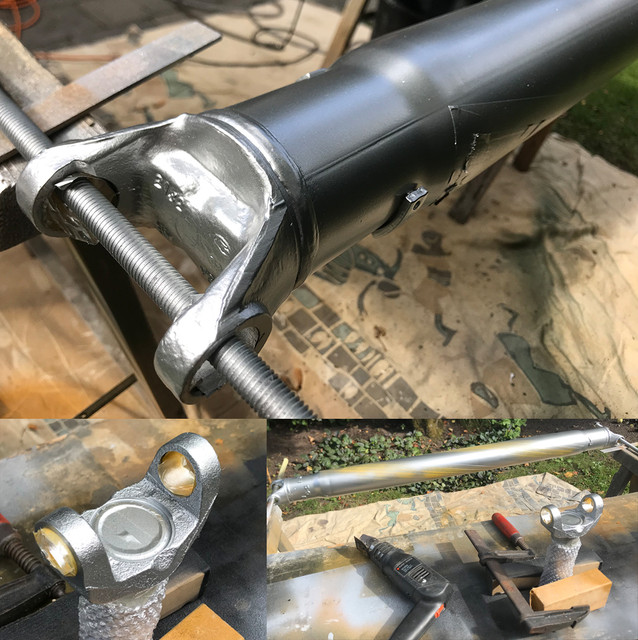
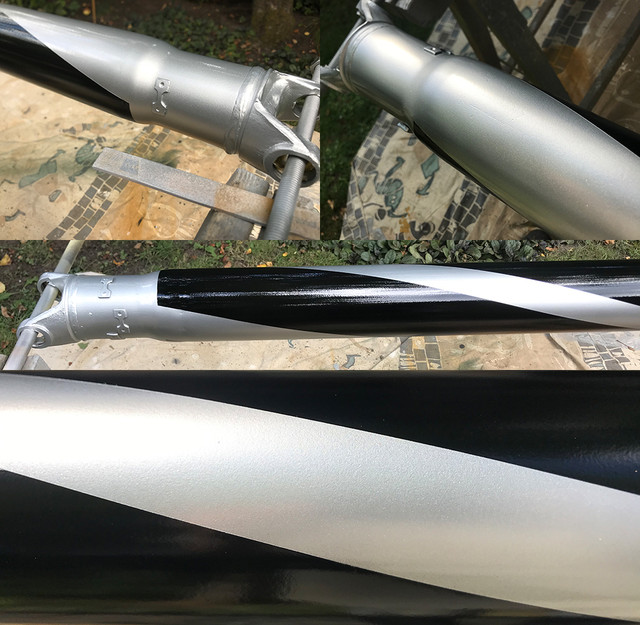
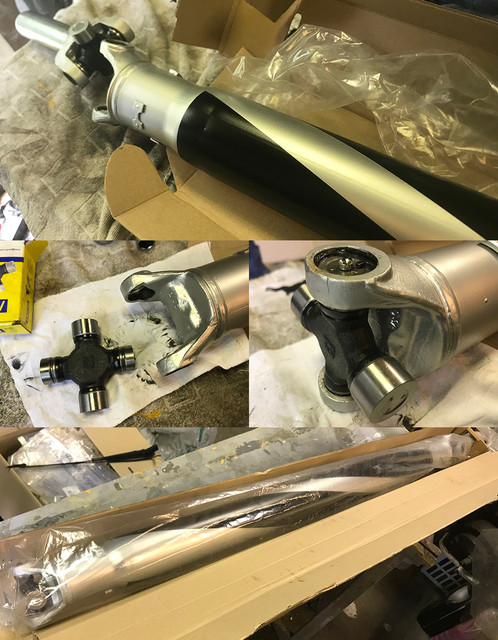
Water sanded the driveshaft epoxy, cleaned up again the hears and retaped.
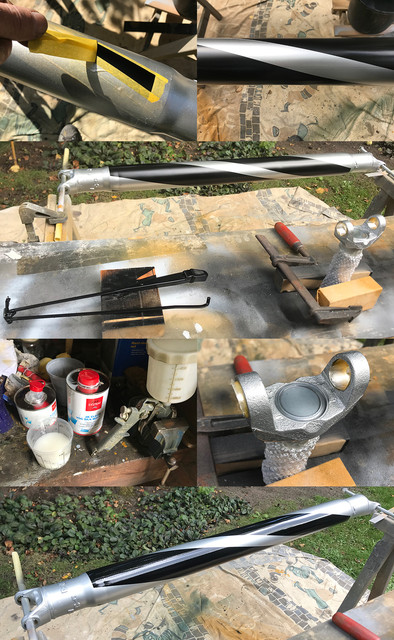
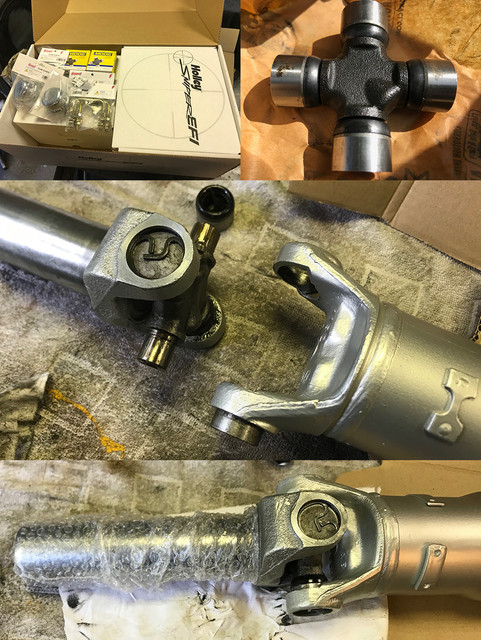
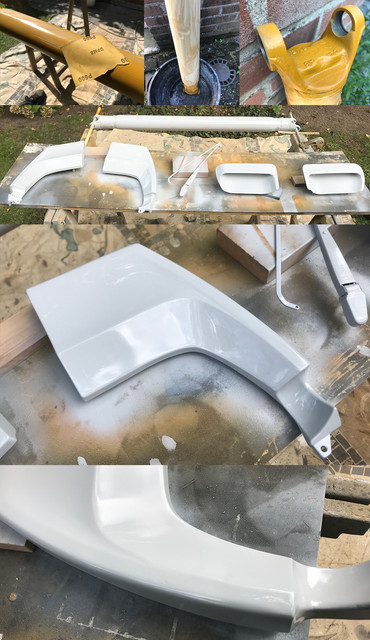
As I need shoot some green, same as the scoops are to the grey, I've primed the extensions as they can be sprayed together when I'll spray some green.
Tried a new primer today, 2k and of very very fine grain. Never used such fine almost glossy primer before, and I have mixed feelings about it:
I love it and hate it at same time!
I hate it because I made no less than 4 runners on the shaft. It will take 2 minutes to fix them, so its no biggy but I wasn't really expecting it to be so fluid and not covering as primers usually do. Unlike top coat that is more difficult than base color/paint, It shine right away and its hard to judge when enough is enough (tho now I know ).
And I love it, because, its the first time I have such fine primer, allowing very precise spray, almost airbrush like on a 1.4 mm gun! I think the main reason it failed on the shaft was because I've sprayed using 1.4mm nozzle @2bars and routinely thinned it as the other primers I use. This one needs more testing, prolly using my 1mm gun and less thinner for sure.
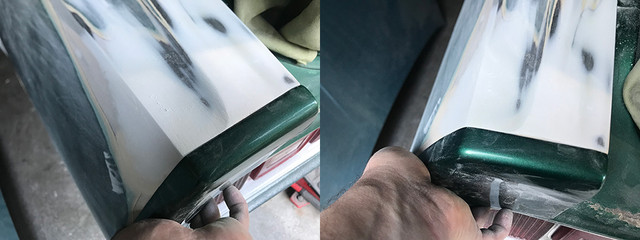
I might know tomorrow how it let itself be sanded if weather permits, as I need correct again one of the extension. One is fine, the other still needs some work, as one edge where it was repaired has an "undefined" edge. Hard to see on the pict, but it needs more guts and tell the eyes it is there. It doesn't atm.
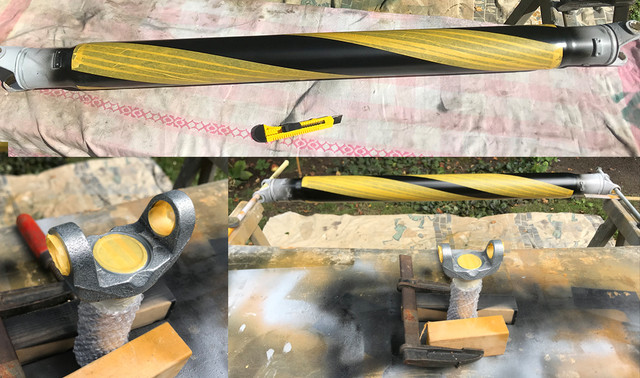
Also redid one of the wipers arm, as I've let it fall by accident ruining the top of it. I'll do this one when I'll spray black.
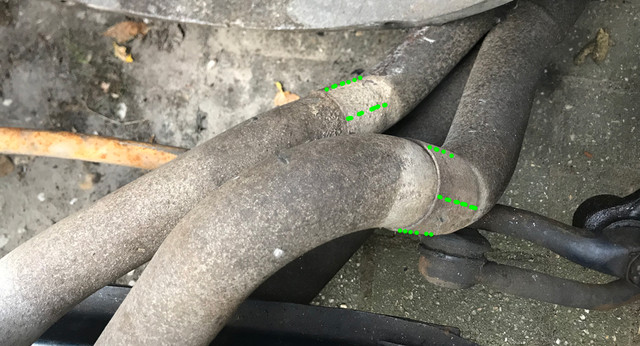
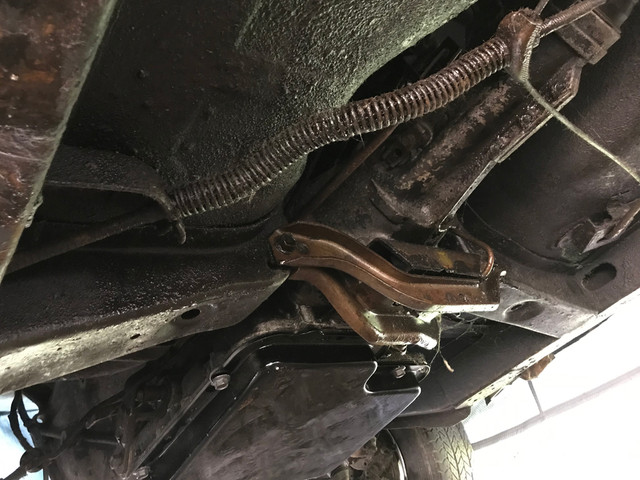
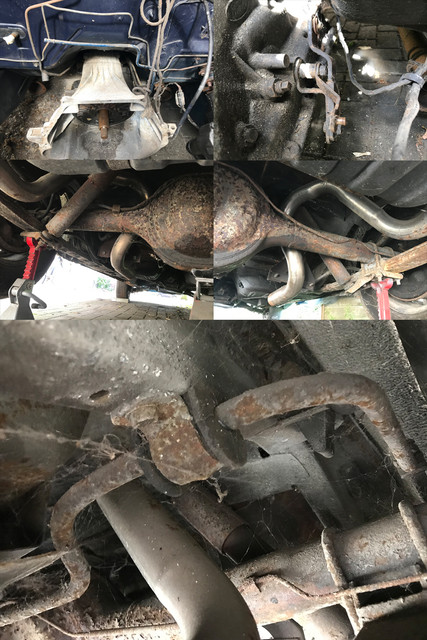
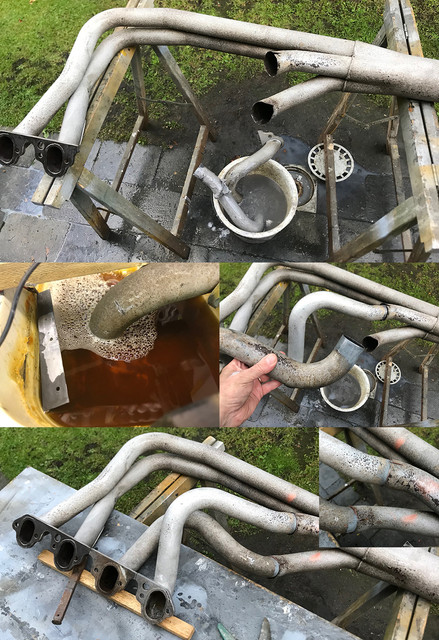
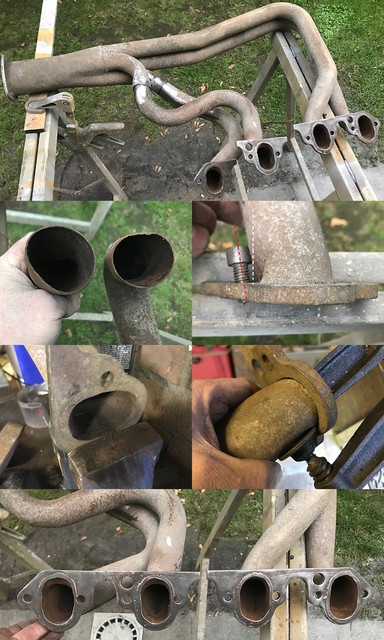
Finished the afternoon trying to remove my headers... heat did help clean the connections a bit, but still no movement, so as they now really must go out, I will have to cut lines. I think one on each side should work. Tho will retry heat with only one cut first. If someone has an idea other than this, let me know. They've been in penetrating oil and kept wet for weeks, hammered.. I don't think I have another choice here. Do I?
Heavy rain and thunder as I type, I wonder what I'll be able to do tomorrow...
back to chilly temp tomorrow, no time to waste!
Primed the fender in filler primer. Looks now much better than it was but still need some fine tuning bondo. I've sanded the hood line a tad too much, and the line edge on top isn't consistent on the whole line. Didn't see it while busy as the fender was having another angle. Will need work very slowly for that one. Another issue on the middle line, where there is still a tiny "s" in it (deep rusty dent was there)) that needs small correction. For the rest even, if very hard to see on these sunny picts, I need small tiny touches on 4 or 5 locations, a good fine sanding and I should be there. Fixing the hood line is what matters most...
Because I need spray some grey/silver on lower part of both fenders, economically speaking, the more parts to paint at once the better. The scoops, already paint free and semi polished, were waiting for a while, so gave them a good soda bath and 800 fine water sanding, rinsed them and protected the studs, they are in good clean states, simply fear to crack the zamak trying remove them with double nuts. Turns out they were actually handy to hold the part in place.
Water sanded the driveshaft epoxy, cleaned up again the hears and retaped.
As I need shoot some green, same as the scoops are to the grey, I've primed the extensions as they can be sprayed together when I'll spray some green.
Tried a new primer today, 2k and of very very fine grain. Never used such fine almost glossy primer before, and I have mixed feelings about it:
I love it and hate it at same time!
I hate it because I made no less than 4 runners on the shaft. It will take 2 minutes to fix them, so its no biggy but I wasn't really expecting it to be so fluid and not covering as primers usually do. Unlike top coat that is more difficult than base color/paint, It shine right away and its hard to judge when enough is enough (tho now I know
).And I love it, because, its the first time I have such fine primer, allowing very precise spray, almost airbrush like on a 1.4 mm gun! I think the main reason it failed on the shaft was because I've sprayed using 1.4mm nozzle @2bars and routinely thinned it as the other primers I use. This one needs more testing, prolly using my 1mm gun and less thinner for sure.
I might know tomorrow how it let itself be sanded if weather permits, as I need correct again one of the extension. One is fine, the other still needs some work, as one edge where it was repaired has an "undefined" edge. Hard to see on the pict, but it needs more guts and tell the eyes it is there. It doesn't atm.
Also redid one of the wipers arm, as I've let it fall by accident ruining the top of it. I'll do this one when I'll spray black.
Finished the afternoon trying to remove my headers... heat did help clean the connections a bit, but still no movement, so as they now really must go out, I will have to cut lines. I think one on each side should work. Tho will retry heat with only one cut first. If someone has an idea other than this, let me know. They've been in penetrating oil and kept wet for weeks, hammered.. I don't think I have another choice here. Do I?
Heavy rain and thunder as I type, I wonder what I'll be able to do tomorrow...
Last edited by a moderator: