- Joined
- Mar 30, 2017
- Messages
- 2,418
- Reaction score
- 930
- Location
- The Netherlands
- My Car
- 73 Grande 351C
71 Mach 1 429CJ
@midlife
Actually I do that all the time!. Some count sheep. Go figure!!
--------------------------------------------------------------------------------
Weather was as bad as it can be this past weekend. Hard wind and rain of the kind that soaks you in matter of seconds... non stop for almost 3 days. Impossible to do what I wanted, and as I need first to finish some work before start new..
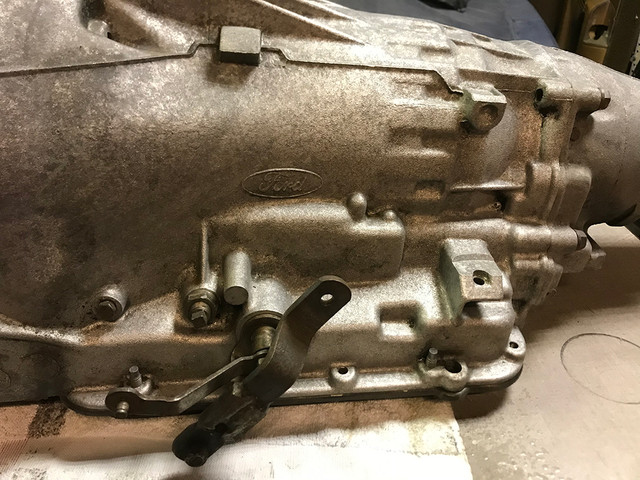
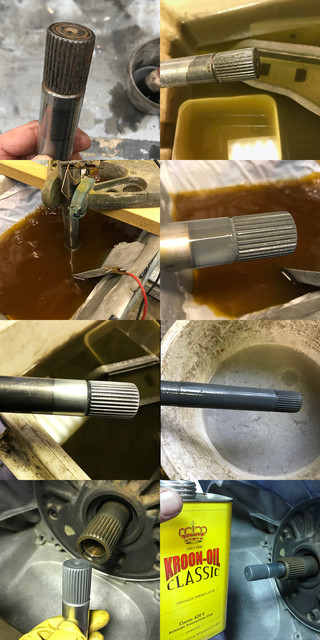
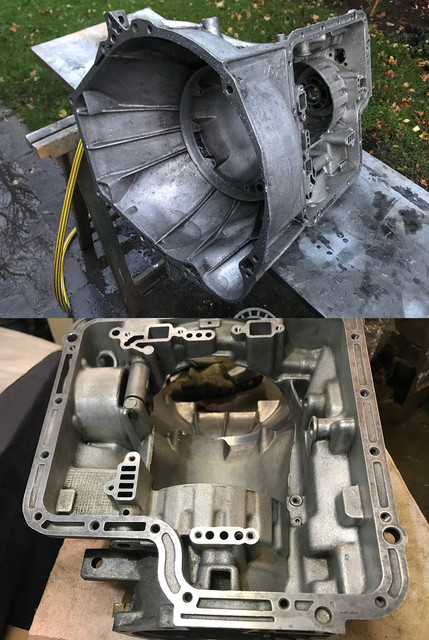
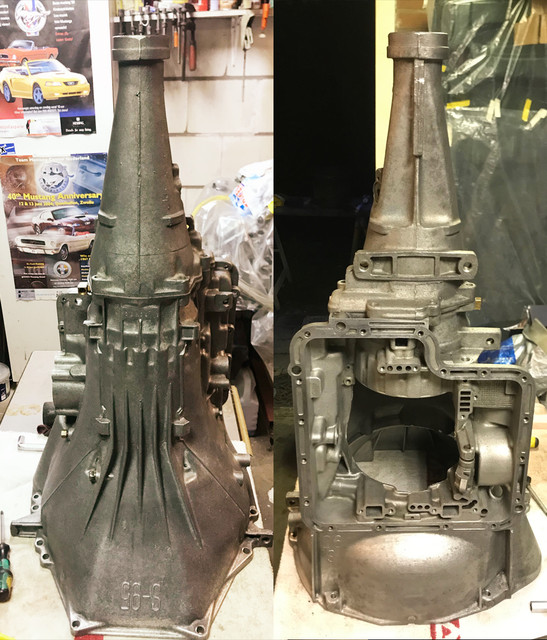
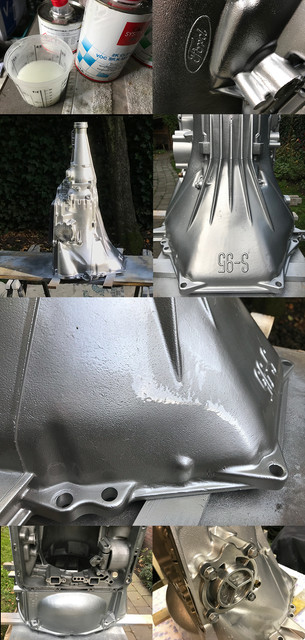
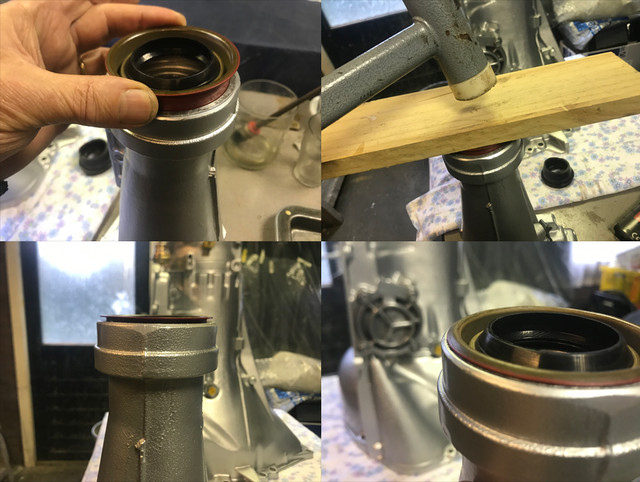
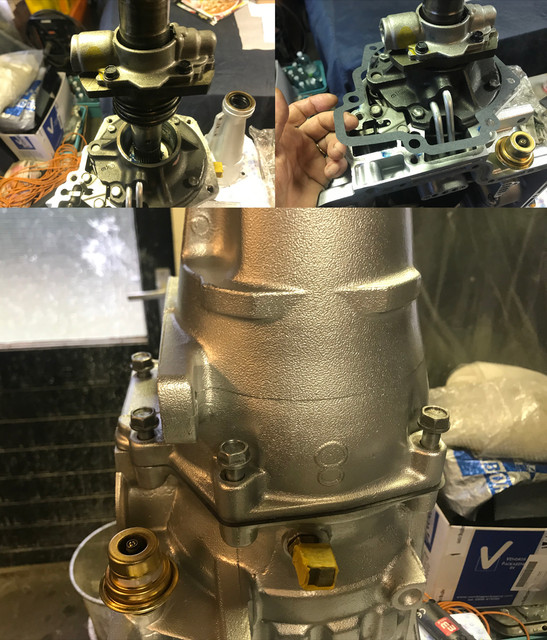
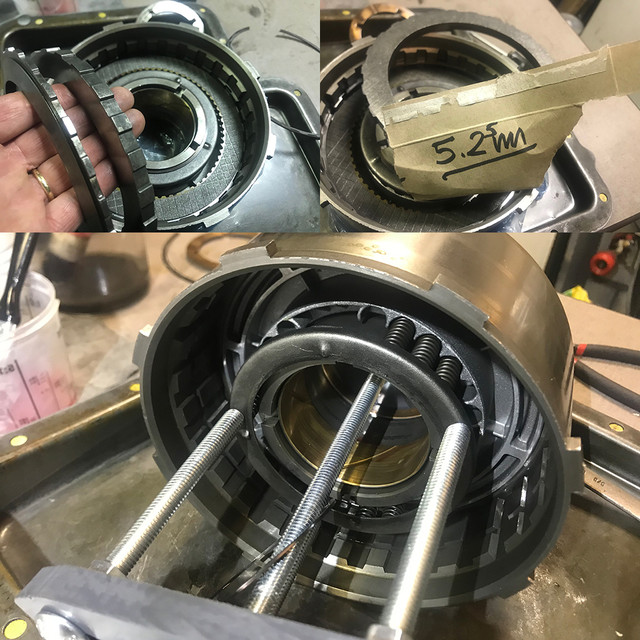
As cold days are coming, one of the next big step I plan to start soon, is to rebuild the C6. Of course to do so, I need a solid table to work on. There is one that will do fine next to my workbench, but of course its loaded with stuff on it, under it, in it. Ended up cleaning and moving stufs around for most of the weekend but got the table ready for surgery")
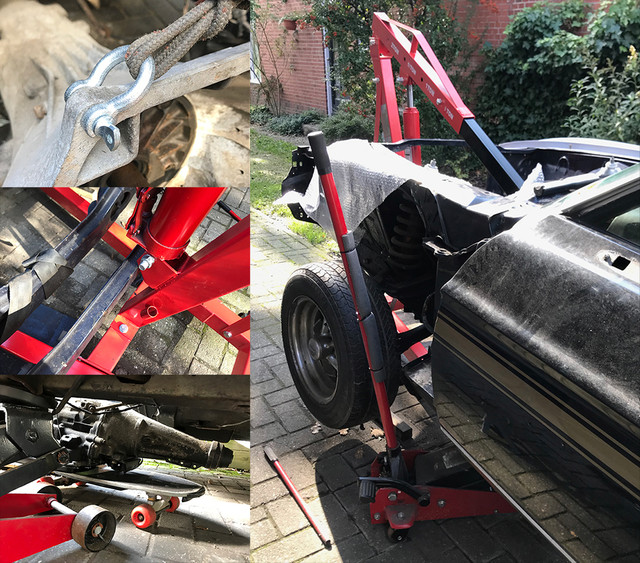
To remove the trans, place the engine and trans back etc... As no renting place around here got 2 tons lifts and considering the arm needs be extended, I wasn't planning set back the 429 alone with an engine hoist pushed to its limits. Especially with the headers that needs be mounted at same time.
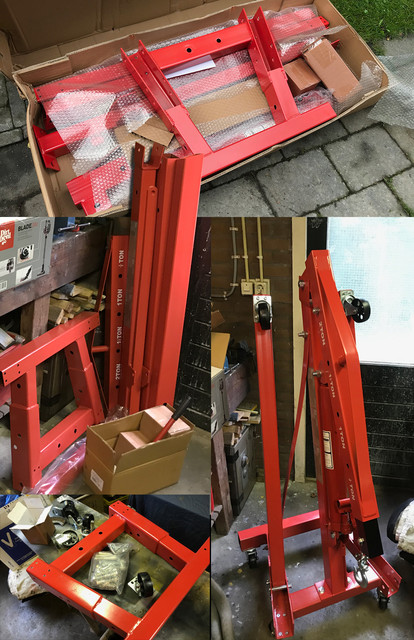
The red monster arrived on wood palette last Thursday. The heavy package of 70+ kg was kindly delivered at my garage door. Perfect service.
The space it takes isn't that bad but It will store it in pieces in the attic once I don't need it for a while or sell it. As renting one cost about 1/3 of a new one per day, its worth it and I won't stress myself if something would not go as expected and require extra time to be fixed.
Took a while to assemble it, as the doc was very vague and the provided bolts with different properties but similar in length not labeled or sorted for easy assembly. With a bit of common sense and few bad words, ended up with a working hoist.
I have the plate for the engine already on intake and some extra chains under way.
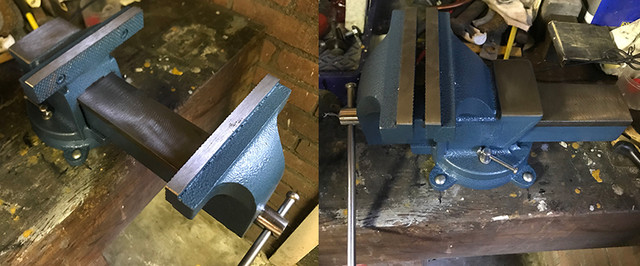
While rain was pouring, also changed my wise, the previous one, British made, was too small, and finally broke on me after more than 30 years of hard service. This new baby wasn't the one I wanted first, but was sold for this 150 mm width and its large open capacity for its relative compact size and the fact that it can rotate 360 on its base, making it ideal for my tiny space.
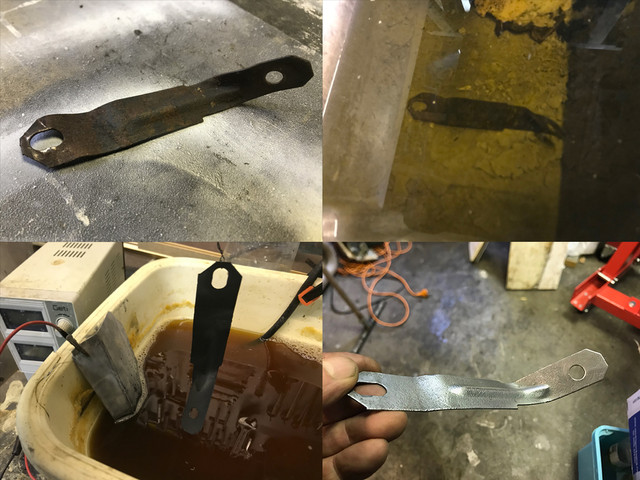
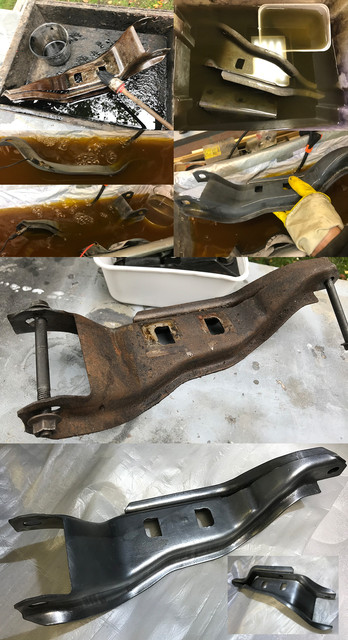
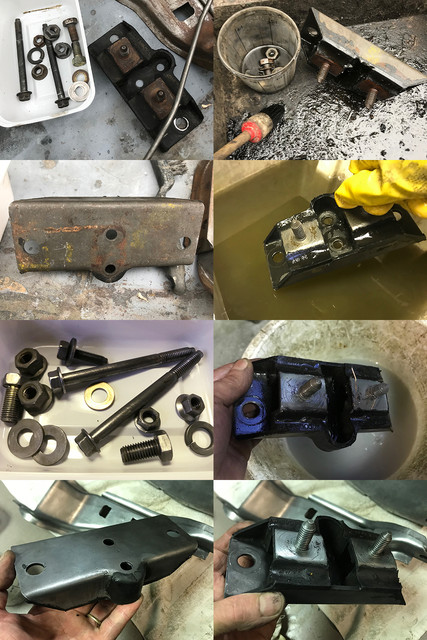
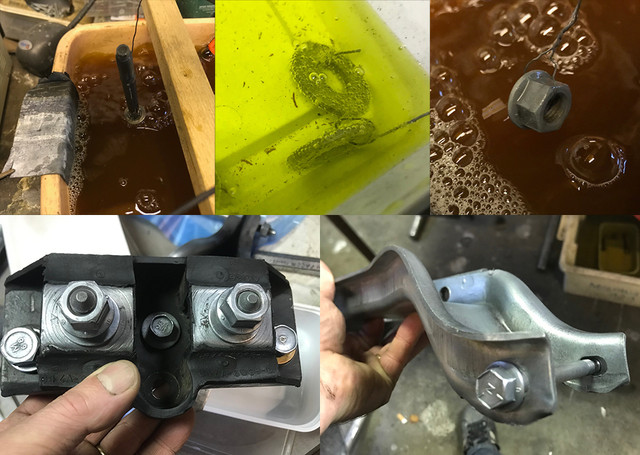
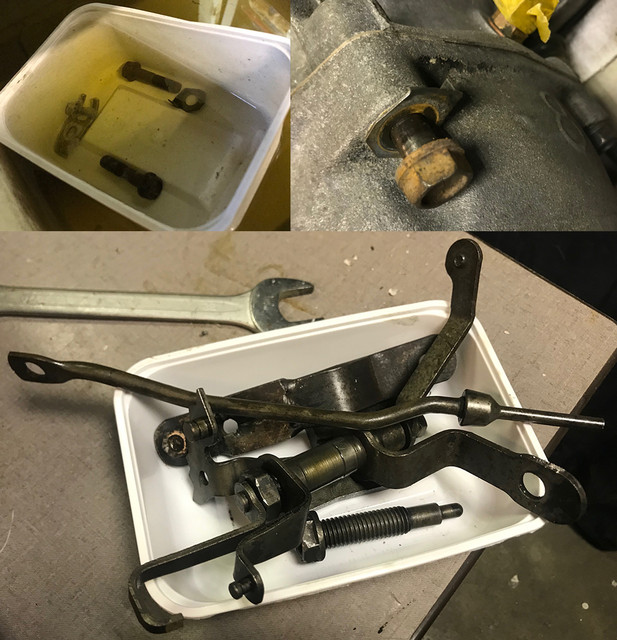
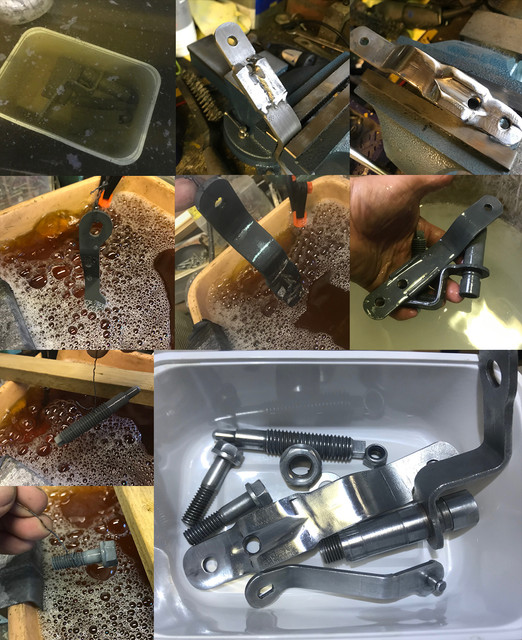
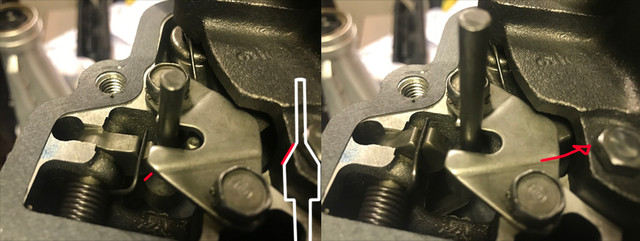
And because I want to do at least one thing on the 71 per weekend, I did one tiny thing, a fender bracket
Missing the other one, I'm gonna fab it at some point if I haven't got my hands on a new one by then.
Not the mustang weekend as I love them, but it had to be done and thanks to this ugly weather, its now done.
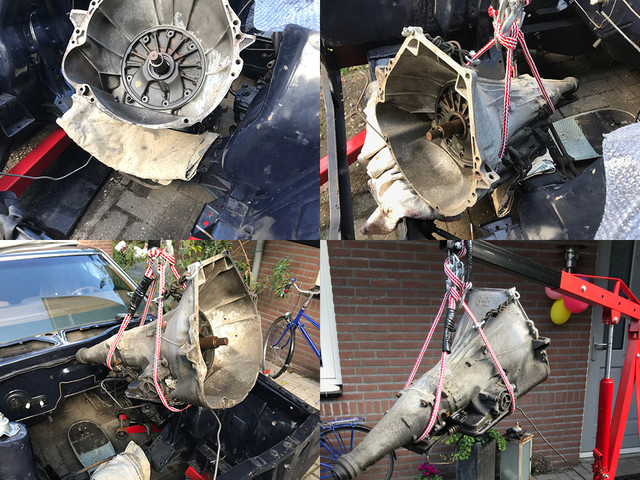
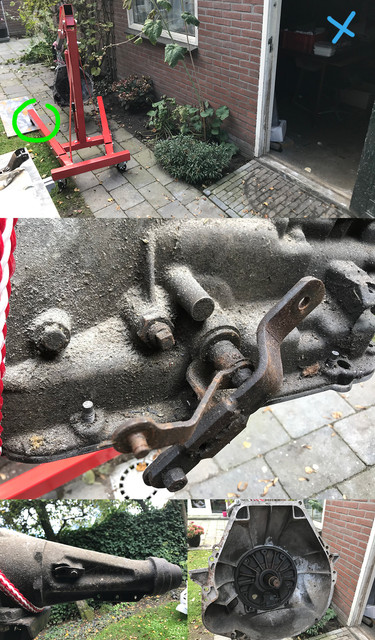
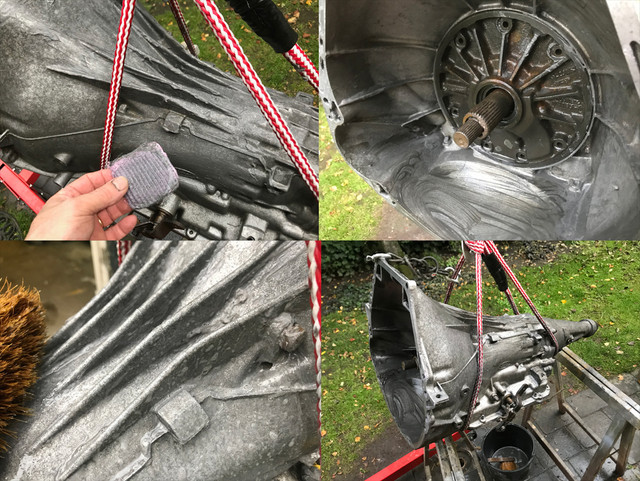
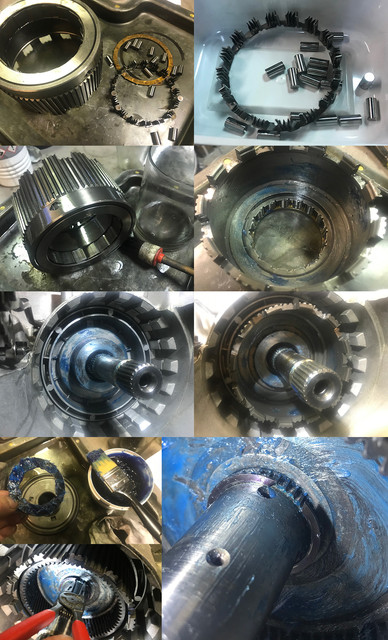
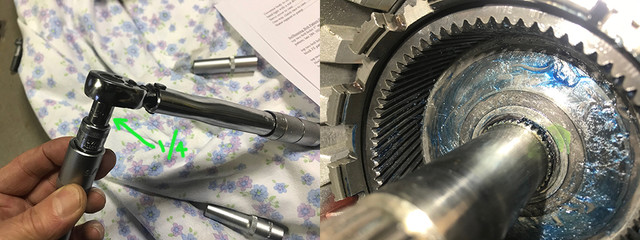
Let's hope next weekend will be better and that I can get the trans out with my new red monster toy and start its inspection so I can order what is necessary...
Actually I do that all the time!. Some count sheep. Go figure!!
--------------------------------------------------------------------------------
Weather was as bad as it can be this past weekend. Hard wind and rain of the kind that soaks you in matter of seconds... non stop for almost 3 days. Impossible to do what I wanted, and as I need first to finish some work before start new..
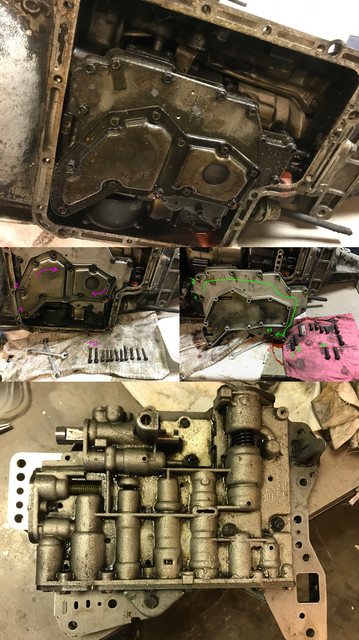
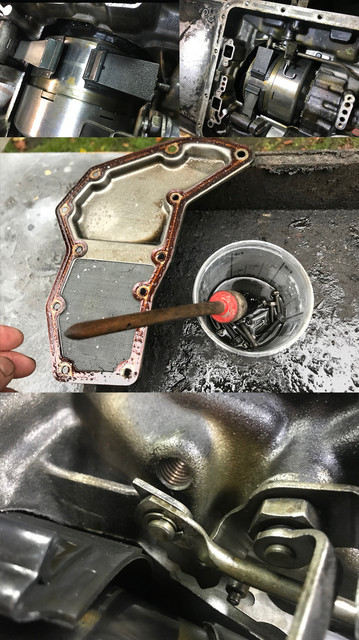
As cold days are coming, one of the next big step I plan to start soon, is to rebuild the C6. Of course to do so, I need a solid table to work on. There is one that will do fine next to my workbench, but of course its loaded with stuff on it, under it, in it. Ended up cleaning and moving stufs around for most of the weekend but got the table ready for surgery
To remove the trans, place the engine and trans back etc... As no renting place around here got 2 tons lifts and considering the arm needs be extended, I wasn't planning set back the 429 alone with an engine hoist pushed to its limits. Especially with the headers that needs be mounted at same time.
The red monster arrived on wood palette last Thursday. The heavy package of 70+ kg was kindly delivered at my garage door. Perfect service.
The space it takes isn't that bad but It will store it in pieces in the attic once I don't need it for a while or sell it. As renting one cost about 1/3 of a new one per day, its worth it and I won't stress myself if something would not go as expected and require extra time to be fixed.
Took a while to assemble it, as the doc was very vague and the provided bolts with different properties but similar in length not labeled or sorted for easy assembly. With a bit of common sense and few bad words, ended up with a working hoist.
I have the plate for the engine already on intake and some extra chains under way.
While rain was pouring, also changed my wise, the previous one, British made, was too small, and finally broke on me after more than 30 years of hard service. This new baby wasn't the one I wanted first, but was sold for this 150 mm width and its large open capacity for its relative compact size and the fact that it can rotate 360 on its base, making it ideal for my tiny space.
And because I want to do at least one thing on the 71 per weekend, I did one tiny thing, a fender bracket
Missing the other one, I'm gonna fab it at some point if I haven't got my hands on a new one by then.
Not the mustang weekend as I love them, but it had to be done and thanks to this ugly weather, its now done.
Let's hope next weekend will be better and that I can get the trans out with my new red monster toy and start its inspection so I can order what is necessary...
Last edited by a moderator: