I think I just blew up my A/C

7173Mustangs.com

Help Support 7173Mustangs.com:

This site may earn a commission from merchant affiliate links, including eBay, Amazon, and others.
Does anyone knows of an A/C vent for the center where you can adjust the horizontal direction of the louvers? What I have now allows vertical adjustment but not horizontal. I would like to have two separate vents in the center like I have, but with the horizontal adjustment capability. I notice that in my daily driver I adjust it for the air to hit right in my face until the car cools down. In the Mustang I can't get that to happen due to the lack of adjustability. I wonder if the Cougars have something like that.

Edit: I found this. I wonder if something like this will fit. However, it is ridiculously expensive.

https://secure.cougarpartscatalog.com/store/p/14604-Center-A/C-Register-Bezel-Grade-A-Used-1969-1970-Mercury-Cougar.html
One more discovery about my A/C. I realized my center air register (now I know the right name) has the louvers reversed, meaning that they are aiming towards the middle instead of towards the driver/passenger. Who installed this thing??? :shootself:

The Shop Manual can be a wonderful thing. I will get this fixed over the winter and I may not need the adjustable register I was researching.
Sorry to waste everyone's precious time. I just figured out my dumbness ( :shootself: ). I didn't know that you could rotate the register to change the air direction from coming out straight or towards the driver/passenger.

 
Last edited by a moderator:
I, for one, don't feel like my time has been wasted. I find it interesting that even relatively simple things like this can be assembled wrong. You would hope that more complex assemblies were handled by more competent workers, but I doubt it. A lot of things were designed so they couldn't be assembled wrong, but this, because of it's simplicity, wasn't. I believe time constraints were the reason for a lot of errors, if someone was having a bad day and getting behind they just threw it together.

 
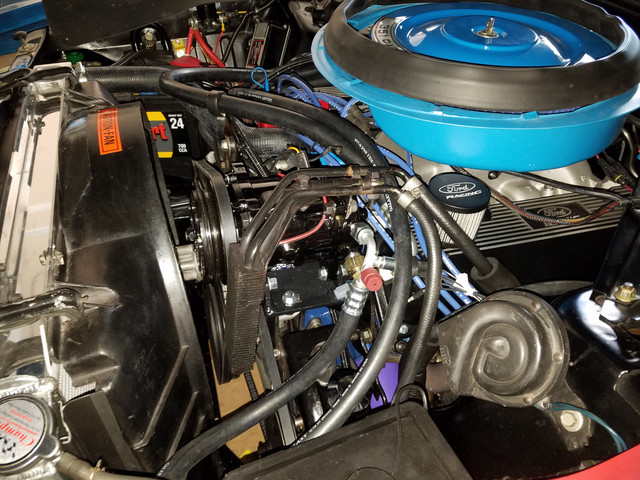
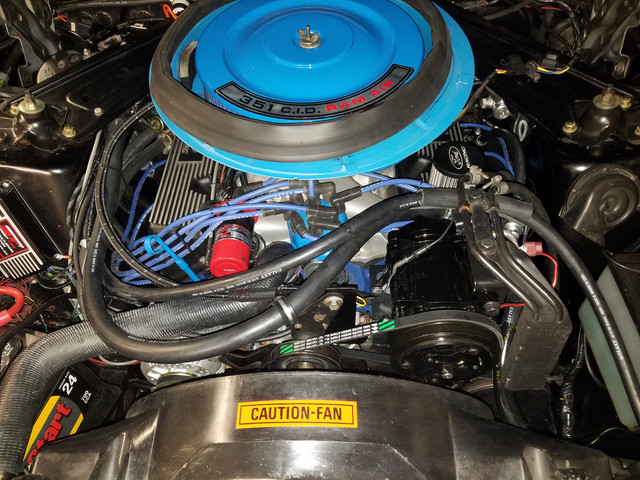
Here is an update. I installed the new Sanden compressor and hoses. I am still waiting for one 90 degree adapter to connect the suction hose. The adapter that I ordered last week was not sealing so I had to get another one. I got a Hi/Lo pressure switch to protect the compressor and system of stupidity. I also purchased a RPM switch that I will install in the cabin to protect the new compressor from my heavy foot. It is too hard not to rev the engine.

All is left is to flush the condenser, add a new dryer, perform a vacuum test,  and charge it. I will keep the charging pressure at the lower end of the range :chin: . I am learning my lesson.

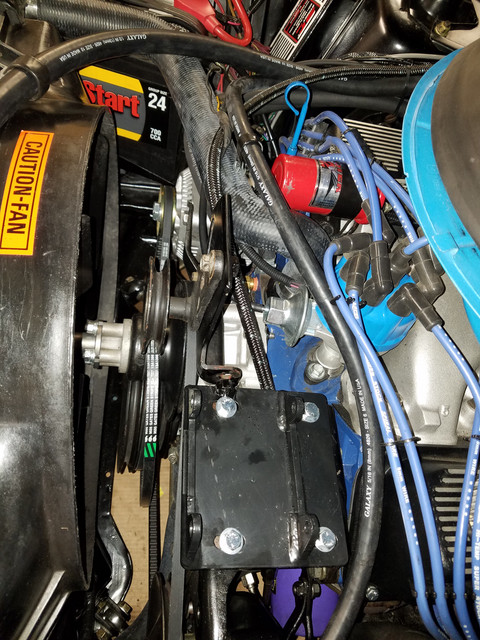
I got this adapter bracket to go from York to Sanden. It worked great. I modified the tensioner pulley from the old bracket by cutting the top plate that screws onto the top of the York. I then welded a nut to the new adapter bracket to add a third attachment point for the pulley bracket:


I had to add a couple of angle brackets on the Sanden to hold the steering cooler:


Okay. Let me report on the latest. So I installed the new compressor and charged it. I think the worst case scenario happened. I am suspicious there is a blockage. I was able to get the high pressure to 150 psi. However, the system is not cooling down. The low pressure gets up to about 30 psi as refrigerant flows in, but when no refrigerant flows in it goes to zero or a little below. When you run the system with the gauges and no charging the high side is at about 150psi while the low side is at zero. After a while the compressor made some noise so I shut the system down. Thoughts?

 
I would start with the expansion valve. The orifice in it is the most likely (smallest hole) place for something to plug.
That's the plan. One more item to add to my winter to do list. The weather is getting cooler here so no urgent need for A/C. I will also flush the coil, hoses and reflush the condenser. And a new drier. I understand that the compressor shouldn't be flushed, so how can it be clean? I am hoping that debris didn't damaged or clogged the compressor.

 
As a follow up to this thread. Today I took it to a shop that works in classic cars. Very nice guys! They found that the evaporator is blocked. That said, since I will be removing the evaporator, I will have to bite the bullet and go with the Classic Auto Air system. I am not looking forward to this work, but I am encouraged by the recent posts were Trillizo was able to complete the task without removing the whole dash.

 
I am finding this blog interesting, as I am currently going thru my heating/ ac system on my '71 Mach. It all started with my heater core starting to leak. The very day I saw the drips of coolant I disconnected the heater core hoses from the engine, as I knew I might as well be changing out a heater core. My A/C had not been blowing cold for a while as well, so I pulled the heater/evaporator box from the car.....I've been down this road before when I was a mechanic at a Mustang shop....and I resolved to completely rebuild the box, replace the heater core, and thoroughly go thru the A/C, all in one big project. I ordered a new "foam kit" to re-new all the doors and seals in the box, which, in itself, needed a thorough cleaning after 30 years of use ( I replaced the heater core 30 years ago when I first bought the car), a lot of dirt and debris can collect in the box over time, so now is the time to clean everything. The lower part of the box needed a few cracks repaired as well. Cracks repaired, the newly re-foamed door seals and cleaned and re-painted doors with hardware were re-installed into the lower box, and a new heater core was installed into it as well. The upper box was in perfect shape, but was cleaned as well, metal parts repainted, and new foam seals glued to the door(s). I , as we speak, am soaking the evaporator in a 5 gal carb cleaner to remove lots of black filth that has accumulated on it, and the screen than protects it. One of the techs at Classic Auto Air told me over the phone that the evaporator rarely goes bad, and that flushing it with laquer thinner would clean it out, should I be concerned. Later today, I will flush the evaporator out this way, and finish the install into the box. After all this, I should be getting close to re-installing the completed heater/ac unit back into the car. I am resolved to have both systems working PERFECTLY, and to do it with factory style parts. I am definately resolved to keep the R-12 system and York compressor unit. RPM-wise, my car, with a shift-kit, and 3.50:1 rear Trac-Loc, and auto trans, entering the freeway foot-to-the-floor, shifts at 4000, so the York compressor is fine. Normal shifting occurs before that anyway. I am, however, thinking of getting a new high efficient condenser unit, forward of the radiator., which will be an upgrade. I already have purchased a new receiver/drier, and new expansion valve for the project. I've also purchased a new factory correct "s" bend heater hose, that connects to the core and attaches to a new, correct style heater valve ( neither of which have ever been concourse since I've owed the car ) , but the heater had worked fine, It didn't matter much to me then if the heater valve wasn't absolutely factory-ish....it worked. 

I am also going to replace all of the vacuum hoses that control the various doors and heater valve, with properly color striped hoses. There is a flow chart in the shop manual that walks you through a function check of  the vacuum motors and doors, which isolates any problems with the controls, once I re-install the box assembly and hook it all up. All total, it's a little bit of work, but not beyond me at all. I love my Mach, and I drive it everyday, and anytime I need to replace something on it, I strive to restore it, or make it as factory as I can. Some day I'll be gone, and the next owner will appreciate it being right. I should take pictures just to show how it all goes for the interested.

 
I re-installed the heater/ac box today. First thing I did was to replace the two vacuum hoses that go thru the firewall to the heater valve, and for vacuum source for the control switch. Apparently.... either the molded  firewall grommet and hoses were one part, or the vacuum hoses just became as one with the grommet over time,...I suspect the latter. I could not pull the hoses thru either direction. So replacing the two hoses became a mini project in itself , so cut of the ends in the engine compartment and drilled the two holes open so that I can slide fresh hoses thru. I bought some paint pens ( brown, white, red, blue, purple, and yellow ), to color stripe the new hoses just like the factory did . Once the two ( black and purple ) hoses were run , the Heater/ac box went in. At this point, I was thinking I'll just make up correct length vac hoses, color stripe them and be done. However, the factory Did mold the hoses to a six-hose "gang plug" at the control switch. I ended up removing the control switch from the center instrument panel, color coding it with paint dots, ( the color is cast in tiny letters on the back side, which does you no good when viewing it from the front ), and making up four custom length, color coded new individual hoses, plugged into the control switch.....red, yellow, blue, and white. At that point, I had to put my center instrument panel back together and re-install the right kick panel, glove box liner, glove box door. This all took the better part of the day. I haven't yet hooked up the heater hoses, being that I want to flush out the radiator and cooling system first. A/C hook up is after that.

Sometimes a smallish project can be like going through a junk drawer.....you can spend hours cleaning up things and re-organizing. Glad this part is done, kinda a pain in the arse, but it came out good.  

 
Back
Top