MuscleTang mod project thread (1971 M-Mach 1)

7173Mustangs.com

Help Support 7173Mustangs.com:

This site may earn a commission from merchant affiliate links, including eBay, Amazon, and others.
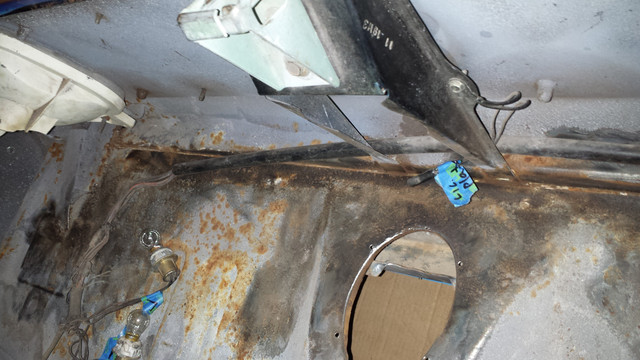
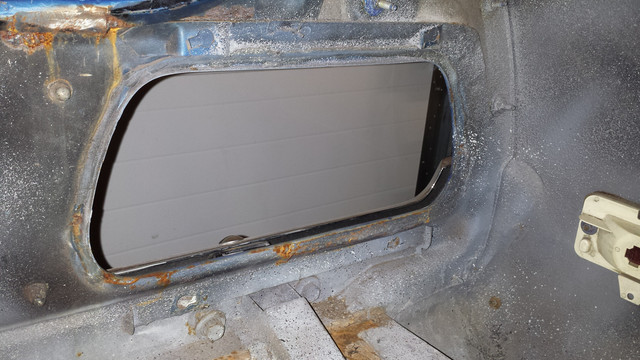
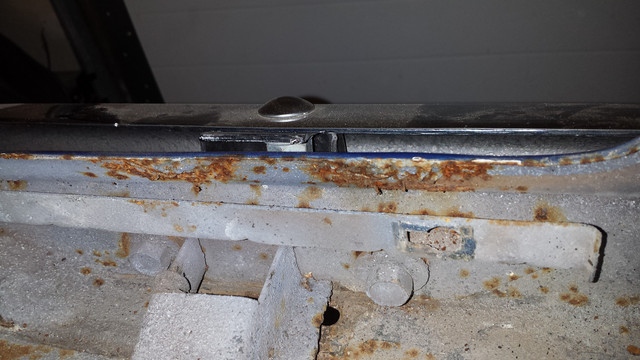
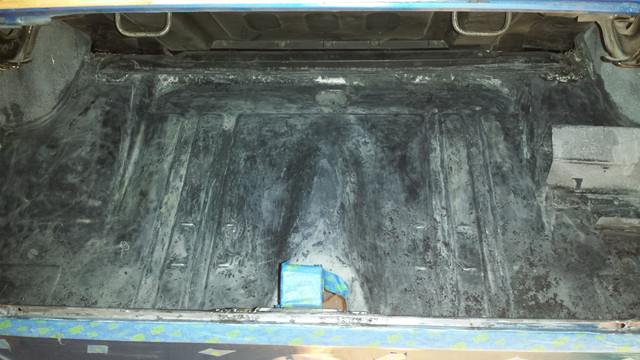
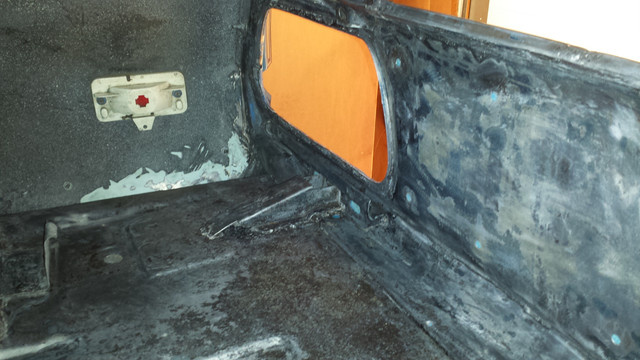
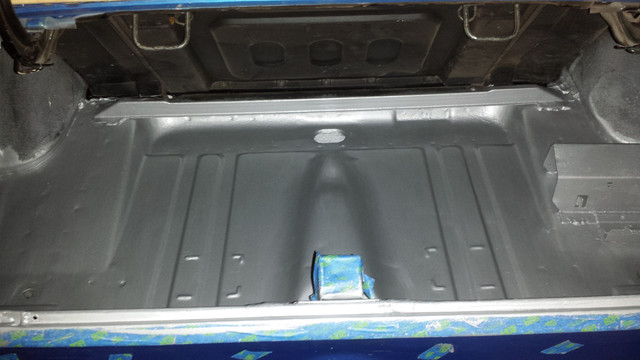
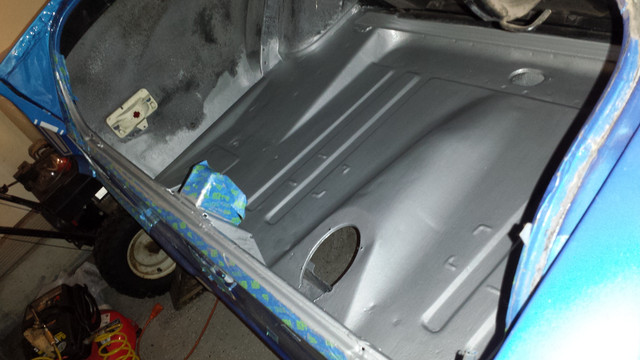
I am currently working on fixing rust issues in the trunk and inner fenders. As I ready to paint the trunk area I am curious on how the trunk side of the tail light panel it's supposed to look from factory - this is a hard picture to find since it has to be taken from inside the trunk. By no means I am performing a rotisserie restoration, but I would like to approximate as close within my capabilities. After repairs, grinding, cleaning, prepping, I am covering the trunk floor with Rust Bullet, beadliner coating and trunk paint, but I don't know how the inside of the tail light panel is painted, how the center support of the panel is painted and how the lock bracket is painted. Also, if someone has a picture of the trunk seal groove (without seal) where it meets the inside of the trunk it would be appreciated.

Another question, I have seen some tail light panels painted black, was this an option, or just customization?
This was responded on this separate thread:

https://7173mustangs.com/threads/correct-appearance-of-trunk-side-of-tail-light-panel.28266/
 
Last edited:
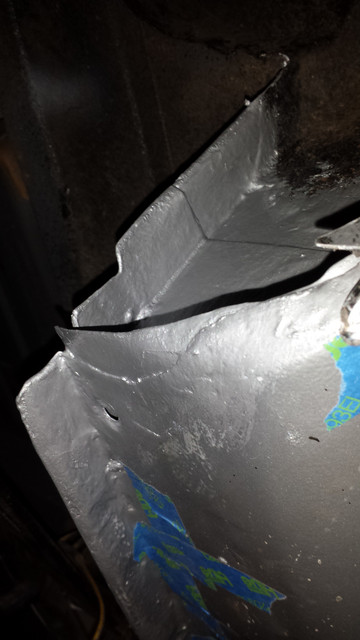
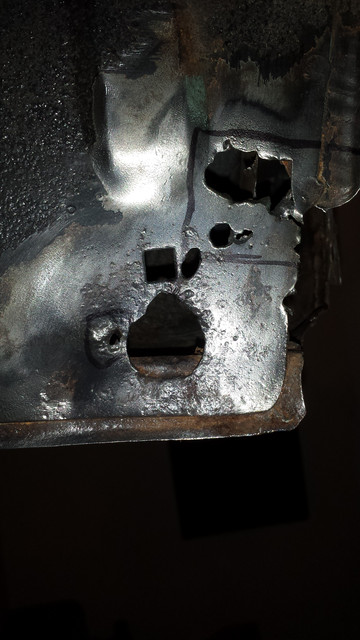
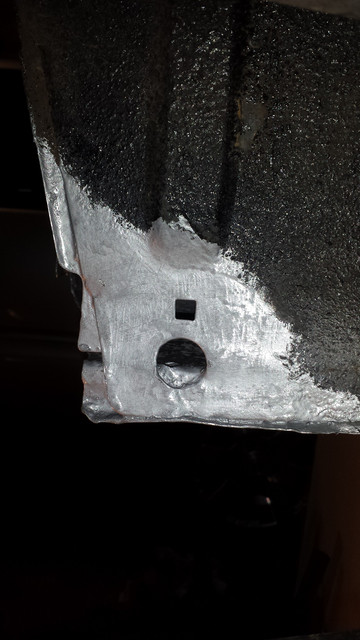
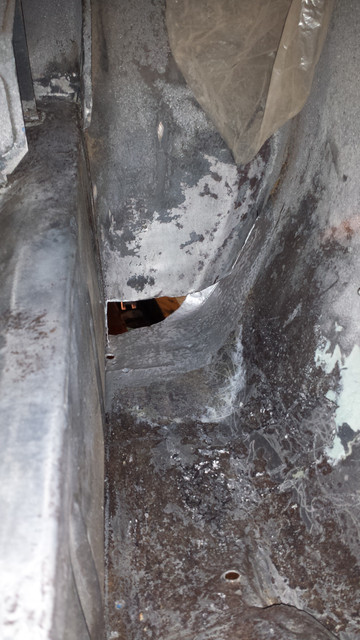
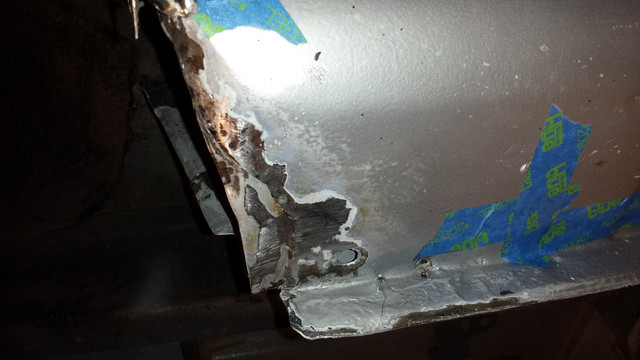
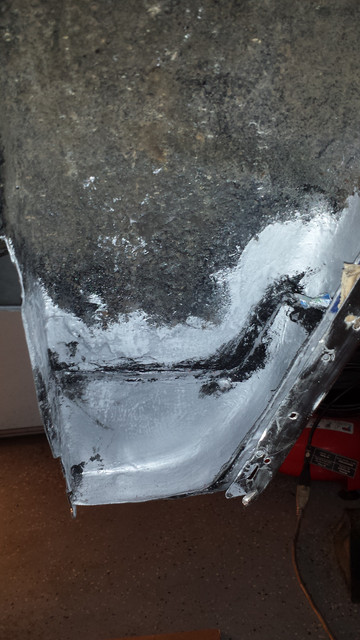
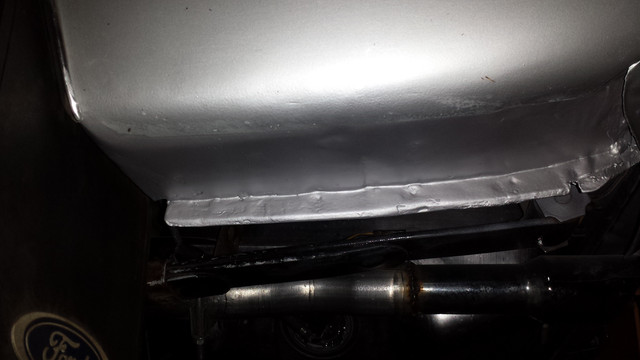
Now that I have the trunk and the repaired areas of the inner fender coated with 3 layer of Rust Bullet I am looking into seam sealing the overlaps and in between panels. However, as you can see in the picture, I had to cut a piece of the fender due to rust. The picture shows an underside view of the fender behind the wheel. I overlapped the new inner fender panel on top of the fender welding it with plug welds. The bottom of the fender now shows an overlap seam. I am not too concerned on making this look perfect, but I would like to do better. So I would describe what I am thinking of doing with the idea of getting some help from the forum. I will roughen the Rust Bullet coat with 120 grit, add some putty to smooth the overlap, spray with primer, and then spray with Argent paint. Does this make sense? If so, what type of putty should I use here? I have some 3M Bondo Glazing putty. With this plan, I seem to be missing the step of sealing the seam. I will seam seal on the inside, but I don't know if should do the outside and then shape it with putty. Help...... thank you.


Last edited by a moderator:
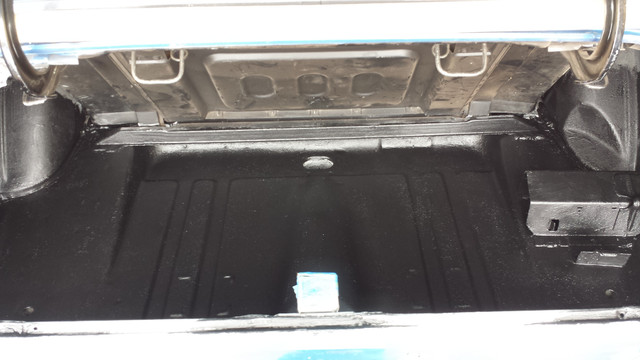
Wanted to post some pictures here to summarize the work I did on the trunk and wheel wells.

Here are the steps involved:

-Clean, grind, sand, and I mean a lot of it.

-Cut rusted pieces.

-Kept sanding, and again, a lot of sanding. Some small areas of the rear fender were rusted through. These were in the surfaces that face down. I tried to remove all the rust and then a little more.

-Cut pieces out of sheetmetal to replace, fit and shape pieces. I bought new complete wheelwells for each side. I cut the pieces from here. However, the piece of the trunk drop off I made it myself from sheetmetal I had laying around.

-Welded pieces and ground the welds. I overlap the sheetmetal and spot welded. This is not an structural piece so I minimize the amount of welding.

-Clean and primed all the sanded surfaces with three layers of Rust Bullet (with brush).

-Applied seam sealer.

-Applied epoxy to the through holes in the rear fenders.

-Cleaned and applied two coats of UPOL bedliner (with brush) on the interior surfaces.

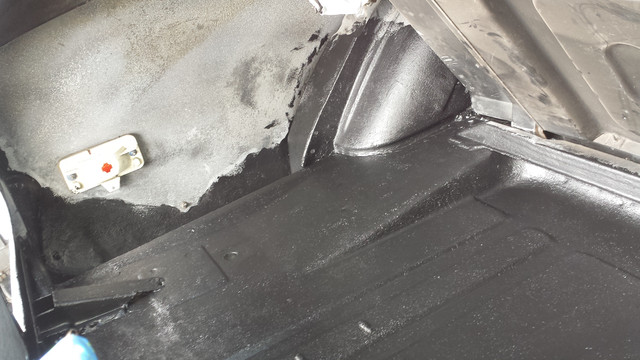
-Sprayed BoomMat insulation on the trunk side of the wheel wells

-Sprayed Eastwood's trunk paint on interior. As you can see in the pictures, some areas turned out a bit more yellow. My guess is that there was a reaction between the BoomMat and trunk paint. I tried to fix it by removing the trunk paint, priming and repainting, but to no avail. The pictures exaggerate the yellowing due to the flash. You can't see unless you are really looking for it.

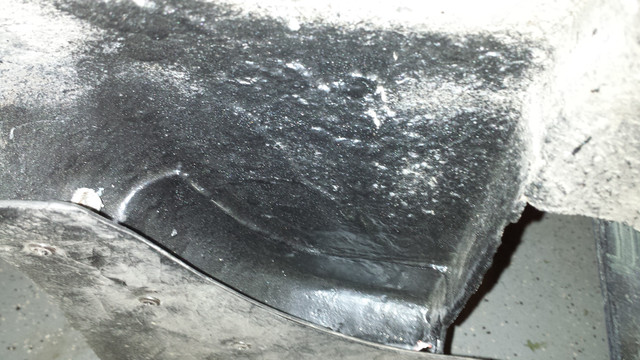
-Sprayed Eastwood's undercoating on the exterior areas of the wheel wells that were affected.

-Repaired the bottom surface of the rear fender with epoxy, putty, primer and "closely" matching paint. It is not perfect but it is well hidden since it is facing downwards.

Before:


Grinding, sanding, cutting:


Rust Bullet coats:


Seam sealer:


UPOL bedliner coats:


Eastwood's trunk paing


Wheel well after Eastwood's undercoating:


Bottom of rear fender after repair and painting:


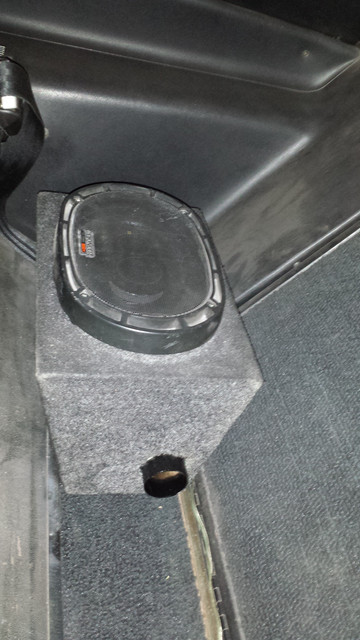
Some time back I posted about my 6x9 speaker enclosures. I bought the car with these enclosures and after replacing the old Pioneer speakers with a new pair of Kickers I was disappointed with the sound of the bass. I have used these speakers in the past so I knew they have the pop I wanted. The enclosures were completely closed, so what I did is to port them. I purchased a 1.75" OD (1 5/8" ID) polycarbonate tube from Amazon to do the trick. What I like of this tube is that while it's tough, it's also thin. I used one of the many vent port calculators in the internet to get an idea of diameter/length of the tube. My goal was to make the longest port tube I could, which ended up being 11.5" long. You have to locate the end of the tube at least one diameter from the internal wall of the enclosure. In my case I let the tube protrude 3/4" out of the enclosure, which gave me 11.5". According to the calculator for the volume of my enclosure (minus the approximate volume of the tube and speaker), that diameter and length gave me a frequency of about 50Hz, which is not bad.

Well, the final result is amazing. The bass is now alive!! It was so worth it. I am satisfied with the sound so no need to get a subwoofer or anything more fancy.


Don't get fooled by the Pioneer grill. I left it there so it looks "vintage". The speaker is a 6x9 Kicker.

Links:

Tubes: https://www.amazon.com/gp/product/B000OMHJJO/ref=oh_aui_detailpage_o04_s00?ie=UTF8&psc=1

Vent port calculator: http://www.mobileinformationlabs.com/HowTo-1Woofer-Box-CAL%20Port%20lenth%201.htm

 
Last edited by a moderator:
Changed the ignition switch last week. I am having an intermittent power failure that I have not been able to figure out. It happens seldom but it is frustrating. 

Thanks to Midlife for all his help!

The car starts and works with no problem, but once in a while I go to start the engine and the starter clicks once and it doesn't turn. After that I will lose power to everything in the car for a few seconds/minutes. Then the power will come back and the car would start without an issue, unless the problem manifests itself again. Only three times it happened back to back. The last time it happened it was even stranger. The dome light was able to be turned on during this time, but by turning the switch to ON or ACC the dome light will turn off.

I don't know for sure if it is the ignition switch, but changed it just in case. The ignition switch has the capability to turn off all the power. Not all the symptoms point to the switch but it is a starting point. I have already checked ground, wiring and all connections. All looks good. I am carrying a multimeter in the car just in case it happens again I can diagnose.

Something that happened is that I bought the ignition switch from CJPony. They sent me one with the wires reversed at the connector, and with wires that were much longer. Did not match their pictures at all. I ended up buying Standard Motor' model US67 from Amazon. It worked well. CJP responded to my complaint quickly and they refunded my expenses after showing pictures of the mismatch.

I think I may have to readjust the ignition switch. After I start the car and I let go the switch, I don't get power to the accessories until I rotate the ignition back just a touch.

 
I added turndown exhaust tips to the cutouts. These are QTP's 11250, which I painted with hi-temp black. The cutouts are from last year, they are from BadlanzHPE.

They were probably not needed, but I wanted to keep the exhaust off the floors.


Changed the ignition switch last week. I am having an intermittent power failure that I have not been able to figure out. It happens seldom but it is frustrating. 

Thanks to Midlife for all his help!

The car starts and works with no problem, but once in a while I go to start the engine and the starter clicks once and it doesn't turn. After that I will lose power to everything in the car for a few seconds/minutes. Then the power will come back and the car would start without an issue, unless the problem manifests itself again. Only three times it happened back to back. The last time it happened it was even stranger. The dome light was able to be turned on during this time, but by turning the switch to ON or ACC the dome light will turn off.

I don't know for sure if it is the ignition switch, but changed it just in case. The ignition switch has the capability to turn off all the power. Not all the symptoms point to the switch but it is a starting point. I have already checked ground, wiring and all connections. All looks good. I am carrying a multimeter in the car just in case it happens again I can diagnose.

Something that happened is that I bought the ignition switch from CJPony. They sent me one with the wires reversed at the connector, and with wires that were much longer. Did not match their pictures at all. I ended up buying Standard Motor' model US67 from Amazon. It worked well. CJP responded to my complaint quickly and they refunded my expenses after showing pictures of the mismatch.

I think I may have to readjust the ignition switch. After I start the car and I let go the switch, I don't get power to the accessories until I rotate the ignition back just a touch.
After I changed the ignition switch I started having issues that after the engine started I did not have power to the instrument panel or radio. I figured that if you turn the key back a little by hand, the power would come back. I adjusted the ignition switch position and it got better, but not as it used to be. Then I adjusted the switch further more to a point where the gear in the switch cylinder jumped a tooth. I tried many different adjustments and couldn't find a sweet spot where the switch will spring back correctly and the gear won't jump the tooth. After more investigation I figured out that the return spring built into the new ignition switch is not as strong as the original switch. It really upsets me that they can't replicate a part correctly.

So, long story short, a trip to the hardware store landed me a conical spring and couple washers. I added the spring and washers where the rod exits the ignition switch. The spring is compressed between the housing of the switch and the hook of the rod coming from the ignition cylinder. I had to cut the spring so it fits. I think this fixed the issue. Now, after I start the engine, the switch returns to the appropriate position. It's not a concourse solution, but it works, and no one can see it.

 
Done a few things in the front suspension: added roller perches and modified strut rods from Pacific Thunder Performance.

Installed Street Fire (MSD) CD ignition: huge different at idle and acceleration. I had to retune my EFI. A lot less gasoline is now needed to start and during acceleration.

Completed installation of TMI seat covers.

And I can't remember all the so many little things I have been doing.

 
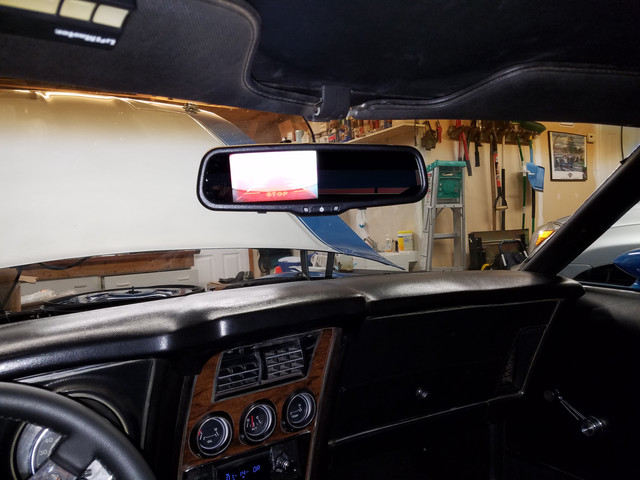
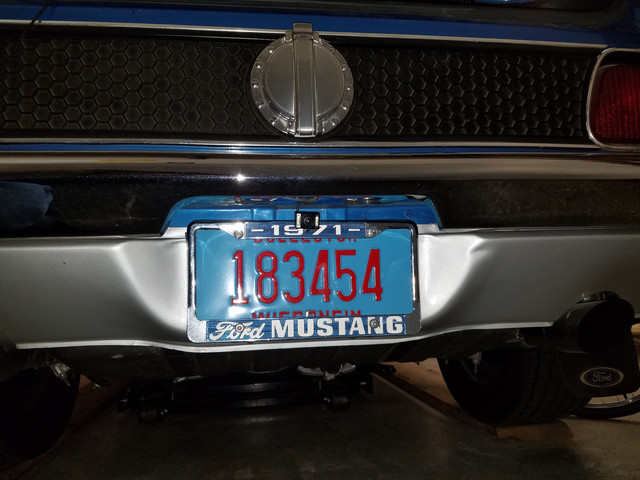
Installed this back up camera:

https://www.amazon.com/gp/product/B01M260I3Z/ref=oh_aui_search_detailpage?ie=UTF8&psc=1

Edit: the link is not working anymore. The camera is an AUTOVOX T1400W

Good overall and easy installation. Did not have to drill a hole or cut any wires. The only issue is that the mirror vibrates more than I would prefer. I am working on trying to improve this issue.

Some may not like the look of the double mirror, but you can't really notice unless you look from the side. Most people won't even notice.


Edit: see update here https://www.7173mustangs.com/thread-muscletang-mod-project-thread-1971-m-mach-1?pid=348034#pid348034

This model with the mirror that attaches over the original did not work for me.

 
Last edited by a moderator:
This week I am starting my long awaited project to drastically increase the performance of my Mach 1. I will be stroking the engine to 408 and installing a TKO600. The stroker kit will come to TMayer. He will also perform any block machining and head assembly. I am keeping my good old iron 4V heads. Cam has not been yet selected but it will be some type of hydraulic roller. For the TKO600 I am planing on the Modern Driveline kit. I will try to keep up to date with posting news and pictures about the project. In the mean time while the engine is out several things will happen: new intermediate brake line, new brake booster, fixing rust on battery apron, fixing rust on cowl. With the new engine, a new radiator, new distributor, new steering pump (Saginaw conversion since my newly rebuilt broke), new hoses, new A/C condenser hose, and many others.

 
Last edited by a moderator:
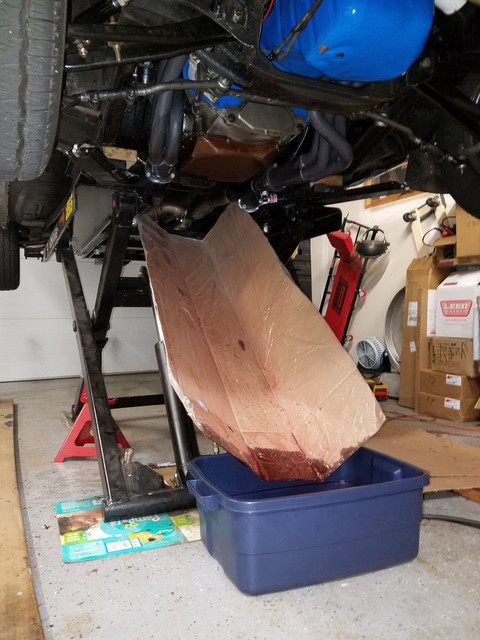
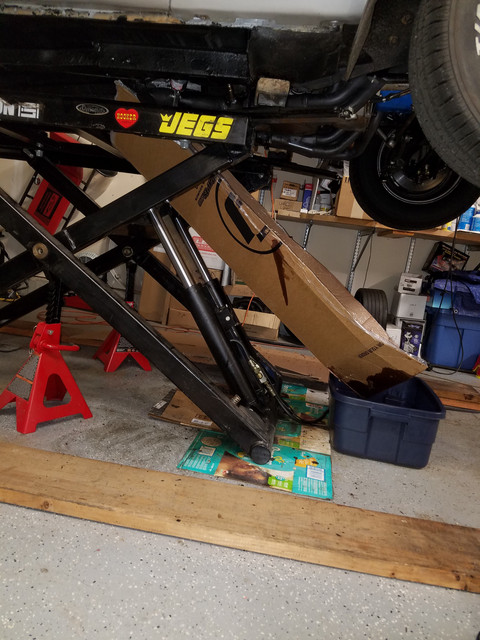
I am starting by draining the transmission fluid. Since I have a scissors lift I had to be a bit creative since I am not able to fit a pan underneath due to the lift. I basically took a long box and cut it to act as a big funnel. I covered the box in plastic wrap to allow the fluid to drain down instead of being absorbed. All for $0.


You are staying busy for sure.

When you do the inner fender under the battery you will need to get a new reinforcement that goes under the battery for the battery box bolts. I got one off eBay last year that was a perfect copy and great repo. I do not know if they are still on there or not. The repo inner does not have the reinforcement or did not in past. I am sure you know to wash that area with baking soda to kill any acid still there before prep for paint.
Thanks David. I need to see in what condition mine is. Would you have a link or picture of the reinforcement?

 
Last edited by a moderator:
You are staying busy for sure.

When you do the inner fender under the battery you will need to get a new reinforcement that goes under the battery for the battery box bolts. I got one off eBay last year that was a perfect copy and great repo. I do not know if they are still on there or not. The repo inner does not have the reinforcement or did not in past. I am sure you know to wash that area with baking soda to kill any acid still there before prep for paint.
Thanks David. I need to see in what condition mine is. Would you have a link or picture of the reinforcement?
I went back and found when I posted the link to them on eBay here it is. Did not check to see there were more. Wish I had got two when I ordered.

http://www.ebay.com/itm/1973-Ford-Mustang-Cinnamon-/351327287911?forcerrptr=true&hash=item51ccbcfa67&item=351327287911&pt=US_Cars_Trucks&nma=true&si=qN7yVrAZIQx7d8e3PyrNUwO5NQs%253D&orig_cvip=true&rt=nc&_trksid=p2047675.l2557


Latest posts

Back
Top