Summer deadline - 72 Mach 1 Build thread

7173Mustangs.com

Help Support 7173Mustangs.com:

This site may earn a commission from merchant affiliate links, including eBay, Amazon, and others.
so progress has been slow as i've been away and busy at work.

For the roof rust Steve - i am going to use rustbuster fe123. it's supposed to be the best but i don't know if that's just advertising hype or what. Check out their website. I ordered it off ebay for £38.5 for the 1 litre bottle. I'm still sanding the sections, and i now intend to remove the center roof panel so i have easier access to the whole roof. I have a bigger concern though, the pitting in the roof is quite bad in one section, i havent prodded with a screwdriver yet but i may need a new roof skin. Still on the fence as it's another ton of work but lets get all the rust off first....

Not a T5 - no chance :) I listen to the radio when i don't have my ear defenders on....

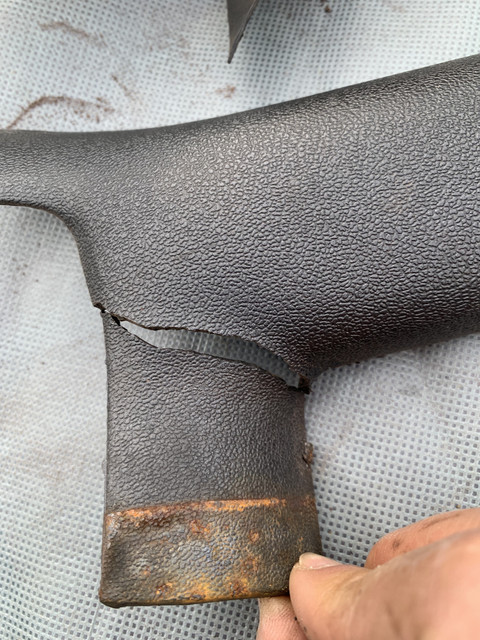
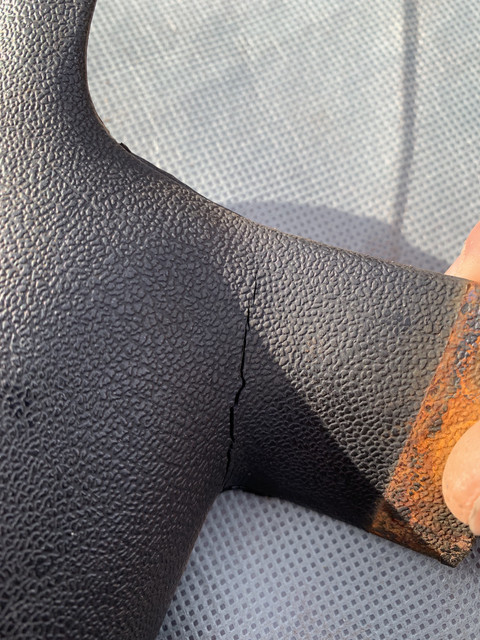
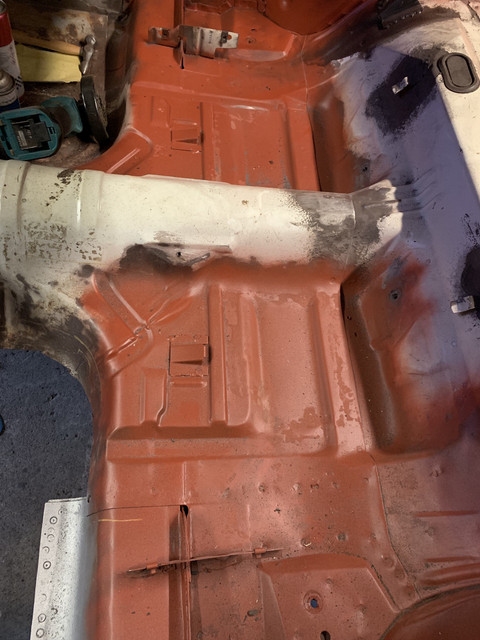
So, I've cleaned up the rear floor section and its now done. I also cleaned rear passenger side inner panels and primed with red oxide. i've been slowly disassembling the wiring loom, door rubbers and metal trim.

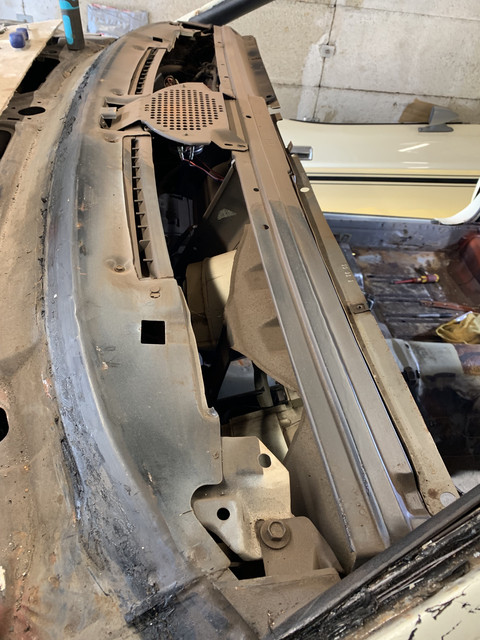
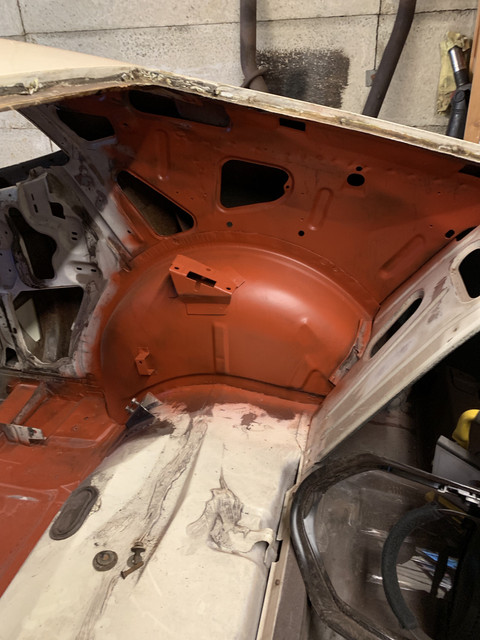
I am struggling to get the front windscreen out as i intend to remove the whole dash. In fact car will be a complete shell when it gets to paint. I will cut out all the sealant and have another go next weekend.


Any progress is good progress. Work allows you to imbibe in your hobby.

I see from your last picture where you have red oxide you did not touch behind where the rear wheel arches are. Yoy may want to consider a soda blaster for that. A PITA for sure but it will give you piece of mind long term

 
Any progress is good progress. Work allows you to imbibe in your hobby.

I see from your last picture where you have red oxide you did not touch behind where the rear wheel arches are. Yoy may want to consider a soda blaster for that. A PITA for sure but it will give you piece of mind long term
the rear wheel arches are going to be the rear challenge, i dont have the luxury nor desire to remove rear fenders as the metal is solid, but the job would have been a lot easier. I am planning on purchasing the eastwood soda blaster kit (frosts have a good deal at £250) and then i can use that for all rust removal of parts and difficult to reach areas....

 
did a few bits and pieces over the long weekend.

Firstly, using feedback from another thread (thanks Carolina Mustang) i managed to find some old black metallic spray paint and applied to the fold down seat. First i stripped the paint, red oxide primer'd it, then painted it. I am not 100% happy with the finish, probably as the paint cans are over 5 years old and have been sitting in the garage when i first thought about partial resto.... (didnt realise back then it would evolve into a nut and bolt resto....)


dumb question, but if anyone knows the colour code for this paint so i can get it made for spray gun use as I may use on other panels. I prefer this black to the "black" black.... this one is definitely more factory like but still a little more glossy than original, although over time it may fade to the factory original look.

 
Last edited by a moderator:
i finally managed to get the windscreen out, but it was a bitter lesson to learn. I used a wire string to feed through the glass edge to remove the heavy dose of silicone (it felt like it had been freshly applied, i wonder if PO had glass removed and then silicone applied - anyway, it was messy..... i digress. I missed a 10cm section with the wire, and as i carefully lifted the glass, i heard a crack.... long story short, the bottom section corner has a crack in it. Truth is i was going to replace the windscreen/shield anyway, but as this was the original glass (still has the pilkington logo and 72 date code) i wanted to keep it just in case. Plan B is replacement glass, with me copying the pilkington stamp and applying to new glass (if this is available let us know)

Removed dashpad. Couldn't find out how to get this off, prized off a corner and took a peek below it, and could see the clips, then lifted and pushed inwards and it eventually came off.... going to be fun putting that back in...


Dashpad is in relatively good condition, i dont think i will repaint it, just touch up the scratches at the edge prob. caused by my amateur windshield removal technique...


Broken pillar trim panels.... Fabrice, I'm coming for ya for advice on these, repair not replace :)


corundum crystal shape

 
removed instrument bezel, easier to do once dashpad removed, had to disconnect the speedo cable and power supply, speedo cable was removed by pinching the plastic connector and pulling back.

I will need to order replacement glass ad its cracked, added to CJP wish list.


Next steps are to remove steering column, dash, wiring loom and brake booster and the panels remaining on the footwell so all that is left is the body shell. Thinking about a rotisserie as well as that may make the rust removal and painting easier to do.....

 
You've been busy!!

Pity the windshield broke. Chances it does are fifty fifty in my experience.

For the black, and in fact all colors, I find gun spraying much nicer on parts greater than a few inches. I use lots of metallic and uni paints that I let compose at my paint shop,

I know no can beats the clear coat durability and look. Simply because it not having the nozzle nor the pressure that you need for a nice mist that will give you a smooth result.

I use cans too for small part, but always finish with sprayed coating.

I buy small 1/4 liters black/colours in uni and metallic. Then spray different coatings.

This one for instance is semi-gloss and gives a durable coating, many times better than what you could get with a can. Especially regarding scratch resistance.

https://www.carsystem.org/en/nc/products/group-detail/2k-clear-voc-silkmatt-2k-clear-coat/

I use a small .8 mm nozzle gun for it. sprayed at +-2 bars with a tad of thinner. Using a small gun, you get great precision and can prep/use small amounts. Of course for a panel/big parts a 1.4 or 1.6 nozzle bigger gun is better. This brand also provides nice mat and gloss clear coats also touch and uv resistant. Its not cheap, but becomes more economical once you start paint groups of parts and learn how to not prep enough to repaint your house for 2 small parts (been there) :)

Oh and another stupid reason I like this brand for, the hardener comes in a sealed container that you can open and close. Sounds like basic... but no. You have no idea how often I need go get extra hardener because most brands use small metal cans that are not 100% closed once you've open them once or twice. Few months later it's gone or no longer liquid.

For the plastic, make them one again is the easy part, the challenge will be to well protect the visible grain during the melting and somehow find a way to sculpt the melted region afterwards.

I was planning do some test on this, as I have massive speakers holes to close but did not come to it yet. I think @Rackerm did some nice plastic fixes at some point, may be he knows a way to restore the grain..

For the second pict, if you can press it together and it makes the broken edge visually disappear, then only melting and adding material on the other side "could" do the trick and leave the surface visually perfect while strong enough. Ideally you should try to find another broken piece of similar plastic and test on it.

 
Too late now but when taking the windshield out you should get the dash out of the way for sure. The A post covers are always brittle from the heat. I would just glue them with ABS cement and then reinforce the back side with epoxy and fiberglass. Hope you noticed the little support piece behind the screw in the middle. The dash will go back on easy just make sure you have the clip fingers straight. On your instrument panel lens. They do not repo lens with the trip reset button. You will have to cut your old one out and use it.

If someone put RTV or something around the windshield that sucks. If you go slow and spray your tool with WD-40 to keep from sticking you can get them out in one piece. The bottom edge is always the tough part. I use an actual kitchen knife that I spray over and over with WD-40 to cut the class out. Have to watch out for the gray area and not scratch. You never pry on the glass with metal only push with hand or a wood dowel.

 
You've been busy!!

Pity the windshield broke. Chances it does are fifty fifty in my experience.

For the black, and in fact all colors, I find gun spraying much nicer on parts greater than a few inches. I use lots of metallic and uni paints that I let compose at my paint shop,

I know no can beats the clear coat durability and look. Simply because it not having the nozzle nor the pressure that you need for a nice mist that will give you a smooth result.

I use cans too for small part, but always finish with sprayed coating.

I buy small 1/4 liters black/colours in uni and metallic. Then spray different coatings.

This one for instance is semi-gloss and gives a durable coating, many times better than what you could get with a can. Especially regarding scratch resistance.

https://www.carsystem.org/en/nc/products/group-detail/2k-clear-voc-silkmatt-2k-clear-coat/

I use a small .8 mm nozzle gun for it. sprayed at +-2 bars with a tad of thinner. Using a small gun, you get great precision and can prep/use small amounts. Of course for a panel/big parts a 1.4 or 1.6 nozzle bigger gun is better. This brand also provides nice mat and gloss clear coats also touch and uv resistant. Its not cheap, but becomes more economical once you start paint groups of parts and learn how to not prep enough to repaint your house for 2 small parts (been there) :)

Oh and another stupid reason I like this brand for, the hardener comes in a sealed container that you can open and close. Sounds like basic... but no. You have no idea how often I need go get extra hardener because most brands use small metal cans that are not 100% closed once you've open them once or twice. Few months later it's gone or no longer liquid.

For the plastic, make them one again is the easy part, the challenge will be to well protect the visible grain during the melting and somehow find a way to sculpt the melted region afterwards.

I was planning do some test on this, as I have massive speakers holes to close but did not come to it yet. I think @Rackerm did some nice plastic fixes at some point, may be he knows a way to restore the grain..

For the second pict, if you can press it together and it makes the broken edge visually disappear, then only melting and adding material on the other side "could" do the trick and leave the surface visually perfect while strong enough. Ideally you should try to find another broken piece of similar plastic and test on it.
thanks, lots of detail there. I will definitely go with the spray gun for interior panel resprays. for the plastic when you're welding plastic on plastic i was thinking if you weld tight from behind with the 2 panels clamped together you should only see a hairline on the front which when painted with filler primer should hopefully go. will see though.

 
Too late now but when taking the windshield out you should get the dash out of the way for sure. The A post covers are always brittle from the heat. I would just glue them with ABS cement and then reinforce the back side with epoxy and fiberglass. Hope you noticed the little support piece behind the screw in the middle. The dash will go back on easy just make sure you have the clip fingers straight. On your instrument panel lens. They do not repo lens with the trip reset button. You will have to cut your old one out and use it.

If someone put RTV or something around the windshield that sucks. If you go slow and spray your tool with WD-40 to keep from sticking you can get them out in one piece. The bottom edge is always the tough part. I use an actual kitchen knife that I spray over and over with WD-40 to cut the class out. Have to watch out for the gray area and not scratch. You never pry on the glass with metal only push with hand or a wood dowel.
Yes, RTV sealant was placed all around the screen. What was the factory sealant ? was it just the 3M strips  that the glass rested on ? CJP do these and i will order.

I never thought of the spraying with WD40, great idea, too late now, but if it saves someone elses windscreen from the nackers yard then good for them.

Re instrument panel lens, checked on CJP and they are now available with the trip reset lens. CJ Part number IBL23. thanks.

 
I will definitely go with the spray gun for interior panel resprays.
Spray gun is your best friend. Tho prep of parts surfaces is the key, no matter how well or what you spray.

for the plastic when you're welding plastic on plastic i was thinking if you weld tight from behind with the 2 panels clamped together you should only see a hairline on the front which when painted with filler primer should hopefully go. will see though.
Yes that what I said in prev reply for the second one, where I see a chance you can do this and be done in 5 minutes.

For the first one, broken in two, all depends if it broke with a torsion where the "hairline" doesn't match the original alignment and you have highs and lows along the break. Can't tell from the pict. The problem being that this plastic is not hard, it's a bit soft and you don't want it breaks again the moment you install it. They are not structural parts but there is a bit of pressure from the screws. Your luck is that the break follows the shape that is bit round, so that might be enough to regain the strength you need.

If you dig deep enough on the inside while mixing both sides (but not too much, like 1mm max along the line) first, bring enough material in this melted groove, might be just enough.

If the 'hairline" isn't satisfying/too obvious, once cold, may be a tiny drup of bondo with a micro drup of hardener (so it doesn't get hard fast) that you would smear/push into the holes with you finger and wipe/clean fast with a bit of thinner on a rag, could save the grain and close the small gaps. I saw on both grilles I did, that a thin layer of bondo sticked very well on the details I wanted to smooth out.

I think you should pay a visit to some garage/junkyard to find similar broken piece of plastic and try first. It's a one shot thingy! :D

 
Last edited by a moderator:
two things that I saw and have dealt with from your posts. I had to replace my windshield, it was exceptionally hard to find an original and the repro models aren't the same, they don't fit as well and don't have the shade across the top the same. Take the time to find an OEM replacement not a re-pop. Also you have the upgraded dash with push button distance meter. This plastic is NOT available (unless its been re-popped in the last year) there are several forum posts about either converting a re-pop to this type or refinishing the original. Don't toss the original whatever you do you may very well need it. ( I saw the previous post , EXACT reproduction is an overstatement ftom CJP) The original lens has a black plunger with a black boot and no visible spring. It will work but wont actually be resto.

 
Last edited by a moderator:
However you glue or weld them together try using some kind of reinforcement accross the crak on the underside. Something like a staple or nail accross that you then cover with material.

Sent from my SAMSUNG-SM-G930A using Tapatalk

 
two things that I saw and have dealt with from your posts. I had to replace my windshield, it was exceptionally hard to find an original and the repro models aren't the same, they don't fit as well and don't have the shade across the top the same. Take the time to find an OEM replacement not a re-pop. Also you have the upgraded dash with push button distance meter. This plastic is NOT available (unless its been re-popped in the last year) there are several forum posts about either converting a re-pop to this type or refinishing the original. Don't toss the original whatever you do you may very well need it. ( I saw the previous post , EXACT reproduction is an overstatement ftom CJP) The original lens has a black plunger with a black boot and no visible spring. It will work but won't actually be resto.
thanks and noted re windscreen, I'm really pi$$ed about the crack but i was going to replace it anyway as it had a noticable scratch in the middle. I'll keep an eye out for a quality OEM replacement if any are available. re CJP repro, I'll hold off on purchasing and go back to CJP to find out who manufactures the repro part and why they can't for the love of money get it right !

 
However you glue or weld them together try using some kind of reinforcement accross the crak on the underside. Something like a staple or nail accross that you then cover with material.

Sent from my SAMSUNG-SM-G930A using Tapatalk
noted thanks, you can buy those hot staples for plastic welding so will look at that option for reinforcement, as the movement of the car will likely crack it again.

 
if you can get the original glued back together with a nearly invisible seam I posted a thread a while back on how to refinish an original lens to remove even very deep scratches.

 
Too late now but when taking the windshield out you should get the dash out of the way for sure. The A post covers are always brittle from the heat. I would just glue them with ABS cement and then reinforce the back side with epoxy and fiberglass. Hope you noticed the little support piece behind the screw in the middle. The dash will go back on easy just make sure you have the clip fingers straight. On your instrument panel lens. They do not repo lens with the trip reset button. You will have to cut your old one out and use it.

If someone put RTV or something around the windshield that sucks. If you go slow and spray your tool with WD-40 to keep from sticking you can get them out in one piece. The bottom edge is always the tough part. I use an actual kitchen knife that I spray over and over with WD-40 to cut the class out. Have to watch out for the gray area and not scratch. You never pry on the glass with metal only push with hand or a wood dowel.
Yes, RTV sealant was placed all around the screen. What was the factory sealant ? was it just the 3M strips  that the glass rested on ? CJP do these and i will order.

I never thought of the spraying with WD40, great idea, too late now, but if it saves someone elses windscreen from the nackers yard then good for them.

Re instrument panel lens, checked on CJP and they are now available with the trip reset lens. CJ Part number IBL23. thanks.
That is good to know that they have made the trip version of the lens.

Yes the windshield was installed by using the 3-M strip windshield adhesive. You can order in different thickness. I forget which diameter was used. The material in the picture was ordered to replace the rear window in my F-150 but is same material. The three metal stops at the bottom of the windshield keep if from sliding down over time. You put the glass in the opening set the three bottom stops with the plastic edge strip on the glass. Then take glass out and put the strip adhesive in place. You need an extra set of hands to set the glass in right first time.

I removed a windshield out of parts car I have that was a repop and it was like half the thickness of the Ford glass. So ask the seller what the thickness of the glass is.

Take some time to work with your trim clips that hold the aluminum windshield trim in place. You can bend them so that they catch the trim correctly. Also check the lip on the trim to see that it has not got flattened down. I go around the opening and place masking tape where each clip is so I know where to press down to get the clip to catch. You should never have to hammer the trim on you will destroy it.

It is a good time to polish the trim while off also. You have to strip the anodize off so you can polish and you will need to clear coat the trim to keep it shiny or have anodize done again. If you have never polished the trim might be a good idea to let someone in the business do it. A buffing wheel will grab and edge and boom the trim is shot in the blink of an eye. There are several former threads on that subject to look at.

If any of the studs the trim clips go on are missing you can drill a hole and attach with a screw but put some of the windshield strip sealer around the threads to stop water.


Back
Top