That rear window is gonna be so sweeet!Remade the rear glass buck. Put in an inch and a half height to the center of the glass to get the same radius as the original glass. Scoping out thermal forming companies to get it made. Marco and I figure the investment into making a heat source and vacuum table can just be put toward getting it made professionally. Also we've been playing with the tail lights and coming up with concepts. Now that we are successful with a couple of attempts we will have a finished piece to show this coming weekend.
You are using an out of date browser. It may not display this or other websites correctly.
You should upgrade or use an alternative browser.
You should upgrade or use an alternative browser.
WIDE-BODY KIT FROM SCRATCH
- Thread starter Wide-body71
- Start date


Help Support 7173Mustangs.com:
This site may earn a commission from merchant affiliate
links, including eBay, Amazon, and others.
- Joined
- Jul 11, 2014
- Messages
- 909
- Reaction score
- 20
- Location
- Toronto, Canada
- My Car
- I am Currently restomoding a 71 Fastback. I designed a wide-body kit for the rear of the car and a more aggressive front nose. The back of the car is 6 inches wider than stock to accommodate the 315 on 12 inch rims.
Thanks. I've already talked to my third thermal forming company because it is a little unheard of to do what I'm thinking. Leave it to me to have a really good BAD idea. My M O I guess lol. I didn't know polycarbonate held moisture and therefore needs to first be dried in some kind of drier for 4 hrs before it's ready to be reheated for forming. Even then there is only a 3-4 hr window to make the form before it's re-absorbed the ambient moisture. There are clarity issues, bubble issues and even separating the piece from the buck after it cools issues. BUT WORTH IT if I make my vision a reality.
Last edited by a moderator:
...might be a bubbly vision roflThanks. I've already talked to my third thermal forming company because it is a little unheard of to do what I'm thinking. Leave it to me to have a really good BAD idea. My M O I guess lol. I didn't know polycarbonate held moisture and therefore needs to first be dried in some kind of drier for 4 hrs before it's ready to be reheated for forming. Even then there is only a 3-4 hr window to make the form before it's re-absorbed the ambient moisture. There are clarity issues, bubble issues and even separating the piece from the buck after it. Oops issues. BUT WORTH IT if I make my vision a reality.
- Joined
- Jul 11, 2014
- Messages
- 909
- Reaction score
- 20
- Location
- Toronto, Canada
- My Car
- I am Currently restomoding a 71 Fastback. I designed a wide-body kit for the rear of the car and a more aggressive front nose. The back of the car is 6 inches wider than stock to accommodate the 315 on 12 inch rims.
 This is just a test piece. This was using a much shallower lens which made us move to the taller lens. Also I get to test which areas I'm going to black out to get the desired effect. Should have it figured out for the weekend. Also noticed that the red is very transparent so I'm going to put a textured piece in front of the led lights to diffuse it better. BTW if anyone was thinking of thermal forming I found out after three attempts that 1/16" polycarbonate will not take shape like the same thickness in PETG. The PTEG plastic is made for forming. It picks up even the sanding marks on the buck. 300 degrees for around 5 min and it was very playable. I do recommend taking up forming small scale pieces that fit in an oven. It is a great hobby to try. Not too expensive and awesome for making dashboard pieces, tail lights etc. Black ABS plastic sheets are also perfect for forming.
Last edited by a moderator:
- Joined
- Jul 11, 2014
- Messages
- 909
- Reaction score
- 20
- Location
- Toronto, Canada
- My Car
- I am Currently restomoding a 71 Fastback. I designed a wide-body kit for the rear of the car and a more aggressive front nose. The back of the car is 6 inches wider than stock to accommodate the 315 on 12 inch rims.
If someone could explain to me how to post a video I'd be happy to post some of the process. I've had no success with posting a video on any forum
- Joined
- Apr 27, 2012
- Messages
- 4,765
- Reaction score
- 103
- Location
- Nashville, Tennessee
- My Car
- 1973 Q code Mach 1
So the plastic is clear, thermal formed to your plug and then painted on the backside, is that correct? Can this material be glued or layered in any way?
My thought was you could make a separate plug/pattern for diffuser panels which could be attached inside the lens-even if it was a mechanical attachment. You might just be able to take the pattern off an existing light fixture like the flat panels used with flourescent lighting
My thought was you could make a separate plug/pattern for diffuser panels which could be attached inside the lens-even if it was a mechanical attachment. You might just be able to take the pattern off an existing light fixture like the flat panels used with flourescent lighting
- Joined
- Jul 11, 2014
- Messages
- 909
- Reaction score
- 20
- Location
- Toronto, Canada
- My Car
- I am Currently restomoding a 71 Fastback. I designed a wide-body kit for the rear of the car and a more aggressive front nose. The back of the car is 6 inches wider than stock to accommodate the 315 on 12 inch rims.
Jeff that's exactly what I was going to do my friend. The process is as you described. I have very old replacement fluorescent lenses her at my shop. Much thicker and stronger than the crumbly stuff at Home Depot. I was even thinking of glueing it in first so that the lens is clear on the exterior and red on the textured lens. I'm also putting a pin stripe around the lens on the bezel so that once I black out the rest, the stripe is removed and red lens shows through lit up as well.
It's amazing how a rediculously amount of time goes into this stuff. You've got mucho ambition and patience Angelo, I love watching you think and then materialize those thoughts, your a man after my own heart. Kudos buddy!!!
- Joined
- Jul 11, 2014
- Messages
- 909
- Reaction score
- 20
- Location
- Toronto, Canada
- My Car
- I am Currently restomoding a 71 Fastback. I designed a wide-body kit for the rear of the car and a more aggressive front nose. The back of the car is 6 inches wider than stock to accommodate the 315 on 12 inch rims.
Thanks Ray. Same can be said for your build. I however have much help from people with various talents. My friend Marco, a mustang man himself, has become a huge factor on how many trick things I can bring to this build. His design skill I hugely respect and his ability to give time and effort to all of the pieces he can make for this car that I otherwise wouldn't have access too. Ideas that never come to light and as far as I'm concerned, an inferior build. The big name builders have the means to realize an idea and make the killer cars that they do. Even with all this help there is still only so far i can go on my budget. Bang for the buck has always been my thing though.It's amazing how a rediculously amount of time goes into this stuff. You've got mucho ambition and patience Angelo, I love watching you think and then materialize those thoughts, your a man after my own heart. Kudos buddy!!!
- Joined
- Jul 11, 2014
- Messages
- 909
- Reaction score
- 20
- Location
- Toronto, Canada
- My Car
- I am Currently restomoding a 71 Fastback. I designed a wide-body kit for the rear of the car and a more aggressive front nose. The back of the car is 6 inches wider than stock to accommodate the 315 on 12 inch rims.
 Still the test piece. Idea #1. Still have others to try out.
luxstang
Well-known member
- Joined
- Dec 23, 2010
- Messages
- 6,624
- Reaction score
- 101
- Location
- Luxembourg / Europe
- My Car
- 1972 Mustang Convertible
Looking good when installed on the car!!
"Still the test piece." Is that why the lines look out of square with eachother?Still the test piece. Idea #1. Still have others to try out.
- Joined
- Jul 11, 2014
- Messages
- 909
- Reaction score
- 20
- Location
- Toronto, Canada
- My Car
- I am Currently restomoding a 71 Fastback. I designed a wide-body kit for the rear of the car and a more aggressive front nose. The back of the car is 6 inches wider than stock to accommodate the 315 on 12 inch rims.
Right. Good eye. Since these bucks are plotted on a computer and CNC cut Its the rudimentary tape job I did that put everything out of whack I'm trying to figure out where I want the black and red. Just broad strokes right now till Ive locked in on the final mock up. Since this post the look has changed again. I'm going with a tighter look. More 69 tail light appeal. I will post that one only when it's painted correctly."Still the test piece." Is that why the lines look out of square with eachother?Still the test piece. Idea #1. Still have others to try out.
I dig where it's going. My only input would be to increase the radius of the pinstripe tape to match the radius of the center square.
- Joined
- Sep 16, 2012
- Messages
- 596
- Reaction score
- 2
- Location
- SW PA
- My Car
- 72 Mustang Convertible Modified Spec White(ext) Black Pwr Tp/Int Frt Pwr Disc Brks 351 Clevelandw/Ram Air/2 BBL Manifold/Holly EFI & Hurst (wde ratio) 4-spd/429 or 351 Ford Toploader Trans/3.5 rear axle ratio Mach 1/racing mod suspension [email protected] sec Magnum 500 (frt 7" & rear 8") wheels modified w/71-73 accessories (all original mustang parts)
Enjoy buddy. Would be cool if we could all get together sometime and have a shot or two. I say at the very least, Once this build is done in the next while we all get on Skype and help me celebrate with a toast. As for the tail lights Ray, I was supposed to have made a thermal forming box by now and got these things made up but I'm a couple of weeks from having the Cobra off my plate, final touches for spring, then I'm on it.Will send out a video of them working. Onto 7173mustangs on facebook s as never been able to plug one into 7173mustangs.com video via you tube as with Luxtang was successful at. for one. In a while. :thankyouyellow: Thanks for you inquiry. This thanks on a pole, not a pole dancer, just said thank you, so..In the meantime, have a drink on me. Though been outlawed since the 80's...at least I am not offering you those cannabis pills, eh?..LOLHey man, how are those tail lights going I'm excited about what your doing back there and looking forward to some more pics of that. Keep up the good work.
temporary image host
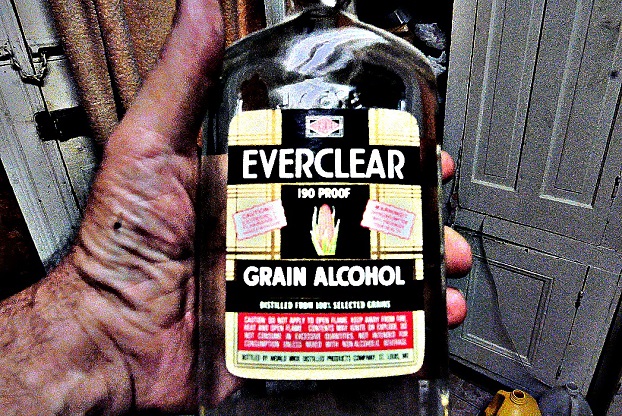
A bud I met back in college days, just before he fought in Vegas, the Mancini vs Du Ku Kim back autumn 82, since Ray Mancini put this out, his private stock. Like to get a bottle for my collection. He is just west of me over in Youngstown or abouts, West of the PA/OH border. Got this off his line. Maybe get even an extra bottle, one for me to do the shots and one for the collectors shelf.

- Joined
- Jul 11, 2014
- Messages
- 909
- Reaction score
- 20
- Location
- Toronto, Canada
- My Car
- I am Currently restomoding a 71 Fastback. I designed a wide-body kit for the rear of the car and a more aggressive front nose. The back of the car is 6 inches wider than stock to accommodate the 315 on 12 inch rims.
 Update on the tail lights. Looks like we're going with a different approach to these tail lights. We decided instead of a one piece thermal form, we're going to vacuum form just the lenses. The bezel will now be a poured epoxy solid piece. More substantial. This is the MDF buck and tray.
- Joined
- Jul 11, 2014
- Messages
- 909
- Reaction score
- 20
- Location
- Toronto, Canada
- My Car
- I am Currently restomoding a 71 Fastback. I designed a wide-body kit for the rear of the car and a more aggressive front nose. The back of the car is 6 inches wider than stock to accommodate the 315 on 12 inch rims.
 Here the two part liquid rubber is poured into the mould and left to cure over night.
- Joined
- Apr 27, 2012
- Messages
- 4,765
- Reaction score
- 103
- Location
- Nashville, Tennessee
- My Car
- 1973 Q code Mach 1
This is going to be interesting.
Also re: the Mancini vs Du Ku Kim fight-this occurred at the height of my interest in boxing. It was tragic and Boom Boom was never the same afterwards
Also re: the Mancini vs Du Ku Kim fight-this occurred at the height of my interest in boxing. It was tragic and Boom Boom was never the same afterwards
- Joined
- Jul 11, 2014
- Messages
- 909
- Reaction score
- 20
- Location
- Toronto, Canada
- My Car
- I am Currently restomoding a 71 Fastback. I designed a wide-body kit for the rear of the car and a more aggressive front nose. The back of the car is 6 inches wider than stock to accommodate the 315 on 12 inch rims.
I hear that buddy.This is going to be interesting.
Also re: the Mancini vs Du Ku Kim fight-this occurred at the height of my interest in boxing. It was tragic and Boom Boom was never the same afterwards
- Joined
- Jul 11, 2014
- Messages
- 909
- Reaction score
- 20
- Location
- Toronto, Canada
- My Car
- I am Currently restomoding a 71 Fastback. I designed a wide-body kit for the rear of the car and a more aggressive front nose. The back of the car is 6 inches wider than stock to accommodate the 315 on 12 inch rims.
 The final rubber mould after its separated from the buck. Now it gets cleaned up, waxed and we pour in the clear epoxy.
Similar threads
- Replies
- 0
- Views
- 1K
- Replies
- 12
- Views
- 4K