Any tips on refinishing the chrome on dash parts?

7173Mustangs.com

Help Support 7173Mustangs.com:

This site may earn a commission from merchant affiliate links, including eBay, Amazon, and others.
That looks GREAT!  Nice bracketry work and the plastic looks awesome as well. :bravo:

You could've used the original gauge cluster, though - you would've had to modify the gauges (remove the dash light socket) instead of hurting the bracket.  That's how I did my ammeter to voltmeter conversion, and the factory dash light circuit is working as it's supposed to.  I used the same Bosch voltmeter for my conversion as well - solid unit!

You're going to have to add a pigtail to the harness for the third gauge, since there's only 2 bulbs in the factory 3-gauge cluster socket (I know - "Captain Obvious," here... sorry :whistling:  )

I thought all the non-veneer center trim pieces had the camera case finish (chrome strips or otherwise).
Eric, thanks for your positive opinion. Yes, I could have used the factory gauges, but I actually wanted numbers to tell me what exactly the oil and temp are not just L - H, C - H.  As for wiring, yes I do have to change it around a bit. I need to do it anyways as it's a bit of a mess under there! I'm also going to use LED's and a piece of the blue diffuser so I have a consistent lighting color.

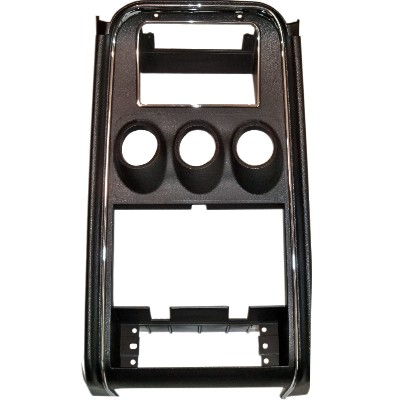
This panel had the wood grain finish that was pretty well wrecked. As far as I knew, there were only the 2 finishes, camera case and "nogahide". I was surprised to find that there was a third, plain. I expected to find the nogahide (or however it's spelled!!) but no. Three finishes, three tool inserts!

 First picture is of it partially cleaned off, what a mess!, second is the Rocketman Tach, and the basic plain dash panel for comparison.

What I showed is basically a try-out. I will need to sand it with 800 and top coat it, then let it sit for a week or two. I'm using SEM Trim Black BTW.

 
Good job, I like the all black look. Nice work on the bracket, that took some thought and head scratching.
 Thanks Don, I was scratching my head only as far as "does it look OK" The bracketry was pretty easy for me as I did a lot of that stuff when I worked.

If anyone else wants to do a similar conversion, I'd be happy to actually measure it and post a drawing.

 
I thought all the non-veneer center trim pieces had the camera case finish (chrome strips or otherwise).
 Eric, I just re-read this and I missed your point. The finish on the outer surface is textured. However it does look like it could be plain in the picture. Sorry if that confused you. It was just the area where the wood grain is applied that is non textured.

 
I am certainly interested as I am working on a similar project.
 Jason, Give me a little time to figure it out. I literally made this as I went through the process. Stay tuned!!
No problem. I have to get my engine done and back in the car first. Gauges won't do me much good without that.  :D

 
Right - I was thinking there was still some texture in the center part (where the veneer goes) on the pieces that didn't receive veneer.

In fact: http://www.ohiomustang.com/store/order_page.asp?itemid=3149

FM-BI009DB_LG.JPG


Right - I was thinking there was still some texture in the center part (where the veneer goes) on the pieces that didn't receive veneer.
 I'll try this again!! it locked up 3 times on me.

 Yes, there are the two finishes around the gauges, but the Wood Grain is not textured underneath. It proved to be a pita to get off, took a lot of time to get it smooth. I tried "wrinkle" paint and that looked like shit and I even thought about using "stone texture" paint as a base, but soon changed my mind. Finally I decided to just go with a smooth look around the gauges. Then came several attempts with the mock-chrome look without success either. As I said before, I was not interested in spending big bucks on this for now, but I didn't want to damage the part either. That's when I came up with just plain black on the entire part as my car has no chrome strips on the other areas.

I'm going over this again in some detail so my intent is not lost. Dose the all black look, look okay?

 
I just re-read it all, and I'm sorry for the confusion.  I thought I'd read something along the lines of 'basic black interior,' which made me think of the camera case pieces in basic black (deluxe interior got the wood grain veneer), and I thought you were trying to duplicate that look... or something like that.  It's too complicated for me to explain the road the voices in my head led me down and all around before getting me lost then ditching me to wonder where exactly it was I was going in the first place.  If you happen to see me on the side of the road, don't pick me up - who knows what'll come out along the way. :whistling:

I do know that I was not bashing your work or trying to tell you what you should've done.

Again - it looks awesome!  Nice job! ::thumb::
 Eric, no worries!

My car does have the 1A basic black interior and I should have standard seat covers as well, but, BORING!!. It had Mach1 seats in it when I got it, still does and will as long as I own it. The only textured items are the non-gauge center panel and the mini consul, the rest is plain, just black and boring!

I do actually like the gauge panel in all black, but I wanted some feed back, which has been positive.

Hope that clears up any outstanding confusion,

Geoff.

 
Here is a couple of pictures requested.

The capillary tube is about 6 ft long with a spiral wire cover and the sensor is 2" overall, so that would need to clear the pump vanes if used at the vac temp switch location, still to be checked. It's pretty tight in there regardless.

The oil extension tube has the 1/8th NPT on the side. It's a "mirror" shot, but quite clear.

If there is anything else, let me know and I'll post it.

The tape on the coil is from unintentional grounding when I welded the bracket together. Don't do that!!

I'll explain later Jason.

 
That helps with the oil. Looks like a short brass nipple and a brass block T? You will want to check the temp sensor depth for sure if putting that into the vac switch port on the water pump. I am thinking it is going to interfere with the impeller. I am going to be working on my sensors tomorrow night do I can try to get a good max depth reading on that port for you since the motor is out of the car I can spin the water pump by hand to check.

 
That helps with the oil. Looks like a short brass nipple and a brass block T? You will want to check the temp sensor depth for sure if putting that into the vac switch port on the water pump. I am thinking it is going to interfere with the impeller. I am going to be working on my sensors tomorrow night do I can try to get a good max depth reading on that port for you since the motor is out of the car I can spin the water pump by hand to check.
 Yes, I just did that on my spare block. I think you're right, the vac port is out. The orig temp sensor port is barely deep enough either, but without actually checking it, hard to say. I can go try it on that block I guess. When I said the cap. tube would interfere with the pulley if using the temp sensor port, I miss spoke, it is the alt bracket that will be a bit close. I'm trying to keep it all looking compact and out of sight as much as possible, but I'm thinking I might have to compromise and use a T fitting. Also, I plan on running the cap. tube along with the coil wires and wrap them with harness tape. There may also be a spare coil of tube I have to hide under the dash. I'll go into this more as the project unfolds. In the mean time, if you come up with something easier, I'm all ears!

Geoff

 
Last edited by a moderator:
Mine will be a slightly different animal as I went with electronic gauges so I will have less issue up front for coolant temp, but a bigger issue in back as the oil pressure sensor on the electronic version is pretty good sized.

 
Mine will be a slightly different animal as I went with electronic gauges so I will have less issue up front for coolant temp, but a bigger issue in back as the oil pressure sensor on the electronic version is pretty good sized.
 I may have to scrap the Bosch temp gauge and go electric unless I can get an adaptor. There is one supplied, but it is NPT not 5/8 straight thrd that would be needed into the block. It dose not tighten up as is.

What gauges are you using?

 
Back
Top