92 GTS-Rs Project Thread

7173Mustangs.com

Help Support 7173Mustangs.com:

This site may earn a commission from merchant affiliate links, including eBay, Amazon, and others.
British weather will mean a lot of rain so where all good, worst case I electrocute myself! 
With all your "connections", you MUST know someone with some shop space you can 'borrow'. Working outside sucks at the best of times. I only have a 1 car garage (would be a 2 car in the UK!!) but when I have had to pull the motor, I have to do it in the driveway, then push the car back in.......... and that's on a SUNNY day!

As others have said, take your time and you'll be fine.
I wish I did know someone willing to let me use their shop but sadly I don't :(

 
A carport would be unthinkable on your driveway? Even a temp one? 
Some heavy repairs (like floor pans) can demand quite some time before be completed, good lighting is essential and can't really be done properly in between rain clouds. Not to mention that not all neighbours do enjoy seeing welding arcs or listen to the charming sound of a grinding session followed by a hammering moment. 

Back in early 90's, when I was still living in Paris, I had the same prob. I was forced to open my vains to pay for a tiny closed place to do the heavy work.

South of you there are plenty farms, may be one not too far away would let rent a barn/space?

 
I wish I did know someone willing to let me use their shop but sadly I don't :(
THAT really sucks. Knowing how small some UK driveways are, you might not even have room for one of those tarp-like temp garages. I know you never thought you'd be in this mess, but you are and as Fabrice suggested, ask around on the nearby farms etc. Put an ad in the local paper or whatever. Time to think out of the box again.

I thank my lucky stars the car I found was in pristine condition, so I was not faced with these issues, however from what I read and learned here, I think you definitely need somewhere with a level floor so as to make sure you can keep the frame square and true. That body could twist like a pretzel with the main structure (floor) cut out of it. I'm sure there are others here that can elaborate and add suggestions.

All the best moving forward, the end result will be amazing. Keep the faith! 

 
To answer an earlier question about having an overlap when installing the floor pan, the overlap will make it a little stronger and easier to weld, but the benefit is short-lived. The overlap provides a place where moisture can penetrate and take a long time to dry out, giving it plenty of time to rust out the edges of your new floor pan.
Although, using seam sealer on a lap joint weld would prevent rust causing moisture.

 
So here we are in 2021 and sadly I still don't have any more progress on the floor pans or inner cowl area,   Weather in the UK has been very cold, not quite cold enough for deep snow but with the car outside and in the shade its not exactly been easy to work on.

So lets have a couple of positive updates......

Rear window polished trim, remember the piece of trim that was badly distorted and dented I posted earlier?  well after a lot of work I got the dents out removed the lacquer varnish and polished it.   Very pleased with the result. 

Its not back on the car but that's another part restored.

Next was to repair my RHS Window trim, again big dents and nicks in the aluminium.  I tried using oven cleaner (uk brand) to try and remove the varnish but that didn't work, so i spent hours with wet and dry paper.  I managed to get all the dents out of it and its come up like new.  Again Really pleased.

IMG_20200418_152734.jpg

IMG-20210401-WA0008.jpeg

IMG_20210402_163603.jpg

IMG_20210402_182626.jpg

IMG_20210403_140117.jpg

IMG_20210403_140214.jpg

IMG_20210403_180612.jpg

IMG_20210403_180606.jpg

 
I managed to get hold of some front grille support brackets and I also liked the colour detailing in the picture that Stanglover posted, so I have now also detailed some of my parts Zinc Grey with Clearcoat. 

Now having painted those parts showed the rest of the car to be in a poor state, so I have set to work on the front of the car, removing the chrome bumper, grille light support frames and making good the radiator Support frame.   I had to knock out a few dents on the support frame and the cheap eBay hammer and dolly kit I bought has now paid for itself  :biggrin:  

IMG_20210329_172154.jpg

IMG_20210329_172254.jpg

IMG_20210329_172305.jpg

IMG_20210404_134940.jpg

IMG_20210413_143418.jpg

IMG_20210413_143336.jpg

IMG_20210413_191455.jpg

 
I have decided the front area of the radiator will be finished in Gloss black and the engine bay (when I get that far will be finished in satin Black). 

After rubbing down and repainting the headlight frames and support brackets, they have come out really well.   It was actually nice to bolt something back on the car! 

IMG_20210413_191445.jpg

IMG_20210422_120948.jpg

IMG_20210423_174714.jpg

IMG-20210420-WA0008.jpeg

IMG_20210426_174722.jpg

IMG_20210426_174731.jpg

IMG_20210426_174756.jpg

 
Now you may have noticed the LHS Front wing removed, just as well I did because now I have found more problems  :classic_sad:   I have found a large hole on the LSH inner frame where its spot welded to the strut tower middle section!

I have since cut that section back and treated the area with 30 percent  Phosphoric Acid.

Notice on the inside area toward the hood hinge Bondo!   There is a fracture crack and someone has tried to hide it using bondo and black paint.  :classic_angry:   I have ordered some sheet steel (which is currently almost a week late) so that I can fabricate up a section and patch it in. 

Another job has been repairing and painting the bumper support frame. The Bumper and frame were held on with cheap galvanised hex head metric bolts!   Not a domed head coach bolt in site!  one side of the bumper bracket was torn and there were other distortion tears, all confirming this is a salvage car. 

So I got the mig welder out and attempted some weld repairs.  Came out not too bad.  I'm still not confident to tackle the floor pans yet, but its a start. 

IMG_20210420_115958.jpg

IMG_20210421_120454.jpg

IMG_20210422_131409.jpg

IMG_20210416_173445.jpg

IMG_20210416_173450.jpg

IMG_20210416_173458.jpg

IMG_20210418_175550.jpg

IMG_20210418_175601.jpg

 
So let me update you on the Mig welder I purchased.

I had an area under the rear seat that was not too structural so thought I would give the welding a go........ The method I was going to use was to butt weld the panels together (not overlap).   it started off OK but sadly I ended up with a few blow through holes and need now to repair the repair.   I'm not happy enough to tackle the floor pan yet, after grinding back welds some areas have become too thin so I need to do this again.

As I said welding is new to me so this is a learning curve.   I did want to go on a welding course but sadly the UK went into lockdown because of Covid, so once restrictions lift I will try and find a course again for thin sheet metal.  My welded does take Gas and I am using small bottles of an Argon mix.

IMG_20201110_143556.jpg

IMG_20201113_094248.jpg

IMG_20201126_131414.jpg

IMG_20201126_164949.jpg

IMG_20201126_165004.jpg

IMG_20201126_165016.jpg

IMG_20201129_111309.jpg

IMG_20201129_111315.jpg

 
More updates.... Battery Tray area,  mmmmm!

When working on the front of the car I came across a piece of tin bolted loosely to the front inner fender area   Wonder what that's there for, it did not look original?

Holy Sh**t more Holes!   

I am just bemused and saddened by how much was hidden from me when I bought this car! :classic_wacko:

IMG_20210413_191540.jpg

IMG_20210413_191547.jpg

IMG_20210413_220456.jpg

IMG-20210423-WA0023.jpeg

 
England ain't Arizona :D

Best and easiest way is, is to change the entire apron. Did same a few weeks back (you can see the whole process on my thread).

Another fellow english man is enjoying the same work atm, he posted in his reply where to buy the reinforcement that you need...

More fun on your driveway this summer! :D

 
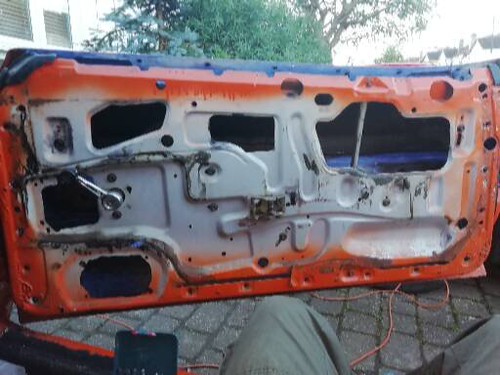
Got the car up in the Air and have found many more problems.

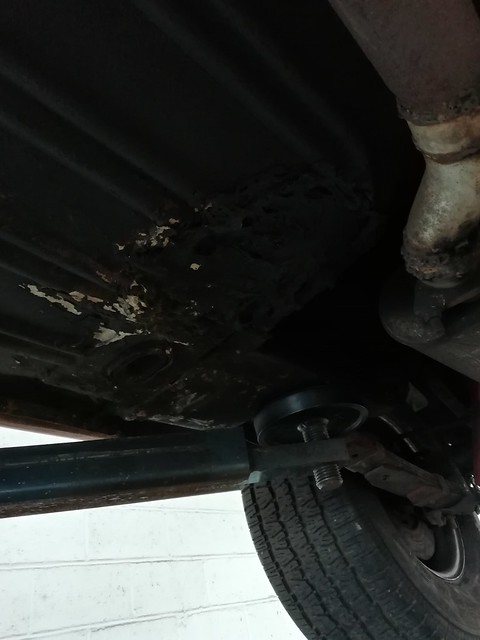
Damaged rear passenger floor pan,

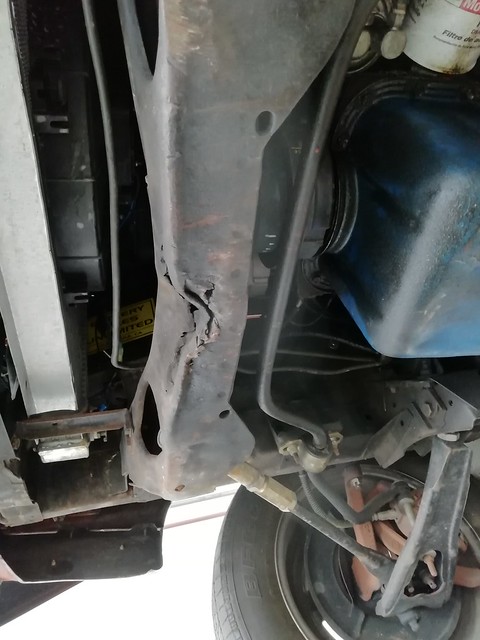
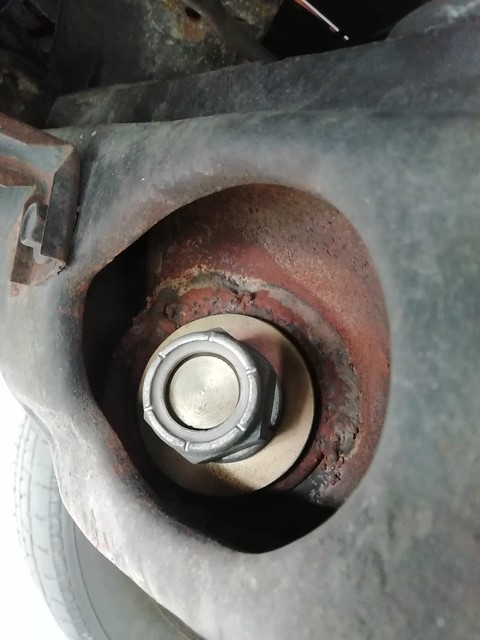
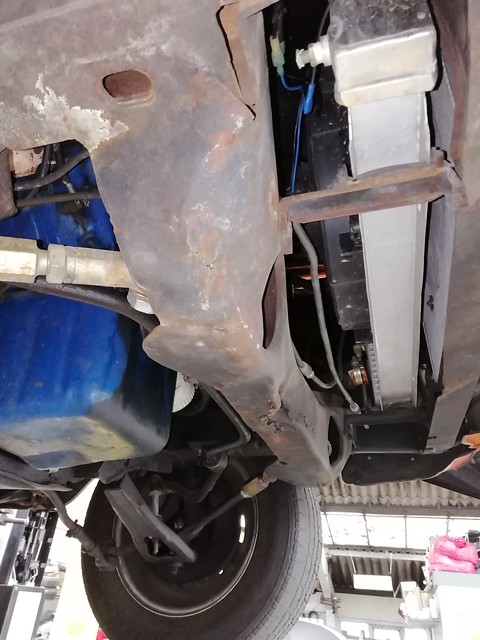
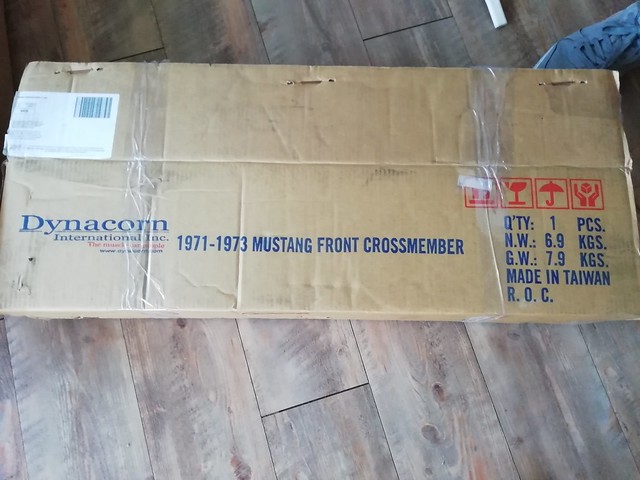
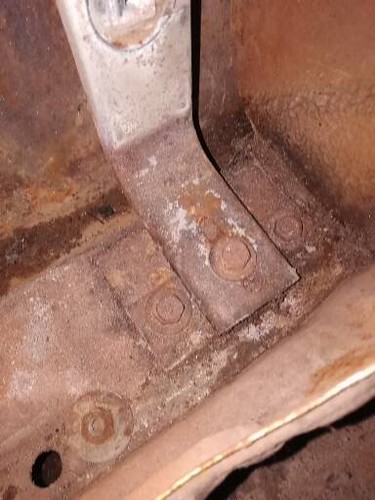
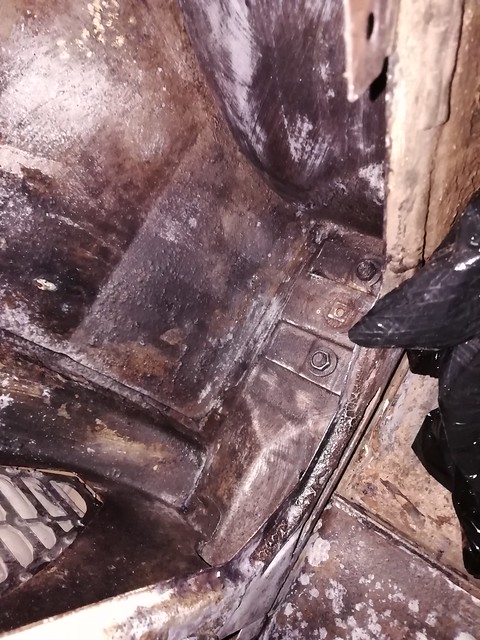
Front suspension strut crossmember bent.

48832937217_4cd197d10f_z.jpg


48832767436_26cc935449_z.jpg


Someone tried to weld up the crossmember!

48832767246_71152f20bd_z.jpg


48832766171_3ef3ff587a_z.jpg


I have purchased a replacement Crossmember and that should be fitted in the next couple of weeks.

49173420288_48d3c86489_z.jpg


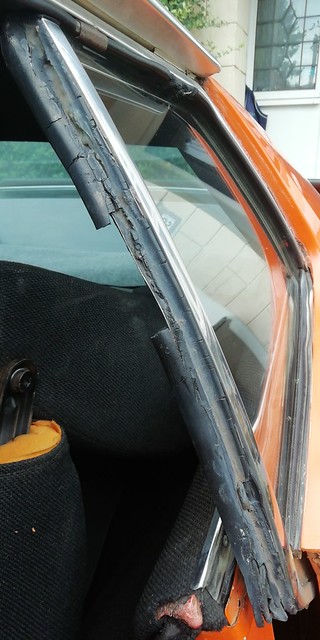
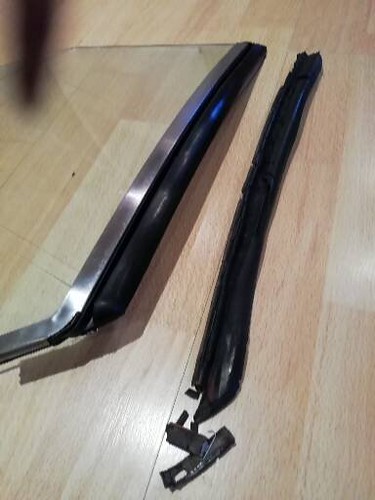
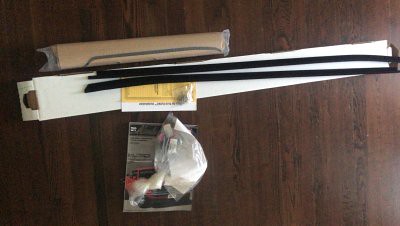
The Weatherstripping on the car is in a very poor state and I have also purchased the parts needed.

49173927726_95283a0722_z.jpg


49424609417_00693a5c9a.jpg


One thing many of the companies don't tell you is that there are actually 2 weatherstrips on the outside of the door, the upper weatherstrip normally comes in the new beltline kit, but the lower one is NOT included! This seems nuts to me.

So I managed to find the correct part from NPD.

49424365841_4ac52d7168_w.jpg


I have made a start on Stripping the doors, clearing out surface rust, vacuuming out the crud and treating the interior of the door and quarter panel with water based rust converter I purchased off eBay. Once this is fully dry (and the weather improves) I will spray over this with Grey Zinc primer.

49424698782_2cc429c537.jpg


49424721272_d1a686fc80.jpg


49424721287_6180fd72d6.jpg


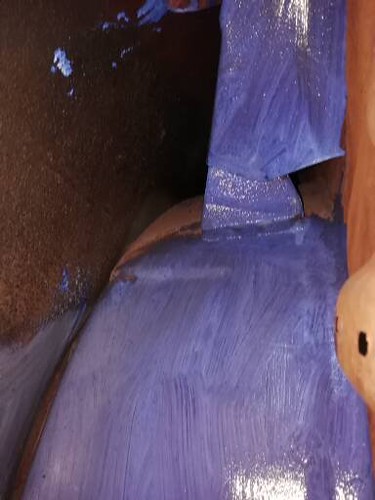
I have also started rust proofing the inner quarter panels

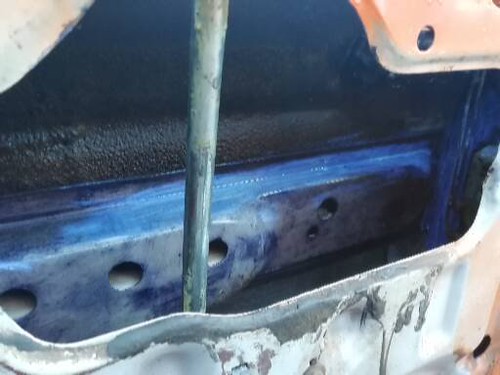
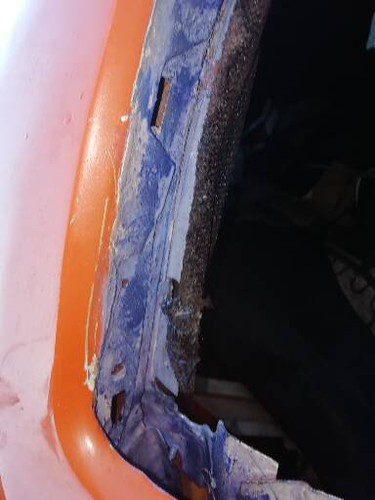
Before clearing off the crud,(you can see the moisture build up) :(

49424009763_8a18e7fb2b.jpg


49424488801_db95c464bd.jpg


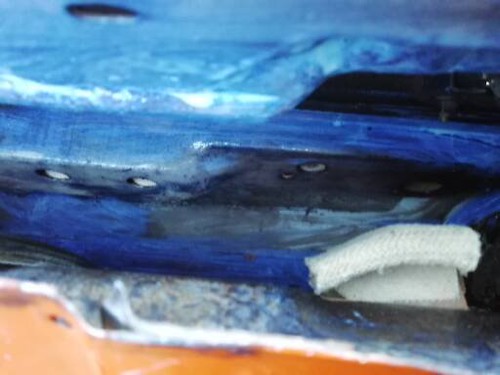
After rust treatment

49424854311_48e046c56b_z.jpg


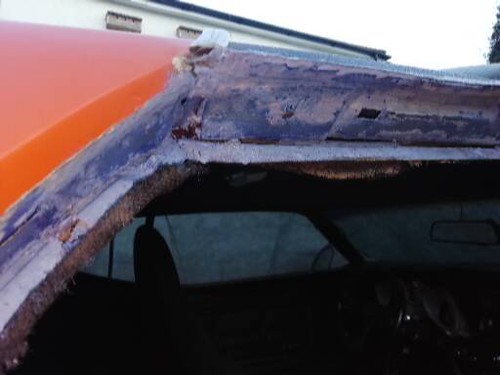
I have also had to remove the passenger side roof drip rail as that is damaged and I now need to find a new one :(

49424716767_dd4dee8022.jpg


49424023188_d43b7e44f1.jpg


49424488721_429e9e4299.jpg


Again I will give the rust treatment a blow over with Zinc Primer prior to reassembly.

Now if anyone can help me with advice on the correct sealants and reassembly of the roof drip rails and weatherseals I would appreciate it :)

I will most likely have to order everything from the USA.

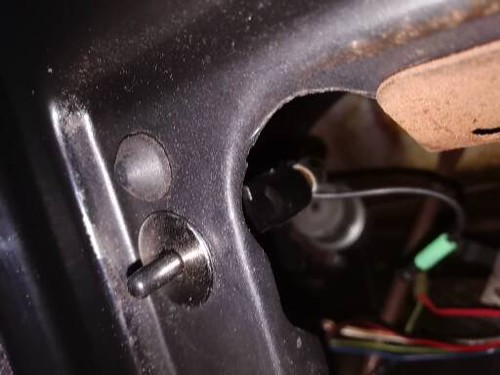
Now I needed to do something to cheer me up actually Fitting something on the car (rather than keep removing stuff), so I purchased a interior glove box light from an earlier mustang.

I had to make the empty hole on the glove box frame a little bigger using a step drill and 1st fixed the new light switch and bulb.

49424023378_d077902b60.jpg


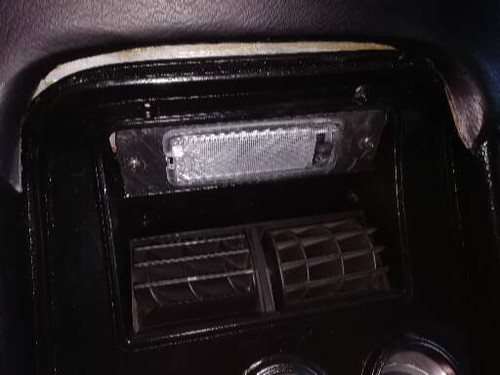
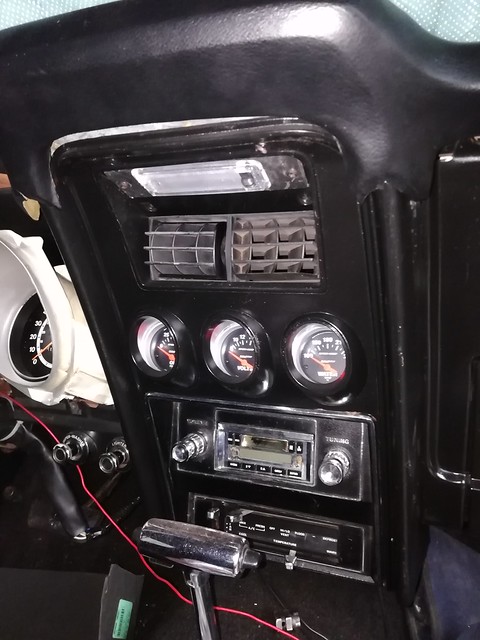
2nd job was to fill the empty hole above the centre console where the infamous Map light should be (depending on which model car you have,

my car is a basic 302 so it did not come with the light).

I had seen posts from some old members on here but I did not get any reply on seeking a replacement light, I had seen one on eBay for over $238.00 (which was nuts) So I decided to make my own.

I purchased a Hella interior light (which I think is mercedes and features a 3 position switch) for $9.00 then found an old bit of black plastic and cut the recess for the light to fit, then I shaped the plastic to fit the shape of the centre console. It's not finished yet as I have to clean up the black plastic to get a good finish on it, I also have to wire it up, but I am pleased with the result so far :)

49424708762_61e7c524f0.jpg


49424853951_66129e951e_z.jpg
It is good to see this car! I have been trying to track down this car for a while. It belonged to my wife's father before he passed away and left it to her brother. He had it for a few years and we always told him we wanted it if he decided to sell it. Cool to see it made it's way all the way over to England! Glad it is in good hands. It was sold to a dealer in El Cajon, California in 2018 before making it's way to you!
 

Latest posts

Back
Top