Summer deadline - 72 Mach 1 Build thread

7173Mustangs.com

Help Support 7173Mustangs.com:

This site may earn a commission from merchant affiliate links, including eBay, Amazon, and others.
Baz if you need a piece of plastic trim to do some plastic welding i have a broken piece of trim you could have.
thanks for the offer Steve, I should be ok. I've ordered some soldering iron tips off ebay with the flat ends to use for welding they're coming from China so will take a couple of weeks I can then start practicing on plastic pieces.

On a related note my Mach 1 plastic grille has a few broken sections i will try and take pics later when i get to it, but if anyone has a broken grille or pieces they're willing to part with I'd be interested.

 
Last edited by a moderator:
I removed the brake booster today. It was fiddly and i dont know how i'm going to put everything back together lol. Does anyone know if there is some factory marking to indicate whether booster is original or repro ? also is there a bench test one can do to test it works ? apologies if this has been asked before.

also i was struggling today to remove the steering column, all the bolts are removed on the firewall side, what do i need to disconnect on the engine bay side ?

I'll try and take some pics tomorrow.

 
original or repro ?


What do i need to disconnect at the engine end to remove steering column ?


Last edited by a moderator:
The clamp between the rag joint and steering box, that connects the rag joint to the steering box input shaft. One bolt. You can also remove two bolts that hold the rag joint together. You'll also need to remove the firewall plate/clamp from the inside.

 
I have a "donor" 71 grille, but it's different for 72. Otherwise, I'd cut a bit you need (if still on the donor).

The booster seams be the correct one, tho, looks on picts like a 9 inch. Both my cars have originally an 11. I know you can have both sizes, but I don't know why they are not all of same size. My 73's is refurbished(exterior), my 71 was busted, full of brake fluid. Replaced it with a new one, as sending for repair was too crazy, but have only managed to find a new 9. Kept the old one, in case I ever find a place to let it rebuild or find the parts needed for a rebuild.

If you manage to find a serial, I'm sure @Secluff will tell you where it was made and when!

[ i dont know how i'm going to put everything back together lol.]

I know the feeling, don't think about that now! :)

btw what happened to one of the steering pump tube/base? I detect from the non-round shape the use of "illegalOnMustang" tooling :D

 
I have a "donor" 71 grille, but it's different for 72. Otherwise, I'd cut a bit you need (if still on the donor).

The booster seams be the correct one, tho, looks on picts like a 9 inch. Both my cars have originally an 11. I know you can have both sizes, but I don't know why they are not all of same size. My 73's is refurbished(exterior), my 71 was busted, full of brake fluid. Replaced it with a new one, as sending for repair was too crazy, but have only managed to find a new 9. Kept the old one, in case I ever find a place to let it rebuild or find the parts needed for a rebuild.

If you manage to find a serial, I'm sure @Secluff will tell you where it was made and when! 

[ i dont know how i'm going to put everything back together lol.]

I know the feeling, don't think about that now! :)

[btw what happened to one of the steering pump tube/base? I detect from the non-round shape the use of "illegalOnMustang" tooling :D]
re grill, thanks - I'll send some pics of the bits that are missing to see if this works for your donor pieces

re booster -So, reason i asked, was same as you i guess, if my part was repro, i would hesitate less to just get it replaced with a new one than send it for repair or try to repair it myself. Surprised you gave up on that option ;)

Steering pump removal was a disaster, you just reminded me, i need to get that sorted as well.... 

oh did i forget to mention ? My summer deadline will be coinciding with the 50th anniversary of the car - summer 2022 :=) gives me plenty of time to get a degree in plating, plastic welding, soup making, the works..... maybe even paint spraying....

 
The clamp between the rag joint and steering box, that connects the rag joint to the steering box input shaft. One bolt. You can also remove two bolts that hold the rag joint together.  You'll also need to remove the firewall plate/clamp from the inside.
thanks Don, will give it a go. the firewall plate bolts are now loose and ready to come off just wasnt sure of the engine bsy side....
Been awhile since i last posted, had to take a bit of an enforced career break, now trying to get the project back on track.

Removed passenger side seat pan. will reuse this but need to do some minor welding.

Preparing the driver side replacement floor for installation... have come across an issue, wondering how other folks have overcome ?.... the front of the floor near the tunnel is not seating correctly, do i need to create some cuts in the floorpan to ease pressure on it so it sits correctly. My approach is to spot weld using punched holes on the sill, front and back sides, and on the tunnel to screw in some metal hex screws to align tunnel to replacement pan and then to cut a line across and then to butt weld in across the cut line once it has been secured using clamps.


When I did mine I shaped it as I was welding. Sometimes I had to use a hammer sometime just pushing against it with the hammer. Probably it will depend on how much of a gap you are trying to close.

 
thanks for the suggestion, I put a 12kb kettle bell on the floor pan to hold it down and its improved fit. there's about a 1cm gap at the front when I look from below. I want to avoid having to guess the gap and cut it only to find it too short. I will fettle a little more and then cut it a little short to give me something to play with and then weld.

I am getting there and the fit overall looks good, one issue is the floor height is around 0.3cm taller than prior floor as the sill lip is shorter than the original floor pan. I guess i can live with that as it will give a little more headroom.

 
You could use self taping screws or cleco's for this. then you sure you have the same alignment each time you take the patch back in place after you have changed something.

You also prevent cut too much doing this way.

You can hammer it in as you go, but if your part has too much tension, you can be sure the tension will be released in some form or another at some point.

 
I used Clecos and self drilling hex head screws when installing mine. Screwed it down to the floor support, then to the rocker and the rear torque box. Finally leveled and adjusted the fit working my way around the tunnel side of the pan.

 
thanks both, i have used self drilling hex screws, I'll do a final alignment tomorrow and then prepare for welding !

 
been struggling a bit this weekend with the replacement floor pan, advice welcome.

Where i am trying to join two panels together where it was factory spot welded, the panels keep separating during welding, its like I'm not doing the weld correctly or there is an earthing issue.

I've tried welding next to the hex screws where panels are joined together. I have to admit i have used a conventional mig without the spot welding attachment, will that make a difference ?

also many pin holes needing to be filled hence uneven welds....


Turn your heat up. Looks like your weld is sitting on top and not penetrating down through to 2nd layer. When it’s hot enough the 2nd panel will actually have a hump coming through on bottom side. No special tip needed. Also after I do my weld and it’s still cherry red I tap it with my flat body hammer. Helps pull them together while they are hot.

 
Last edited by a moderator:
Turn your heat up. Looks like your weld is sitting on top and not penetrating down through to 2nd layer.  When it’s hot enough the 2nd panel will actually have a hump coming through on bottom side.  No special tip needed. Also after I do my weld and it’s still cherry red I tap it with my flat body hammer. Helps pull them together while they are hot.
thanks, i didn't think to do that. will try that and report back.

 
Listen to Kevin. He was extremely helpful when I welded mine together. One of the mistakes I made when I was learning to weld is keeping the heat down too much. I kept making holes in the metal so I solved this by lowering the amps, which is not necessarily a good idea. With time and experience I learned to weld without poking holes. It has to do with building the weld pool slightly before moving and then not moving too fast, but just enough to keep the pool with the tip. Hard to explain. It is all about practice. Now, my happy setting is to follow the recommendation of the chart but adding about one or half a number to the amps. I tend to weld better at a higher amps.

 
Listen to Kevin. He was extremely helpful when I welded mine together. One of the mistakes I made when I was learning to weld is keeping the heat down too much. I kept making holes in the metal so I solved this by lowering the amps, which is not necessarily a good idea. With time and experience I learned to weld without poking holes. It has to do with building the weld pool slightly before moving and then not moving too fast, but just enough to keep the pool with the tip. Hard to explain. It is all about practice. Now, my happy setting is to follow the recommendation of the chart but adding about one or half a number to the amps. I tend to weld better at a higher amps.
thanks both, increasing the heat setting did the trick and it worked so big lesson learned. one of the issues with my welder (its a GYS smartmig so pretty good standard for DIYer like me) is the poor design of the control knob, i could blow on it and it moves.... many a time the knob has gone to a higher setting and it blew through the welded metal. This created an obsession on my part in keeping the temp set low and hence i didn't think to push it up for spot welds. I'm also learning and this was a good insight ans in future I will adjust setting to the need.....

the downside is my welds are a little 'blobby' making more work of sanding/grinding down, but hopefully with practice this will come down to a neat thin blob...

 
Last edited by a moderator:
hello all :) happy Xmas to y'all. signing back in after a bit of a hiatus and stalled progress with the car, i.e. nothing really done in over a year. Lame I know... Hope everyone is safe and well and covid free. 

I'd previously left the thread having partially completed welding one floorpan back in with some welds to redo due to lack of penetration into the lower panels. I've put that to the side and decided to work on rust proofing the shell and doing a load of archeology on the panels to find where replacements are needed before i return to proper welding.

I've spent the past 2 weeks back in earnest working on the car on the following sections and will detail with pics in subsequent posts...

1. Inner wheel arches and quarter panels. applied rustbuster fe123 rust remover and red zinc primer on all inner panels, sanding where i could physically reach the metal.

2. Roof. removed center support brace panel and derusted and primed. cleaned rust on inside of roof, there was some pitting but I didn't want to replace the complete roof skin for the sake of a couple of sections, i think it will be ok. Difficult to get into all the nooks and crannies in the side panels but I've done the best I could.

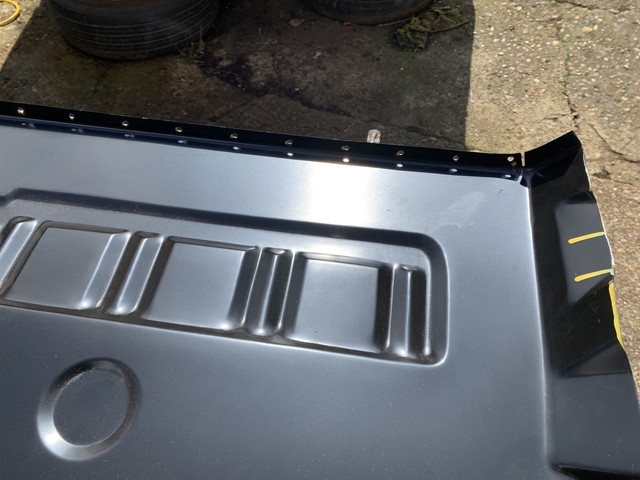
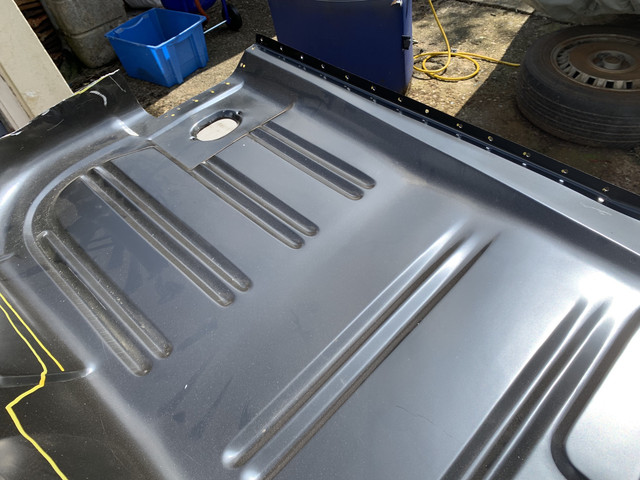
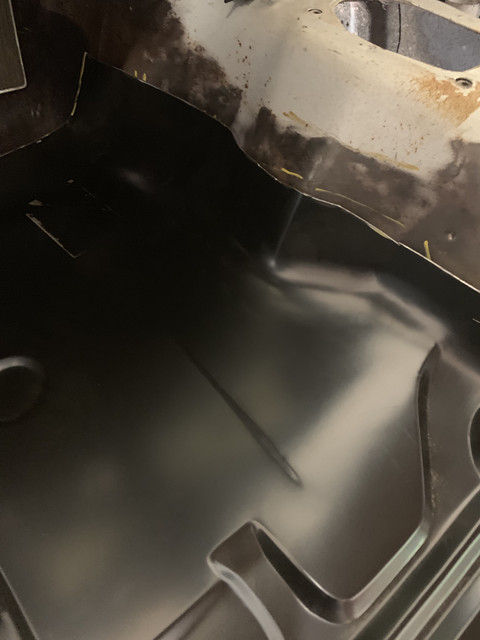
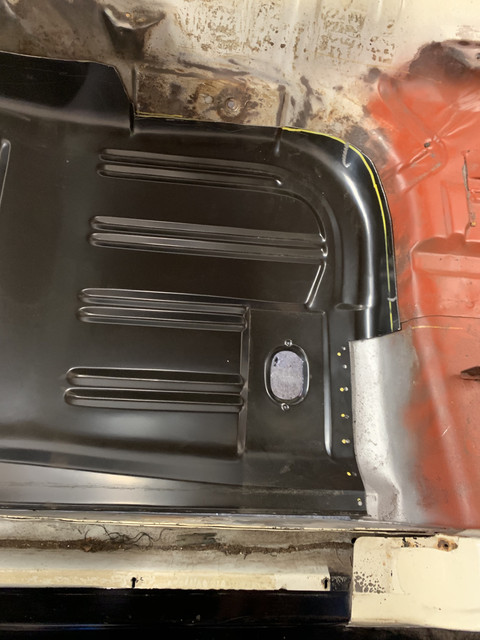
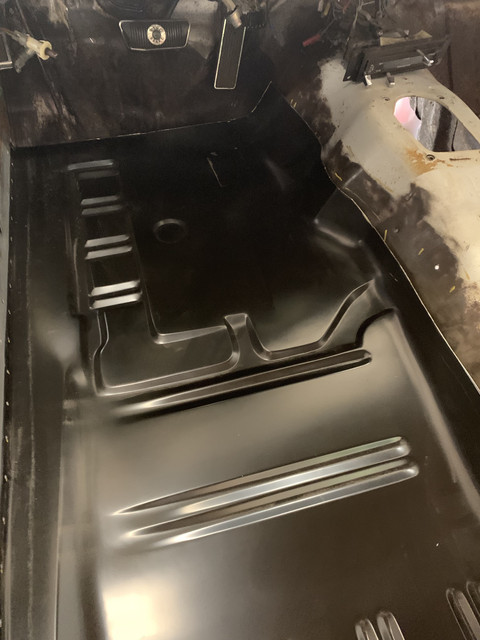
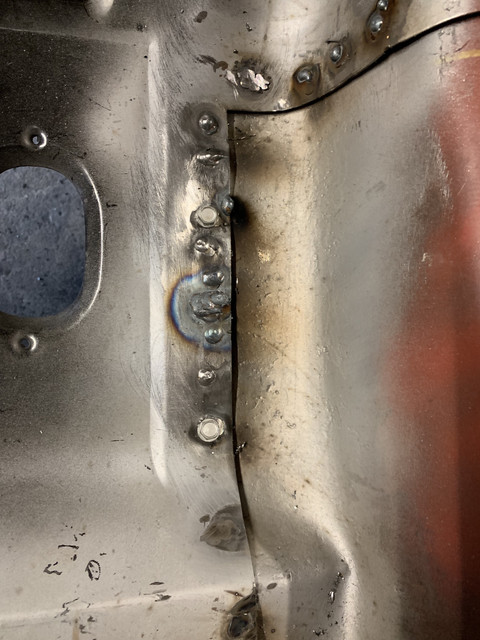
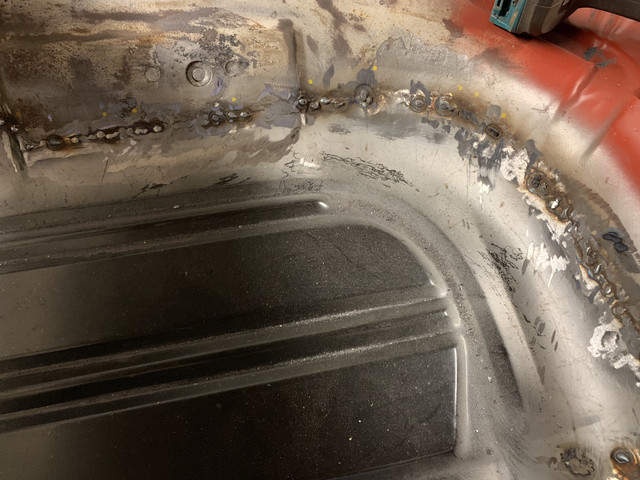
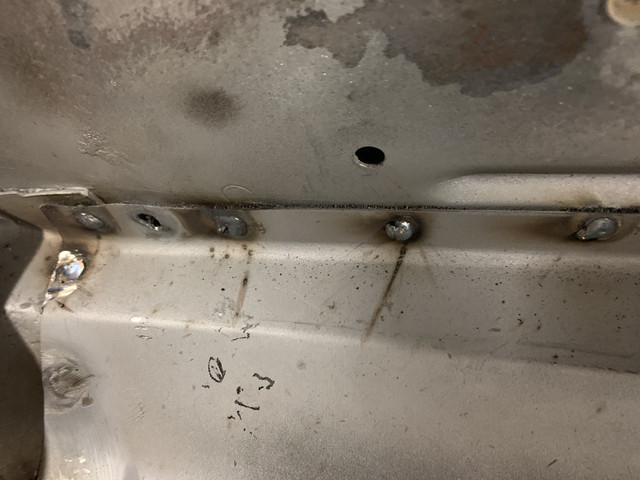
3. Trunk. some holes in trunk floor, mainly pinholes but more rusty sections at rear. I have marked them ready for welding. I've decided against replacing the complete trunk floor as it is solid on the whole and |I want originality above everything else. Both quarter sides have rust holes in lower quarter panels and trunk drop off on the left hand side, right is ok. Have spent ages with hands in crevices trying to remove all the rust. i will order a left hand trunk drop off panel but will patch in clean metal into the underside of quarter panels. I do not want a 50/50 car (50% replacement panels, just my personal preference) and thankfully have got to the rust in time to fix most. will go into the repairs in more detail and would appreciate some advice along the way, particularly on the trunk drop off panel, and cutting a repairing seams around where the quarter panel connects with tail panel.

4. Underside of car. in. really good condition, very little rust, cleaned off all the underseal to leave the tunnel (slop grey obsessives note: thre underside tunnel is primed in slop grey!). have a couple of minor repairs to do.

5. Exhaust hangers. was going to buy replacement. In the end I decided to just clean and paint them.

6. Rear window surround. cleaned off all the gooey sealant and sanded back to bare metal, primed. couple of areas will require welding as there are pinholes and heavy pitting

7. Front window surround. As per rear window,  cleaned off sealant, back to bare metal and primed. top corners have some panel separation so interested to understand what i need to do get back to factory...

8. Engine bay and cowl. I've started sanding back to bare metal and rust proofing and priming. I'm doing this in sections and hope to have this completed by end of year. once done I will then get back to fitting the front inner right hand fender support panel and the remaining welding..... I see a couple of folks in the other build threads are also on these sections :)

random pics with questions to follow...

 
Last edited by a moderator:

Latest posts

Back
Top