1972 Grande rebuild

7173Mustangs.com

Help Support 7173Mustangs.com:

This site may earn a commission from merchant affiliate links, including eBay, Amazon, and others.
Here, you need this, print it and add to AAW kit. I was having trouble understanding the front wiring for the Mach 1 option. One of the engineers created this just for me! That’s how awesome the tech support is, they are over the top good, make friends with them!
 

Attachments

  • 660025E2-4532-4F0F-8858-A2A2406A6F59.jpeg
    660025E2-4532-4F0F-8858-A2A2406A6F59.jpeg
    1.7 MB
I am not sure what you mean by the Mach 1 light wire setup. I do have a Mach 1 front grill and I wired that up for both running light and turn signal. Asfor AAW, I have the generic 22 circuit AAW kit instead of the specific mustang kit. The fuse box is pretty large and I still need to figure out where to put that. I like your idea. I saw Autoedits did a similar thing on youtube. I think your setup is good, clean, and accessable (most important! - I am getting too old to crawl).
 
Here, you need this, print it and add to AAW kit. I was having trouble understanding the front wiring for the Mach 1 option. One of the engineers created this just for me! That’s how awesome the tech support is, they are over the top good, make friends with them!
Thanks! Very nice diagram. From what I can tell, in this setup you do not have to have the grill lights on at all when driving. Those lights are on a stand alone switch. I set mine up with LEDs and they come on when the running lights are on and the they also signal along with the signal light below the bumper. But to be honest, I have not completed wiring them yet so I have not seen what it looks like. Maybe I will change it to your configuraton. Either way, it is fun to try different suff out.
 
Thanks! Very nice diagram. From what I can tell, in this setup you do not have to have the grill lights on at all when driving. Those lights are on a stand alone switch. I set mine up with LEDs and they come on when the running lights are on and the they also signal along with the signal light below the bumper. But to be honest, I have not completed wiring them yet so I have not seen what it looks like. Maybe I will change it to your configuraton. Either way, it is fun to try different suff out.
In this config, grill lights are coming on with headlights, but not parking or turn signals…
 
I would liketo get some thoughts on what I did a few weeks ago. The rear valance was not fitting exactly as I liked. So instead of fitting the new valance to the new rear quarter panel and possibly damaging the shape of the valance, I added some metal to match the valance shape. Any thoughts/comments?
Only issue with this is that you have a much better fit than Ford ever did. Those valances usually have a pretty big gap between the valance and the rear lower quarter panel. Very nice work, looks very good, I am sure that is how the designers of the car intended that to be.
 
Only issue with this is that you have a much better fit than Ford ever did. Those valances usually have a pretty big gap between the valance and the rear lower quarter panel. Very nice work, looks very good, I am sure that is how the designers of the car intended that to be.
Thanks. The gap was driving me nuts. But I did not want to "bang" the valance to the quarter panel. So I just customized it to fit. Thanks again.
 
Lights are good. Turn signals, hazard, backup light, and brakes. So far so good. Electrical work is tedious. Not difficult. But very detail oriented and a slow process. Here are some pics of my progress. Still have to finish the center console with the vacuum gauge, o2 gauge, and fuel pressure gauge hooked up. Then put the carpet and seats back in. Next work on getting the windshield and rear glass area cleanup for install.
 

Attachments

  • 56.jpg
    56.jpg
    986.7 KB
  • 58.jpg
    58.jpg
    319.4 KB
  • 61.jpg
    61.jpg
    370.5 KB


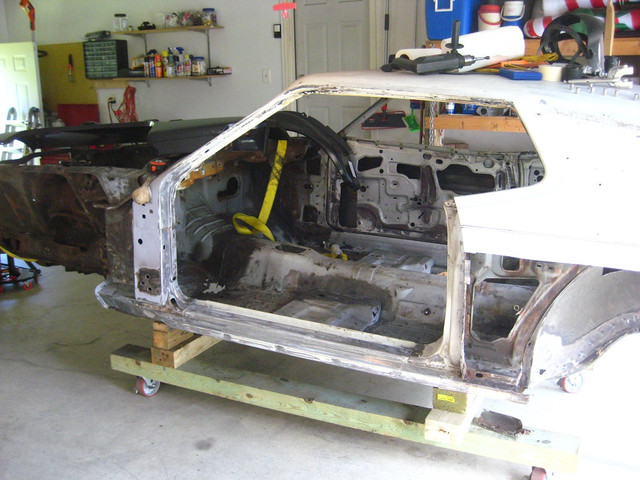
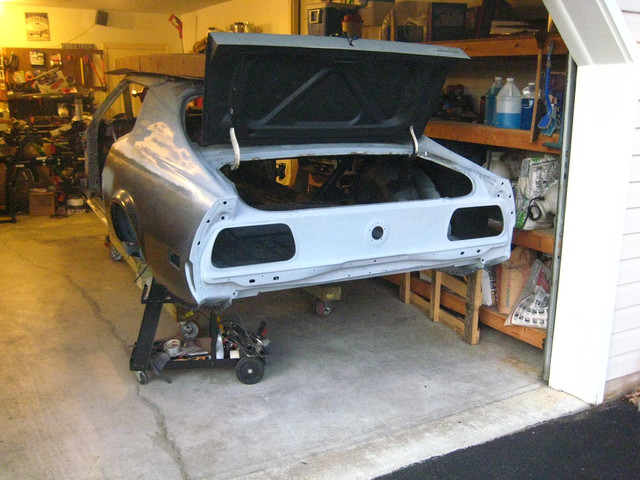
Pic of car completely disassembled and work started on trunk, tail panel, and rear quarter panels.


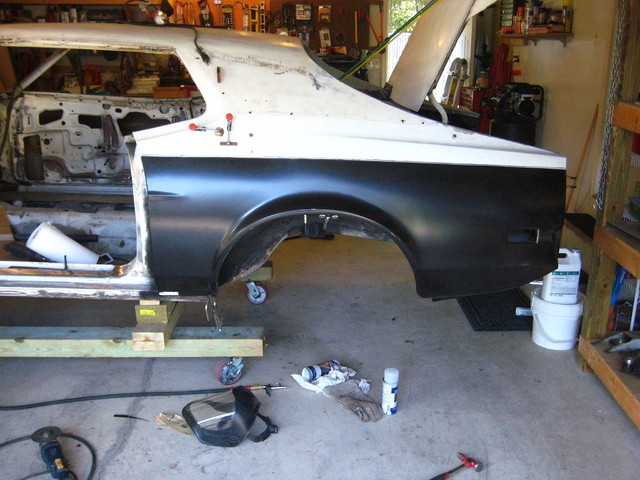
Quarter panel test fitted.


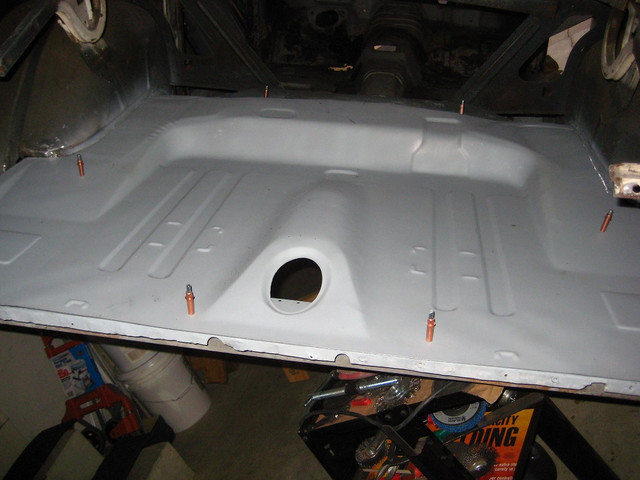
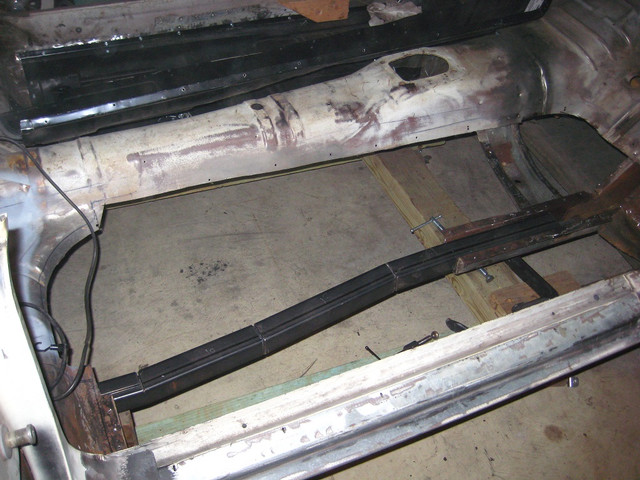
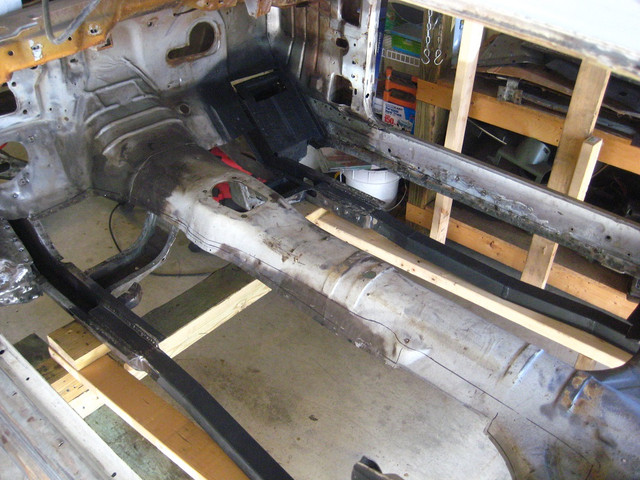
Trunk floor test fitted. I also boxed in the subframe below the trunk floor to strengthen the body.


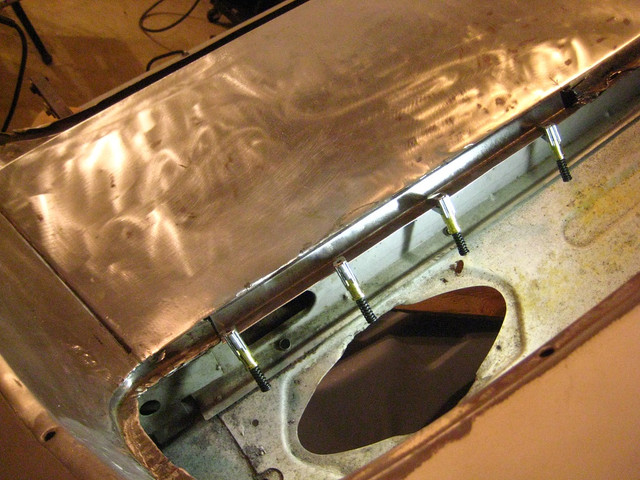
Working the trunk rain gutter area. This was a total pain!


Trunk, tail panel, floor, quarter panels about 90% done.


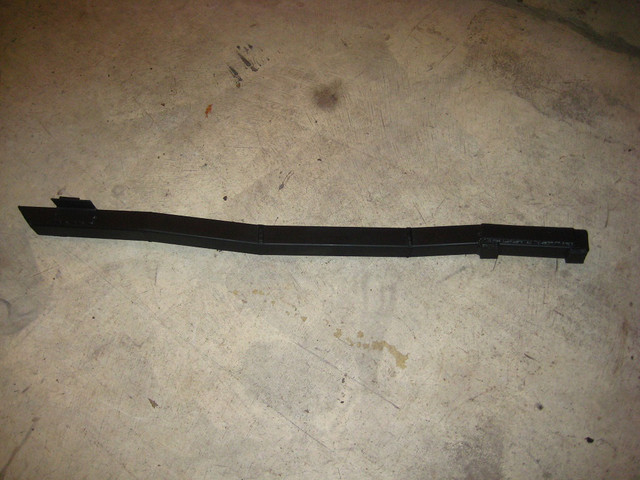
Adding subframe. Saw this drawing/design online.


Completed subframe (1 of 2)


Subframes welded on.

host photos online
Welcome, it looks like you have been pretty busy. Nice work so far, keep us updated.
 
This weekend I cleaned up the engine bay wiring a little. I also painted the cowl top to match the body and put on the dash top to see the color combo for the interior. It was too hot to work on the interior. I did not want to leave sweat puddles everywhere. :-(
 

Attachments

  • 63.jpg
    63.jpg
    473.2 KB
  • 64.jpg
    64.jpg
    361.9 KB
Things that I did since last post. AC is emplaced. Heat works great. Just need to button up the compressor lines, complete A/C wiring, and charge. Still cold out so no hurry. Sound proofed trunk to cab area. Also painted interior molding and panels. Added exterior window molding. Painted roof rail and window channel (flat/semi glos black). Still need to add butyl/lining for water proffing and install this molding. Finished windshield and rear window clip preparation and installation (for the screw in type since I had to replace some metal around the windshield and rear window. Put tint on rear window and seal. I still need to order the windshield and install both the rear glass and windshield. But I had to do the headliner first which is done. But not pretty (first time) but good enough. Then modify the dome light and door switch to work with the new wiring harness. Now dome light work with door open and/or headlight switch. And I put in an LED light so nice and bright. Still need to find the cover or buy a new one. :) I was having hard time lining up the accessory belts so I decided to just get an after market pulley kit. I installed that and the front of the engine looks much cleaner. Also, now I can easily see the timing marks on the tamper so I removed the old timing tape (I put the TDC mark on the dampener where I could see it but it was not ideal) and put on new tape to sync with the actual mark on the dampener. I found out that I swag mark was half a degree off. I patted myself on my back for that. My SWAG was pretty good. The new v-belt bracke kit is very nice. On thing I noticed is the power steering bracket for the ford power steering pump does not allow the pump to rotate fully inward because the heads are on the way of the filler tube. And I cannot fully rotate it out ward because of the notch built on the pump. I will have to do some research to see if it was me screwing something up, wrong part, or modification needed.
 

Attachments

  • 70.jpg
    70.jpg
    40.3 KB
  • 74.jpg
    74.jpg
    59.4 KB
  • 73.jpg
    73.jpg
    43.9 KB
  • 72.jpg
    72.jpg
    48 KB
  • 71.jpg
    71.jpg
    56.5 KB
  • 69.jpg
    69.jpg
    68 KB
  • 68.jpg
    68.jpg
    63.9 KB
  • 67.jpg
    67.jpg
    65 KB
  • 66.jpg
    66.jpg
    229.2 KB
The red circle is where the filler tube hits the cylinder head and the yellow circleis the stop built on the pump. There are 2 belts that I purchased. Gates 7450 and 7445. The7445 is sligthly too small because the filler tube hits the head and the 7445 is OK, I think but the pump is at the stop. So if/when the belt begins to stretch, there will be no more that I can move the pump. So maybe switch setup to a saginaw pump? Any ideas out there?
 

Attachments

  • 75.jpg
    75.jpg
    168 KB
O boy. I think I fried my sniper ECU. I crushed the CAN cable located near the throttle body and when I tried to start the car, it shorted out (made a pop sound) and shut off the hand held computer. I tried fixing the cable but stil no power to the hand held or even the fuel pump. Engine cranks over and lights work, etc. But no power to the sniper. Any ideas?
 
Your accessory drive looks pretty custom…on the PS, mine is tilted farther out from engine block, a longer belt would allow that And give clearance to AC. Not sure how all your stuff moves to adjust. On my stock 302, the AC is mounted up higher on a hard plate, and an idler pulley above the water pump tightens belt, and the PS and ALT hinge in their mounts to tighten those belts.
 
During the Sniper repair, I put in an Summit Racing 600 cfm carb for 351W - model M08600VS. I had to put on the new mechanical fuel pump as I could not figure out the fuel pressure module to reduce the EFI fuel pump tp 7-8 PSI. I kept flooding the carb. So mechanical it is. I have to say, Summit did a nice job on this carb. Engine fired right up. Had to adjust the idle to 750. But it is smooth and pretty responsive. WIth out having the learn anything. I have not driven the car under load yet I do not know how it will handle. But first, I have to do a home alignment. I finally got glass on.
 

Attachments

  • 20230311 e.jpg
    20230311 e.jpg
    2.9 MB
I am back to up my progress. Did drive the car a little. The engine feels pretty good. Very hard push when stepping in the gas. But I need to gentle to for now until I double check all bolts, etc. I could hear some clunking in the front end. I painted the dash to match the headliner. I also added the wiring for the power windows into the center console so I can put the dash and A/C controls back in.
 

Attachments

  • small 20230812_190529.jpg
    small 20230812_190529.jpg
    553.5 KB
  • smal 20230831_185548.jpg
    smal 20230831_185548.jpg
    602.4 KB
  • small 20230904_163241.jpg
    small 20230904_163241.jpg
    448.4 KB
  • small 20230904_164140.jpg
    small 20230904_164140.jpg
    726.9 KB
I am considering putting the Sniper back on. I really like the Summit carb though. Very responsive and no issues. But I am curious what the sniper will do since it is a larger throttle body then the carb. I also just finished making the CD player adapter from some sheet metal I had laying around. Paint is drying. I also just received the speakers (front and rear) and antenna. I also need to installed the power window units for the door windows and rear windows. Hopefully I will have that done by the end of this weekend. But it is pretty hot here in MD. Maybe I will need to wait until next week. :-(20230602_202056 small.jpg
 
Back
Top