1972 Grande rebuild

7173Mustangs.com

Help Support 7173Mustangs.com:

This site may earn a commission from merchant affiliate links, including eBay, Amazon, and others.


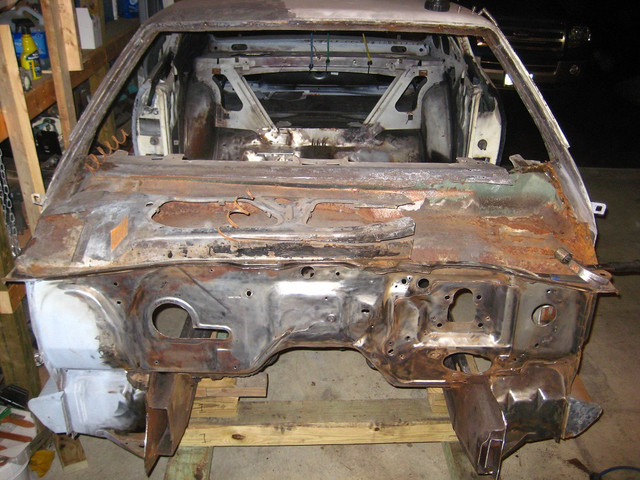
Next I removed the front aprons and cowl.  Both were badly rusted. 
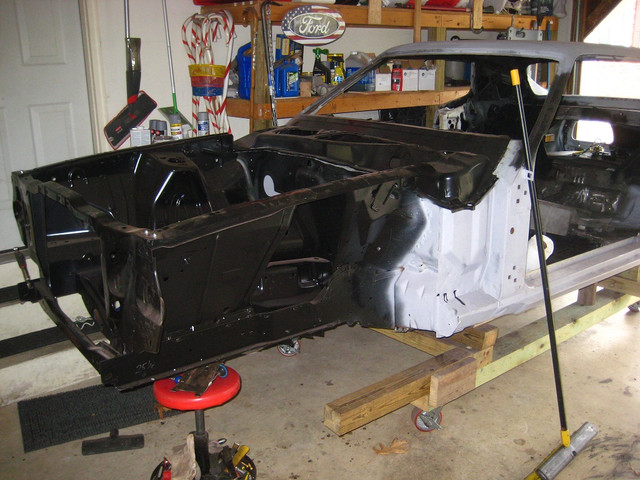


Front aprons/shock towers and cowl on. 
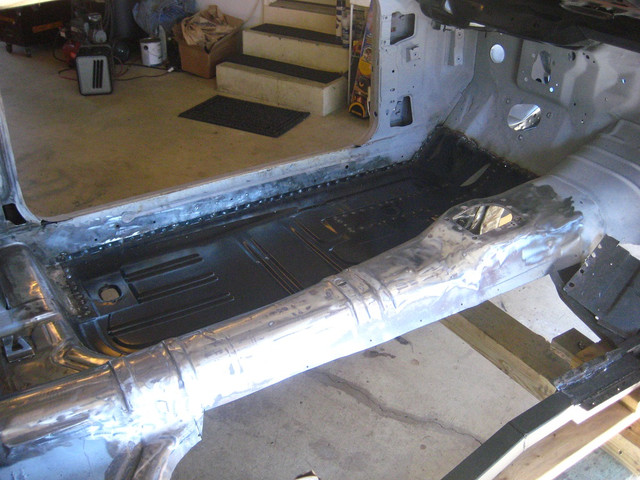


Driver side floor pan done.
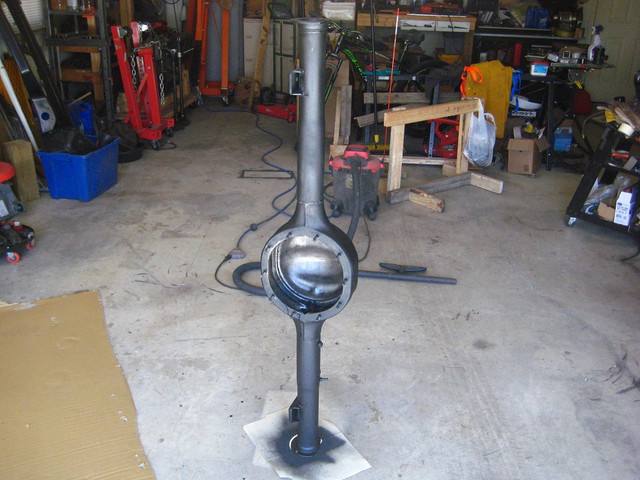


Due to COVID-19 isolation rules and me running out of shielding gas, I took a break from body work and cleanup the axle housing, ordered 3.50 gears, positrac, etc for the axle rebuild.  Gear was a 2.70 on an FMX auto - I plan to put in a T5 Tremec (most likely the TKO500) and the OD ratio is good with the 3.50 rear end (for nice highway driving). 
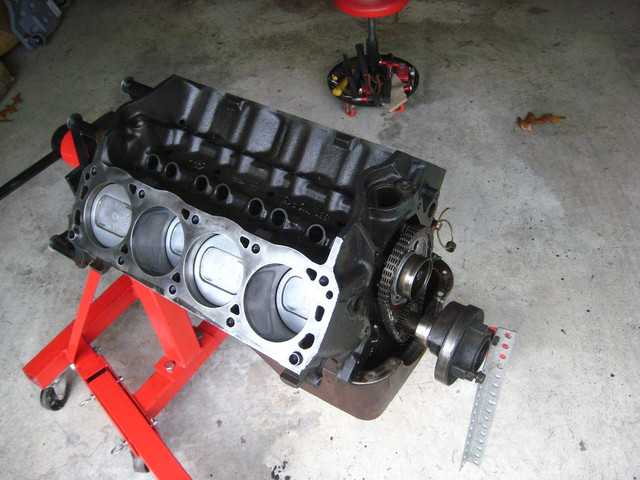


The car had a 351W.  From the plate glued on the block, this is a 1972 remanufactured engine from Richmond VA.  It has the D0oE-C heads which from what I read is a good stock head.  It just needs to be cleaned up.  Intake is an edelbrock 351W performer.  From the research I have been doing, I think I will save for an edelbrock pro-flo 4 fuel injection kit.  Any thoughts on that?  Pic is the cylinders cleaned up.  This cylinders were already bored .060 over (.060 stamped on the pistons) so no further boring will occur (from what I have read). 
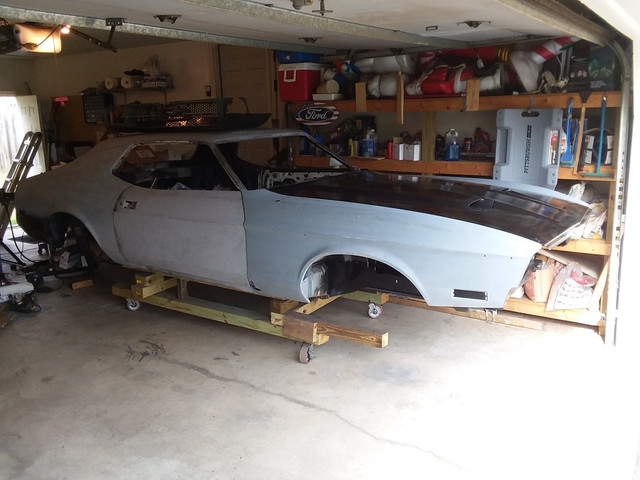


It has been a while so I decided to put the doors, fenders, hood (just layed on) to get a feel for what it would look like.  This was motivating.  It kind of resparked my energy to get this rebuild done.

Please send any thoughts or comments from what you have seen so far?  Once I get some more shielding gas, I will finish the passenger floor board, tighten up any other spots that need welding, add rust inhibitor, and then seam sealer.  Then maybe a coat of primer.  From there the fun begins - suspension, brakes, fuel, and electrical

 
Looking great. Lots of work done on this car. You will like the 5 speed with OD. One of the best upgrades I did. I had the 2.75 open with FMX and went with 3.70 traclok and a T5. great on the highway and plenty off the line if I can get traction. :)

 
Thank you all for the welcome and comments. 73Pony - beautiful car. Seeing your ride gets me more excited about getting mine done.

 
Thank you all for the welcome and comments.  73Pony - beautiful car.  Seeing your ride gets me more excited about getting mine done.
Thanks. The paint and body work on the car is not great. Previous owner painted it in his dusty garage. :) This winter I will likely be stripping it down for a new paint job. The car is rust free just some dings that weren't fixed etc before he resprayed it and he didn't paint the jams or any other non visible part from the outside, the original color was Medium Metallic Brown, so looks a little odd when you open the doors, hood, or trunk.

 
As you can see, body work is what I am doing now. Its very time consuming. But I enjoy working with metal. You can make a mistake and go back and fix it without buying a new part (unlike newer cars with all the plastic panels, etc).

 
Nice job! you appear to be very focused and detail oriented on the build . Thats nice to see the car is getting a good work over! Keep up the good work! and welcome from Idaho.

 
I need some help here.  I have been busy removing the front aprons from the Stang.  Seems they were not aligned properly.  I was using a bubble level and measuring tape.  I saw a youtube video where a guy used a self leveling laser to check body alignment, etc.  So I got one and checked the body alignment.  Well.  It was off so I spent three weeks cutting out my welds (between the heat and working).  At least I did find out my spot and seam welds are pretty good.  So here is where I am at (see photo below).  The aprons are laying in the floor frame rail and the aprons are equal distant to the rear suspension points.  Rear suspension points are level.  In the below picture, the green line with "OK" are mounts for the upper control arm, forward bolt.  I made a mount to keep this portion at the proper height per the Ford manual.  They are not bolted tight so I can move left/right and twist, if needed.  I cannot move the apron up or down.  In the below portion of the picture, "A" and "B" are not level.  You can see the green laser level line at the lower control arm mounts.  Here is where I need some help.  Any idea how I can get the two lower mount locations level - keeping the both front frame rails level and the upper control arm mounts level?  I have tried twisting the right side to bring the lower control arm up to get close to level with the left side.  I can get close - within 1/4".  Is this close enough?  The Ford manual says the tolerance is .06 (approx 1/16").  Any thoughts/ideas?  Thanks for your help. 

Unequal lower control arm mount.jpg

 
Without being there and seeing in person tough to call. If you were on frame machine you could chain down and pull anything you needed. 
I always tell everyone before you ever touch your project no matter the condition take to a frame shop and have the chassis set to zero before you cut anything. 

 
I got the front end with 1/16" tolerance per the 1972 ford manual.  Front to rear on left and right are within 1/16".  Front of frame is level and rear of frame is level per laser level.  I used the suspension anchor points for the rear and the front to take these measruements since that is where the suspension anchors to the car.  Overall, I feel pretty good about the overall frame setup.  

20201009 IMG_1136.JPG

 
I painted the interior and engine compartment with rust encapsulator and then topped it with white sealer/primer.  Overkill?  Maybe. 

20201031_174717.jpg

 
My wife and I picked Spruce Green from Eastwood as the exterior color.  So I painted the interior to see how it looks.  I fugured if I screwed up or the color was bad, the interior is covered anyway by carpet, seats, and paneling.  But we think the color will be pretty cool.  I also sealed/primed the new hood.  And I started painting with engine bay black in fender well area. 

20201111 IMG_1141.JPG

20201111 IMG_1147.JPG

 
Mostly new front suspension and steering components added.  Ordered the MustangsPlus front suspension set for 71-73 Mustangs.  620 coil springs and 1" stabilizer bar.  Should drop the front end about 1".

20201205 IMG_1201.JPG

 
Now the axle next.  For some reason I was not looking forward to this.  I replaced the pinion/ring from 2.70 to a 3.50.  From the research I did, I wanted a balance between responsiveness/torquiness (SP??) and cruiseability.  So I went with the 3.50 ration.  I know with the FMX, the engine RPM's at cruising with stock 26" tires will be around 3000 rpm - not necessarily cruise worthy over long distance but I am planning on installing a 5 speed (T5z).  Also got rid of the open differential and put in a Yukon limited slip.  Used dial indicator etc to ensure .003 max runout and .008-012 bearing load.  All new bearings (pinion, differential, and axle) and axle seals.   New KYB shocks and 4 1/5 mid eye leaf springs plus shackles.  Good times. 

20201231 IMG_1240.JPG

20210112 IMG_1252.JPG

20210114 IMG_1305.JPG

 
Next I rebuilt the steering column with new bearings, turn signal switch, ignition switch and rag joint.  Sanded and painted the column.  Now waiting for backordered steering wheel. 

So currently I am working on small projects, if you will.  Cleaning up the quarter windows, replacing seals, and installing into the body.  Researching brake kits - seriously considering Wilwood brakes.  Researching wheel/tire options.  My plan is the get most of the vehicle ready to run (brakes, fuel, electrical, front seats, dash (instrument panel) before I start working on the engine.  This way I can install the engine and get this baby running.  But there is still a lot of work to do before that. 

small 20210103 IMG_1248a.jpg

 
Wow, that is some big progress, fantastic  :classic_ohmy: :thumb:  

That looks really good! 

I am in front of the same undercarriage-wise: rear axle, rear and front suspension - all new. I will keep my 3:50 gears and update to TracLok  :biggrin:

Keep us posted! 

 
Very nice! Green fits grandé's the best! (ok ok, I might be coloured a tad :D )
Awesome to be in that part of the project where every new addition brings you closer to the day you will turn the key and take it for a ride!

The 3.50/FMX combo, is spot on btw, if you would not go for a T5, I'd say pick a 2.5/2.8k stall converter.

Keep up the good work!


Latest posts

Back
Top