Yellow Mach 1 is back again!

7173Mustangs.com

Help Support 7173Mustangs.com:

This site may earn a commission from merchant affiliate links, including eBay, Amazon, and others.
thx for the details Kevin.

I got enough "mess" in my garage atm (busy with electroplating), but I'd love to try this at some point.

For not too big steering/suspension/brakes components, powder coating is very attractive.

Couple of quick questions tho:

[...while you spray the powder that puts an electrical charge throughout the parts. You cant put too much on, you want to completely coat them.]

You ment too much powder or current? I guess powder. What would then happen, if you did?  The current is not adjustable on this gun, just push button and pull trigger. You CAN'T put too much powder on. The metal will only take as much as it can hold. The excess fall into the tin foil lined box under the parts, to be reused later.

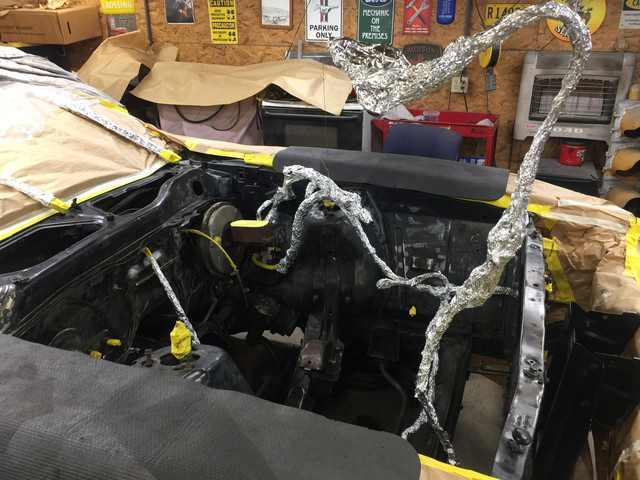
Once you have sprayed, how's the powder holding? I mean a little shock, wind and it all falls down or its fairly "sticking" to the surface? The powder is held on initially by the charge from the gun. You have to be very careful when loading the parts into the oven. Even a small bump and some powder can come off.  But its on there pretty good if you preheated your parts. I always do a dry run with the parts hanging on the rack and plan my route to the oven, in the oven, and back to my box BEFORE I ever shoot any powder. Its better to find out then if your going to have clearance issues in the oven or with something in your way.

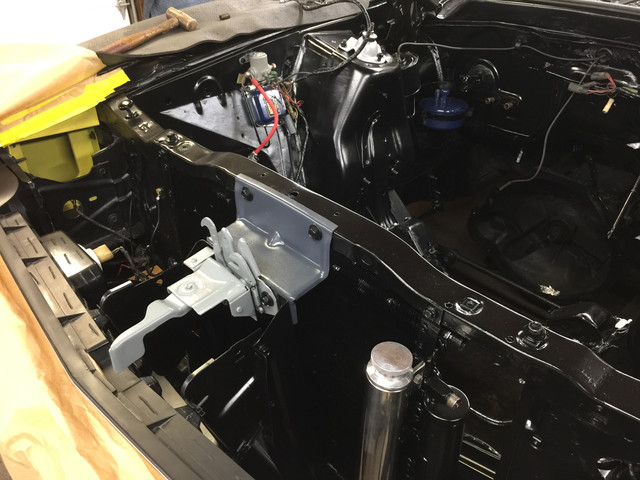
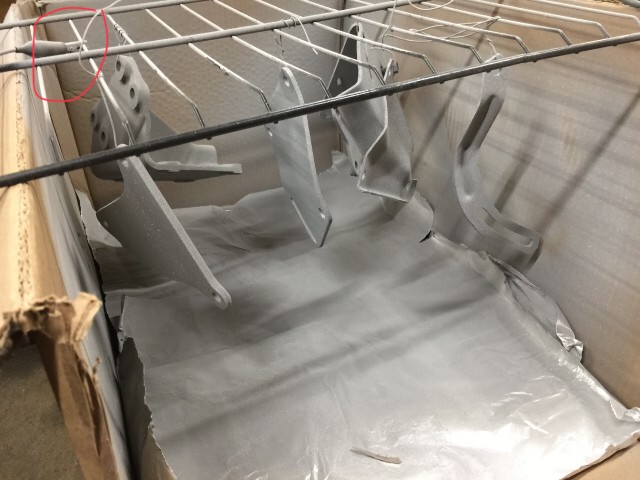
You say you can apply multiple times, how does the new layers stick? Is the powder conductive? As if not, how does the circuit works if the coating builds up and isolate the part? I hang my parts from stainless steel wire on my oven rack that is also metal. I clip the guns ground wire to the oven rack and it conducts the charge through all the parts hanging on the rack. I clean off my rack every once in a while with a flapper disc to make sure all the parts are making good contact.

Or is it that you apply the new coats while it's still bits hot and its sticky? I apply the second coat as soon as they come out of the oven after the first coat. Be careful they will be HOT, 400*. I set the rack back on my box, clip the ground wire to the rack, and proceed to shoot the second coat. Even if the conductivity isn't as good, the overall heat of the part helps the new powder stick very well. And when the parts come out of the oven after first coat, they are not sticky at all. they are fully cured and ready for use once they cool down. As you spray the second coat on you can almost watch it start to flow out over the part. its pretty cool to see.  Once they come out of the oven after 2nd coat and they cool, you can put them right into service!
See above in red.....

See pic below  for ground wire on rack.


Last edited by a moderator:
Fabrice - i powder coated a bunch of my brackets and suspension parts when I restored my '71. Most parts were sandblasted clean, then treated with POR 15's Metal Ready for a phosphate coating. I used powder from Morton, a low gloss black and a textured black. All parts were single coat and cured in an industrial powder oven we had at work at whatever the recommended temp was. This was in 2002 ~ 2003. Parts still look great with no rust showing through and little if any chipping.

 
@turtle5353

Thx for clarifying, very interesting. The kind of answers you don't get in the "look how easy" promotion vids.

My little finger tells me you had to go thru some trial&error before get where you are now.

The parts you did look awesome.

@hemikiller

Yes, that's pretty much the process the company that I've called for a quote told me for my 429 hooker headers . Just like plating, the costs are all about the prep and not really into the material costs. These headers are expensive in the USA and even more once at my door if I would order new ones. So its worth it.

They are too big for a home solution anyway, but for smaller parts I'd love to try this myself.

I need a much much bigger garage...

 
Regular powder coat will not hold up on headers. I have my coated on the outside with CeraKote (Ceramic Coating) and InsulKote on the inside. Keeps heat in the engine compartment way down.

 
Regular powder coat will not hold up on headers. I have my coated on the outside with CeraKote (Ceramic Coating) and InsulKote on the inside. Keeps heat in the engine compartment way down.
I recall you mention that in a reply. I did ask for heat resistant coating and they had only one black solution for this. Not even sure the one they proposed was really suitable or just the only one they had in house. I want contact more companies anyway. 

I surely keep that in mind.

 
@turtle5353

Thx for clarifying, very interesting. The kind of answers you don't get in the "look how easy" promotion vids.

My little finger tells me you had to go thru some trial&error before get where you are now.

The parts you did look awesome. 

I need a much much bigger garage...
Thanks. Yes it was a lot of trial and error! Lot more error than I like to admit!! But I have it down pretty good now. 

Don’t we all need a bigger garage?? I know I do!!

 
You've been a busy bunny today!! The owner is going to be very happy with the new look, as well he should be. And, if I remember without going back, you were not going to pull the motor, just spiff up what you could. Good call to pull it.

Now d'ya feel like coming by my place a doing mine??

What clutch did you end up choosing? it is a long finger by the look of it.

Geoff.

 
Thanks guys! Its coming along. Hope to drop motor back in this week.

Geoff,

I got the clutch from Rock Auto. Its a M-PACT clutch kit. It is the 3 finger design. Same as the one that came off. Its for slightly modified engines. Nothing crazy. Didn't want a hard clutch to push.

 
Thanks guys!  Its coming along. Hope to drop motor back in this week.

Geoff,

I got the clutch from Rock Auto.  Its a M-PACT clutch kit. It is the 3 finger design. Same as the one that came off. Its for slightly modified engines. Nothing crazy. Didn't want a hard clutch to push.
 Thanks Kevin. should be good to go. Diaphragm clutches are harder on the pedal for sure. My left calf muscle is way bigger than the right!!

 I'm looking forward to seeing the results and perhaps hearing your customer's comments.

Geoff.

PS, So I take it you don't want to come and do mine...……. again!
I believe the owner of the car is on here but hasn't posted anything yet.  I told him about the site a while ago. 

For the right money I will work on anything!!!  Bring it on down!!

 
A little more progress this week. Should be dropping motor back in Friday night if all goes well. Painted the hood latch bracket. And powder coated shock tower caps, throttle bracket, and wiper motor cover.  Started putting stuff back together. Wrapped entire wire harness with new tape.  Little things here and there.  Getting closer. 


For the right money I will work on anything!!!  Bring it on down!!
Kevin, unfortunately I'll have to work on my own car again, don't have "the right money" anymore. 

Joking aside, I think that your work on this car shows what you're capable of. Great attention to detail and as I say about my own car "correct appearing to the casual observer" Who cares about "concours", it looks good and looks the part and that is what is important. Well done.

Geoff.

 
Last edited by a moderator:
Back
Top