Fabrice's 429CJ 71 project

7173Mustangs.com

Help Support 7173Mustangs.com:

This site may earn a commission from merchant affiliate links, including eBay, Amazon, and others.
Fabrice, as we had talked about earlier, that is a power buy. I've  seen the Spectra Premium Cu-381 sell for over $250.00  That One looks about as close to the original Modine as the $600.00-800.00 radiators I have seen from various vendors.

Be sure to retest the 18495 valve after it has set for a while. That way you can make sure the vacuum diaphragm wasn't affected by the cooking process. (I do have a "Fix")

And until Santa brings you a vacuum pump, you will still have to vacuum test things the old fashioned way.....just go in your garage so your neighbors can't see what you are doing!  :whistling:

 
@NOT A T5

[That is some really quality work Fabrice and to answer the question about where you're getting your energy from to do all this, it is obvious...Dr OETKER Pizza! ]

Thx. Ahahaha, well, they are soft and not too thick, talking about the box around them ! Ideal to cast shapes for patches! :)

@Secluff

[be sure to retest the 18495 valve after it has set for a while. That way you can make sure the vacuum diaphragm wasn't affected by the cooking process. (I do have a "Fix")]

The diaphragm and its canister were not exposed to the acid. Just elbow oil :) The fix would be some "baby powder" like for rubber?

[That One looks about as close to the original Modine as the $600.00-800.00 radiators I have seen from various vendors.]

I've already compared the shape to some "original repops" and they look alike. There might be a diff in the core, where some offer a more dense mesh to help dissipate more heat, but this option comes at an additional cost above the already spicy price. So, yes, I'm very happy with that one and I'm sure it'll do just fine.

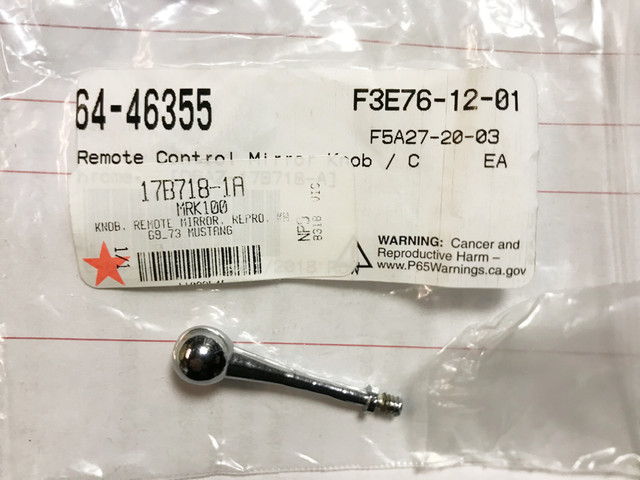
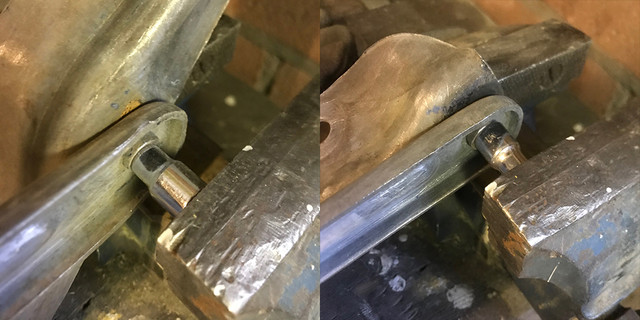
btw got another answer about the knob: Unlike in the Ford kit, there is no guide provided to drill the old broken one.

The casting isn't really wow, but where it looks bit distorted will be behind the big ring, so should do fine. Better to have one than nothing.


If anyone has tips on how to remove/drill the old broken bit of the knob...

 
Here are some basic instructions

https://www.hunker.com/13415526/how-to-extract-small-broken-screws

In addition to what the article recommends left-hand (reversed) drill bits can bite in enough to remove them

https://www.amazon.com/slp/left-hand-drill-bits/q3k8qjv9mbea8ys

There are also mini-screw extractors

https://www.micromark.com/Mini-Extractor-Screwdriver-Set
Thx Don,

I have most I need in house but for bigger boys, not for this tiny size..

I like these mini extractors, looking very handy, the kind of tool you need once every 10 years tho :)

Will try find one of these here.

 
Still cold, under freeze point. Another weekend where I'm not gonna be able to paint anything,

So I went back to cleanup and de-rust.


Did some small hardware, like this trans inspection plate that was having some rust, not much, but where there was some, it was deep enough to need a bath. Rust free after 2 days. I'll finish brush/polish it tomorow.


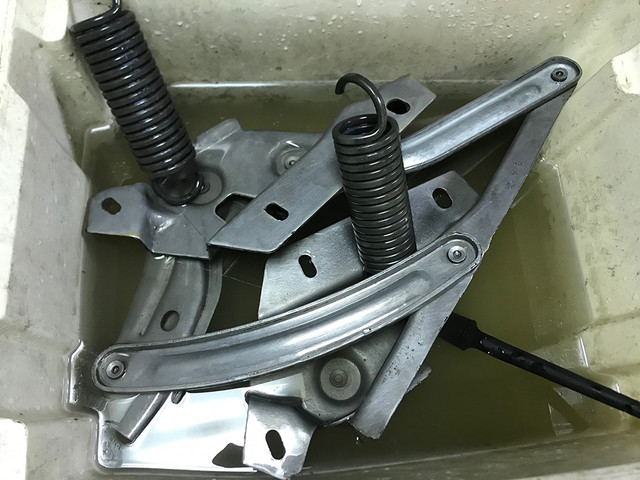
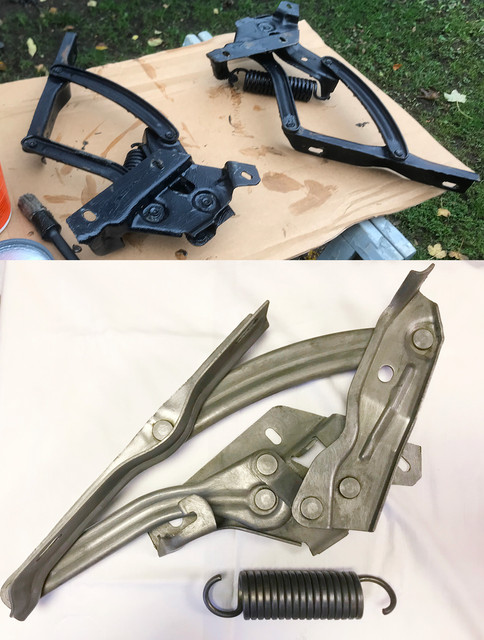
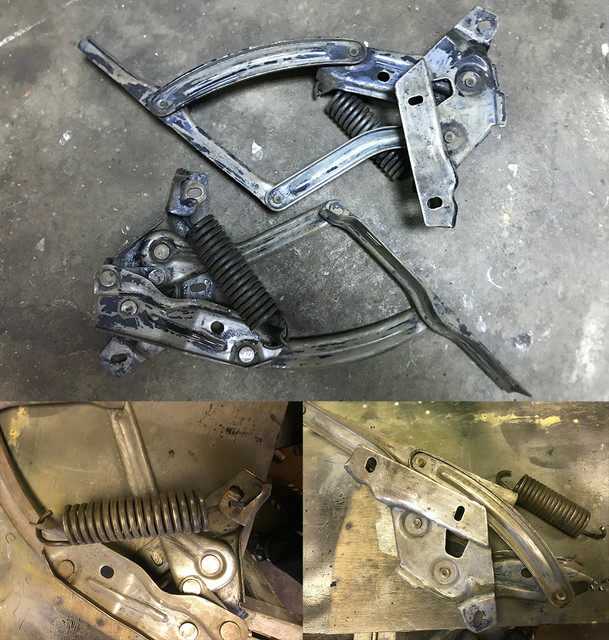
I went back to the hinges that were painted with 2 layers of blue. There was still work to be done to remove the paint. As I know my paint remover doesn't work at all when temp is low, I've removed by hand what was left over. The old paint wasn't really hard to get rid of but hard to be reached, so removed the springs to access hidden places.

I'm already looking forward placing them back, expecting some fun moments :)


I often miss a way to sandblast at home, today I've also regretted not having an hydraulic press.

Tried to squeeze the rivets to compensate some play with my small vice. Helped a bit, but that's about it. I'd need some serious muscle to get rid of it completely. Oh well, at least I tried :)


After somewhat tedious work, I got them to the point they both started to look ok.

Still in bath for the nite, I'll finish them tomorrow.

Then I was really too cold to stay in the garage...

@don,

Thx Don, I think I'll look at this detail when it will be warmer, prolly when I'll remove the interior.

 
Great work as usual Fabrice especially your epic hood effort!

Will be repairing the aftermarket hood I have with the usual bow in it and removing most of the e-coat before priming

Great deal you got on your radiator, I paid about $900AUD for a custom radiator but for that price I would have bought 2 or 3!

Hearing you talk about the cold weather brings me back to my time in the Netherlands Dec 99/Jan 00 so I can understand why it is difficult to paint

I have the opposite problem this weekend as although it is summer we have thunderstorms around and humidity is too high for painting

Wouldn't we all like a climate controlled spray booth!

 
They look good. What are you going to finish the springs with?

Did you get the mirror remote knob repaired?
I don't know yet. I was thinking of letting white chroom (mat grey) the hinges as on my 73 or paint them, and let the springs be coated. At first I wanted all coated, but because the springs need to be under tension to be coated properly en the hinges may break the coating or offer too much resistance. I'm simply not sure yet. I may end up painting them but need to find to "elastic" paint. Really not sure. For now, its all about stop the corrosion and clean they up. I might even have done this for nothing if I go the white chrome way as they will bath them first :)

If you have tips or ideas, please shoot.

[Did you get the mirror remote knob repaired?]

As I wrote, it was too cold to start on this. I'll prolly do it once weather is bits warmer. (was -2 today)

Great work as usual Fabrice especially your epic hood effort!

Will be repairing the aftermarket hood I have with the usual bow in it and removing most of the e-coat before priming

Great deal you got on your radiator, I paid about $900AUD for a custom radiator but for that price I would have bought 2 or 3!

Hearing you talk about the cold weather brings me back to my time in the Netherlands Dec 99/Jan 00 so I can understand why it is difficult to paint

I have the opposite problem this weekend as although it is summer we have thunderstorms around and humidity is too high for painting

Wouldn't we all like a climate controlled spray booth!
thx, yes the radiator was really a good deal. Very rare. I was expecting to pay much more just like you, so Piggy goes now for an EFI with an head start :)

[Wouldn't we all like a climate controlled spray booth!]

Man, a spacy garage and a spray booth... heaven! :)

 
I believe David had some suggestions in some of his posts, about parkerizing (phosphate coatings). I don't have any other suggestions, I thought that as innovative as you are you may have come up with something interesting. Acquiring some of the chemicals needed may be difficult.

If you're thinking about chrome plating, black chrome is also a possibility, it can be either shiny or dull.

Yeah, it's not fun working in the cold, really adds to the difficulty, can lead to hasty decisions, which can be costly or dangerous.

 
Last edited by a moderator:


Finished the cleaning of the hinges and looking back at them before, I'm glad both paint layers and rust are gone. Now need to find a plating company and see what they could do to them for a good long lasting solution... especially the springs.

@Don C

In paralel, I'm also looking a nickel plating. From some sources I've red/viewed, I might give that a try. Its one affordable solution, something I could use on many other items and doesn't require dangerous chemicals or the use of high current. In fact I saw that best results were obtained between 3 and 5 volts, also the solution doesn't require to be kept at "high" temperature like chrome does. Most of all, it doesn't need much more space than a bucket.


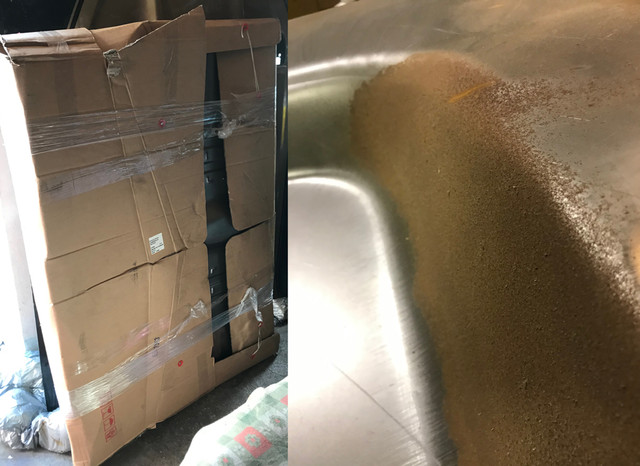
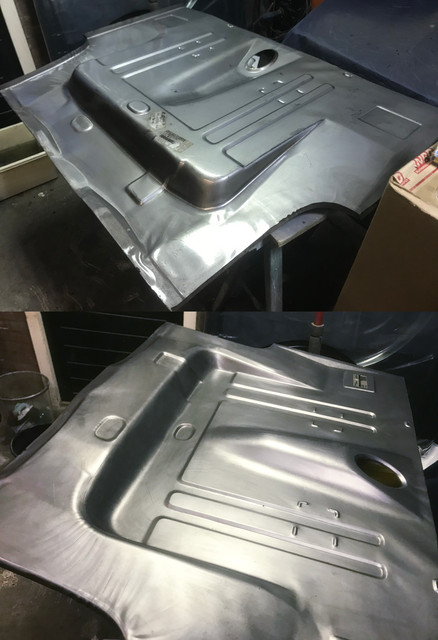
Because my hood was taking all the space I had left in the garage, I did not had yet a chance to look in detail at the floor pan I've received a few weeks back. From the opening, it was looking ok. My garage is dry, expected it to be fine.

Busy making place, I wanted take a closer look before store it on my attic for next year... got the bad surprise to discover it was starting to rust and by the look of it it was already corroded before I got it for sure. On some location rust started to become serious.

Bit mad, as I can't suffer the sight of rust. I mean, I don't want to replace a rusty floor by another one even if less rusted.... pfff

So Instead of cleaning other parts, spend time restoring something supposed to be new..


Managed to remove all the rust, at some place it was starting to be become more than just light rust. I was on time, and got it as I should have received it. Now protected with an oil film it can wait for better days without any chance of corrosion. I also saw it got damaged during storage/transport and that I'll need to massage it back into shape, nothing serious and will dolly that back when i'll install it.

It was a good buy from a european/tax point of view and its now restored, so I'll forget quickly about the lost hours. But I really can't understand how you as a company can ship something in this shape with no second thoughts...

That's probably the naive me expecting the world to be round :)

To be continued...

 
Last edited by a moderator:
Worked on the 73 today. I want it on the road and I need the space to start do serious work on the 71...

Among the todo, I've finally fixed the power windows that were not working for a long while. This thread is for the 71, but thought I'd post this, as the electrics are the same/very similar for a 71, 72 or 73 with PW.

After some testing done a while ago, found out the power windows relay was defect. It's hidden in engine bay next to the brakes master cylinder(73) or under dash on the column(71). The kind of relay Ford used is not to be found here. They are online $20 to $50 repro or more expensive NOS ( $150 to $250).

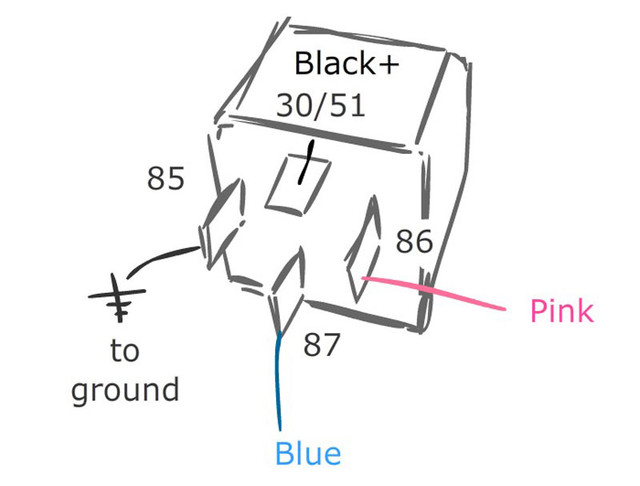
I might one day order an "original" one as part of a bigger order, for now shipping+tax were making this relay a luxury item. Santa already having tough days, I've instead replaced it with a regular 12v/40A 4 slots that you can buy for $2 to $5. The line has a 20A fuse, so even a more common 30A would do just fine. Only work required is to add a ground wire vs the ground that is the metal casing of the relay on the original.

In case you'd ever need/want to do the same, here's the way you can connect.

(using the 73 wire colours).


thx @Don C

Will look in details at this. I need calculate the credits (nickel ratio) required for the springs... Surely looks interesting for small parts.

 
Last edited by a moderator:
If you do try plating them at home, I would come up with a way to stretch them out some so the coils on the springs aren't touching. I haven't thought if a way to keep the hinge pivot rivets from getting plated and freezing them. I haven't tried looking online to see if anyone else has faced the same situation.

 
Long weekend! With this misery cold weather, no hope to start body work or start any part that needs be painted right away.

As this car needs attention pretty much on everything. Among many details I'm prepping for better days, here's one of my new victims..

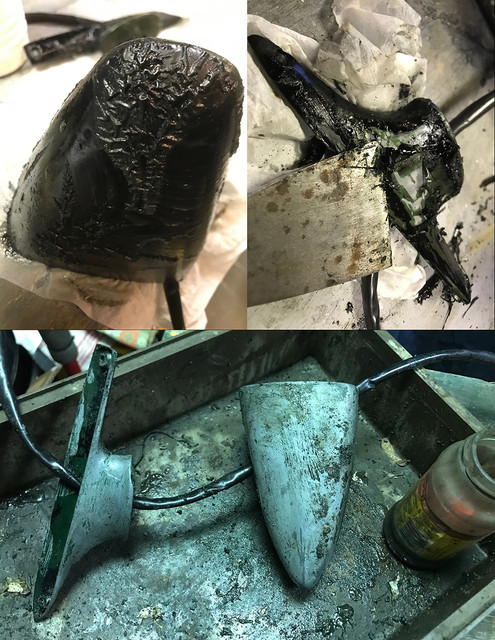
The hood twist locks. The visible part is made of zamac. We all know how bad looking this metal usually chromed can get, hood/fender extensions, door handles. They all get these ugly corrosion bubbles...

Repros go for 125 to 200, in real money (shipping+taxes) this means a +-250 euros at my door. I thought about asking Santa... but the guy just had rough days, so resisted and thought I'd take a closer look first.
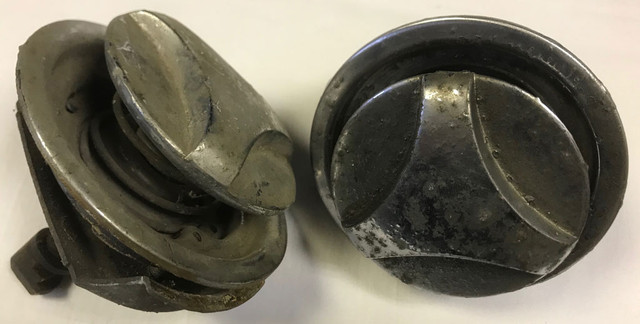


They look pretty bad. No way I'll put these back on a restored hood. Or will I??

So decided to take a shot at them. Pretty aware I might loose my time here. I just wanted to see if parts made of that metal could be saved...
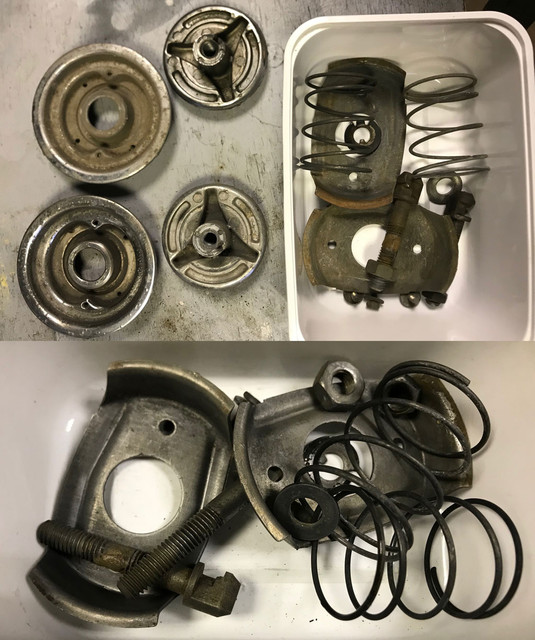


Once apart, half parts went for a bath for different durations, the rest cleaned up.
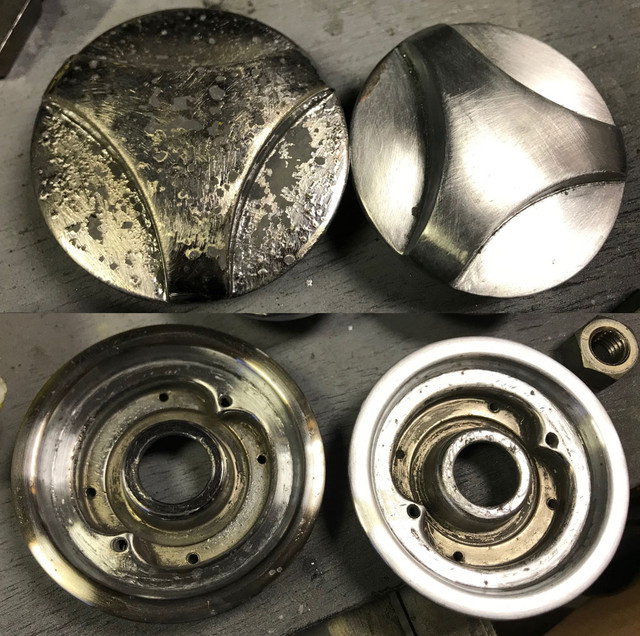


Became quickly obvious that I'm going nowhere until the chrome is removed. Hydrochloric acid is pretty much the promoted way to remove ancient chrome, tho, had to go to plan B right away as zamac doesn't like this acid very much. So instead of risking to make zamac sponges, I went over mechanical removal of the chrome. Turns out to be much harder than expected. Chrome is really tough and I needed to try different methods, combos of tools to remove it without damaging the parts.
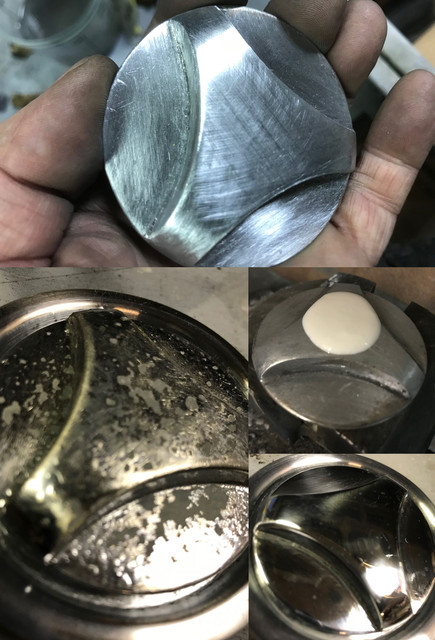


Once I've found my "ok" tools combo to remove most of it and keep the shape undamaged, I was able to get to the casted part of pure zamac.
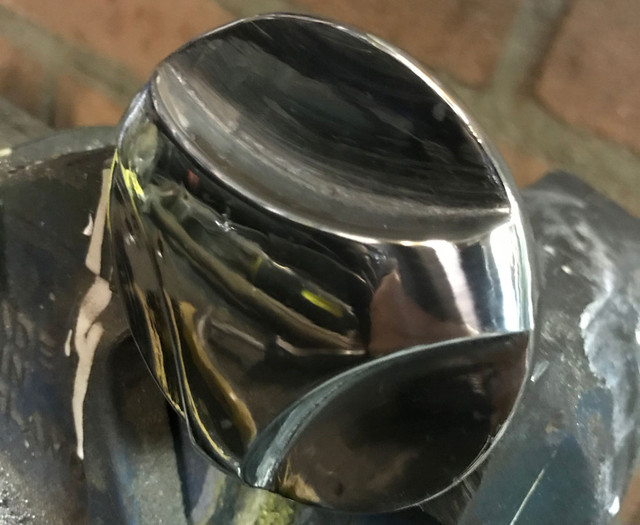


From there, using basic sand papers, files and a good dose of elbow grease, I was able to get to a nice level of surface finish.
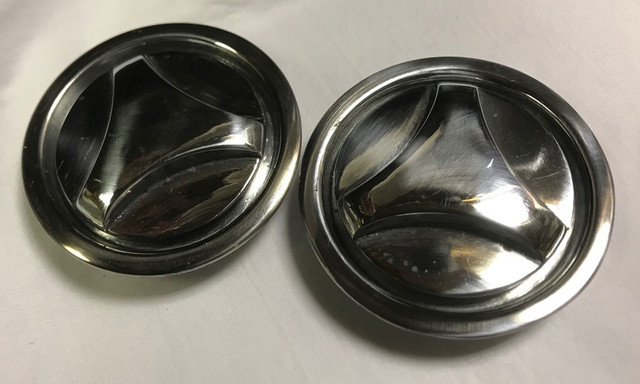


I need to do a second pass with much finer polish and get the last bits of their pitted history off.

But that's the finish I've managed to give them so far. While I'm pretty happy and I see chances of totally removing the ancient corrosion.

I also know zamac will not stay long this way...


Time to cook "haute cuisine"! I've decided for 2019, to not just de-rust but also to protect for a durable finish. Electro plating here I come! :)

The above anodes and other details are on their way and I'll be playing the mad scientist in my garage very soon :)

At some point, I'll plate the above twist locks. But not before I'm confident I can get it done right, and I'll be testing on many others that do not require so much work, like brackets, bolts etc...

That's also why I will be re-polishing the details when so far, as plating doesn't fill the scratches as a thick paint primer does. Surfaces must be perfect.

@Don

Did lots of reseach in past weeks and creating own brew doesn't feel that complicated, at least for these 3 metals.

I should be able to plate most of the small stuffs I get rust free, even if the plating is not that good, the small investment done should do just fine.

If I'm really satisfied with what I'll get, I'll invest a bit more in hardware to handle bigger parts like the hood hinges and probably build some more extended bath.

Anyway, I thought I'd give it a try. I'll post some of my findings as I go... I might sing otherwise in a few weeks from now, but for now, I can't wait to get started!

On the hood hinges springs (and giving them a bit tension so something can be applied in between coils), tried a few things, none really worked, mainly because to be able to plate inside, I need the space to insert a sacrificial rod in there. However, I know what I'll need to build to make it work...
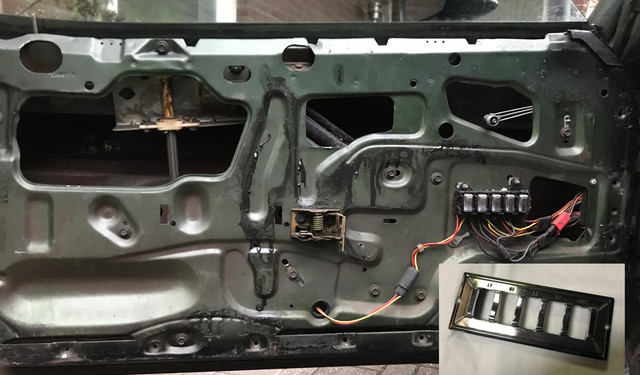


My doors need a bath, some weld work... but its too cold to think about this right now, so while I'm prepping them, taking tons of picts, I'm handling the small hardware first, like the power window bezel...
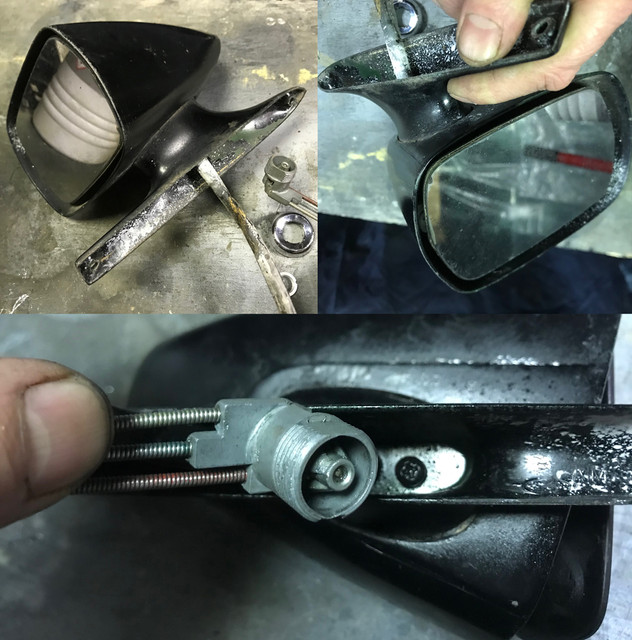


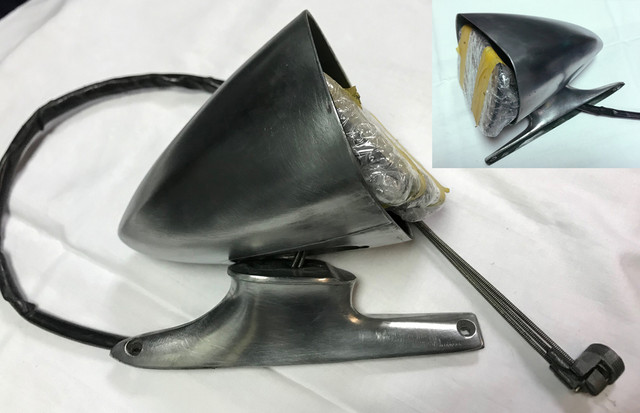
or this mirror. This mirror has the knob broken (definitely need a drilling guide for this), and needs be prep for paint later on. I wanted pull it apart but looks like its not possible to remove the cable without cutting/disconnect them somehow. From what I saw, I'll be forced to work on it with all parts still attached as I don't really feel touching the cable would be wise. Or is there a secret procedure?
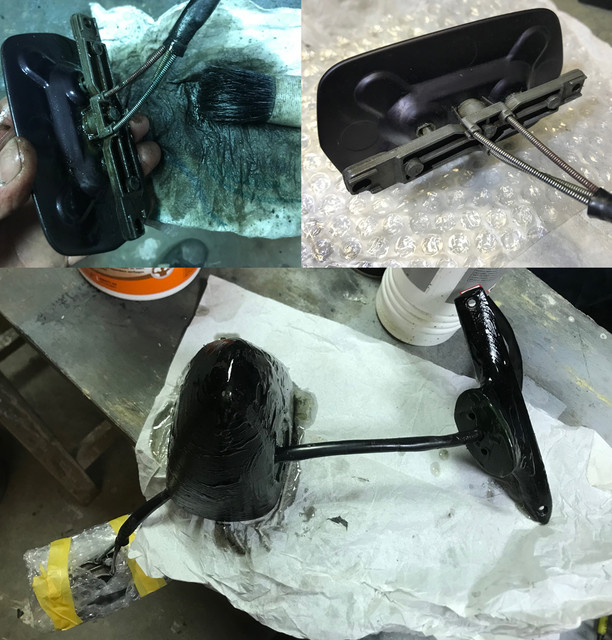


After a good clean up, I've isolated the mirror support/glass and protected it from eventual shock. For now, it's under a layer of paint remover. I'm not sure much will happend due to low temp, I'll see that tomorrow...

 
Last edited by a moderator:
As expected the paint remover had been lazy, so warmed up the metal a bit, reapplied a layer and went do other things meanwhile...


After an hour or so, the chemicals finally did something. Pretty much same as when I was busy on the hood. Back to a dirty job :)


Once the mess was cleaned up, a bit of degreaser and a tad of elbow oil and voila!

Packed that baby and it's now waiting for a paint job together with the rear extensions and the hood scoops sometimes next year. I'll handle the knob once I have something that could act as a drill guide.


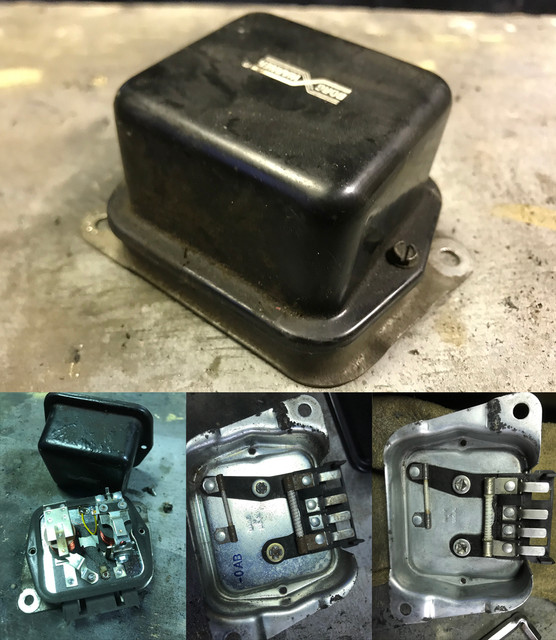
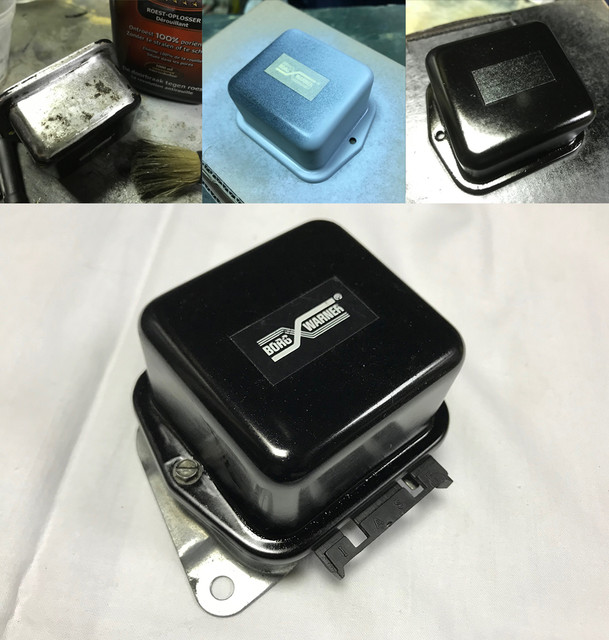
In between other activities gave some love to another "nobody cares" part. The regulator. Undervalued for its purpose its another item that is often ignored till they fail or get tossed when looking bad. While you can get them at the corner of your street in the US for a few dollars, its again another story over here. After an inspection, only the cover and some connections exposed on the rear were corroded. No reason to replace something this is operational. So de-rusted and treated the connections and quick bathed the screws and cover.


I couldn't resist to paint, so the moment rain stopped for a bit, quickly primed and painted the cover and dried it with a gun heater. Few moments later, the little guy and its connections were looking bling bling again.

Piggy and me happy! I went prep other parts...

 
Hey Fabrice, if I were you I would go with an electronic voltage regulator, much more reliable since there are no contacts. You could swap out the housing to get a stock look. I think they are in the $40 range. Where'd you get that Borg Warner unit?
 
Hey Fabrice, if I were you I would go with an electronic voltage regulator, much more reliable since there are no contacts. You could swap out the housing to get a stock look. I think they are in the $40 range. Where'd you get that Borg Warner unit?
+1
That is one task I will do also with my repro part and a NOS electronic regulator. Heard that the new repro vr's are eletronic regulated, too. Could anybody confirm this?

Nice little works, Fabrice. It is always better to do the little things than nothing ;-)

Gesendet von meinem E6633 mit Tapatalk

 
Back
Top