Fabrice's 429CJ 71 project

7173Mustangs.com

Help Support 7173Mustangs.com:

This site may earn a commission from merchant affiliate links, including eBay, Amazon, and others.
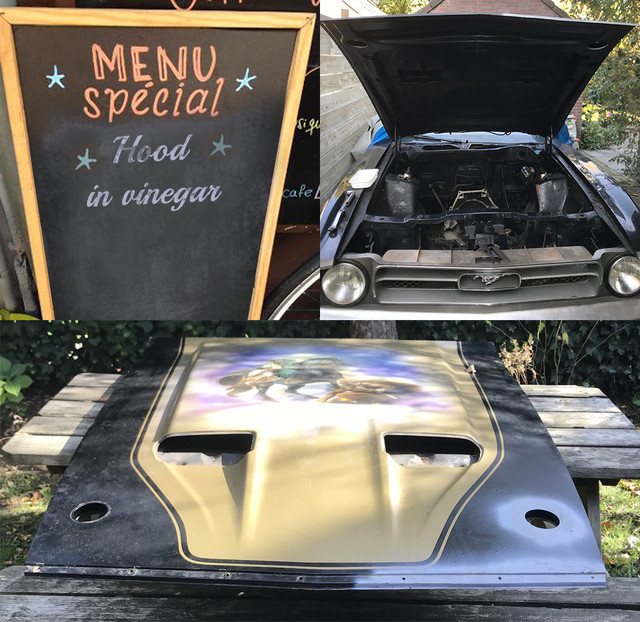
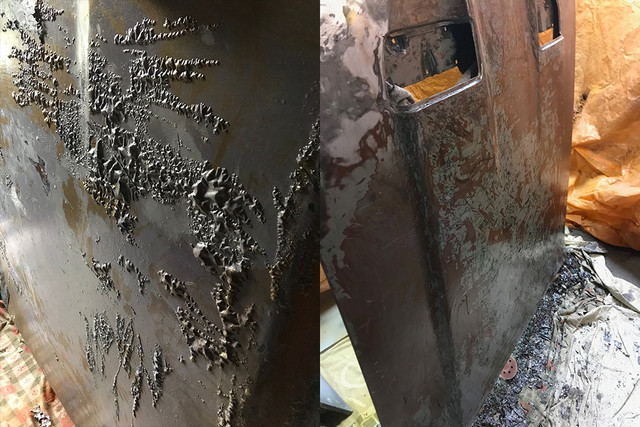
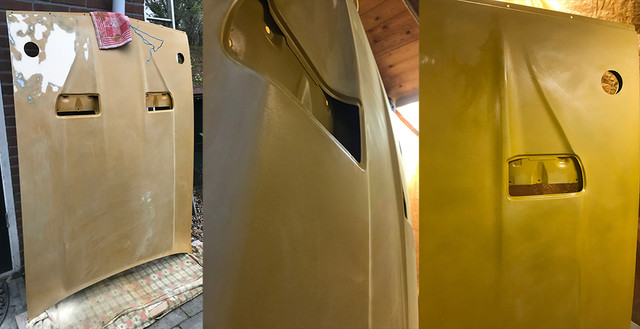
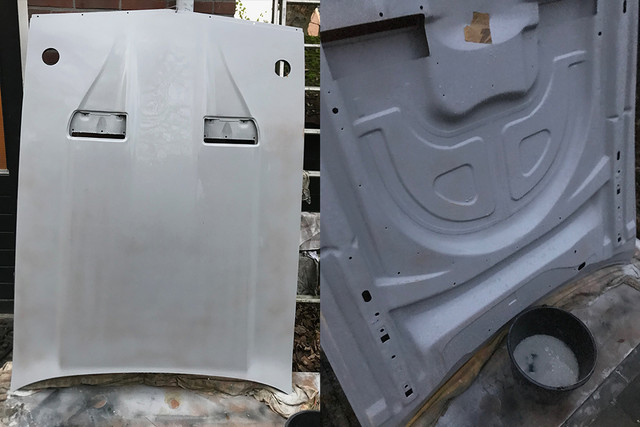
Day started a bit disappointed by what the paint remover left me with... no peeled off paint :(

Just like the deck lid, looked like the paint used long ago on top did not let the chemicals go thru as I hoped.


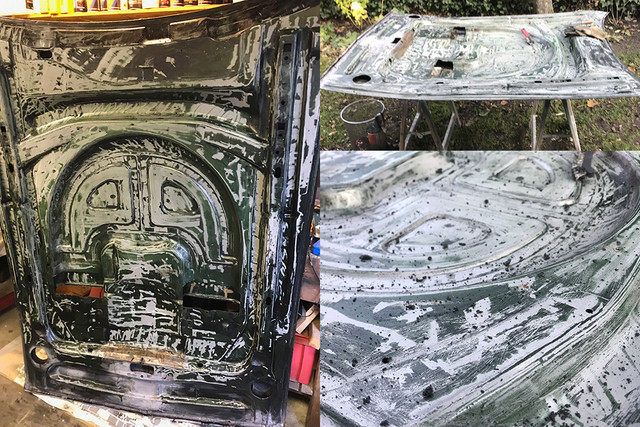
Tho, overall, the paint was very soft. So scrapped all I could roughly and moved the hood outside and placed it flat to work better. (easy to say, bit less in practice)

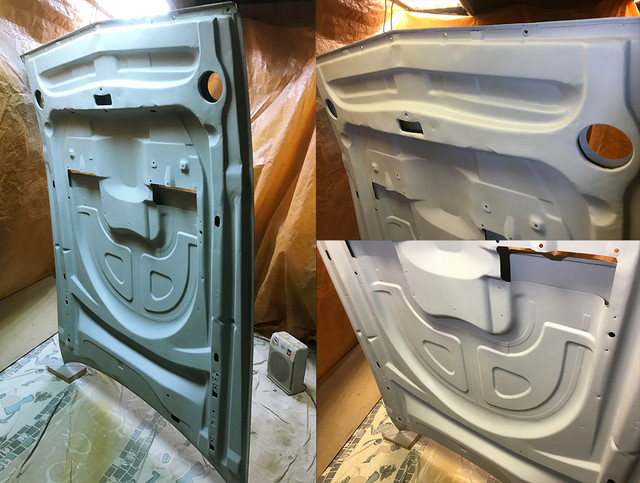
Then applied a new layer of remover and as observed with the decklid, a simple metal handbrush while still wet was working fine. The paint was rolling itself and was relatively easy to be removed.


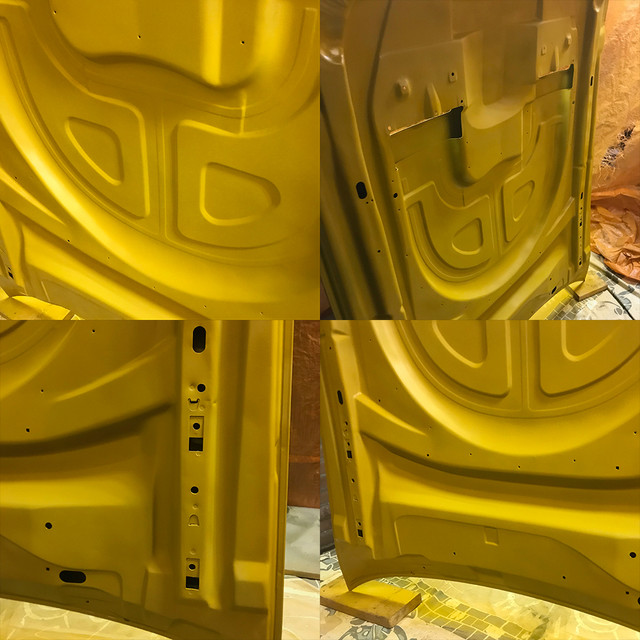
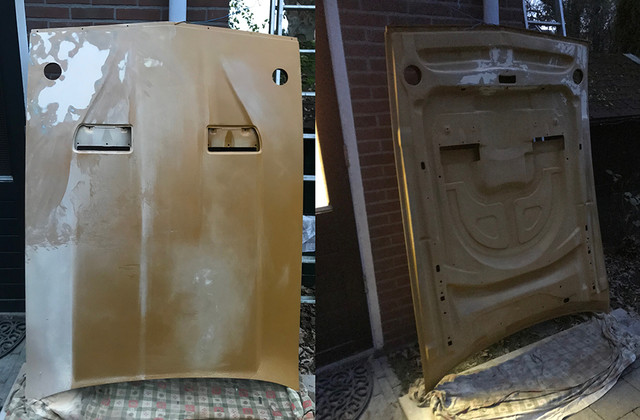
The minutes became hours, but at some point I was able to get the entire underside of the hood paint free and see the bare metal.

Found some light rust here and there too, but no bad news this time. There will be no more welding required on this side! Yeah!


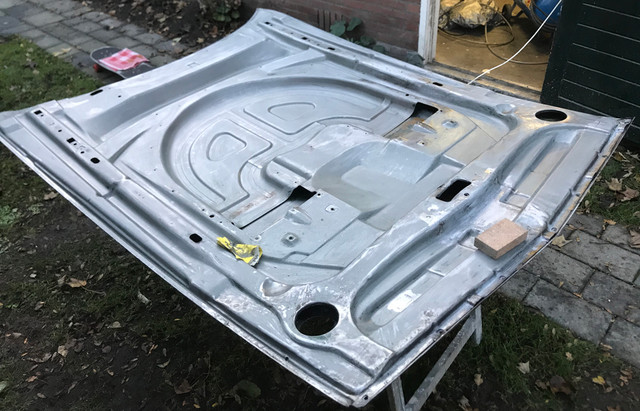
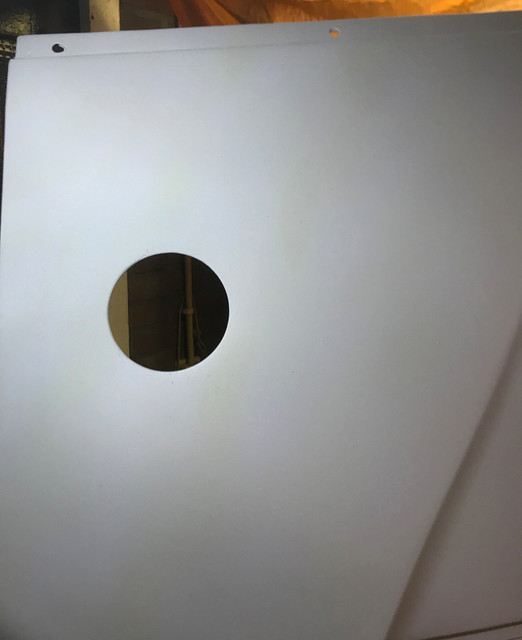
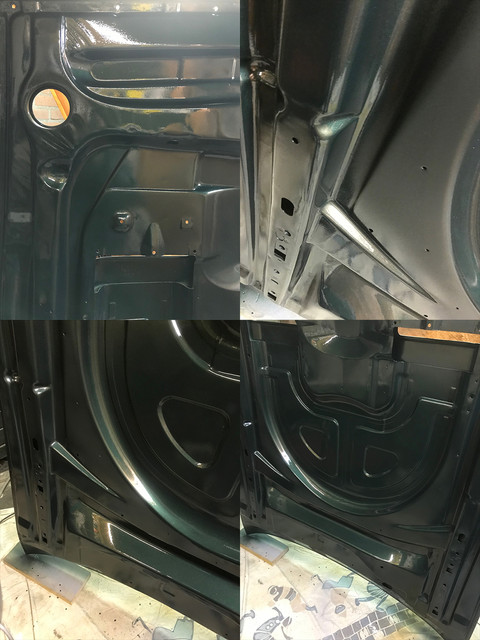
Eventually got a nice clean surface and started work on the details. Small bites of light rust here and there, probably caused at some point in time by small dents that went thru the paint.


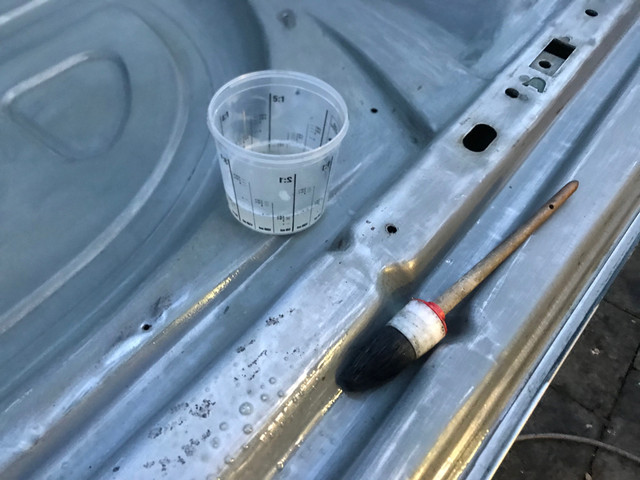
Pretty happy with the results so far, It went on to next step, which was to apply rust dissolver on the entire surface. Did some extra brushing on the rust spots, helping the liquid as much as possible to penetrate. The one I use treats the rust and leaves a phosphate like layer behind once dry. The kind I need, as it was too late and too cold to start spray something on the blank metal.


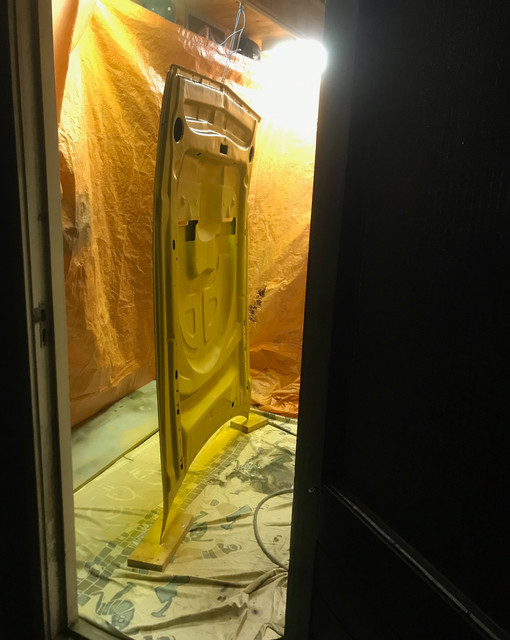
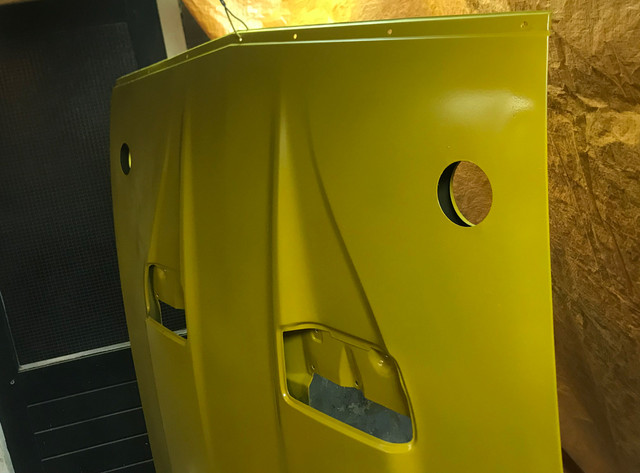
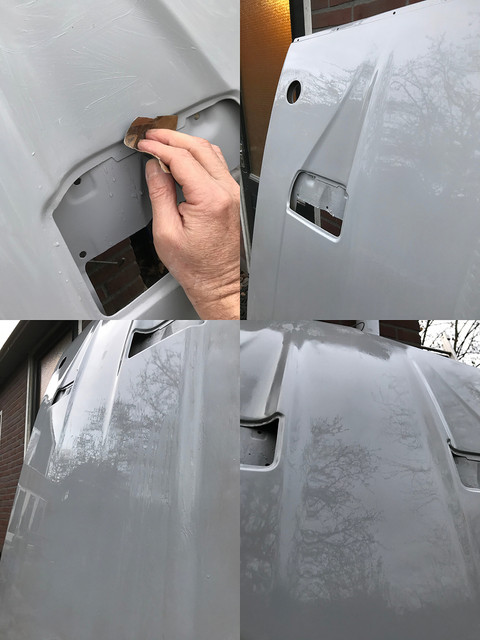
Back into the garage with bright light, all brown spots and regions where gone. Still wet, all was greyish. It will probably be yellowish by tomorrow.

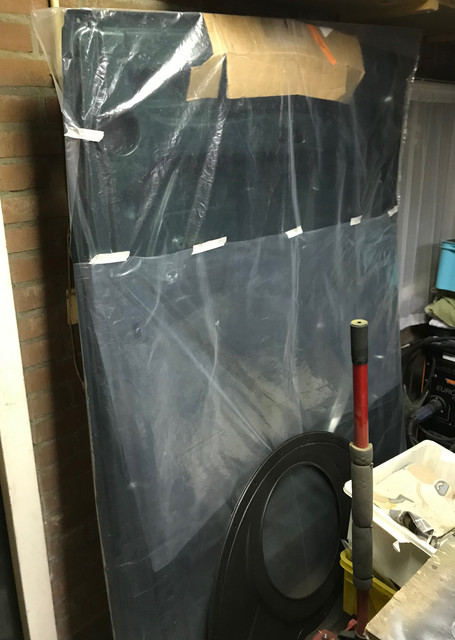
Weather is expected to be dry and relativly soft coming days, so this layer should be enough to protect it till next weekend.

Next is to finish the other side, and begin to spray the epoxy primer. For that I'll have to magically transform a corner of my overfilled garage into some cabine. Even if soft for the time of the year, its way too cold for epoxy.

If you pay for gym, let me tell you, save your money and get yourself a rusty hood to restore! Discovered again this weekend new muscles I didn't know I even had :)

To be continued...

 
Why? You want to replicate it? :)

If you mean a few picts of it, yes I did. If you mean keep it on the hood, mmm, I'm gonna have to disappoint you. This 80's piece of art will peel off next weekend! I promise I will sand it with respect!

Tho, even if its not my taste, this handmade graphic made this car unique. Back in late 80's in Paris, I recall people knew the car because of it. Even if I'm not planning to have something similar again. I'm starting to think about what I would like on the car in the end. I'd like something personal, in the era style, prolly highly inspired by the original deco, but would like to do something else than the classic hockey stick/hood treatment. I would like this car to have that little something that makes it unique just like this thing did. Don't know what yet tho :)

Go to the Sacre Coeur hill in Paris and I am sure some of those artist will love to paint a caricature in that hood.

lollerz rofl rofl

 
Today was "7173HoodDay" in the Netherlands!

250km south west of me, @Vinnie started "cook" his flat hood. From some of his messages, I know he was having serious water fun :)

and on my side I finally came to the point where mine was about to start to look better than before!

Weather was really miserable today, so first I needed to magically transform my garage in a spray booth somehow.


In between moving boxes and tons of stuffs, protecting... placed the hinges under a layer of paint remover for later.


Once enough space was finally created and all I could protect protected, it was time to spray the inner side with epoxy primer after a good final cleaning session. I have more to do on the other side, but as the weather is really wet and expected to stay like this for a few days, I really wanted to have that side protected no matter what.


Probably the most satisfying moment on any part you restore: the moment you have cleaned up the spray gun, tools back to their places. Light a cig and watch the clean surface slowly drying, totally aware of what it takes to get to that point...

@NOT A T5

No way! This is something a mustang lover must do once in his lifetime alone. Experience the pain!

A bit like these initiation rituals seen in some tribes. :)


As the plan was to filler prime today started by quickly applying bits of bondo to have a nicer finish where i've welded,. Nobody looks there, but after so much work, I'm not gonna do difficult for a few minutes of sanding.


While the bondo was hardening went back to the hinges, They stayed the night in the paint remover. Turns out they were having 2 layers of paint. one dark blue, one Ford blue. I'll clean them further later on. Still not sure what I'm gonna do with these. may be sandblast them and have them coated or let them plated with white chrome as my 73.


Turned the hood to the art side and it was time to say goodbye to this 80's piece of art.


I thought I'd be quickly done with the paint removal.... I was so wrong!

How many layers of paint/coating can you have on a 45 year old hood?

well you can have a LOT.

From what I saw, there is first a layer of red primer from Ford, a primer, then the original green and in the middle the grey. then the top clear coat. Then for some reason, there is on the entire left side primer and again green and grey and top coat, and then there is the "herts" layer, black and gold, and a thick top coat and then there is the art work, with primer first, the art paint and likely a very thick layer of clear coat.

Simply too much "and thens" to be dissolved in one go. reapplied 2 times and scrapped tons.

The art layer, the black, most green and gold are gone.

As I can't make dust in the garage to sand these layers or go outside because its raining and can't use heat that could burn the applied epoxy.

Applied another thick layer and called it a day.

Looks like priming is for next weekend. ..

 
@Vinnie

[the hood already looks better without it]

Currently it's really modern abstract art for sure :)

@NOT A T5

[You broke up with Art?]

I'm working hard to have a fresh new canvas! I have some ideas about the graphics I will put on the car at some point, pretty sure it will not again be a pale copy of Boris Vallejo's work. I surely want to have something 7173's mach1ish but would really want to be a tad more creative/personal than just factory look. Nothing wild. I'm not doing an original restoration but I try to respect the car spirit and parts, I think the exterior should tell the same story.

 
Cold just above freeze point during day and wet.

I hate this weather, even more than normal, as low temp reduced my paint remover effect to near zero.

Already less effective than the good ones (prohibited here for environment reasons), like Aircraft remover,

It managed only to soften the paint a bit (on the pict bellow left, its one layer peeling off a bit after days of application)


So spend saturday afternoon, continuing the tedious removal of the many layers... Even found an extra primer layer that did not react at all where the art work was, great needed the extra work...pffff.


Felt as a never ending story, but eventually this morning I got to see the entire metal. Finally!

Rest of the day was about clearing details, like the small regions at the scoops, removing the old red primer...

Gave the garage a good cleaning. Placed the hood outside and finished the corners on the back and the front lip alternating the sides. That's when you value electric tools :)

After a final cleanup and an heat gun session to have the metal bits warmer.

It was time to prep the primer.


With an ambient temp inside at just the minimum requirements for the epoxy. I've sprayed in 4 layers and used the heat gun from a distance in between to ensure the hood/primer would not get too cold.


Using the heat gun and a small heater for a while, not only garage temp was now few degrees above minimum, but saw the epoxy was already hard to the touch after 20 minutes.


So much work to get all out and before you know it, its under a thick layer again :)

Really happy the entire hood is now clean, protected in and out. It's been a very long journey to get there for sure.

What needs to be done next, like bits of bondo and filler primer should be a piece of cake. Will see soon enough. At least I can wait till temp goes up so I can work outside now.

No worries about rust anymore! Yeah!

to be continued...

 
Last edited by a moderator:
Way too cold to get up early and sooo no fun to be outside,

I pushed myself to get something done and as the hood takes all the room into the garage... choice was quickly made: back to the hood.


While the epoxy primer was looking good on both sides, I spend time to sand it all to ensure the filler primer would have a good surface to stick onto, and also needed to apply a little bondo to level an ancient dent repair.

As I can't have dust inside and it was dry on Saturday, I've enjoyed sanding by hand at near freeze point for hours. I prefer feel the shape with my hands while sanding rather than using electric tools, especially to correct a damage place.


Today was no different, as I've noticed some minor details on the repair that were not ok to my eyes, so I've reapplied a thin layer of bondo and reduced the thickness to a minimum again. It was then time to sand a bit finer and degrease/remove the dust.


With the heater on most of the day, temp was just ok to spray inside. Added a tad more hardener than i usually would do, and because the epoxy was really looking very smooth everywhere, prepped the paint with more solvant to allow me to alternate both sides of the hood without the need to charge too much.

Few minutes later, the hood had lost its brownish yellow jacket for a light greyish one. Both sides are now under a nice layer that I've helped a bit to dry with the heat gun from a distance.


Very happy about how the once rusty damaged misery looking corner turned out. I was expecting the need to reapply bits more bondo.

Using a light to inspect the corner I could not detect any place where the shape was not looking natural. I guess water sanding will reveal that better next weekend but for now it looks like very fine sanding should do the trick.


Also glad to see the extra efforts (in the cold) put into reducing the epoxy thickness a bit to enhance the sharp edges payed off too.

The shapes are definitely there despite the relative thickness of the primers. Not too blended.


All with all, looks like the hood adventure is coming to an end!

They say the more efforts you put in a paint job the nicer it will look. If I count the calories burned in that hood I should get a kickass one :)

Next weekend, I'll prolly apply a green layer on the inside. The outside will wait for a dust free warm paint booth...

and if all goes well, I could even mark the entire hood as done and reclaim my garage for the other parts waiting! :)

to be continued...

 
Last edited by a moderator:
Whouahhh what a job! If you are interested, as you look like to love to do them, I have the hood from the Mach 1 to be done :)

I know how it's hard to work on it specially when you are alone, heavy and big. But it's good for your body isn't it?

 
Still in hoodland but for the last time! At least, not till i come back to it in a warm dust free paint booth.

Goal today was to paint the underside, and have the top primer ready for later.


So enjoyed wet sanding outside. As it's low temp, windy and rainy, it was big fun again.

The rain had a positive side tho, the surface kept wet longer helped to see potential flaws.


Once the top was done, I've really hated the fact that the hood has two sides :)

But went on and on using wet 400 and 600 and by the time the sun went down. I was finally done.


After a hot drying session, dust removal and degreasing. Applied the green and a good layer of clear coat. Very hard to take a pict of the colour inside with orange reflecting on it. There are few flaws from the press/shaping process on the metal that are now revealed with the shine. It crossed my mind to stop and go back to bondo/sand these, as I know once up side down on the car no light will hit it like this ever again. So I've resisted! :)


The paint is a dark green similar to the original Ivy Green, bits darker, with tiny metallic particles creating nice green to almost black regions. That should give me the classy look I'm after. It is not the most easy paint to spray to get it even, especially standing like this. Ideally I would have loved painting it layed horizontally, Not having enough space for that, I had to be careful to not charge too much and get runners. In the end, I saw I could have charged bit more clear coat. So I think, I'll spray another layer later on.

For now: I'm finally done with this hood! Yeah!

Tomorrow, I'm gonna pack this big baby into soft plastics so it can wait dust free for the hinges/latch etc.. and start clean the huge mess in the garage.

Not sure yet who's gonna be my next victim. As it's wet and cold, I need something that does not need be painted, as least not right away...

To be continued.

@manu Mach1

[ Whouahhh what a job! If you are interested...]

Non merci! Got a hood overdosis at the moment! :)

 
Last edited by a moderator:
Fabulous work Fabrice, absolutely fabulous!
Thanks @jpaz. Anybody could do this you know. The only hard part is actually doing it! :)

Very nice indeed. I wish I had your energy.
Well, I must say I've regained energy that was lost doing these dirty jobs. Lost 10 pounds/5kgs in past months and I feel much better.


But today, forced by the miserable pouring weather, I've played it "energy safe" :). Clean up the mess (still lots to do).

Hood is now in hibernation waiting for future sunny days..

Easy forgotten, the hood with its fully functional ram air has plenty hardware and I'm not planning to place back rusty bolts and screws,

so went back to "old guy" activities: cooking bolts!

After a good degreasing and quick brushing session, all the ram air screws, latch, scoop hardware etc... went into a bath.


After just few minutes, lots of bubbles and started look much better. As all was kinda greasy/dirty and corrosion not that far, they should be cooked by tomorrow..

To be continued..

 
Last edited by a moderator:
Miserable weather, rain, wind...

Time for a "little things" weekend!


First finished my hood hardware, latch, scoops fasteners, Ram-air...

You know, the usual budget eaters if you order them new.

They came out bath pretty ok. I''ll prolly paint a few when temp will be higher.


Then cleaned up another set of "nobody cares" parts: The winshield washer nozzles.

I've kept the existing tubes for now as I'm going to bring them with me as example next time I visit my fav "winshield washer nozzles tube shop"! :) I recall, that for the 73, it wasn't that easy to find something similar. I've just cleaned them, I''ll prolly spray a thin layer on them as well.


Then gave some love to that relatively hard to find original 429 part.

This original Mustang thingy alien to most 71-73 owners is for many (me included) the kind of part near an engine that you might see but do not look at. It's just there, Its just an original thingy. Good enuff.

Well thanks to my good friend @Secluf, I know now that Its a vaccum operated coolant valve. With hot water running through the heater core all the time and being in such close proximity to the AC evaporator core, this valve helps for a better cooling, is controlled by the "Mode" switch" on the ac control. The vacuum signal closes the valve shutting off the hot water flow. At higher rpm, in combo with the "s" shaped hose behind it to the core its also preventing pressure damage to the eater core often occuring on BB AC cars.

The above lines are a shameless digest rewrite of Steve's detailed answer.

Short story: I'm gonna place this piece of rocket science back but not before I give it a massage!


First started suck on it to test if it was working (Dear Santa, I really need a handheld vaccum gauge/pump...)

After a good cleaning and an acid bath (why did they use material that can rust on one side only??)

The actuator and the valve inside were not the most easy places to be reached, but when there's love there's a will.

Even primed and painted the bare metal side after its bath to prevent further corrosion.


After some elbow oil was used, I've ended up with a nice bling bling version of the once dirty/corroded one (see above)


Because I do save quite a lot by restoring parts, my piggy was fat enough to be sacrificed for a radiator. The car came mostly complete, unfortunately: no radiator, no fan shroud. Lost in France 20+ years ago. Problem is that when you need a radiator for a 429, like if the metal required is super rare, the pieces you find with original specs are (ridiculously) expensive. With prices in range of $600-800, this means a 1k euros easy once at my door. I made a selection of radiators earlier and was about to order a much cheaper aluminium version when for some weird search reason, I came across another page displaying a new brass copper repop with exact same sizes as the original and made for a 71 429 Mustang, direct fit, with the trans cooler for the extraordinary price of $69!! I thought it was a mistake, I would order and get back a mail telling me they forgot a zero. But no, it was the right price and ordered it right away. Even added two extra's to the list. All arrived here just under 200 euros. Not even the US price for any other that I've found capable to cool down this engine.


Looked in details this made in canada baby today, welds etc: pretty ok! Fittings for the shroud and trans lines are also provided.

I'll know for sure once in use, but for now, I very happy to have it, and I can also remove the rad from my "to be found" list.

Time to drop a few things in bath and call it a day.

To be continued...

 
Last edited by a moderator:
Back
Top