MuscleTang mod project thread (1971 M-Mach 1)

7173Mustangs.com

Help Support 7173Mustangs.com:

This site may earn a commission from merchant affiliate links, including eBay, Amazon, and others.
I would not waste the money on an aluminum driveshaft.  Due to the relatively small diameter of a driveshaft the rotational weigh savings is minimal, unlike a flywheel.  Spend your extra money somewhere else.
I agree with you. I don't expect much to any performance improvement. The only improvement I can find is less vibration due to the dampening effect of aluminum, plus talking rights. However, the price difference of the shafts is relatively small so that's why it is tempting. As a reference, a shaft cut to fit, balanced, including the transmission yoke and 1350 u-joints is $435 for steel and $550 for aluminum.

 
Progress is moving along very slooowly. With vacation, work, surgery, toasty garage, etc, not much time. The crankshaft is in after I needed to replace the main bearings for STDX bearings to gain a little more clearance. Now I am at between 0.0025" and 0.0030" with Plastigage. Gaped the rings and now I am working with the rods. After I installed all of them, the second to last (off course!) was way too tight. I realized that the halves were mismatched. I rematched the rod and "feels" good but I have to Plastigage it to make sure. That's my next task, but I can't do much strength until I recover, which means two more weeks of very little work. After the rods/pistons are installed then it will be time for the cam and timing gear. Then the heads. The heads already have the valves installed. So I have to install the rocker studs and rod guides. I need to figure out how to properly located the guides since there is some play. After all that then have some fun with an adjustable push rod to setup the optimum rod length and order the right set of push rods.

I was originally hoping to be driving the car in July. Now I realized that was more of a dream. Now I am just hoping to drive it this summer. Perhaps at the end of August.

 
Here are some pictures to update my thread. I am slowly working on assembling the 408 stroker.
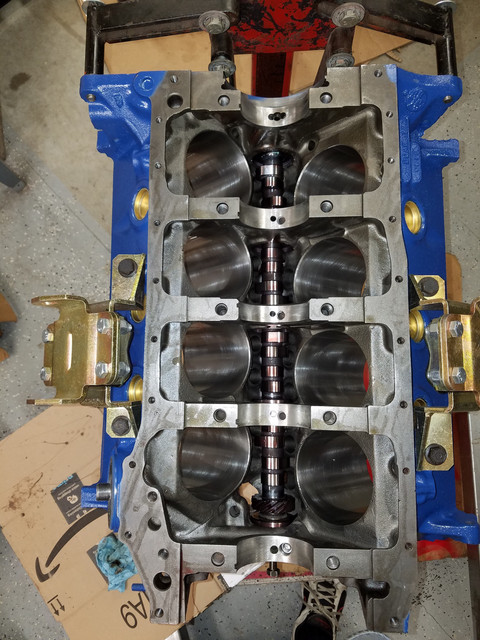
Cam in.


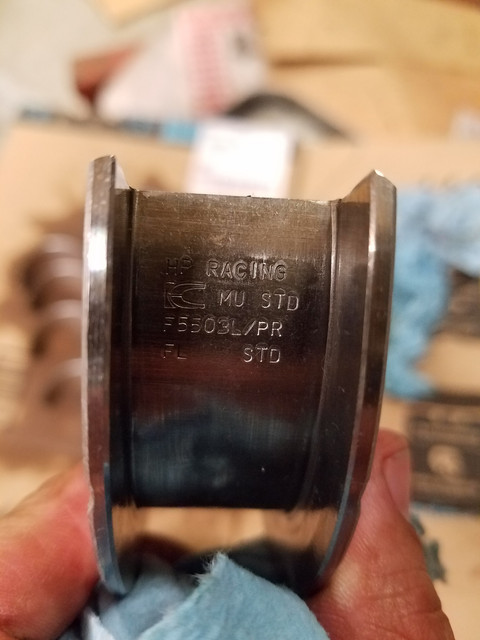
King bearings. I ended up using the STDX bearings instead of the pictured STD. The X are 0.001 thinner to allow for a 0.001 larger clearance.
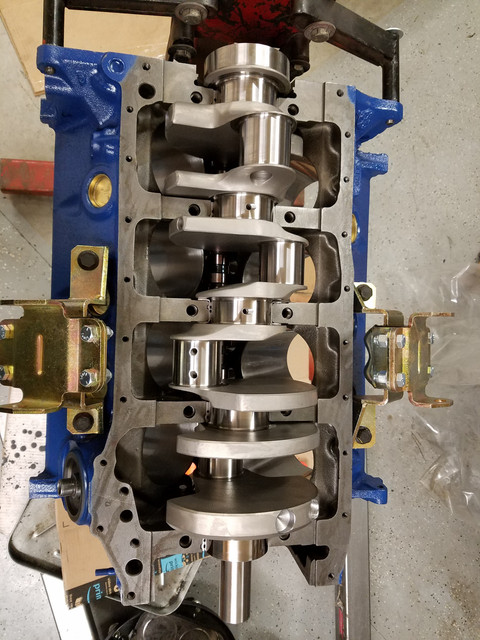
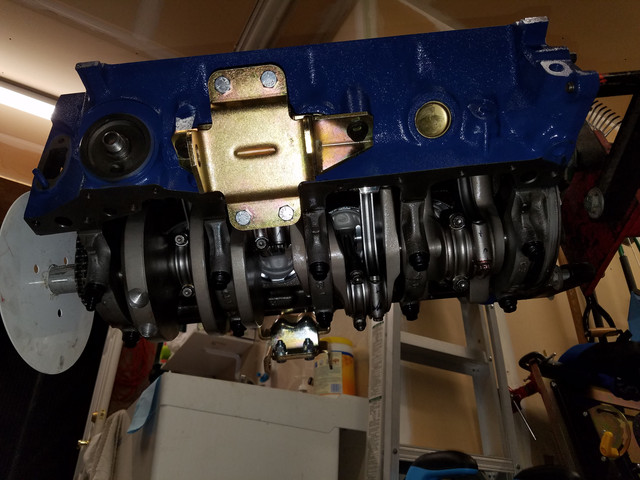


Crank in


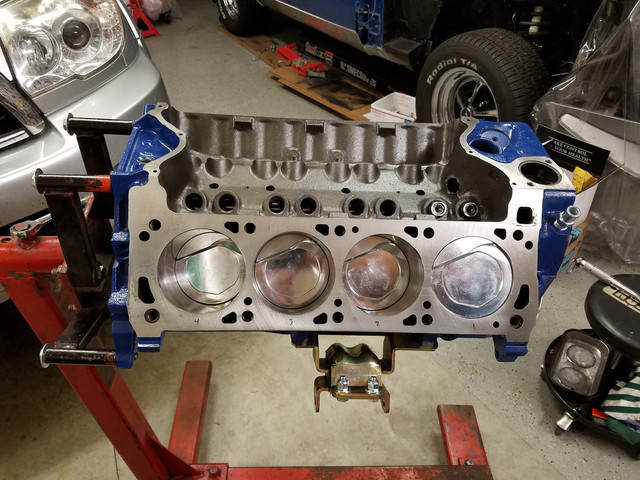
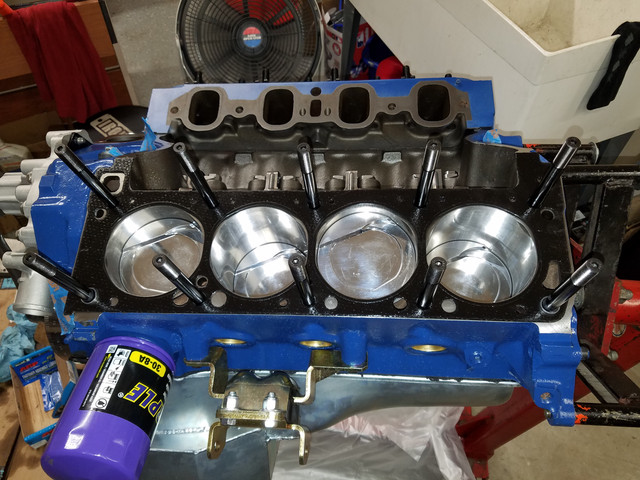
Rods and pistons in.


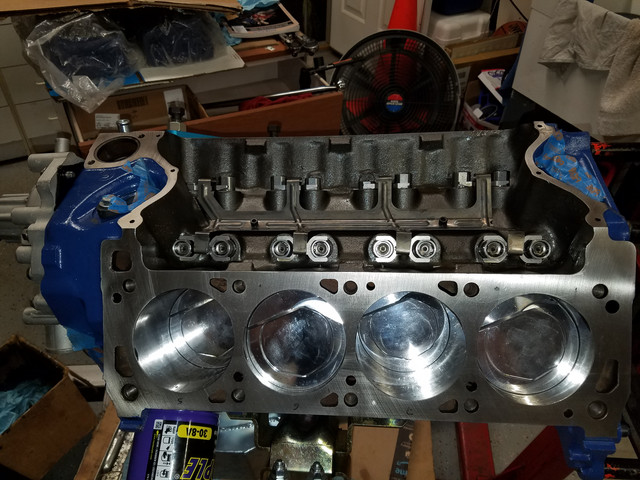
Pistons in. All clearances and gaps checked.


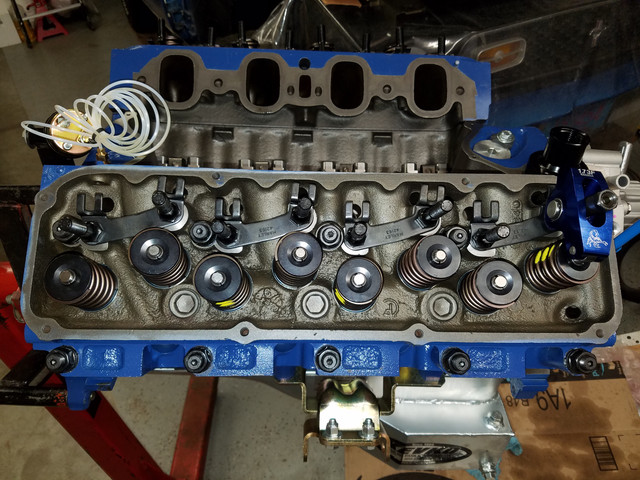
Roller rockers and retrofit kit.


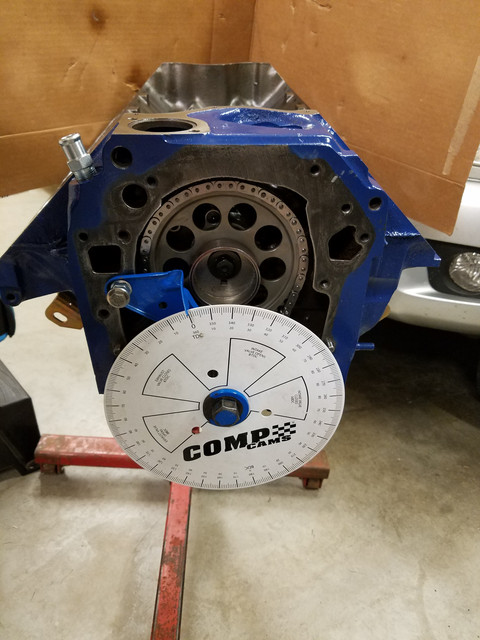
Cam thrust plate, timing chain in, cam degreed.


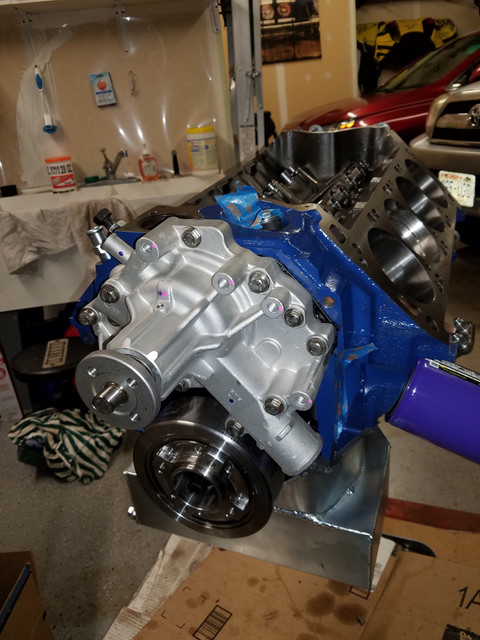
Oil pan, water pump, timing cover and harmonic balancer in.


Head studs and gasket in proper orientation.


Preassembled heads, guide plates, testing for push rod length while priming pump (hence oil pressure gauge)


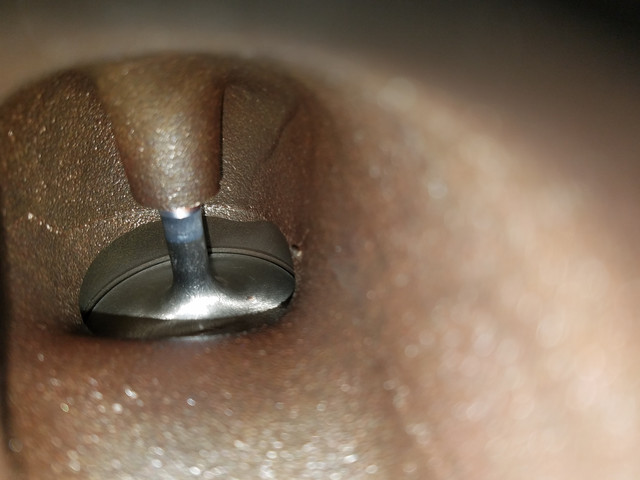
View of intake valve through port.


Engine close to being ready for testing. I am waiting for the push rods so the covers are just in place for the picture.


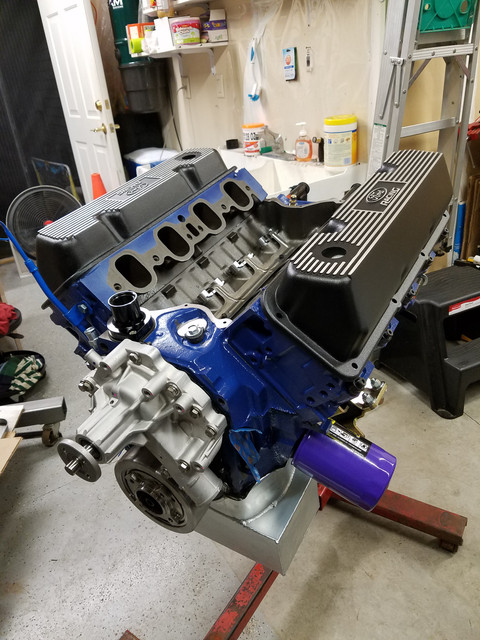
It finally looks like an engine!

 
Are those standard height valve covers? If so I think you are going to have an issue once you get all of the rocker arms installed. My ford motorsports covers did not fit and I had to go with a tall valve cover.

Also, not sure what you are using for valve cover gaskets but I went with these and they are great since you can reuse them after you adjust your rockers.

https://www.summitracing.com/parts/fel-1682
So far the one rocker I have on with the adjustable push rod fits, but I will have to double check.

 
Looks good!! I like to see how the valve covers play out.
I am glad to report that the valve covers fit, but with a slight modification. One of the baffles below the PVC opening was hitting a rocker. It was a simple matter of slightly hammering the baffle away from the rocker. I rotated the engine a couple times without the gasket on and did not hear any interference.  With the gasket on you gain more clearance, which gives me a peace of mind. The real test will be when I start the engine.

 
BTW, after testing the valve covers. I was wrapping up for the night and I placed some masking tape on the plug holes for protection. I got distracted with other things and then thought of turning the engine couple more times to double check. While turning I hear this noise but it didn't seem to be metal-to-metal. I was like crazy going over stuff and then I thought of the tape. Long and behold, when I check the plugs the tape was missing from #8. I didn't find it anywhere. I was like "oh shut..." I took the snake camera that I can connect to my cell phone to see inside and there it was. The piece of tape got sucked into the cylinder. After a little bit of manipulation, a thin screw driver and long nose pliers I was able to take it out. That was scary for a moment..... Although an embarrassing situation, I am sharing it here so it doesn't happen to someone else. Obvious lesson learned: don't "plug" the plug holes with something that could get sucked in while turning the engine!

 
Looking good and like me bet you can't wait to drive it

Did you have any issues with the rocker stud length using Scorpion rockers?

I ended up with a 2.100 stud and a .120 washer but perhaps my valve length was oversize

 
Looking good and like me bet you can't wait to drive it

Did you have any issues with the rocker stud length using Scorpion rockers?

I ended up with a 2.100 stud and a .120 washer but perhaps my valve length was oversize
Yeah... I can't wait. If all goes well I should be able to start the engine outside the car next week.

The studs were on the short side. I was able to use the 1.9" studs with a 1/8 washer on top of the guides. That gave me 8+ turns of engagement. There was one cylinder, #4, where something was different and the rocker adjustment nut was higher and I got 6+ turns. All the valve stems are at the same height, so I can only guess that the machining of the rocker "pedestal" was a bit different.

What size of push rods did you end up using? Mine are 7.9". I could have use a bit longer which would have moved the rocker up and decrease the engagement so we decided to stick with the 7.9". The wear mark was slightly off center, but still was acceptable.

 
Last edited by a moderator:
I ended up with 8.100 pushrods and used 2 methods to determine height, both spot on

I have a custom Jones hydraulic roller and using his lifters so a bit of an unknown combo hence all the trouble with rocker studs

 
Theres nothing more satisfying than watching a bunch of metal parts become a engine
Agreed! It is satisfying to see the bunch of parts become and engine. The next step is to see the bunch of parts make the engine function, which hopefully will happen this week. And then, the final satisfaction will be when I see the bunch of parts moving the car.

 
Hey...

Sharp car there!!!

 
Last edited by a moderator:
I am proud to say that I tested the engine and run great. The only issue I had during testing was with the old carburetor. Silly me thinking that I could use an old carburetor that has been sitting for two years. The secondaries float was not sealing so gasoline kept flooding. I ended up capping the gas supply to the secondaries so I can test the engine. Since I had no radiator I ran it for a short time until the thermostat opened. I was so busy taking care of stuff during that time that I forgot to shoot a video.

One issue I noticed after the test was that while turning the engine by hand I kept hearing this grinding noise. It worried me for a while until I figured out it was the flywheel rubbing against the engine back plate (block plate). I have read about this in the past, but I have forgotten. Because the oil pan sticks out slightly at back it doesn't allow the back plate to sit flush causing it to rub against the flywheel. Now I just have to remove the flywheel and grind a smiley face on the back plate so it sits flush. I had installed the flywheel bolts with red Loctite so it will be fun.

I drained the oil and looked very good. The filter had fine metal particles mixed with the oil but I think this is expected.

Now I start the long journey to get the engine in the car, connect accessories and assemble to the new transmission and clutch.

Edit: here I posted a picture of the test setup: https://7173mustangs.com/threads/diy-engine-test-setup.31710/
 
Last edited:
a suggestion on putting the beast back in. Put it in with the trans attached and all the front accessories. so much easier. Also slide the drivers side header roughly into place and tie it up. Makes header install much easier. Me and one other person did mine this way and we went from on the engine stand to up and running in less than 1 hr.

 
+ 1 on installing engine/trans together

I tried to install with both headers on but had to remove one to get it in

Lowering the front of the car and raising the back made it easier too

Good luck with the install and hopefully you will post a video when running

 
If you get your hands on a load leveler, it was helpfull when I put mine in with the tko . Once in we switched to a lift plate and a floor jack under the trans. To get the headers in and mounts bolted up. It went very smooth. Getting everything else done in the engine compartment done has been slow. We built a new house and moved in may. Just getting going on the mustang again. One thing I can say is vintage air/aeroquip e z fittings and hose are a super nice way to do the a/c. Good luck getting it all together!

 
Back
Top