MuscleTang mod project thread (1971 M-Mach 1)

7173Mustangs.com

Help Support 7173Mustangs.com:

This site may earn a commission from merchant affiliate links, including eBay, Amazon, and others.
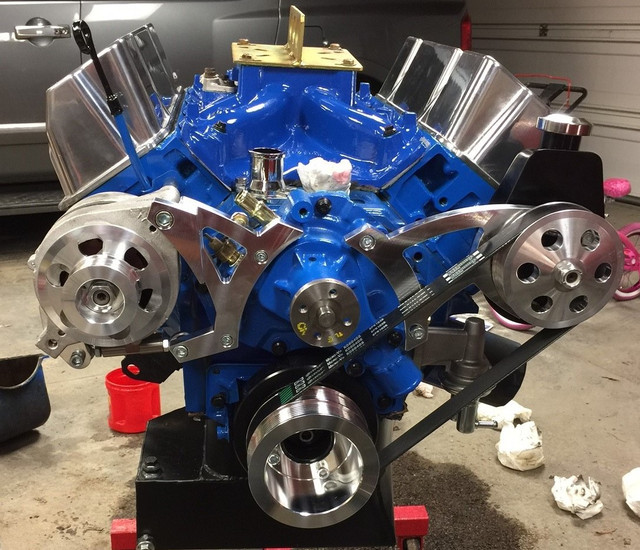
I am proud to say that I tested the engine and run great. The only issue I had during testing was with the old carburetor. Silly me thinking that I could use an old carburetor that has been sitting for two years. The secondaries float was not sealing so gasoline kept flooding. I ended up capping the gas supply to the secondaries so I can test the engine. Since I had no radiator I ran it for a short time until the thermostat opened. I was so busy taking care of stuff during that time that I forgot to shoot a video.

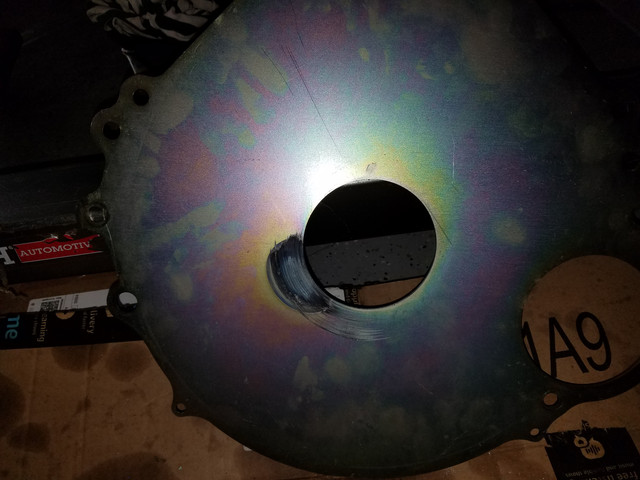
One issue I noticed after the test was that while turning the engine by hand I kept hearing this grinding noise. It worried me for a while until I figured out it was the flywheel rubbing against the engine back plate (block plate). I have read about this in the past, but I have forgotten. Because the oil pan sticks out slightly at back it doesn't allow the back plate to sit flush causing it to rub against the flywheel. Now I just have to remove the flywheel and grind a smiley face on the back plate so it sits flush. I had installed the flywheel bolts with red Loctite so it will be fun.

Here is the block plate after being ground against the flywheel:


Here is the flywheel:


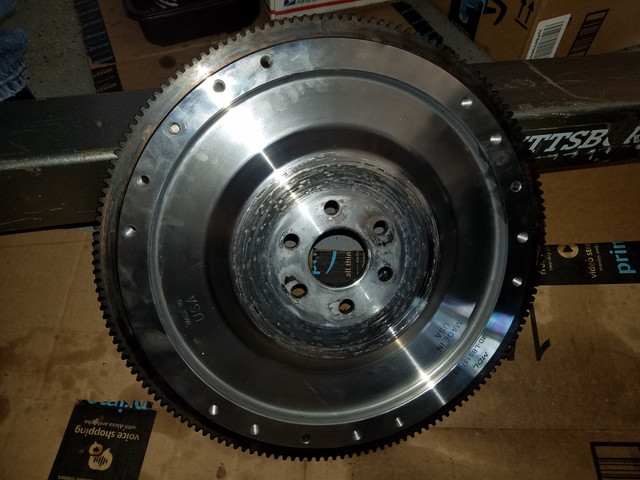
Since the block plate is aluminum and the flywheel is steel, there was very little damage to the flywheel. What I think it happened is that the heat generated started melting the aluminum and breaking it into the flywheel. A soft touch with the flap wheel took care of it. It now looks shiny with little to no steel material removed.

I now ground a groove on the block plate to allow for a flat fit of the bellhousing. Today I will test for flatness.

 
While aligning the bellhousing I am finding that the parallel measurement is off by 5 thousands. The limit is 2 thousands. I am measuring this by attaching the dial indicator to the flywheel rotating the needle against the back face of the bell. I checked the mating surfaces for damage and all looks good. I am purchasing some round shims to put around the bolts to try improving the parallelism.

The bore (or concentric) alignment was at the high limit of 10 thousands TIR, but once the bellhousing is more parallel this measurement should improve. The bore alignment is done by rotating the needle of the dial indicator against the bore as the flywheel rotates.

This has taken a lot of time and a lot of removing of the bell and flywheel, but I am doing my best to get it within tolerance.

 
Last edited by a moderator:
While aligning the bellhousing I am finding that the parallel measurement is off by 5 thousands. The limit is 2 thousands. I am measuring this by attaching the dial indicator to the flywheel rotating the needle against the back face of the bell. I checked the mating surfaces for damage and all looks good. I am purchasing some round shims to put around the bolts to try improving the parallelism.

The bore (or concentric) alignment was at the high limit of 10 thousands TIR, but once the bellhousing is more parallel this measurement should improve. The bore alignment is done by rotating the needle of the dial indicator against the bore as the flywheel rotates.

This has taken a lot of time and a lot of removing of the bell and flywheel, but I am doing my best to get it within tolerance.
Well. Finally got the bellhousing aligned per specs: 0.002" parallel TIR and 0.004" concentric TIR. I used 5 thousands washers on one side. Two washers on the right-most bolts, and one on the center-right bolt. I also measured for soft foot and didn't find any changes. I will be posting a separate thread to explain it all.

Edit: link to thread with alignment explanation: https://7173mustangs.com/threads/alignment-of-bellhousing-to-engine.31790/
 
Last edited:
Engine is in. Transmission is in. I ended up installing them separately. Since I have the headers in the car fitment of both at the same time was an issue, and working by myself doesn't help so I did it in two steps. One mistake I made was to fill the transmission up with oil before installation. I don't know what was I thinking. You have to tilt the transmission quite a bit for the shaft to slide into the clutch. It was a bit messy. I was holding the transmission leaking but couldn't do much to stop the oil so I had some oil on me. I am glad I had a bunch of rags next to me. At the end not a big deal. Probably about a 1/4 of a quart lost. EDIT: in hindsight filling up the transmission before installing is not that bad of an idea, but the smart thing would have been to install the yoke to eliminate oil leaking through the seal.

Next steps are to adjust the clutch, connect all the water hoses and radiator, connect gas lines, connect steering lines, install accessories, and complete the wiring. Right now I have big bundles of entangled wires and hoses that I will be sorting out. Drive test day is approaching!

EDIT PS: the biggest unknown I have right now is that the headers are very close to the engine mounts in the driver's side. I have changed engine mounts so these ones (Prothane) stick out more towards the headers than the original ones. I estimate the gap to be a tight 1/8" right now. I am afraid that there will be contact during acceleration. At this time I am moving forward with the way it is. I was able to grind a little bit but it was very tight to get much done. If it is an issue while driving I will have to resort to denting the tube to gain more clearance.

 
Last edited by a moderator:
Here goes the report. This weekend I tested the car with newly stroked rebuilt engine and TKO600. First drive in one year. It feels very strong with amazing power. I have never seen the nose of the car so high. The acceleration through the gears, even in 4th gear, is excellent. In third gear I hit the gas once focusing in the RPMs and when I looked at the speedometer I was almost at 110mph. Pretty cool. No vibrations from the drive train.

Spinning tires in first gear was way too easy without clutch. I still have to do tuning of the EFI and the timing to feel that all has been tuned in. I ran the car between 2,500 and 4,000 rpms in 3rd gear a bunch of times for break in before hitting 6,000+ RPMs several times. Now I am changing the oil and looks good with a few fine metal debris.

Summary of what was done this last year:

-Engine totally rebuilt and stroked to 408.

-Installed TKO600 and new drive shaft from Strange (1350 U-joints). Among mods here was to tilt the rear axle 4 degrees up to be closer to the transmission angle.

-New Champion radiator.

-Adapted a Saginaw type of steering pump replacing the Ford unit that was leaking. I will be writing more details in a thread about this mod. Right now it feels okay, but I am still dealing with air in the system making the steering hard.

-Replaced the engine mounts with Prothane ones. I did not measure any difference in engine position. Actually, after all was installed, the fan was hitting the bottom of the fan shroud so I had modify the shroud. The transmission was positioned as high as possible in the tunnel to keep the drivetrain angles under control. However, the Hooker headers were very close to the driver's side mount.

-The engine combo has the Blue Thunder manifold. It cleared the ram air hood easily, but I have had already modified the air filter.

-Fixed cowl rust.

-Fixed battery apron rust.

-Replaced strut rod cross member.

-Replaced mid brake line.

-Replaced brake booster with the one from LEED brakes.

 
Glad you were finally able to drive it again

I'm sticking with a carby for now but might consider EFI further down the track

Interesting you mention the Saginaw style pump

My falcon engine actually came with one and is a factory fit from the very last of the Aussie Cleveland V8s from very late 1983

From memory it uses an earlier bracket but with a bunch of spacers

There is aftermarket set ups available such as this one -https://outlawspeed.com.au/shop/af64-4009

A little expensive so will be interesting to see your mod set up
The aftermarket brackets are way overpriced. I ended up using the stock bracket with a couple mods. And yes, you need spacer bushings since the distance between pulley and pump are different.

In your Falcon, can you check which Saginaw pump part number is it? Do you have pictures of the bracket?
I hear you. I went with a set up from CVF racing. It was very nice and when I purchased it was a lot cheaper than it is now. Below is a link to the kit. I paid closer to $400 and that included the pump (my pump is black though). Here is a pic when I was setting it up..

https://www.cvfracing.com/ford-351c-351m-400-serpentine-system-power-steering-alternator/


So far I have no leaks under the car, except for one coming from the back of brake master cylinder I installed 2 years ago. It is a Scott Drake. Was this supposed to be such a piece of junk? Granted that it saw a lot of purging sessions with a lot of hard pressing, but It lasted just two years, with about 1,000 miles on it. One more item to my winter work list.

Are there any brands that you recommend? I need a master cylinder compatible with 4 discs.

 
Last edited by a moderator:
Been following your build closely. Awesome job and a lot of neat ideas.

 
Interesting you mention the Saginaw style pump

My falcon engine actually came with one and is a factory fit from the very last of the Aussie Cleveland V8s from very late 1983

From memory it uses an earlier bracket but with a bunch of spacers

There is aftermarket set ups available such as this one -https://outlawspeed.com.au/shop/af64-4009

A little expensive so will be interesting to see your mod set up
The aftermarket brackets are way overpriced. I ended up using the stock bracket with a couple mods. And yes, you need spacer bushings since the distance between pulley and pump are different.

In your Falcon, can you check which Saginaw pump part number is it? Do you have pictures of the bracket?
Yes they are, will get some photos and post tonight. From memory most Saginaw pumps can be used but will need to change the pulley and the hose connections could be different. My pump is same as 6 cylinder Falcon from same era Kelpro part no KPP107. Bracket was earlier type with spacers. If it helps this bracket may work and is not expensive plus some Aussies put the F series Saginaw pumps on their falcon - https://shop.broncograveyard.com/Power-Steering-Pump-Bracket-V8/productinfo/12842/ - is for a Windsor so might not work?

 
I'd love so much to see this beast in action.

Modern trans with this crazy power must really be fantastic.

Tony, you got to find a way to film it on a road and show us how this baby does!

 
I'd love so much to see this beast in action.

Modern trans with this crazy power must really be fantastic.

Tony, you got to find a way to film it on a road and show us how this baby does!
I am dealing with some distributor issues as explained in the parallel thread. Once I get my advance figured out I will drive it more. Weather has been terrible here with a lot of rain which doesn't help. I want to drive it as much as possible before the white stuff comes.

 
Hi Tony

Not sure if it will help but have posted photos below of Saginaw pump 84DA 3A674A and bracket set up

The bracket could be the same as for earlier C2 pump
Thanks. I just posted a thread explaining my Saginaw pump adventure:

https://7173mustangs.com/threads/adapting-a-saginaw-steering-pump.31980/
The bracket solution in your picture uses the same two bolts of mine, but instead of an S bracket in the rear it uses a extension plate for the third bolt in the front
 
Last edited:
Tony,

Sounds like you have a beast for sure.

One concern I have is you said that when you ran the engine outside of the car you found some fine metal in the oil or filter. You also said you found more after engine was in the car and ran. You should never find metal in the oil or filter. If the oil galley, block crank oil holes and everything cleaned like for surgery there should be nothing in the oil. I was looking at a set of Molly coated rod bearings, shiny black, just pulled out of a Pontiac engine after running on strip for a while and not a single scratch on anything. This car turns over 165 mph in 1/4 mile so not loafing. Nothing ever in oil or filter either.

With the pistons and bearings installed how difficult was it to rotate the crankshaft? Did you prime the oil system with a drill motor before cranking over?

One year at Charlotte car show they had a contest for the NASCAR guys to assemble a 351 Cleveland. The two teams I watched I think had four to a team. The engine block was bare when they started heads were together. From start of assembly to a running engine was under 20 min. They had to do one check of oil clearance with plastic. You could for sure tell they had done it before.

If metal keeps showing up I believe I would pull the pan and look at bearings. Can you tell if it is bearing material or maybe casting from cam or lifters?

Want to see your timing tickets soon.
David, I will report after the next oil change. Most of the metal were fine particles that basically made the oil look like metallic paint, if that makes sense. I can't tell where they could be from. The few particles that had a size that allowed me to "feel" them did not look consistent with bearing material. I thought that fine metal particles was normal for a new engine. I primed the engine multiple times before starting outside the car and before starting in the car. I even checked couple of the cylinders with a borescope and all looks good. I pulled the distributor yesterday while dealing with the advance issue I had and the gear looks in good shape.

 
You could also get an oil analysis done which will determine what metal particles are in the oil. For example if copper or nickel show up that could indicate bearings depending on their material composition. Not usually an expensive test where I'm from.

 
Back
Top